Applies To: AuthPoint Multi-Factor Authentication, AuthPoint Total Identity Security
You can create local AuthPoint users on the Users page in the AuthPoint management UI. When you add a local user account, the user is created and managed entirely in AuthPoint and not synced from an external user database.
Because you can only create one local user at a time, you most commonly create local users for testing or when you want to add only a small number of users.
Unlike users synced from Active Directory or an LDAP database, local AuthPoint users define and manage their own AuthPoint password. When you add a local user account, the user receives an email that prompts them to set their password.
Passwords for local AuthPoint users must be more than five characters. Numbers and special characters are not required.
When you add a local user account, you choose whether to have AuthPoint create a mobile token for the new user account and send an email to the user to activate their mobile token. AuthPoint does this by default. In most cases, we recommend that you assign a token to users and send them the Token Activation email. User accounts need a token to authenticate with AuthPoint. You might choose not to do this for users that use hardware tokens for authentication, or for service accounts that bypass MFA with basic authentication.
To create local AuthPoint users, in the AuthPoint management UI:
- Select Users.
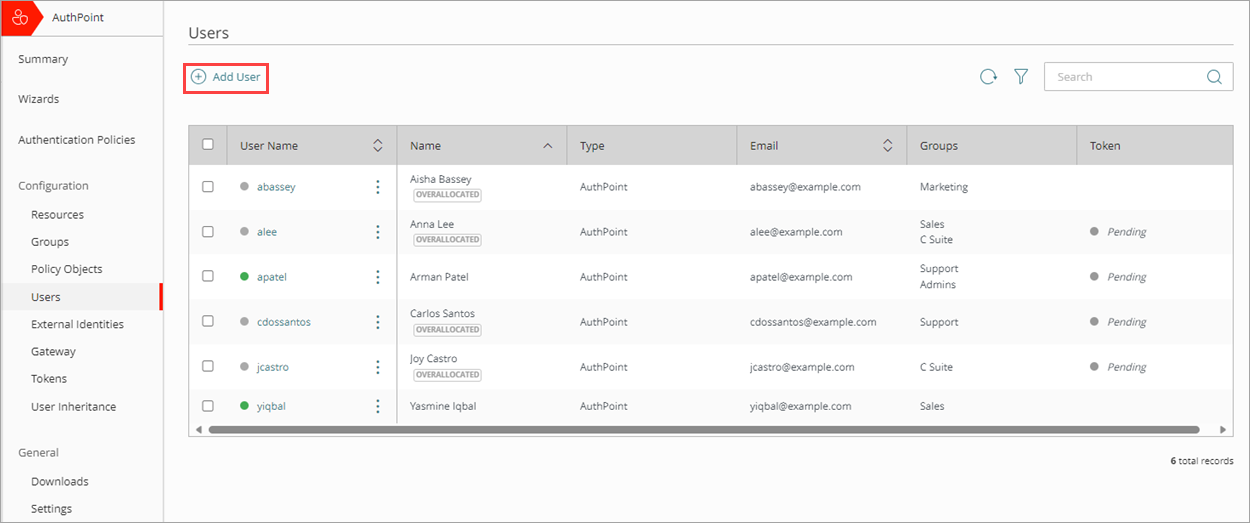
- Click Add User.
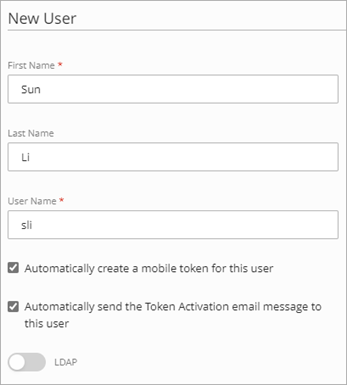
- In the First Name text box, type the first name of the user.
- In the Last Name text box, type the last name of the user.
- In the User Name text box, type a unique user name.
-
If you do not want AuthPoint to create a mobile token for this user account or send an email to the user to activate their mobile token, clear the Automatically assign a mobile token to the user and Automatically send the activation email for the user check boxes.
You cannot change these settings after you create the user account. To assign a token to a user that does not have these options selected, you must resend the Token Activation email. For more information, go to Resend Activation Email.
The LDAP toggle indicates whether a user is synced from AD or an LDAP database. The toggle is not selectable.
- In the Email text box, type the email address of the user.
-
From the Groups drop-down list, select one or more AuthPoint user groups to add the user to. Each user must be added to a group.
You cannot add users to groups that are synced from Active Directory or Azure Active Directory.
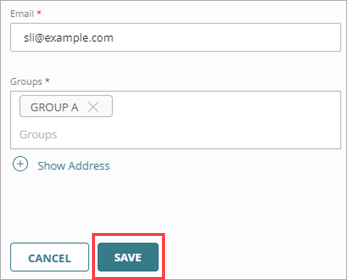
- (Optional) Click Show Address and type an address, mobile number, and any other additional information.
- Click Save.
The user receives two email messages. One is used to set their AuthPoint password and the other to activate a token in the AuthPoint mobile app.
After you add a user, that user appears on the Users page with a green Activated status icon next to their user name. The Activated status icon indicates that the user has been created and is currently active (not blocked).
When the user sets their AuthPoint password and activates their token, their token info is shown in the Token column with a green Activated status icon next to the token.
If a user does receive the token activation email or set password email, you can send the user a new email message so that they can activate their token or set their password. For detailed steps to resend the activation email and the set password email, see Resend Activation Email and Resend the Set Password Email to a User.