Applies To: AuthPoint Multi-Factor Authentication, AuthPoint Total Identity Security
The AuthPoint Gateway is an application that you install on your network so that AuthPoint can communicate with your RADIUS clients, the AuthPoint agent for ADFS, and your Active Directory or LDAP database. The Gateway functions as a RADIUS server and is required for RADIUS authentication and to enable LDAP synced users to authenticate with SAML resources.
The Gateway runs as four services: Gateway, RADIUS, LDAP, and ADFS. The Gateway uses these TCP service ports for internal communication between the different Gateway services:
- WatchGuard AuthPoint Gateway service — TCP port 9000
- WatchGuard AuthPoint RADIUS service — TCP port 9001
- WatchGuard AuthPoint LDAP service — TCP port 9002
- WatchGuard AuthPoint ADFS service — TCP port 9003
If other applications use these TCP service ports, the Gateway might fail to start or appear offline.
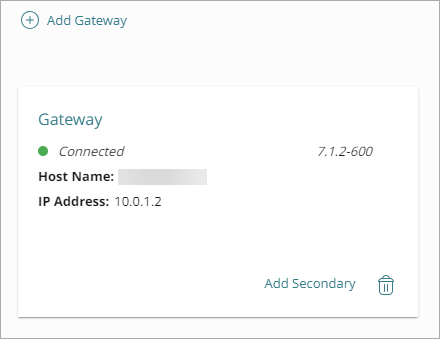
You can see the Gateway(s) you have configured on the Gateway page. There is a tile for each Gateway that shows you the version that is installed, the IP address, and the current status of the Gateway.
-
 — The Gateway is installed and can communicate with WatchGuard Cloud
 -
 — The Gateway is not installed
 -
 — The Gateway is not connected and cannot communicate with WatchGuard Cloud
Requirements
You can install the AuthPoint Gateway on these compatible operating systems:
- Windows Server 2012 R2
- Windows Server 2016
- Windows Server 2019
- Windows Server 2022
- Windows Server 2025
The AuthPoint Gateway requires Java. You must install Amazon Corretto 11 or 15. To download Corretto, go to aws.amazon.com/corretto/.
Java must be configured for the system and not for a single user. If you configure Java for a single user, Gateway installation fails.
The AuthPoint Gateway cannot be installed on Windows servers with FIPS mode enabled.
Primary and Secondary Gateways
You can configure more than one Gateway on a network. For each primary Gateway that you configure, you can configure up to five secondary Gateways.
Primary Gateway
The primary Gateway synchronizes your LDAP users and enables RADIUS authentication and LDAP user authentication. This Gateway is the primary point of communication between AuthPoint and your RADIUS clients, the AuthPoint agent for ADFS, and your Active Directory or LDAP database.
Secondary Gateway
You can configure secondary Gateways as a failover for LDAP user authentication. When your primary Gateway is not available, AuthPoint automatically sends LDAP user authentications through the secondary Gateway until the primary Gateway becomes available again.
You can also use secondary Gateways as a backup RADIUS server. The only limitation is that the third-party software or device that sends authentication requests to the Gateway must support the use of additional RADIUS servers.
You cannot use secondary Gateways for load balancing or LDAP user synchronization.
Configure a Primary Gateway
Before you install the Gateway, you must configure it in the AuthPoint management UI.
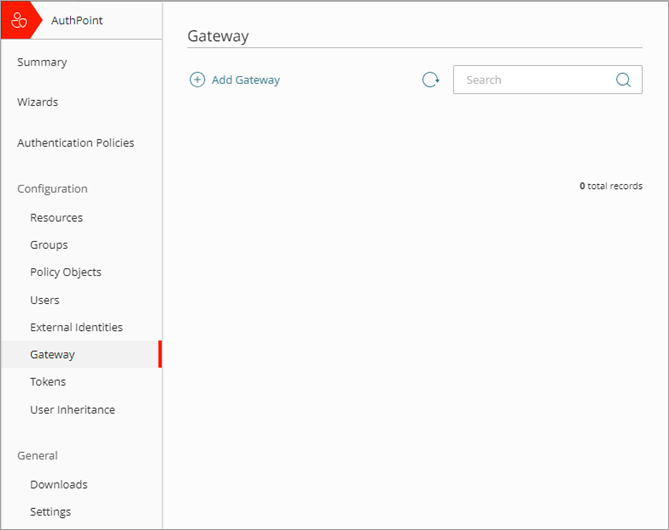
- From the navigation menu, select Gateway.
- Click Add Gateway.
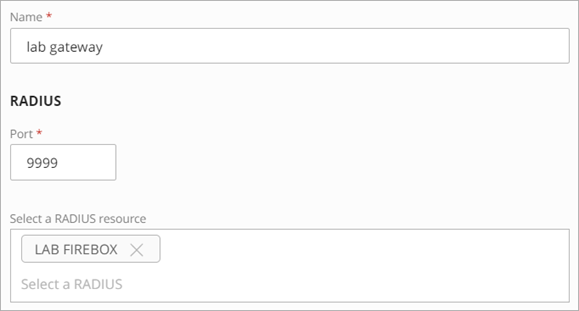
- In the Name text box, type a descriptive name for the Gateway.
- In the RADIUS section, in the Port text box, type the port number for a RADIUS client to use to communicate with the Gateway (RADIUS server). The default Gateway ports are 1812 and 1645.
If you already have a RADIUS server installed that uses port 1812 or 1645, such as the Network Policy Server role, you must use a different port for the AuthPoint Gateway.
For the Gateway to work with RADIUS client resources, you might have to create a new inbound firewall rule for the UDP RADIUS port that you configured or disable the Windows firewall.
- From the Select a RADIUS resource list, select your RADIUS client resource.
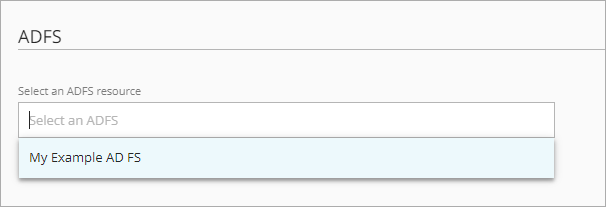
- In the ADFS section, in the Select an ADFS resource list, select your ADFS resource.
-
In the LDAP section, in the Select an LDAP provider list, select your LDAP or Active Directory server.
If you have more than one external identity on the same network, you can configure one primary Gateway to sync users from all of your external identities or you can configure multiple primary Gateways to sync users from each external identity.
- Click Save.

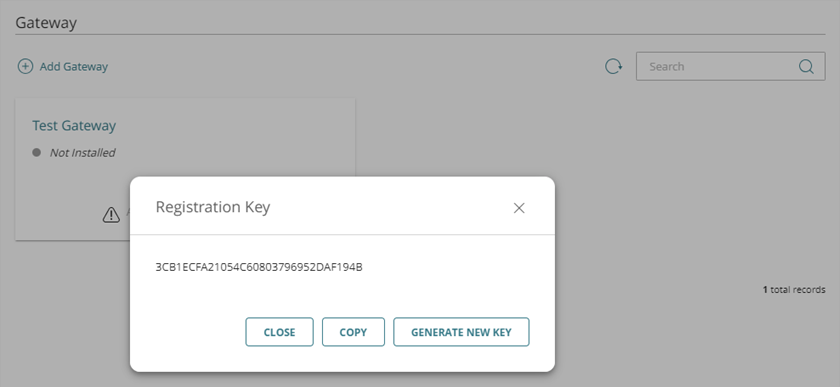
- At the bottom of the tile for your Gateway, click Registration Key.
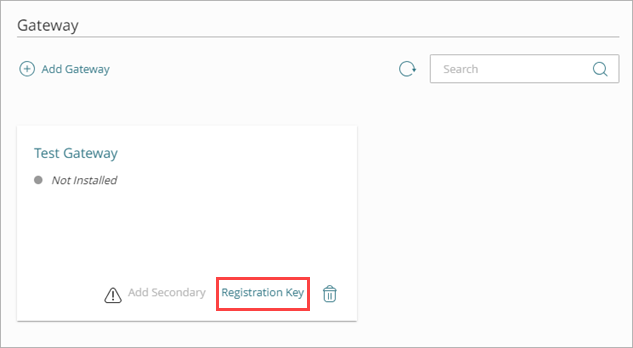
- In the Registration Key window, copy the registration key. You need this value to install the Gateway.
The Gateway registration key is a one-time use key. If the installation of the Gateway fails, you must generate a new key to use for the installation.
Download and Install the Gateway
- From the navigation menu, select Download.
- In the Gateway Installer section, click Download Installer.

-
Run the Gateway installer anywhere on your network that has Internet access and that can connect to your RADIUS clients and LDAP server.
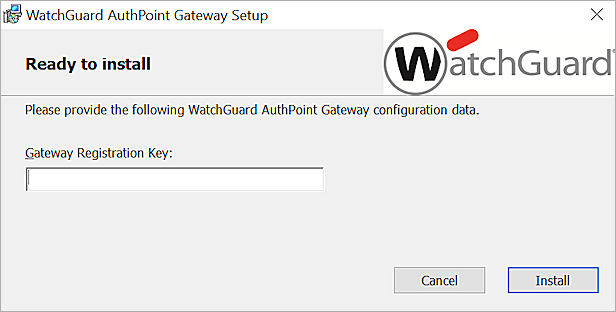
WatchGuard AuthPoint Gateway Setup dialog opens.In some cases, antivirus software can cause the installation of the Gateway to fail. We recommend that you disable your antivirus software while you install the Gateway.
- In the Gateway Registration Key text box, type or paste the Gateway registration key from AuthPoint.
- Click Install.
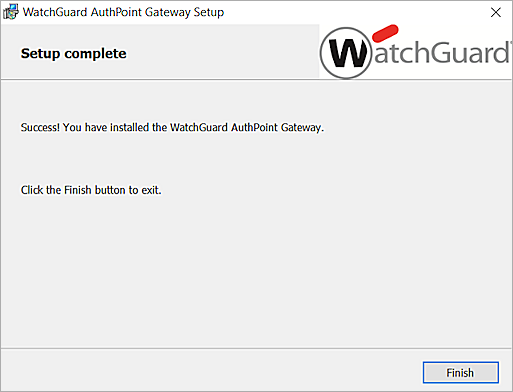
- Click Finish.
- Make sure the RADIUS port (the default ports are 1812 or 1645) is open on the server on which the Gateway is installed. The port is not open by default. If the port is open, make sure it is not used by anything else on that server, which would cause a conflict with the Gateway.
For the Gateway to work with RADIUS client resources, you might have to create a new inbound firewall rule for the UDP RADIUS port that you configured or disable the Windows firewall.
- In the AuthPoint management UI, on the Gateway page, check the circular icon next to your Gateway name. A green icon indicates that the Gateway is successfully installed and can communicate with AuthPoint.
If the installation of the Gateway fails, you must generate a new key to use for the installation.
Configure and Install Secondary Gateways
For each primary Gateway, you can add up to five secondary Gateways. When you add a secondary Gateway, it inherits the properties and associations of the primary Gateway. When you edit the primary Gateway, those changes are also made to all secondary Gateways.
To add a secondary Gateway, your primary Gateway must be installed and version 5 or higher.
To add a secondary Gateway:
- On the tile of your primary Gateway, click Add Secondary.
- Type a name for your secondary Gateway.
- Click Save.
The secondary Gateway is created. - Next to the secondary Gateway you added, click
 and select Registration Key.
The Registration Key window opens. - Copy the registration key for the secondary Gateway. You need this value to install the Gateway.
After you add a secondary Gateway, you must download and install another Gateway (version 5 or higher) on your network in a different location from the primary Gateway. The steps to install a secondary Gateway are the same as the steps to install a primary Gateway. To install a Gateway, see Download and Install the Gateway.
Secondary Gateways have their own registration keys used for the installation. When you install a secondary Gateway, make sure you use the correct registration key.
Change the Primary Gateway
If you have configured one or more secondary Gateways, you can select a secondary Gateway to become the new primary Gateway used to sync LDAP users. The current primary Gateway becomes a secondary Gateway.
When you change a secondary Gateway to become the primary Gateway, this does not affect the authentication process between the RADIUS server and the RADIUS client (Firebox). The Firebox always sends authentication requests to the RADIUS server configured as primary on the Firebox first. If the Firebox does not receive a response from the primary RADIUS server, then after three failed authentication attempts, the Firebox sends the authentication requests to the secondary RADIUS server. If you want to change the RADIUS server a Firebox uses for authentication, you must make that change in the Firebox settings. For more information on how to change the RADIUS server for authentication, go to Use a Backup Authentication Server.
To change the primary Gateway, your secondary Gateway must be installed and connected to WatchGuard Cloud.
To change the primary Gateway:
- Next to the secondary Gateway, click and select Make Primary.
The Make Primary Gateway window opens. - Click Make Primary.
The secondary Gateway becomes the primary Gateway and is used to synchronize users from your Active Directory or LDAP database.
Migrate a Gateway or Upgrade the Gateway Server
If you want to upgrade the operating system of your primary Gateway server, or just move the primary Gateway to a new server, you install a new instance of the AuthPoint Gateway on your new server as a secondary Gateway. After the new Gateway is installed, you can uninstall the primary Gateway.
- Configure and install a secondary Gateway on the new server. The secondary Gateway inherits the properties and associations of the primary Gateway
- Change your new secondary Gateway to the primary Gateway. For more information, go to Change the Primary Gateway.
- Uninstall the old primary Gateway.
Sync Users from Active Directory or LDAP