Applies To: AuthPoint Multi-Factor Authentication, AuthPoint Total Identity Security
You can sync Entra ID users and groups to Directories and Domain Services in WatchGuard Cloud. Directories and Domain Services is where you add shared authentication domains for WatchGuard Cloud services, such as AuthPoint.
After you add an Entra ID authentication domain in Directories and Domain Services, you can configure AuthPoint to sync specific Entra ID users and groups.
To sync users and groups from Entra ID, you must:
- Add an Entra ID authentication domain to Directories and Domain Services in WatchGuard Cloud. For detailed steps, go to Add an Authentication Domain to WatchGuard Cloud.
- Add an Entra ID external identity in AuthPoint and create one or more group syncs.
In AuthPoint, the Entra ID external identity connects AuthPoint with Directories and Domain Services in WatchGuard Cloud. The group syncs you add to the external identity specify which users to sync to AuthPoint.
If Entra ID users get an error message that says “MFA did not authorize” when they authenticate to protected resources, this message usually comes from Entra ID and indicates that AuthPoint could not validate the user credentials. For more information, refer to this Knowledge Base article.
Requirements
To configure an Entra ID external identity in AuthPoint, you must already have an Entra ID authentication domain in WatchGuard Cloud Directories and Domain Services. For detailed steps, go to Add an Authentication Domain to WatchGuard Cloud and Sync Users, Groups, and Devices from Entra ID to Directories and Domain Services.
When you set up an AuthPoint external identity to sync Entra ID users from Directories and Domain Services, be aware of these requirements:
- Users that do not have a first name, user name, and email address in Entra ID are not included in the synchronization.
- If the group sync returns more users than you have available AuthPoint licenses, the sync only creates as many users as your license supports.
- When you configure a group sync, in most cases we recommend that you assign a token to users and send them the Token Activation email. User accounts need a token to authenticate with AuthPoint. You might choose not to do this for users that use hardware tokens for authentication.
- Entra ID external identities sync users and the Entra ID groups that they belong to. You cannot manually add synced users to existing AuthPoint or WatchGuard Cloud Directory groups.
Before you sync users, make sure that each user account has a valid email address. If the email address for a user account is not correct, the user cannot receive the email message to activate a token. If a user identified by your group sync has the same email address as a different, existing AuthPoint user account, AuthPoint does not sync the external user.
Migrate an Existing Azure AD External Identity
If you have an Azure AD external identity, you can convert it to the new Entra ID external identity type. This conversion is required for AuthPoint to integrate with Directories and Domain Services.
The conversion process preserves your group syncs, synced users, and synced groups.
After you migrate to the new Entra ID external identity, previously synced users remain in their existing AuthPoint groups but new synced users are only added to synced Entra ID groups based on group membership in Entra ID. You cannot manually add users synced from Entra ID to AuthPoint groups.
After you migrate an existing Azure AD external identity, we recommend that you review your authentication policies to make sure that the policies use the Entra ID groups for synced users and not the AuthPoint groups that were previously required for Azure AD group syncs.
Before you can convert an Azure AD external identity to an Entra ID external identity, you must add an Entra ID authentication domain in WatchGuard Cloud Directories and Domain Services. For detailed steps, go to Add an Authentication Domain to WatchGuard Cloud and Sync Users, Groups, and Devices from Entra ID to Directories and Domain Services.
You can convert Azure AD external identities that have one or more group syncs configured. If your Azure AD external identity does not have a group sync configured, we recommend that you delete the external identity and add a new one after you add your Entra authentication domain to Directories and Domain Services. A group sync is required because that is the configuration that the conversion process preserves. Without a group sync and synced users or groups, there is nothing to convert.
To convert an existing Azure AD external identity to an Entra ID external identity:
- Go to Configure > AuthPoint.
- Select External Identities.
- Select the External Identities to Migrate tab.
- In the row of the external identity to migrate, click Start Migration.
When you start the migration, AuthPoint makes all of the necessary updates to the external identity. Your existing group sync, and the Entra ID users and groups you have synced to AuthPoint, are not affected by this migration. The migration can take a few minutes to complete.
When the migration process is complete, your external identity is moved from the External Identities to Migrate tab to the Entra ID tab.
Add an Entra ID External Identity and Group Sync
To add an external identity in the AuthPoint management UI:
- From the AuthPoint navigation menu, select External Identities.
- Click Add External Identity.
The Add External Identity page opens.
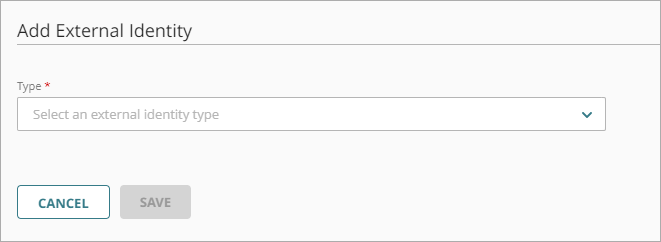
- From the Type drop-down list, select Directories and Domain Services.
Additional fields are shown. - In the Name text box, type a descriptive name for the external identity.
- From the Domain Service drop-down list, select your Entra ID authentication domain. This is the authentication domain you added to Directories and Domain Services in WatchGuard Cloud.
- In the Sync Users and Groups section, click Add Group Sync.
The Add Group Sync window appears. - Select the Entra ID groups you want to sync users from. You can select multiple groups.
- Select whether you want the synced users to be MFA users or non-MFA users. MFA users are user accounts that will use AuthPoint to authenticate. Non-MFA users are users that will only ever authenticate with a password, such as a service account user. Non-MFA users do not consume an AuthPoint user license and cannot authenticate to resources that require MFA.
- If you want AuthPoint to create mobile tokens for these user accounts and send an email to the users to activate their mobile tokens, select the Automatically assign a mobile token to the synced users and Automatically send the activation email for the synced users check boxes.
You cannot change these settings after you sync the user accounts. To assign a token to a user that does not have these options selected, you must resend the Token Activation email. For more information, go to Resend Activation Email.
- Click Add.
The Add Group Sync window closes. - Click Save.
After you add a group sync, AuthPoint syncs users from Directories and Domain Services and creates an AuthPoint user account for each user identified by the group sync. If the group sync returns more users than you have available AuthPoint licenses, the sync only creates as many users as your license supports.
The newly created AuthPoint user accounts appear on the Users page with a green Activated status icon next to the user name. The Activated status icon indicates that the user has been created and is currently active (not blocked). You can identify users synced from an external identity by the Entra ID label in the Type column in the list of users.
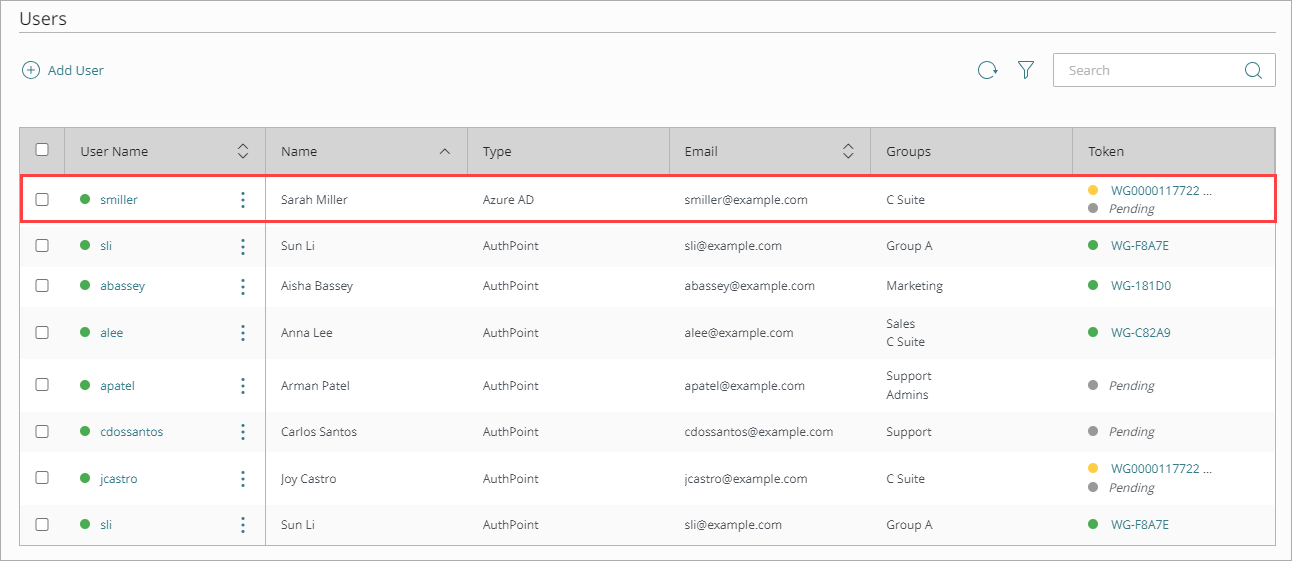
Each user receives an email that they use to activate their token in the AuthPoint mobile app. When a user activates their token, you can view their token in the Token column with a green Activated status icon next to the token.
If a user does not receive the token activation email, you can send the user a new activation email so that they can activate their token. If you chose not to automatically assign a mobile token to a user, you can use this option to create a token for them and send them the token activation email. For detailed steps to resend the activation email, go to Resend Activation Email.
The newly created groups appear on the Groups page. You can identify synced groups in the Groups list by the Entra ID label in the Type column.
If you change the name of a synced group in Entra ID, the synced group in AuthPoint automatically updates to match. You cannot edit the synced groups in AuthPoint.
If you delete a group in Entra ID, or if you delete the group sync, the synced group is not deleted in AuthPoint. You must manually delete the synced group in AuthPoint.