Applies To: Endpoint Security Elite, Endpoint Security 360, Endpoint Security Prime, WatchGuard EDR, WatchGuard EDR Core, Endpoint Security Basic
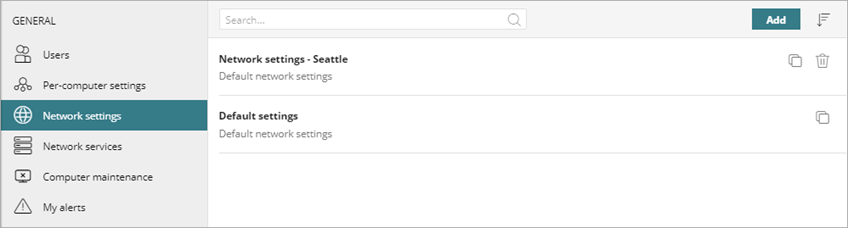
On the Network Settings page, you create settings profiles to specify the language of WatchGuard Endpoint Security installed on computers and devices. You can also define the type of connection to WatchGuard Cloud with proxies and add cache computers that act as repositories for signature files and other components.
Settings vary for Endpoint Security Elite, 360, Prime, Basic, WatchGuard EDR, and EDR Core. Throughout this documentation, Endpoint Security refers generally to all products. If a setting is not visible in the Endpoint Security management UI, it is not supported by your product.
Your operator role determines what you can see and do in WatchGuard Cloud. Your role must have the Manage Network Settings permission to view or configure this feature. For more information, go to Manage WatchGuard Cloud Operators and Roles.
To configure a network settings profile:
- In WatchGuard Cloud, select Configure > Endpoint Security.
- Select Settings.
- From the left pane, select Network Settings.
- Select an existing security settings profile to edit, copy an existing profile, or in the upper-right corner of the page, click Add to create a new profile.
The Add Settings or Edit Settings page opens.
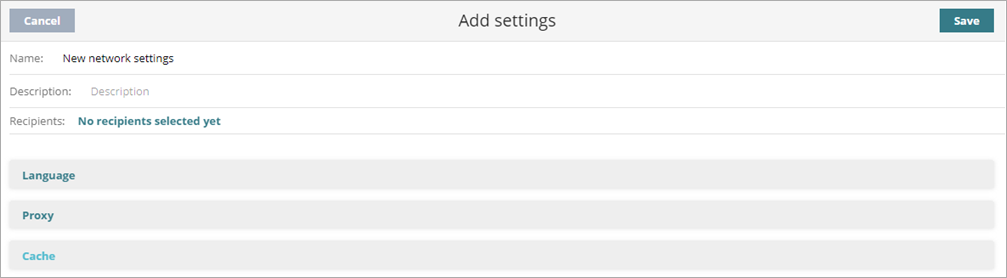
- In the Name text box, type a name for the settings profile.
- (Optional) In the Description text box, type a brief description of the settings profile.
- Configure these settings, as required.
- Click Save.
The settings profile appears in the list. - Select the profile and assign recipients, if required.
For more information, go to Assign a Settings Profile.
Configure the Client Software Language
Configure the language of the endpoint software installed on computers and servers. Users cannot change the specified language.
Your operator role determines what you can see and do in WatchGuard Cloud. Your role must have the Manage Network Settings permission to view or configure this feature. For more information, go to Manage WatchGuard Cloud Operators and Roles.
To configure the language of the endpoint software:
- Select Language.
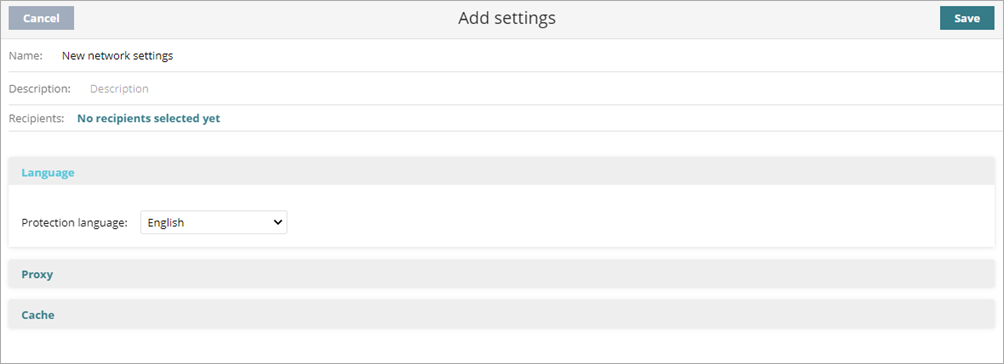
- From the Protection Language list, select the language you want to display in the client endpoint software.
Configure the Proxies List
A proxy acts as an intermediary for the communication between two computers: a client on an internal network (an intranet, for example) and a server on an extranet or the Internet. In the network settings profile, you can add proxies for Windows, Linux, and macOS computers to use. You then specify the order these computers in the subnet use the proxies.
When there are multiple computers, the first available computer in the list is the proxy. If it becomes unavailable, your computers try the next proxy computer on the list until the end of the list is reached, then they try the first computer again until they can connect.
If computers cannot connect to a proxy computer on the list, they try to connect to the default proxy of the computer. If unavailable, then the computers use DNS or DHCP to query the network and get the discovery URL that points to the proxy auto-configuration (PAC) file. If computers still cannot connect to a proxy, then WatchGuard Endpoint Security tries to connect directly to the cloud.
Your operator role determines what you can see and do in WatchGuard Cloud. Your role must have the Manage Network Settings permission to view or configure this feature. For more information, go to Manage WatchGuard Cloud Operators and Roles.
To configure the Proxies list:
- Select Proxy.
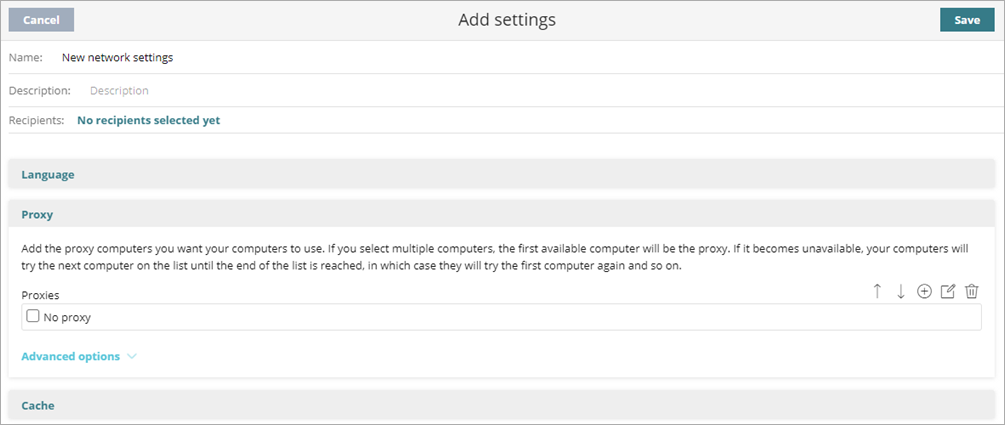
- To add a proxy, click
 and follow the steps in Add a Proxy (Windows Computers).
- To edit an existing proxy, select the check box next to the proxy and then click
 .
. - To delete a proxy, select the proxy and click
 .
.
- To edit an existing proxy, select the check box next to the proxy and then click
- To change the precedence of proxies in the list, click the
 arrows.
 - To disable real-time communication between proxies and the computers and devices on your network, select Advanced Options.
For more information, go to Disable Real-time Communication.
Configure the Cache Computer List Manually
After you designate a computer as a cache, you can manually configure the order of cache computers that the computers and devices in your network will use on the Network Settings page. The first available computer will be the cache they use. However, if it becomes unavailable, your computers and devices will try the next computer on the list.
You can enable computers to automatically look for cache nodes on their network segment. For information on automatic mode, go to Configure Cache Computers Use on the Network.
Your operator role determines what you can see and do in WatchGuard Cloud. Your role must have the Manage Network Settings permission to view or configure this feature. For more information, go to Manage WatchGuard Cloud Operators and Roles.
To configure the cache computer access list manually:
- Select Cache.
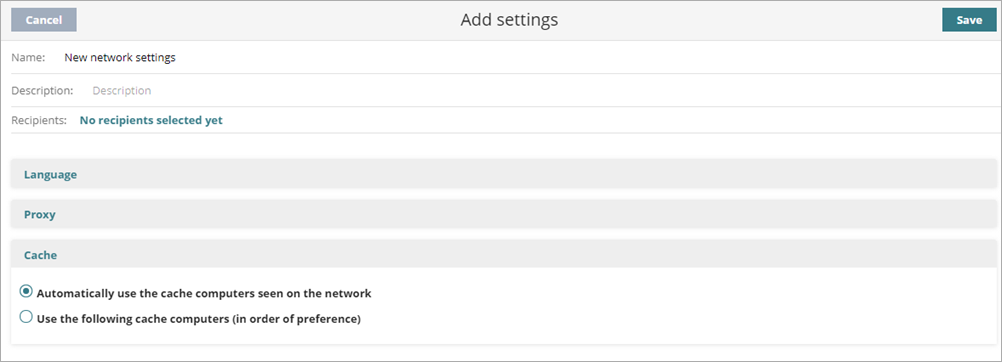
- Select Use the following cache computers (in order of preference).
- To add a cache computer, click and select a computer. If there are no cache computers, follow the steps in Designate a Cache Computer (Windows computers).
- To edit an existing cache computer, select the check box next to the computer and then click .
- To delete a cache computer, select the computer and click .
- To change the precedence of the computers in the list, click the arrows.
When there are multiple cache computers, the first available computer is the cache. If it becomes unavailable, your computers try the next computer on the list until the end of the list is reached. If it cannot find any available computers, WatchGuard Endpoint Security will try to access the Internet directly.
Add a Proxy (Windows Computers)
Disable Real-time Communication
Configure the WatchGuard Agent Remotely for Endpoint Security