Applies To: Endpoint Security Elite, Endpoint Security 360, Endpoint Security Prime, WatchGuard EDR, WatchGuard EDR Core, Endpoint Security Basic
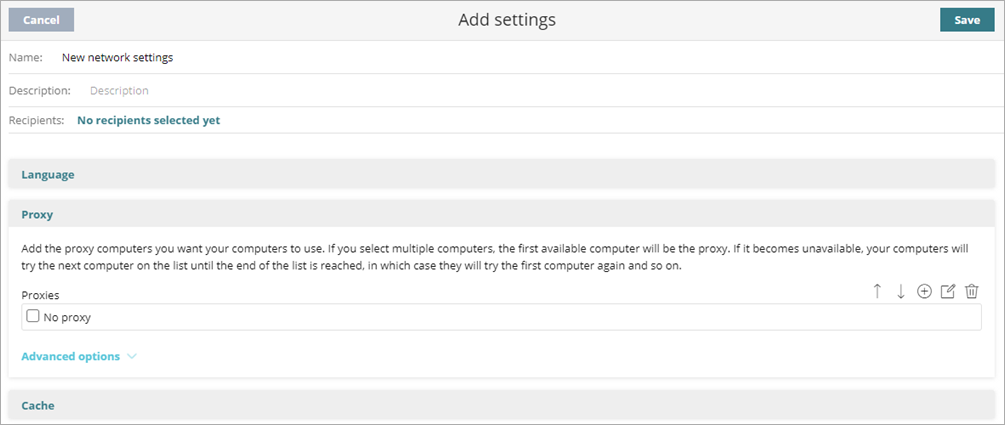
When you create a network settings profile for a computer, you can add proxies that computers on your network use to connect to WatchGuard Cloud. Only Windows computers can act as a proxy. Windows, Mac, and Linux computers can access the network through a Windows proxy. This is useful in a network where there are computers that cannot have direct access to Internet for security reasons.
You can add or designate more than one Windows computer on the network as a proxy. When there are multiple proxies, Endpoint Security uses the first proxy to connect to WatchGuard Cloud by default. Proxy computers can serve a variable number of devices, based on the hardware resources installed. As a general rule, a proxy computer can serve a maximum of 100 computers.
Proxies cannot download patches or updates through the Patch Management module. Only computers with direct access to WatchGuard Cloud or with indirect access through a corporate proxy can download patches.
Endpoint Security on Linux computers cannot download packages from a proxy to install or update the security software.
Proxy Types
In the Add Proxy dialog box, you can select the proxy type you want to add:
- Corporate proxy
- Automatic Proxy Discovery Using Web Proxy Autodiscovery Protocol (WPAD)
- WatchGuard proxy
If you select no proxy, access to the Internet is direct, not through a proxy. Endpoint Security uses the computer settings to communicate with WatchGuard Cloud.
We recommend that you configure a WatchGuard proxy only to enable isolated computers (those without an Internet connection, either direct or through a corporate proxy) to access WatchGuard Cloud. If no WatchGuard proxies are available, you must first designate a computer as a WatchGuard proxy. For more information, go to Designate a Computer as a WatchGuard Proxy (Windows Computers).
Your operator role determines what you can see and do in WatchGuard Cloud. Your role must have the Manage Network Settings permission to view or configure this feature. For more information, go to Manage WatchGuard Cloud Operators and Roles.
When you add a corporate proxy, access to the Internet is through a proxy installed on the company network.
To add a corporate proxy:
- From the left pane, select Network Settings.
- Select an existing security settings profile to edit, copy an existing profile, or in the upper-right corner of the page, click Add to create a new profile.
The Add Settings or Edit Settings page opens.
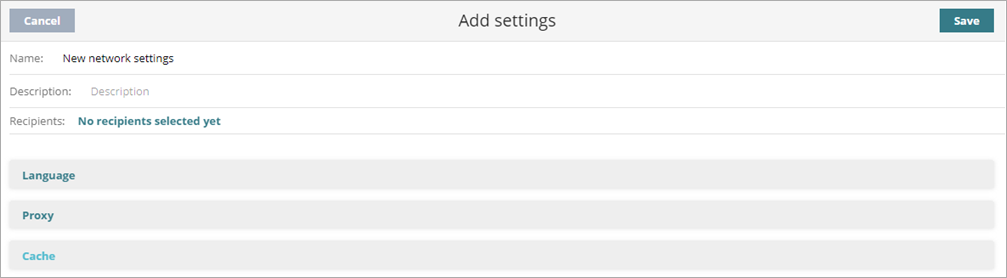
- In the Name text box, type a name for the settings profile.
- (Optional) In the Description text box, type a brief description of the settings profile.
- Select Proxy.
- Click
 .
.
The Add Proxy dialog box opens. - Select Corporate Proxy.
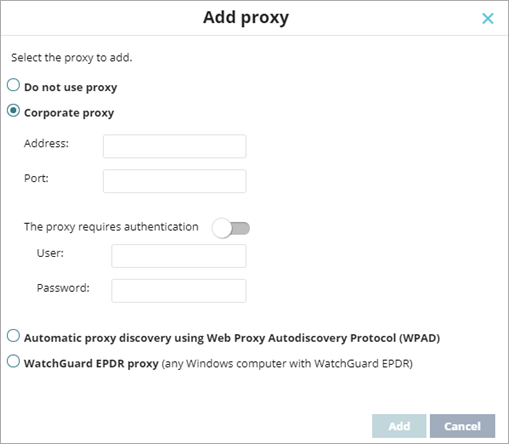
- Configure the proxy parameters.
- Address — Enter the proxy server IP address.
- Port — Enter the proxy server port.
- The proxy requires authentication — Enable this toggle when the proxy requires a user name and password.
- User name — Enter the user name of an existing account that has permission to log on to the proxy computer.
- Password — Enter a password of the proxy account.
- Click Add.
For information on how to configure precedence of multiple proxies in a network settings profile, go to Configure the Proxies List. - Click Save.
The settings profile appears in the list. - Select the profile and assign recipients, if required.
For more information, go to Assign a Settings Profile.
Access to the Internet is through a proxy that is discoverable through Web Proxy Auto-Discovery (WPAD) protocol. This method uses DNS or DHCP to query the network and get the discovery URL that points to the proxy auto-configuration (PAC) file. WPAD protocol is primarily used in networks where clients are only allowed to communicate externally through a proxy.
This option is not supported on Linux. We recommend that you do not use it for Linux operating systems.
To add a proxy through WPAD protocol:
- In WatchGuard Cloud, select Configure > Endpoint Security.
- Select Settings.
- From the left pane, select Network Settings.
- Select an existing security settings profile to edit, copy an existing profile, or in the upper-right corner of the page, click Add to create a new profile.
The Add Settings or Edit Settings page opens.
- In the Name text box, type a name for the settings profile.
- (Optional) In the Description text box, type a brief description of the settings profile.
- Select Proxy.
- Click .
The Add Proxy dialog box opens. - Select Automatic proxy discovery using Web Proxy Autodiscovery Protocol (WPAD).
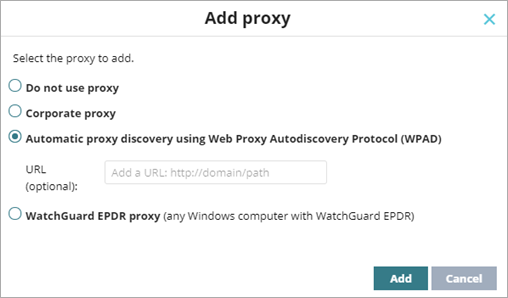
- (Optional) In the URL text box, type the HTTP or HTTPS URL that hosts the PAC configuration file.
- Click Add.
For information on how to configure precedence of multiple proxies in a network settings profile, go to Configure the Proxies List. - Click Save.
The settings profile appears in the list. - Select the profile and assign recipients, if required.
For more information, go to Assign a Settings Profile.
Designate a Computer as a WatchGuard Proxy (Windows Computers)