Applies To: Endpoint Security Elite, Endpoint Security 360, Endpoint Security Prime, WatchGuard EDR, WatchGuard EDR Core, Endpoint Security Basic
You can use the Computers page in the Endpoint Security management UI to group and manage your devices.
For information on how to manage endpoints from the WatchGuard Cloud user interface, go to Manage Endpoints in WatchGuard Cloud.
Your operator role determines what you can see and do in WatchGuard Cloud. Your role must have the Manage Computer Tree permission to view or configure this feature. For more information, go to Manage WatchGuard Cloud Operators and Roles.
To open the Computers page:
- In WatchGuard Cloud, select Configure > Endpoint Security.
- Select Computers.

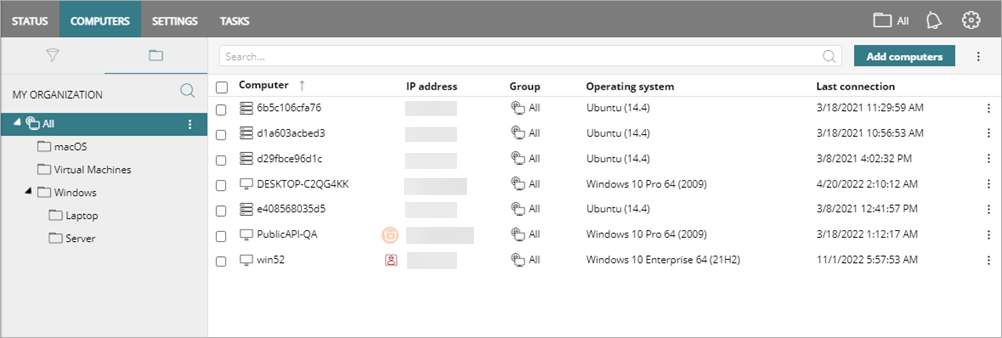
The Computers page has two panes. You use the left pane to filter and organize computers and devices and use the right pane to review the details.
Filters are useful when you have a large number of computers and devices on the network. Endpoint Security includes a number of commonly used filters that administrators can use to organize and locate network computers. These predefined filters can be edited or deleted. For examples of additional filters typically created by network administrators, go to Example Filters.
Left Pane
Use the Filters and My Organization tabs to see and organize the computers you manage.
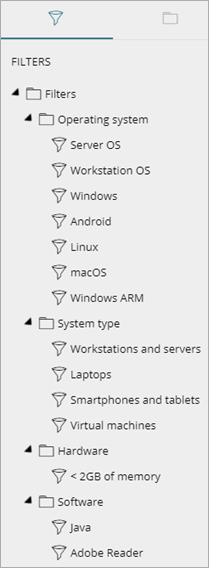
Filters Tab
On the ![]() Filters tab, you can dynamically group computers and devices on the network based on their characteristics.
Filters tab, you can dynamically group computers and devices on the network based on their characteristics.
You can use logical operators to define complex filters. For example, you can filter your computers by operating system, software installed, or by a custom filter with specific rules for settings, protection status, hardware, software, range of IP addresses, groups, or latest proxies used by the agent.
For more information, go to Add a Filter.
My Organization Tab
You can manually assign computers to a group. Use the ![]() My Organization tab to create a multi-level structure of groups, subgroups, and computers. The organizational structure can custom, the company Active Directory structure, or a combination of the two.
My Organization tab to create a multi-level structure of groups, subgroups, and computers. The organizational structure can custom, the company Active Directory structure, or a combination of the two.
The Active Directory structure is generated automatically. To include a computer in a custom group or an Active Directory path, you must install the WatchGuard Agent. You can move computers and devices from one path to another as necessary. For more information, go to Manage Endpoint Groups in Endpoint Security.
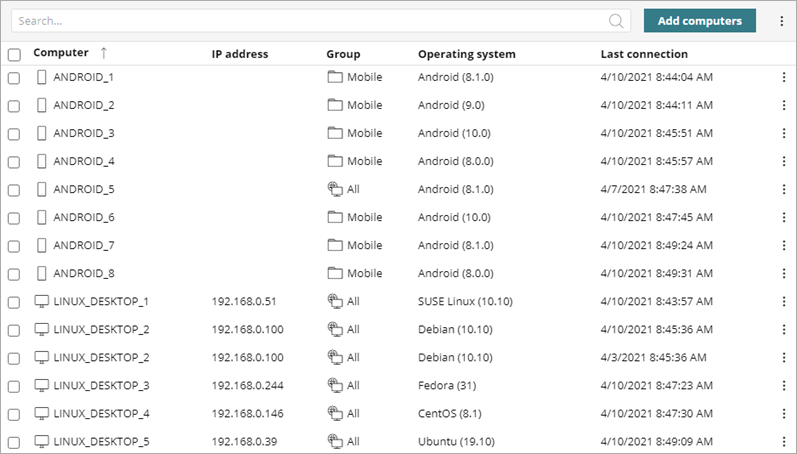
Right Pane
When you select a filter or group from the left pane, the right pane displays a detailed table of the computers on the network. You can use the Search bar to find a specific computer in the list. Search by computer name, device ID or MUID.
Click Add Computers to download the WatchGuard Agent. For more information, go to Download the WatchGuard Agent Installer for Endpoint Security Products.
To restrict or expand the information displayed in the table, from the options![]() menu (in the upper-right corner), select Add or Remove Columns. Select the columns you want to show in the table.
menu (in the upper-right corner), select Add or Remove Columns. Select the columns you want to show in the table.
To export the table to a .CSV file, in the upper-right corner, click ![]() and select Export. Select Reduced Export to send a subset of the information in the table.
and select Export. Select Reduced Export to send a subset of the information in the table.
In the list of computers, click the options ![]() menu to open a list of actions. The actions available is different for endpoints with different operating systems:
menu to open a list of actions. The actions available is different for endpoints with different operating systems:
- Move to — Move the device to a different group.
- Move to Active Directory path — Move the computer to a different Active Directory path
- Delete — Delete the device and related information (for example, detections) from the Endpoint Security management UI. This feature is available for Windows, Mac, and Linux devices. When you delete a device, it becomes unprotected. If a deleted device reconnects to the WatchGuard servers, the device and information will show again in the management UI. For information on how to remove the WatchGuard Agent, go to Uninstall the Endpoint Software.
- Scan now — Starts a virus scan of the computer.
- Schedule scan — Opens the Task page to create a scheduled scan task for the computer.
- Restart — Restarts the computer.
- Isolate computer — Opens a dialog box to isolate the computer from the network. This option is available for Windows and Mac computers.
- End RDP Attack Containment mode — Turns off RDP attack containment mode for the computer. External RDP connections are no longer blocked.
- View available patches — Opens the Available Patches list. This option is only available with the Patch Management module.
- Schedule patch installation — Opens the Task page to schedule patch installation on the computer. This option is only available with the Patch Management module.
- View computer inventory — Opens the Files with Personal Data list to show all files on the computer that were accessed. This option is only available with the WatchGuard Data Control module.
- Verbose mode - Generates extended telemetry for the computer. This option is available only on Windows computers in Audit mode. For more information, go to Configure Verbose Mode.
- Reinstall protection — Opens the Reinstall Protection dialog box. Select to install the protection now or at a scheduled time.
- Reinstall agent — Opens the Reinstall Agent dialog box. Select the discovery computer from which you want to reinstall the WatchGuard Agent on the computer, and enter the required credentials.
To display detailed information about a computer, click the computer in the table. For more information, go to Computer Details in Endpoint Security. For information on the details page available for endpoints from the WatchGuard Cloud user interface, go to Endpoint Details in WatchGuard Cloud.
Manage Endpoint Groups in Endpoint Security
Manage iOS Devices in Endpoint Security