Applies To: AuthPoint Multi-Factor Authentication, AuthPoint Total Identity Security
A hardware token is a physical device with a built-in token that your users can use for authentication. You can purchase WatchGuard hardware tokens or you can use third-party hardware tokens with AuthPoint. To do so, you must:
- Buy supported hardware tokens from WatchGuard or a third-party vendor.
- Import hardware tokens to AuthPoint.
- Assign hardware tokens to users.
- Activate hardware tokens.
Each AuthPoint user can have up to 20 software tokens and any number of hardware tokens.
You can import the same WatchGuard hardware token to multiple AuthPoint accounts. You might do this if you have an administrative or support user in several managed accounts. To learn how to transfer ownership of a WatchGuard hardware token, go to Transfer Hardware Token.
For RADIUS authentication, hardware tokens support the PAP protocol only. Hardware tokens do not support RADIUS authentication with the MS-CHAPv2 protocol, such as with an IKEv2 VPN.
You cannot use WatchGuard hardware tokens with third-party MFA services. You can only use WatchGuard hardware tokens with AuthPoint MFA.
Supported Hardware Tokens
Hardware tokens must meet these requirements:
- Response Format — Six-digit time-based OTP that includes only numbers with a 30 or 60-second time interval
- Algorithm — OATH time-based OTP (RFC 6238)
- Seed Delivery — OATH PSKC file (RFC 6030)
WatchGuard hardware tokens are automatically associated with your account, so you do not need a seed file. This makes the process to import tokens safer and easier.
- Feitian C200 (Time-based OTP)
- HID ActivID MiniToken (Time-based OTP)
- Gemalto/SafeNet OTP 110 (Time-based OTP)
- OneSpan/Vasco GO6 (Time-based OTP)
- Token2 (Time-based OTP)
This list only includes tokens that WatchGuard has tested with AuthPoint. AuthPoint also supports other third-party hardware tokens that meet the requirements.
Import Hardware Tokens to AuthPoint
You must import hardware tokens to your AuthPoint account. The import process is different for WatchGuard hardware tokens and third-party hardware tokens.
WatchGuard Hardware Tokens
To import WatchGuard hardware tokens, you provide the serial number of an individual hardware token or a box of hardware tokens. You can import a WatchGuard hardware token into multiple accounts. You might do this if you have an administrative or support user in several managed accounts.
Third-Party Hardware Tokens
To import third-party hardware tokens into AuthPoint, you must upload a seed file and provide a key. You receive the seed file and key from your hardware token vendor. The seed file must be encrypted.
- Seed File — The seed file is a Portable Symmetric Key Container (PSKC) file that is used to import hardware token information into AuthPoint. This file contains device information for each hardware token. The accepted file types for a seed file are .XML, .PSKC, .TXT, and .VIP.
- Key — The key is used to decrypt the seed file so AuthPoint can validate the one-time passwords (OTPs) that the hardware tokens generate. The key can be a string of characters that you type in AuthPoint or a file that you upload. The accepted file types for a key file are .TXT and .BIN.
If you are a Service Provider, make sure that you import the hardware tokens to the AuthPoint account that will use them.
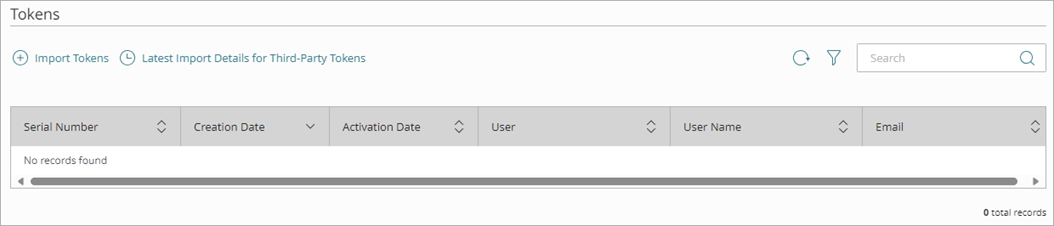
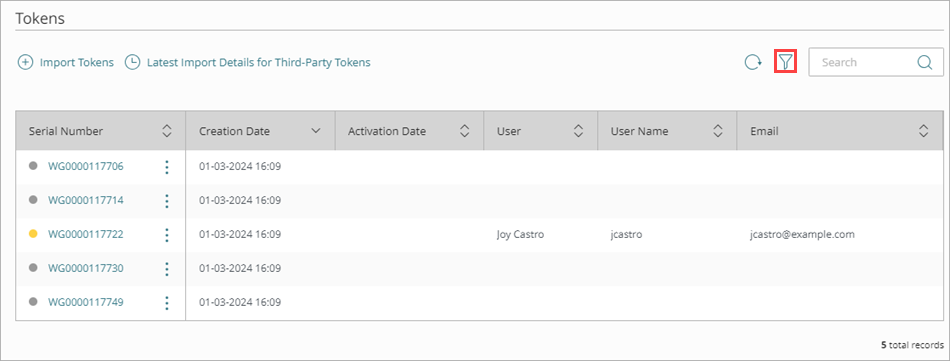
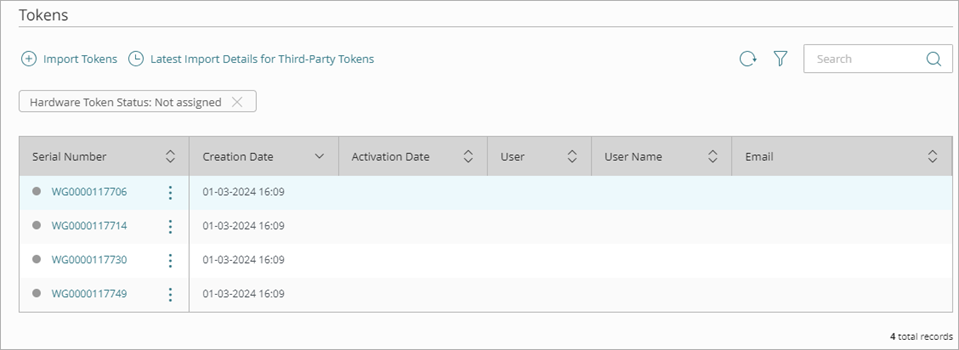
- From the AuthPoint management UI, select Tokens.
The Tokens page appears.
![]()
- Click Import Tokens.
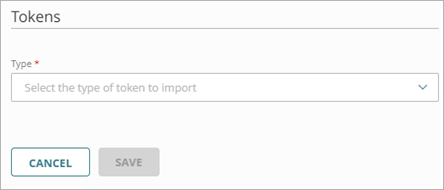
- From the Type drop-down list, select WatchGuard Tokens.
Additional fields appear. - Type the serial number of a hardware token or box of hardware tokens.
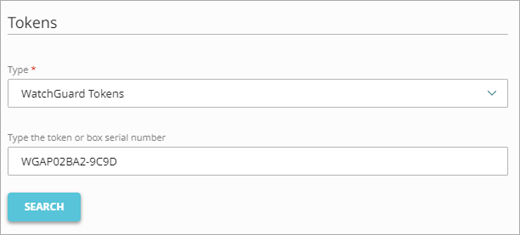
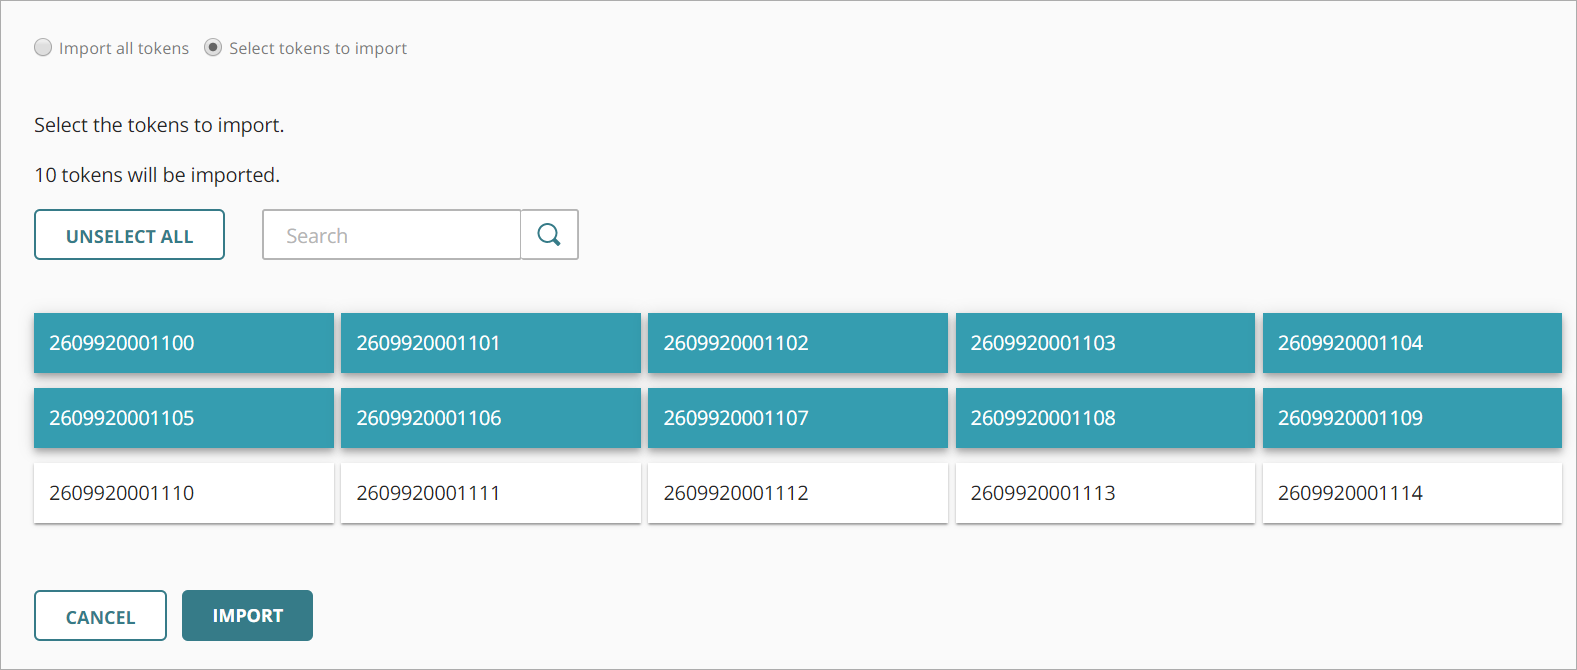
- Click Search. For a box of hardware tokens, all hardware tokens from that box are shown and you select which tokens to import.
- Select the tokens to import.
- To import all tokens, click Select All.
- To import only specific tokens, select them.
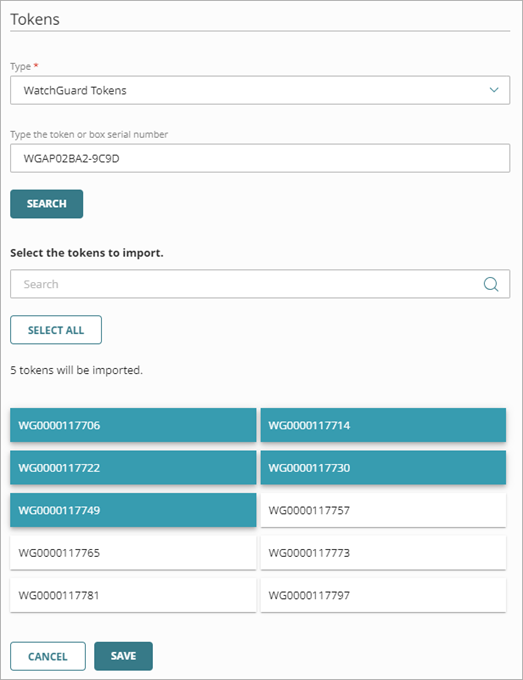
- Click Save.
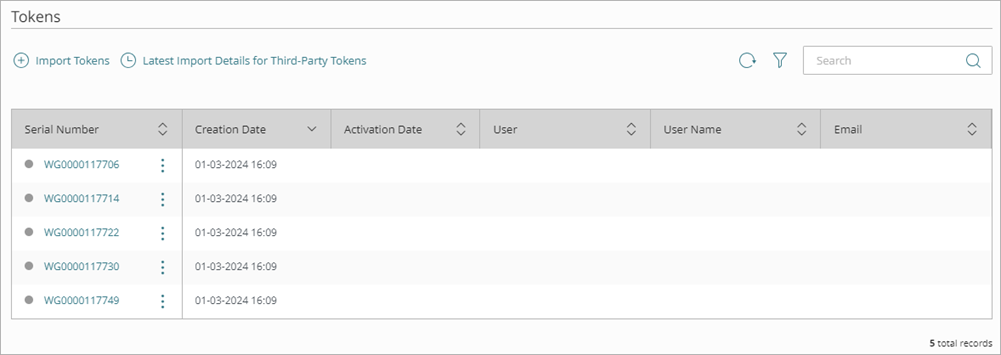
The hardware tokens are imported.
- From the AuthPoint management UI, select Tokens.
The Tokens page appears.
- Click Import Tokens.
- From the Type drop-down list, select Third-Party Tokens.
Additional fields appear. - Type or paste the Key. Or, if you have a key file, select Upload key file and upload the file. The accepted file types for a key file are .TXT and .BIN.
You receive the key from your hardware token vendor.
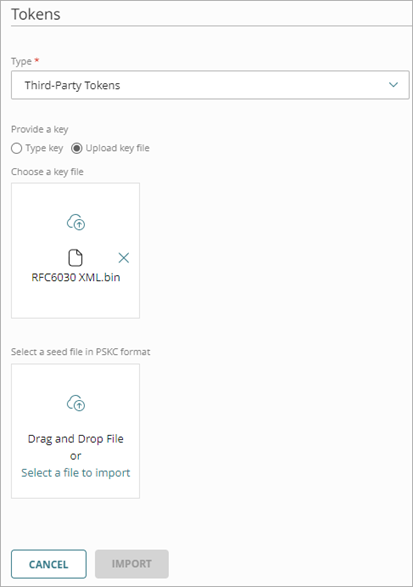
- In the Select a seed file section, drag and drop your seed file. Or, click Select a file to import and select your seed file. The accepted file types for a seed file are .XML, .PSKC, .TXT, and .VIP.
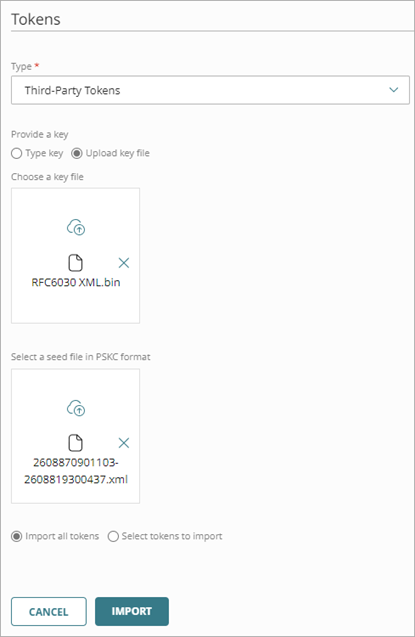
- (Optional) If you only want to import some of the hardware tokens, select Select tokens to import. You might do this if you purchased a large batch of hardware tokens that you want to import to several different accounts.
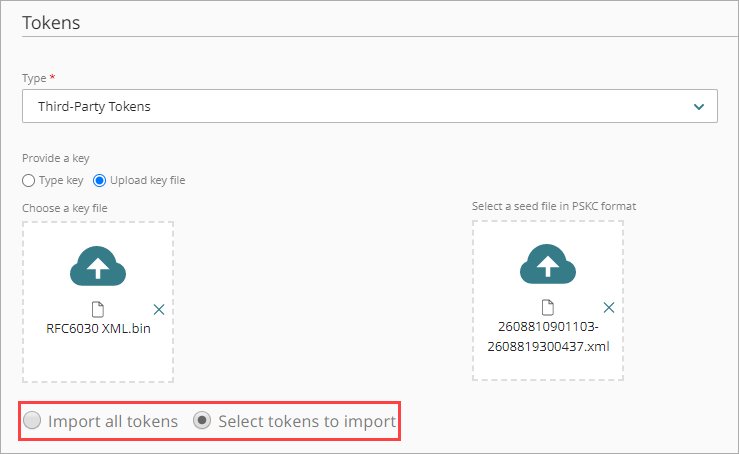
- Select the tokens to import.
- Click Import.
Your hardware tokens are imported and a page opens with the import details.
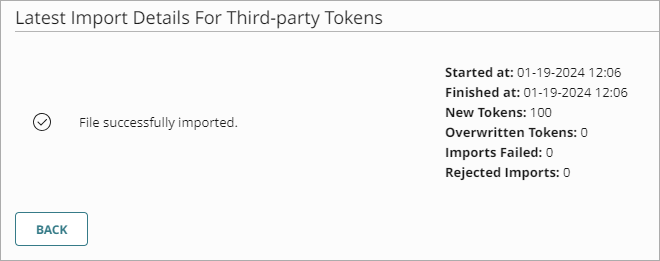
For more information about import details, see Hardware Token Import Details.
After you import your hardware tokens to AuthPoint, you must assign the tokens to users and then activate the tokens.
If you have configured the IdP portal, users can activate their own hardware tokens from the IdP portal. For more information, see Activate a Hardware Token.
Assign a Hardware Token to a User
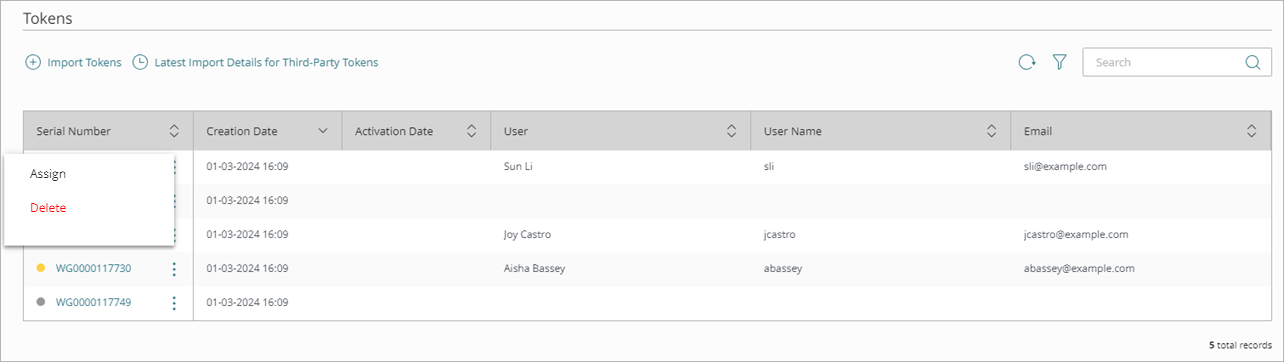
You can assign hardware tokens to a user from the Hardware Tokens page or the Users page.
When a user activates hardware tokens from the IdP portal, AuthPoint automatically assigns the activated tokens to the user that activated them.
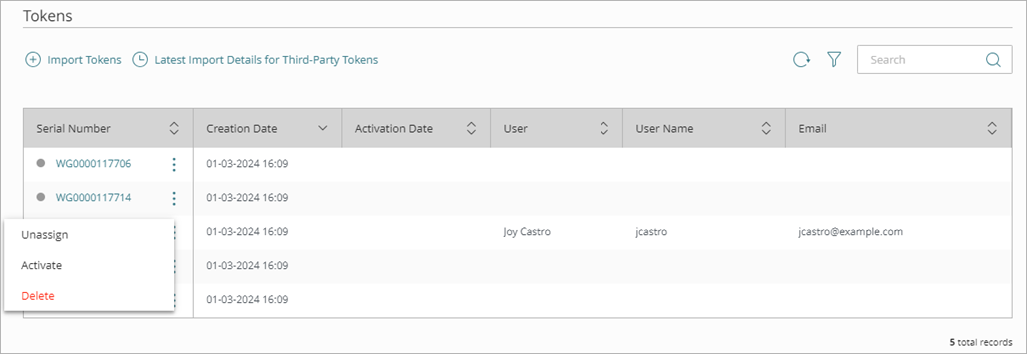
- Next to the hardware token you want to assign to a user, click
 and select Assign.
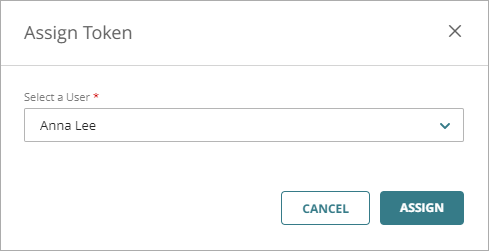
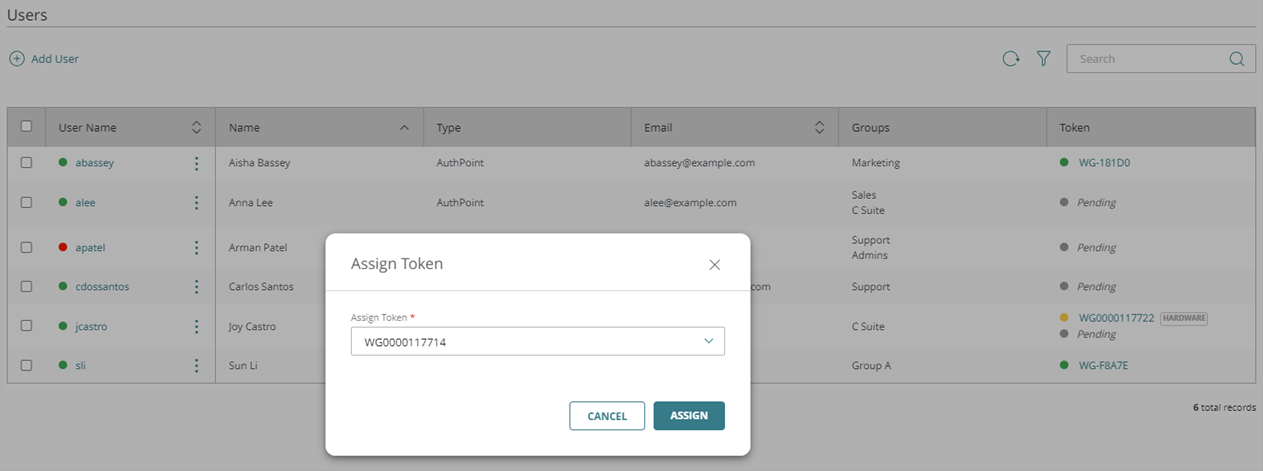
The Assign Token window opens.
- From the Select a user drop-down list, select the user that you want to assign this hardware token to.
- Click Assign.
- Next to the user you want to assign a hardware token to, click and select Assign Hardware Token.
The Assign Token window opens.
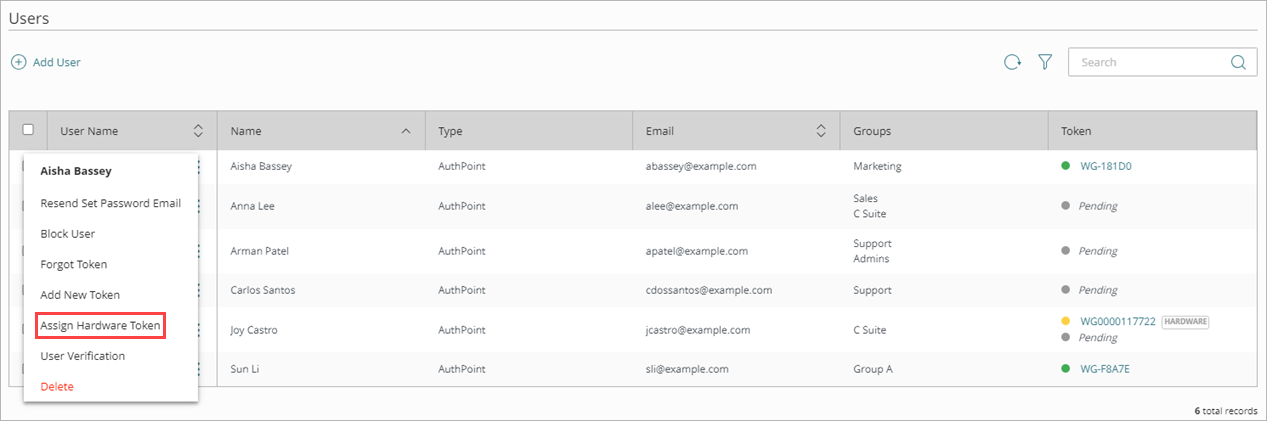
- From the Assign Token drop-down list, select the hardware token you want to assign to the user.
- Click Assign.
Activate a Hardware Token
After you assign a hardware token to a user, you must activate the token before it can be used for authentication. You can activate hardware tokens from the Hardware Tokens page or the Users page.
Users can also activate their own hardware tokens from the IdP portal. When a user activates hardware tokens from the IdP portal, AuthPoint automatically assigns the activated tokens to the user that activated them.
- Next to the hardware token you want to activate, click and select Activate.
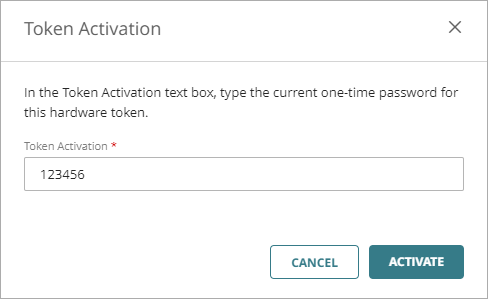
The Token Activation window opens.
- In the Token Activation text box, type the current OTP for the hardware token. Make sure you specify the password for the correct hardware token.
- Click Activate.
The token is activated and can be used for authentication.
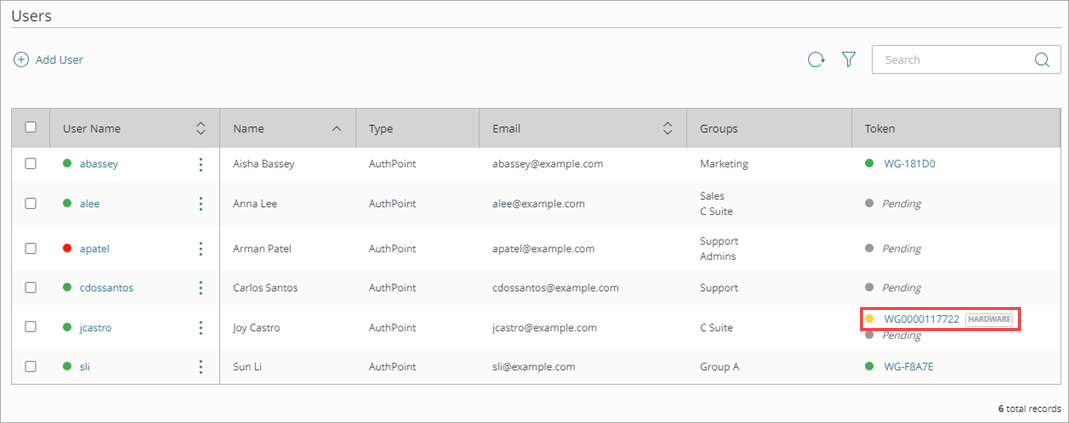
- For the user whose hardware token you want to activate, in the Token column, click the serial number of the hardware token.
The Token Management window opens.
- Click Activate.
The Token Activation window opens.
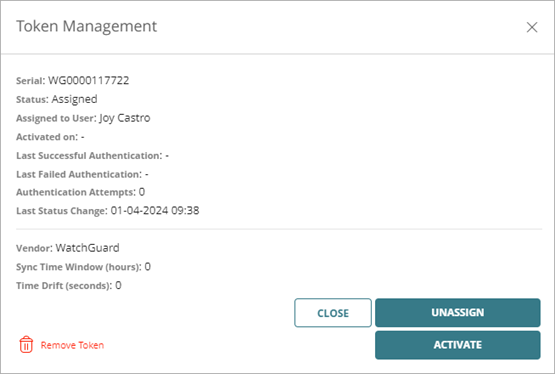
- In the Token Activation text box, type the current OTP for the hardware token. Make sure you specify the password for the correct hardware token.
- Click Activate.
The token is activated and can be used for authentication.

Authentication with Hardware Tokens
You can use hardware tokens to authenticate with an OTP. You authenticate with hardware tokens the same way you authenticate with the software tokens on your phone. When you access a resource that requires authentication, select the option to authenticate with OTP and type the OTP shown on your hardware token.
For more information, see About Authentication.
Filter the Hardware Tokens List
You can apply filters to the list of hardware tokens so that it is easier to see specific tokens. You might do this after you import a large number of hardware tokens if you want to see only specific tokens in the list, such as unassigned tokens or tokens that have a specific status.
To apply filters to the hardware tokens list:
- Click
 .
.
The Filter Hardware Tokens window appears.
- Select the filters you want to apply. You can select multiple filters.
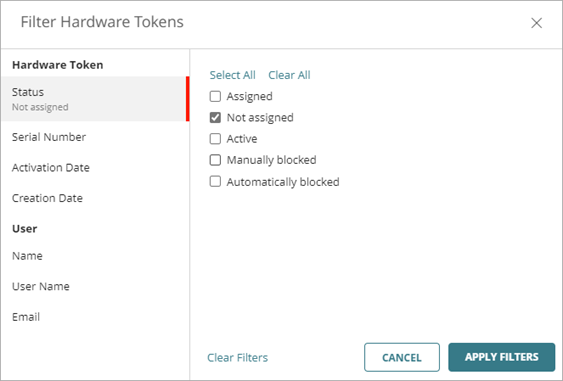
- Click Apply Filters.
Each filter that you apply appears at the top of the hardware tokens list. To remove a filter, click ![]() next to the filter label.
next to the filter label.
Transfer Hardware Token
To transfer ownership of a hardware token to another account, you must remove the token from any AuthPoint accounts it belongs to and then import the token to the new account as if it were a new hardware token.
This procedure is only necessary to transfer ownership. If you want to use the same WatchGuard hardware token in multiple AuthPoint accounts, you can import the token to each of those accounts.
To transfer ownership of a hardware token:
- Remove the WatchGuard hardware token you want to transfer from all accounts that you have imported it to. For detailed steps, go to Remove Hardware Tokens.
- Follow the steps in this help topic to: