Applies To: Cloud-managed Fireboxes
To enable user authentication, you configure users in the Firebox database or in an authentication domain. If you want users to connect to the cloud-managed Firebox to authenticate, you can enable the Authentication Portal. The Authentication Portal is a page on the Firebox.
Enable the Firebox Authentication Portal
To enable the Firebox Authentication Portal, in WatchGuard Cloud:
- Select Configure > Devices.
- Select the cloud-managed Firebox.
- Click Device Configuration.
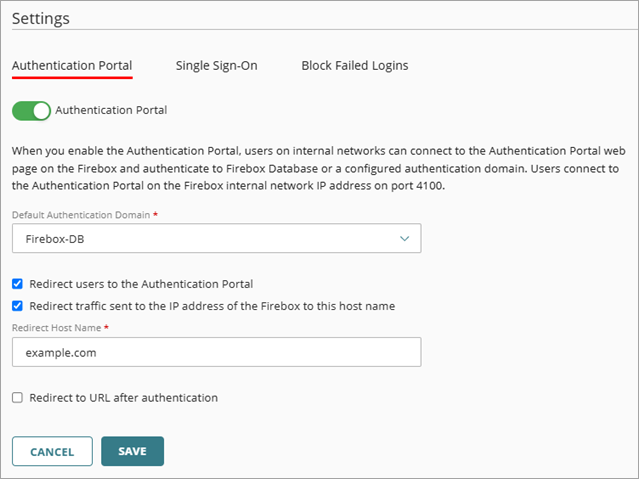
- In the Authentication section, click the Settings tile.
The Settings page opens.

- Enable the Authentication Portal.
- To select the authentication domain in the Authentication Portal, from the Default Authentication Domain drop-down list, select an authentication domain.
- To save configuration changes to the cloud, click Save.
After you enable the Authentication Portal, the WatchGuard Authentication Portal system policy is added to the Firebox. This first-run system policy allows WG-Auth traffic from internal networks to the Firebox on port 4100.
After you deploy the configuration to the Firebox, users on internal networks can use a web browser to connect to the Authentication Portal.
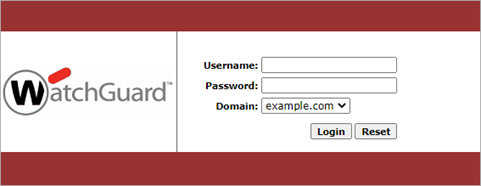
On the Authentication Portal, the default Domain is the Default Authentication Domain that you configure in the Firebox Authentication settings.
For more information, go to Connect to the Firebox Authentication Portal.
Redirect Users to the Authentication Portal
If you require users to authenticate before they can get access to the Internet, you can choose to automatically send users who are not already authenticated to the Authentication Portal or have them manually navigate to the portal. This applies to HTTP and HTTPS connections.
Redirect users to the Authentication Portal
When you select this option, all network users who have not yet authenticated are automatically redirected to the Authentication Portal when they try to connect to the Internet. If you do not select this option, unauthenticated users must manually navigate to the Authentication Portal to log in.
If you select this option, users are only redirected if the device configuration does not include a policy that allows HTTP or HTTPS traffic from the IP addresses of your users. To make sure that your users are automatically redirected to the authentication page, remove any allow HTTP or HTTPS policies other than those that include authorized users or groups.
Redirect traffic sent to the IP address of the Firebox to this host name
Select this option to specify a host name for the page where your users are redirected when you redirect users to the Authentication Portal. You can redirect traffic to a host name to prevent certificate errors in the client web browser. Make sure that the Firebox has a valid certificate signed by a client trusted CA, and make sure that the host name matches the Common Name (CN) from the web server certificate. This host name must be specified in the DNS settings for your organization and the value of the host name must be the IP address of the Firebox. For more information about certificates, go to Manage Certificates in WatchGuard Cloud.
To redirect unauthenticated users to the Authentication Portal, from WatchGuard Cloud:
- In the device configuration, in the Authentication section, click the Settings tile.
The Settings page opens. - To redirect unauthenticated users to the Authentication Portal, select the Redirect users to the Authentication Portal check box.
- (Optional) To specify a host name to redirect users to when you automatically redirect users to the Authentication Portal, select the Redirect Traffic Sent to the IP Address of the Firebox to This Host Name check box. Type the redirect host name in the text box.
- To save configuration changes to the cloud, click Save.
Use a Custom Default Start Page
When you select the Redirect users to the Authentication Portal check box, the Authentication Portal automatically appears when a user opens a web browser. You can define a redirect URL if you want the browser to redirect to a specific page after authentication. For example, you might want to redirect users to a SharePoint site or an internal resource.
To specify a redirect:
- In the device configuration, in the Authentication section, click the Settings tile.
The Settings page opens. - Select the Redirect to URL After Authentication check box.
- Type the redirect URL of the page in the text box.
- To save configuration changes to the cloud, click Save.
Connect to the Firebox Authentication Portal