Applies To: Endpoint Security Elite, Endpoint Security 360, Endpoint Security Prime, WatchGuard EDR, Endpoint Security Basic
Endpoint Security enables you to scan the computers and devices on your network for malicious programs and viruses. You can assign immediate or scheduled scan tasks to all computers in a group and its subgroups.
For information on how to add a scheduled scan task from the Tasks page, go to Create a Scheduled Scan Task.
Your operator role determines what you can see and do in WatchGuard Cloud. Your role must have the Launch Scans and Disinfect permission to view or configure this feature. For more information, go to Manage WatchGuard Cloud Operators and Roles.
Start a Scan Now
Ongoing protection removes the need for on-demand scans. Daily or weekly scans are not recommended for stable, well‑protected endpoints. They do not improve security beyond real‑time protection and could unnecessarily consume system resources.
In these specific scenarios, an on‑demand scan could be useful:
- After a security incident or suspicion — To double‑check devices that showed alerts, unusual behavior, or were offline for some time.
- After the initial installation — To establish a clean baseline and detect any unwanted or risky software already present.
- After major policy changes — If exclusions or rules are modified, a scan can reassess files that were previously not evaluated.
- For compliance or audit purposes — Some regulations require proof of periodic scans. In these cases, scans can be scheduled to meet compliance needs.
To scan a group now:
- In WatchGuard Cloud, select Configure > Endpoint Security.
- Select Computers.
- From the left pane, select the My Organization tab.
- Next to the computer or group of computers you want to scan, click
 .
. - Select Scan Now.
The Select the Type of Scan dialog box opens.
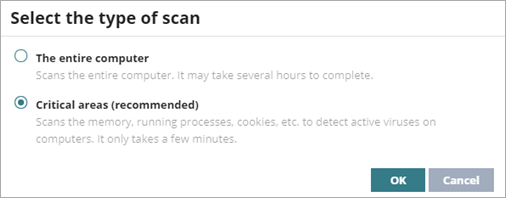
- To scan critical areas for active viruses, such as memory, running processes, and cookies, select Critical areas.
You can also select to scan the Entire computer. This might take several hours to complete. - Click OK.
The scan starts on all computers and subgroups in the group. - Review Task Results.
To disable AutoPlay on removable storage devices, enable the Disable AutoPlay on Removable Storage Devices toggle. For more information, go to Configure Device Control (Windows Computers).
Schedule a Scan
To schedule a scan for a computer or group:
- In WatchGuard Cloud, select Configure > Endpoint Security.
- Select Computers.
- From the left pane, select the My Organization tab.
- Next to the computer or group of computers you want to scan, click .
- Select Schedule Scan.
The Edit Task page opens.

- In the Name text box, type a name for the scan task.
- In the Description text box, type a description of the scan task.
- In the Recipients text box, to add computers to scan, click the recipients.
To see a list of the computers to scan, click View Computers. - To add computer groups and computers, click
 .
. - Select the computer groups or computers you want to scan.
- Click Add.
- Click Back.
- Select when the scan will start.
- To start the scan as soon as possible, select the check box.
- To start the scan at a specific time, select the date and time.
-
To specify the time based on the time on the discovery computer, select the Computer's Local Time check box.
If you do not select this check box, the time is based on WatchGuard Cloud server time.
- If the computer is not connected to the WatchGuard Cloud at the selected time, select how long to retain the scan task from the drop-down list.
- From the Maximum Run Time drop-down list, select how long the scan can run (No Limit, 1 hour, 2 hours, 8 hours, or 24 hours).
- From the Repeat drop-down list, select whether the scan repeats and how frequently (No repeat, Every Day, Every Week, or Every 30 Days).
- Select the scan options.
For more information, go to Scan Options. - In the upper-right corner, click Save.