This document describes how to set up FireCloud with AuthPoint as an identity provider with multi-factor authentication (MFA). With AuthPoint as your FireCloud identity provider, you can use Zero Trust conditions in WatchGuard Cloud to provide more granular control over FireCloud.
Contents
Before You Begin
Before you begin these procedures, make sure that:
- You have a WatchGuard Cloud account
- The account you want to set up has an AuthPoint license and a FireCloud license
- You have an AuthPoint identity provider (IdP) certificate (go to Certificate Management)
Configure FireCloud
To configure FireCloud, complete these steps:
- Get Identity Provider Info from AuthPoint.
- Set Up an Identity Provider.
- Review the Default Settings.
Get Identity Provider Info from AuthPoint
- Log in to WatchGuard Cloud. If you log in with a Service Provider account, you must select a Subscriber account from the Account Manager.
- Go to Configure > AuthPoint.
- From the side navigation menu, select Resources.
- Scroll to the bottom of the page and click Certificate.
- Next to the certificate you want to use, click the three dot menu and select Download Certificate and Download Metadata.
- Open the downloaded metadata file and find and copy the entityID and SingleSignOnService Location values. You need these values when you set up FireCloud.
Set Up an Identity Provider
- From the navigation menu, select Configure > FireCloud.
- Click Set Up FireCloud, then select Manual Setup and click Next.
If you have already set up a FireCloud identity provider, select Authentication and then click Edit Authentication Settings.
- Select Third-Party SAML Identity Provider.
- In the SAML Service Provider Entity IDtext box, enter a name to identify FireCloud as your service provider. An entity ID is a unique name for an identity provider or a service provider. After you configure this value for FireCloud, you use this entity ID to configure your identity provider. In our example, we enter FireCloud.
- In the Identity Provider ID text box, enter the entityID value from the AuthPoint metadata file. This value should be https://sp.authpoint.cloud.watchguard.com/ACC-1234567 where ACC-1234576 is your WatchGuard Cloud account number.
- In the Single Sign-On URL text box, enter the SingleSignOnService Location value from the AuthPoint metadata file. This value should be https://sp.authpoint.usa.cloud.watchguard.com/saml/ACC-1234567/sso/spinit, where usa is your WatchGuard Cloud account region and ACC-1234576 is your WatchGuard Cloud account number.
- In the IDP Certificate field, click the upload button and upload the AuthPoint SAML that you downloaded.
- Click Save.
- On the FireCloud Authentication page, click Download FireCloud Certificate. You use this certificate when you configure a SAML resource in AuthPoint.
Review the Default Settings
By default, FireCloud has all security services enabled with default configurations, and a default access rule is in place to specify which security services apply to user traffic. This means that you can deploy and use FireCloud immediately.
If you want to review the default settings, here is what FireCloud has to offer:
Scanning engines protect against spyware, viruses, malicious applications, spam email, and data leakage. Content scanning services are enabled by default with recommended settings. For content scanning to apply to traffic, you must also enable content scanning in FireCloud access rules.
With FireCloud, you can enable content scanning with these services:
Gateway AntiVirus
Gateway AntiVirus protects your users from viruses. You can configure the action Gateway AntiVirus takes when a virus is detected, an error occurs, scanned content exceeds the configured size limit, or scanned content is encrypted.
APT Blocker
An Advanced Persistent Threat (APT) attack is a type of network attack that uses advanced malware and zero-day exploits to get access to networks and confidential data over extended periods of time. APT Blocker identifies the characteristics and behavior of APT malware in files and email attachments that enter your network. You can configure the action APT Blocker takes for each threat level (High, Medium, Low).
To learn more about content scanning, go to Content Scanning in FireCloud.
You can use FireCloud to monitor and block common security threats, such as botnets, spyware, SQL injections, cross-site scripting, and buffer overflows. FireCloud network blocking security services are enabled by default, with recommended settings.
Botnet Detection
A botnet comprises a large number of malware-infected client computers that a remote server controls and uses to perform malicious acts. The Botnet Detection security service adds a list of known botnet site IP addresses to the FireCloud Blocked Sites List, which enables FireCloud to block these sites at the packet level.
Intrusion Prevention Service
Intrusion Prevention Service (IPS) uses signatures to provide real-time protection against network attacks, including spyware, SQL injections, cross-site scripting, and buffer overflows. Configure the action IPS takes when it detects a threat, as well as the type of scan.
To learn how to configure network blocking, go to Configure Network Blocking in FireCloud.
Geolocation is a security service that enables FireCloud to detect the geographic locations of connections to and from your devices. With FireCloud, you can enable and configure Geolocation to block access to and from specific locations.
The default Geolocation action does not block any countries.
To learn how to configure Geolocation actions, go to Add Geolocation Actions in FireCloud.
Content filtering uses the WebBlocker and Application Control security services to block specific content categories and applications. Content filtering security services are enabled by default with recommended settings.
WebBlocker
WebBlocker helps you control which websites are available to your users. WebBlocker uses a database that groups website addresses into content categories. When a user tries to connect to a website, FireCloud looks up the address in the WebBlocker database and takes the action you specify for the content category.
Application Control
Application Control enables you to monitor and control the use of applications by your users. You can use Application Control to block the use of specific applications, and you can report on application use and use attempts.
To learn how to configure content filtering, go to Content Filtering in FireCloud.
A FireCloud access rule is a policy that determines when FireCloud allows or denies connections. FireCloud matches each connection to an access rule based on the user groups that the user belongs to. You can configure which security services apply to the traffic each access rule handles.
FireCloud has a Default access rule that applies to all connections. The Default access rule has all security services enabled with the default configurations. You cannot edit or delete the Default access rule.
If you do not want to use the Default access rule, you can disable it. If the Default access rule is disabled and a user connection does not match any other access rules, the connection is denied.
To learn more about FireCloud access rules, go to FireCloud Access Rules.
Configure AuthPoint
To configure AuthPoint, complete these steps:
- Add a SAML Resource in AuthPoint.
- Add a Group to AuthPoint.
- Add a Zero Trust Policy.
- Add Users to AuthPoint
Add a SAML Resource in AuthPoint
From the AuthPoint management UI:
- From the navigation menu, select Resources.
Click Add Resource.
The Add Resource page opens.

- From the Type drop-down list, select SAML.
Additional fields appear.

- On the SAML page, in the Name text box, type a name for this resource. In our example, we name the resource FireCloud.
- From the Application Type drop-down list, select Others.
- In the Service Provider Entity ID text box, type or paste the entityID value you copied in the previous section.
- In the Assertion Consumer Service text box, enter the ACS value for your FireCloud account, based on your WatchGuard Cloud account region.
- North America / Americas — https://authsvc.firecloud.usa.cloud.watchguard.com/v1/acs
- EMEA — https://authsvc.firecloud.deu.cloud.watchguard.com/v1/acs
- APAC — https://authsvc.firecloud.jpn.cloud.watchguard.com/v1/acs
- From the User ID Sent on Redirection to Service Provider drop-down list, select User Name.
- For the certificate, upload your FireCloud certificate.
- From the AuthPoint Certificate drop-down list, select the AuthPoint certificate to associate with your resource. You must select the same certificate that you downloaded the metadata and certificate from.
- Click Add Attribute.
- In the Attribute Name text box, type groups. This value is case-sensitive.
- From the Get Value From drop-down list, select User Groups.
- Click Save.
AuthPoint saves your custom attribute. - Click Save.
AuthPoint creates your SAML resource.
Add a Group to AuthPoint
You must have at least one group in AuthPoint. If you already have a group, you do not have to add another group.
To add a WatchGuard Cloud-hosted group to the WatchGuard Cloud Directory:
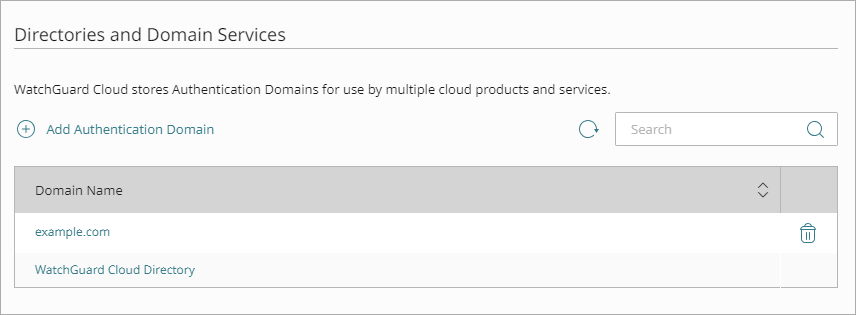
- Go to Configure > Directories and Domain Services.
- Click the WatchGuard Cloud Directory domain name. If you have not yet added the WatchGuard Cloud Directory, click Add Authentication Domain and select the WatchGuard Cloud Directory.
The New Group page appears.
- In the Groups tab, click Add Group.
- In the Group Name text box, type a descriptive name for the group.
- (Optional) In the Description text box, type a description of the group.
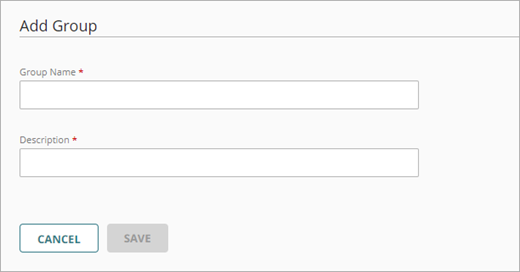
- Click Save.
Your group is added to the WatchGuard Cloud Directory and to AuthPoint.
Add a Zero Trust Policy
Zero Trust policies specify which AuthPoint resources users can authenticate to. In this scenario, we want AuthPoint users to be able to authenticate to the FireCloud SAML resource.
You must have at least one authentication policy in AuthPoint that includes the FireCloud SAMLS resource. If you already have authentication policies, you do not have to create a new authentication policy. You can add this resource to your existing authentication policies.
Users that do not have an authentication policy for the FireCloud SAML resource cannot authenticate and connect to FireCloud.
To configure a Zero Trust authentication policy:
- Go to Configure > Zero Trust.
- Click Add Policy.
- Type a name for this policy.
- In the Target section, from the Content drop-down list, select which groups this policy applies to. You can make multiple selections to add multiple groups.
- In the Resources section, select the FireCloud SAML resource you added to AuthPoint.
- (Optional) In the Conditions section, select the conditions that apply to this policy. When you add a condition to an authentication policy, the policy applies only to user authentications that match the policy and the policy conditions. For example, if you add a time schedule to a policy, the policy only applies to user authentications that occur within that time schedule. Users who only have a policy that includes a time schedule do not get access to the resource when they authenticate outside of the allowed times (because they do not have a policy that applies, not because authentication is denied). For more information, go to About Zero Trust Conditions.
If you add conditions to a policy, we recommend that you create a second policy for the same groups and resources without the conditions. Assign a higher priority to the policy with the policy objects. For more information about priority, go to About Zero Trust Policy Precedence.
- In the Action section, select Allow and then select the check box for each authentication option users can select when they authenticate to resources in this policy with MFA.
- To allow users to connect to FireCloud with only their password, your policy must require only the password authentication option.
- To require users to authenticate with MFA when they connect to FireCloud, your AuthPoint authentication policy must require the push, QR code, or OTP authentication options in addition to the password authentication option.
- Click Save.
Your policy is created and added to the end of the policy list. - Review the order of your policies and adjust as necessary. For more information about priority, go to About Zero Trust Policy Precedence.
Add Users to AuthPoint
Before you assign users to a group, you must add the users to AuthPoint. There are two ways to add AuthPoint user accounts:
- Sync users from an external user database
- Add WatchGuard Cloud-hosted AuthPoint users
Each user must be a member of a group. You must add at least one group before you can add users to AuthPoint.
To import users from Active Directory, Microsoft Entra ID, or an LDAP database, you must add an external identity in the AuthPoint management UI. External identities connect to user databases to get user account information and validate passwords.
- To sync users from Active Directory or an LDAP database, you must add an LDAP external identity
- To sync users from Microsoft Entra ID, you must add a Microsoft Entra ID external identity
When you sync users from an external user database, you can sync any number of users and they are all added to AuthPoint at one time. Users synced from an external user database use the password defined for their user account as their AuthPoint password.
To learn how to sync users, go to Sync Users from Active Directory or LDAP and Sync Users from Azure Active Directory.
You create WatchGuard Cloud-hosted users and groups from the WatchGuard Cloud Directory in WatchGuard Cloud. Directories and Domain Services is where you add shared authentication domains for WatchGuard Cloud devices and services, such as AuthPoint.
Users that you add to the WatchGuard Cloud Directory are automatically added to AuthPoint as well.
You add local AuthPoint users form Directories and Domain Services. You manage the users in AuthPoint on the Users page.
When you add WatchGuard Cloud-hosted AuthPoint users, you choose whether the user is an MFA user or a non-MFA user.
- MFA users are user accounts that will use AuthPoint multi-factor authentication to authenticate. This is not related to the AuthPoint Multi-Factor Authentication license type.
- Non-MFA users are users that will only ever authenticate with a password, such as a service account user. Non-MFA users do not consume an AuthPoint user license and cannot authenticate to resources that require MFA. They can only authenticate to protected resources if the non-MFA user account has a password only authentication policy for that resource.
After you add a user, you can edit the user account if you need to change their account type. When you change a user account from MFA to non-MFA, AuthPoint deletes the tokens and password vault (if applicable) that belong to the user. This action cannot be undone.
Unlike users synced from an external user database, WatchGuard Cloud-hosted AuthPoint users define and manage their own AuthPoint password. When you add a WatchGuard Cloud-hosted user account, the user receives an email that prompts them to set their password.
To learn how to add WatchGuard Cloud-hosted AuthPoint user accounts to the WatchGuard Cloud Directory, go to Add Local Users to an Authentication Domain.
Install the Connection Manager and Test the Integration
For FireCloud to protect your users, they must have the WatchGuard Connection Manager installed on their device and use it to connect to FireCloud.
FireCloud uses the WatchGuard Agent to deploy and install the WatchGuard Connection Manager. When you download the installer from FireCloud, you are downloading the WatchGuard Agent. When you install the WatchGuard Agent, it communicates with WatchGuard Cloud and installs all the software that your account and computer are currently licensed for. To learn more about the WatchGuard Agent, go to About the WatchGuard Agent.
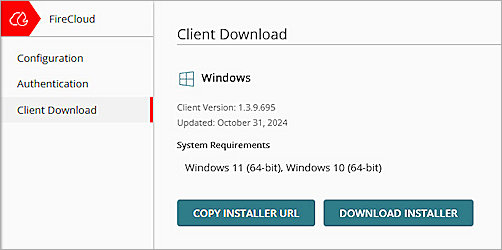
To download the WatchGuard Agent, used to install the WatchGuard Connection Manager:
- Go to Configure > FireCloud.
- From the FireCloud navigation menu, select Endpoint Installation.
- Click Download Installer for the relevant operating system.
- Run the client installer on your client.
- Click Install. The installation of the WatchGuard Agent can take several minutes.
- When the installation is complete, click Finish.
- After the WatchGuard Agent is installed, the agent automatically downloads and installs the Connection Manager. When this is finished, the Connection Manager opens and you are prompted to enter your credentials to connect to FireCloud.
Caution: You cannot install the WatchGuard Connection Manager on computers that have Panda endpoint security products installed. The WatchGuard Connection Manager is only compatible with WatchGuard Endpoint Security products.