Applies To: Cloud-managed Fireboxes
Your mobile users can connect to your company network through a secure WatchGuard VPN.
On a cloud-managed Firebox, you can configure Mobile VPN with SSL, which provides good performance and security. This VPN type uses Transport Layer Security (TLS) to secure the VPN connection and a default port (TCP 443) that is usually open on most networks.
To connect to the VPN, your users must have a VPN client. Users can download the WatchGuard SSL VPN client from software.watchguard.com or from the Firebox. As an administrator, you can also download the client from WatchGuard Cloud. The WatchGuard VPN client runs on Windows and macOS computers. To connect from Android or iOS, your users can download an OpenVPN client from an app store.
This topic explains how to:
- Enable Mobile VPN with SSL
- Add Firebox addresses
- Add authentication domains
- Add users and groups
- Edit the virtual IP address pool
- Configure advanced settings
- Deploy the configuration
- Download the VPN client
- Disable Mobile VPN with SSL
Before You Begin
Before you enable Mobile VPN with SSL in WatchGuard Cloud, make sure to configure a way for users to authenticate to the VPN. Mobile VPN with SSL supports these authentication methods:
- Firebox authentication database (Firebox-DB)
- RADIUS
- AuthPoint
- SAML
For information about how to configure authentication, go to Authentication Methods for Mobile VPN.
Enable Mobile VPN with SSL
To enable Mobile VPN with SSL, from WatchGuard Cloud:
- Select Configure > Devices.
- Select your cloud-managed Firebox.
- Click Device Configuration.
- In the VPN section, click the Mobile VPN tile.
The Select VPN page opens.
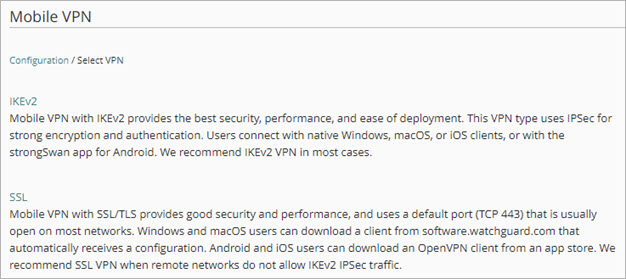
- Click SSL.
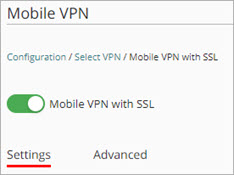
The Mobile VPN with SSL page opens. - Enable Mobile VPN with SSL.
Add Firebox Addresses
In the Firebox Addresses section, add an IP address or domain name for connections from SSL VPN clients to your Firebox.
If you enter an IP address, make sure it is one of these:
If your Firebox is located behind a NAT device, enter the public IP address or domain name of the NAT device. For information about NAT, go to About Network Address Translation (NAT).
- In the Mobile VPN with SSL configuration, go to the Firebox Addresses section.
- In the Primary text box, enter the IP address or domain name.
- (Optional) If your Firebox has more than one external address, enter a Backup IP address or domain name.

If you enter a backup IP address or domain name, the VPN client automatically tries to connect to that IP address or domain after a failed connection attempt. To use these backup connection settings, you must also select Auto reconnect after a connection is lost on the Advanced tab.
Add Authentication Domains
By default, Mobile VPN with SSL uses the Firebox database (Firebox-DB) for user authentication. You can also use Active Directory, RADIUS, SAML, and AuthPoint.
Before you can add an authentication domain to the Mobile VPN with SSL configuration, you must first configure one or more user authentication methods. For more information about Mobile VPN authentication, go to Authentication Methods for Mobile VPN.
To use AuthPoint for Mobile VPN user authentication on a cloud-managed Firebox, you must first add the Firebox as an AuthPoint resource, which requires Fireware v12.7 or higher.
- In the Mobile VPN with SSL configuration, go to the Authentication Domains section.
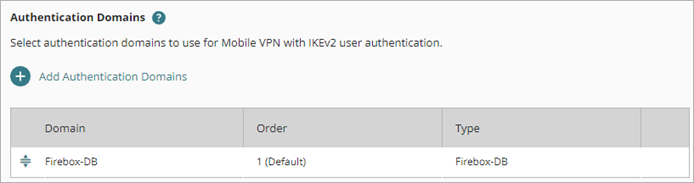
- Click Add Authentication Domains.
The Add Authentication Domains page opens.
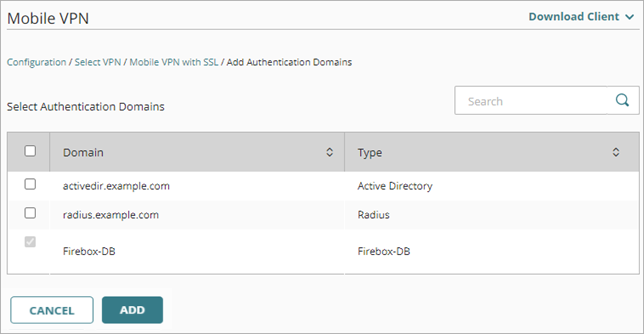
- Select the authentication domains for user authentication.
The authentication domains that you select appear at the end of the Authentication Domains list. - The first server in the list is the default authentication domain. To change the order, click the move handle and drag the domain up or down.
- Click Add.
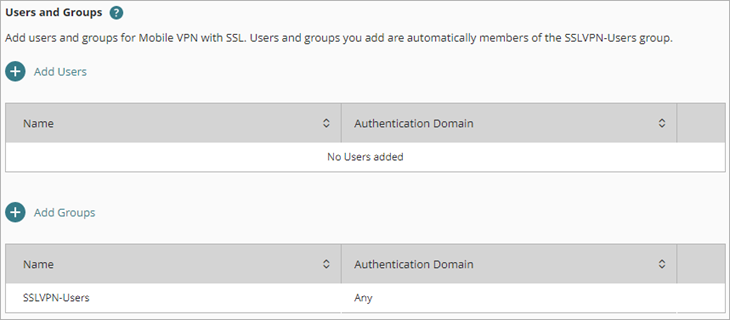
Add Users and Groups
After you select the authentication domains, select users and groups that can use the VPN to connect to network resources protected by the Firebox. You can select these types of users and groups:
- Firebox Database (Firebox-DB) users and groups
- RADIUS authentication domain users and groups
- SAML authentication domain users and groups
- Active Directory authentication domain users and groups
- AuthPoint users and groups
When you enable Mobile VPN with SSL, the Firebox automatically creates a default user group named SSLVPN-Users. In the Mobile VPN with SSL configuration, you select from a list of users or groups on the authentication servers you previously added. Users and groups you select are automatically added to the SSLVPN-Users group.
When you save the Mobile VPN with SSL configuration, the Firebox creates or updates the Allow SSLVPN-Users policy to apply to the groups and users you configured for authentication. The group and user names you added do not appear in the From list in the Allow SSLVPN-Users policy. Instead, the single group name SSLVPN-Users appears. However, this policy does apply to all users and groups you added in the Mobile VPN with SSL configuration.
- In the Mobile VPN with SSL configuration, go to the Users and Groups section.
- To add a Firebox Database user:
- Click Add Users > Add Firebox Database Users.
The Add Users page opens. - Enter the Name of the user.
- (Optional) Enter a Description for the user.
- Enter a Password for the user. The password length must be 8 to 32 characters.
- Enter the Timeout value, in seconds. The default value is 28880 seconds (8 hours). This is the maximum amount of time a user can remain connected to the VPN.
- Enter the Idle Timeout value, in seconds. The default value is 1800 seconds (30 minutes). This is length of time a user can remain connected to the VPN when idle.
- Click Add Users > Add Firebox Database Users.
- To add authentication domain users, from the Users and Groups section:
- Click Add Users.
- Select the check box for each user to add to Mobile VPN with SSL.
- Click Add.
The users that you selected appear in the Users list.
- To add an authentication domain group, from the Users and Groups section:
- Click Add Groups.
- Select the check box for each group to add.
- To remove a user or group from the mobile VPN configuration, in the row for that user or group, click
 .
.
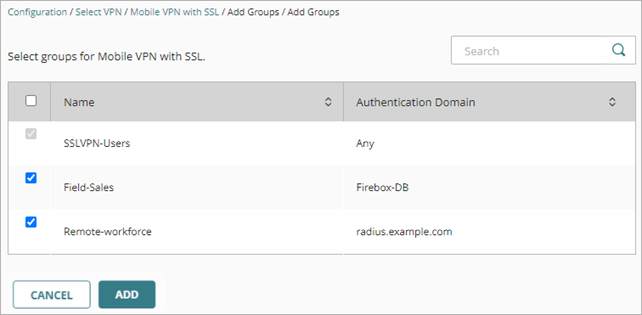
- Click Add.
The groups that you selected appear in the groups list.
Edit the Virtual IP Address Pool
The virtual IP address pool is the group of private IP address the Firebox assigns to Mobile VPN with SSL users. The default virtual IP address pool is 192.168.113.0/24. To add a different pool, you must first remove the default pool. You can cannot configure more than one pool for Mobile VPN with SSL.
Follow these best practices:
- Make sure that the virtual IP address pool does not overlap with any other IP addresses in the Firebox configuration.
- Make sure that the virtual IP address pool does not overlap with networks protected by the Firebox, any network accessible through a route or BOVPN, or IP addresses assigned by DHCP to a device behind the Firebox.
- If your company has multiple sites with mobile VPN configurations, make sure each site has a virtual IP address pool for mobile VPN clients that does not overlap with pools at other sites.
- Do not use the private network ranges 192.168.0.0/24 or 192.168.1.0/24 for mobile VPN virtual IP address pools. These ranges are often used on home networks. If a mobile VPN user has a home network range that overlaps with your corporate network range, traffic from the user does not go through the VPN tunnel. To resolve this issue, we recommend that you migrate to a new local network range.
- A virtual IP address pool cannot be on the same subnet as a primary FireCluster IP address.
- In the Mobile VPN with SSL configuration, go to the Virtual IP Address Pool section.
- Click the IP address of the pool.
The Add Virtual IP Address Pool dialog box opens.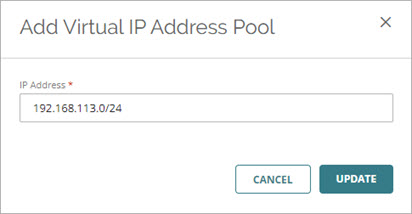
- Type a different IP address and netmask.
- Click Update.
- In the Mobile VPN with SSL configuration, go to the Virtual IP Address Pool section.
- In the Virtual IP Address Pool section, click .
- To add IP addresses to the pool, click Add Virtual IP Address Pool.
The Add Virtual IP Address Pool dialog box opens.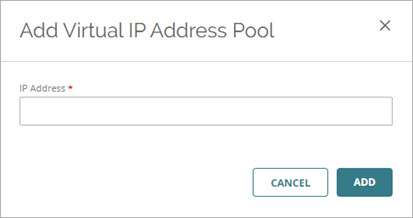
- Type an IP address and netmask.
- Click Add.
Configure Advanced Settings
On the Advanced tab, you can configure these settings:
-
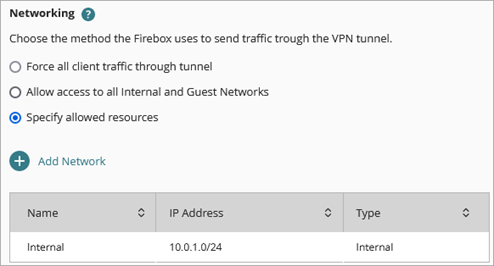
In the Networking section, select the method the Firebox uses to send traffic through the VPN tunnel.
Force all client traffic through the tunnel
Select this option to route all traffic from the VPN client to your private network and to the Internet through the tunnel. This option sends all external traffic through the Firebox policies you create and offers consistent security for mobile users. This option requires more Firebox processing power, which can affect performance. This is the default setting. This option is also known as full tunneling or default route.
Allow access to all Internal and Guest networks
This option routes only traffic to private network resources through the Firebox. Other traffic to the Internet does not go through the tunnel and is not restricted by the policies on your Firebox. This option is also known as split tunneling.
Specify client tunnel routes to resources
Select this option to restrict Mobile VPN with SSL client access to a predefined Firebox network or a client tunnel route that you specify. This option is also known as split tunneling.
You can add a client tunnel route as a network resource. With this option, you can create a split tunnel configuration for traffic that is destined for a private network other than the internal networks of the Firebox. For example, you might add a client tunnel route to support a routed network through a static route, dynamic route, or BOVPN.
When you add a client tunnel route, Mobile VPN with SSL and Mobile VPN with IKEv2 configurations share the available allowed resource.
- Select the Specify Client Tunnel Routes to Resources option.
The Add Network section opens. - Click Add Network.
The Add Network page opens.

- (Optional) To add a client tunnel route, click Add Client Tunnel Route.
The Add Client Tunnel Route dialog box opens. - Type a Name, Network IP Address, and an optional Description.
- Click Add.
The client tunnel route becomes an available allowed Firebox resource.


The client tunnel route is an available Firebox resource on the Add Network page for Mobile VPN with SSL and Mobile VPN with IKEv2 configurations.
- Select one or more networks or client tunnel routes configured on your Firebox, and click Add.
The allowed resource shows on the Mobile VPN with SSL page.

Delete a Client Tunnel Route
Before you can delete a client tunnel route, make sure that the route is not in use by Mobile VPN with IKEv2 as a network resource, and make sure to save any Mobile VPN with IKEv2 client tunnel route changes. For more information, go to Configure Mobile VPN with IKEv2 for a Cloud-Managed Firebox.
To delete a client tunnel route, from WatchGuard Cloud:
- In the Networking section, select the Specify Client Tunnel Routes to Resources option.
The Add Network section opens. - Click Add Network.
The Add Network page opens.
A client tunnel route has a Type of Other.

- Select a client tunnel route and click
 .
.
The Delete Network dialog box opens. - Click Delete.
- Select the Specify Client Tunnel Routes to Resources option.
-
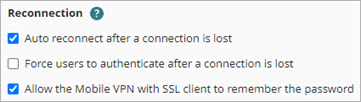
In the Reconnection section, select one or more options.
Auto reconnect after a connection is lost
If you select this option, users can select a check box on the Mobile VPN with SSL client to control whether the client automatically reconnects. This option is selected by default.
Force users to authenticate after a connection is lost
We recommend that you select this option if you use a multi-factor authentication method with a one-time password. After a lost connection, auto reconnect might fail if users do not enter a new one-time password.
Allow the Mobile VPN with SSL client to remember the password
If you select this option, users can select a check box in the Mobile VPN with SSL client to control whether the client remembers the password. This option is selected by default.
-
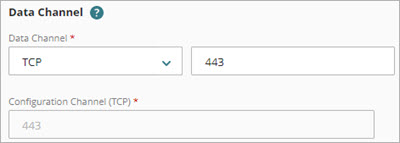
In the Data Channel section, configure the channel settings.
Data Channel
Mobile VPN with SSL uses the data channel to send data after the VPN connection establishes. The default protocol and port is TCP 443. If you enter a different port, users must manually type the port in the Mobile VPN with SSL connection dialog box (example: 203.0.113.2:444).
If you select TCP, the configuration channel automatically uses the same port and protocol. If you select UDP, you can set the configuration channel protocol to TCP or UDP, and you can use a different port than the data channel.
Configuration Channel
The Configuration Channel determines how users download the Mobile VPN with SSL client software from the Firebox.
The default Configuration Channel is TCP 443. If you keep the default setting, users download the Mobile VPN with SSL client software from
https://[Firebox IP address or FQDN]/sslvpn.html.If you change the default Configuration Channel, users must specify the port number in the URL (https://[Firebox IP address or FQDN]:<444>/sslvpn.html).
-
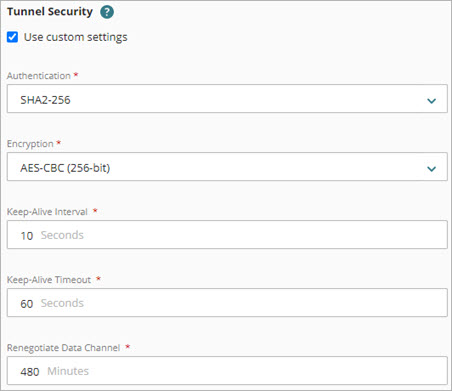
(Optional) In the Tunnel Security section, select Use Custom Settings. You can configure these options:
Authentication method
Select the authentication method for the connection. Authentication settings specify the authentication algorithm and hash size. You can select SHA2-256 or SHA2-512. The default setting is SHA2-256.
Encryption method
Select an encryption method to encrypt the traffic. Encryption settings specify the encryption algorithm and key length. You can select AES-CBS or AES-GCM algorithms that are 128-, 192-, or 256-bit strength.
We recommend AES-GCM algorithms, which typically provide the best performance for most Firebox models. GCM includes built-in authentication, which means a separate authentication algorithm does not have to be calculated. The default setting is AES-CBC (256-bit).
Keep-Alive Interval
Enter a Keep-Alive Interval value (in seconds). This setting controls how often the Firebox sends traffic through the tunnel to keep the tunnel active when no other tunnel traffic exists. The default value is 10 seconds.
Enter a Keep-Alive Timeout
Enter a Keep-Alive Timeout value (in seconds). This setting controls how long the Firebox waits for a response. If no response arrives before the timeout value, the Firebox closes the tunnel, and the VPN client must reconnect. The default value is 60 seconds.
Renegotiate Data Channel
Enter a Renegotiate Data Channel value (in minutes). If a Mobile VPN with SSL connection has been active for the amount of time specified in the Renegotiate Data Channel text box, the Mobile VPN with SSL client must create a new tunnel. The default value is 480 minutes (8 hours). The minimum value is 60 minutes.
Use Network DNS settings
If you select this option, mobile clients use the public DNS server that you configured on your cloud-managed Firebox. For information about public DNS servers, see Configure Firebox DNS Settings.
Assign Network DNS settings
If you select this option, mobile clients use the domain name suffix, DNS servers, and WINS servers that you enter in this section. For example, if you specify example.com as the domain name and 10.0.1.53 as the DNS server, mobile clients use example.com for unqualified domain names and 10.0.1.53 as the DNS server. 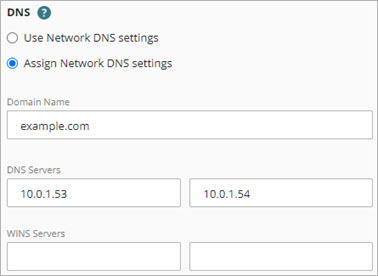
Deploy the Configuration
After you save changes to the Mobile VPN with SSL configuration, deploy the configuration. For more information, go to Manage Device Configuration Deployment.
Download the VPN Client
After you deploy the configuration, download the WatchGuard Mobile VPN with SSL client. For more information, go to Download, Install, and Connect the Mobile VPN with SSL Client.
Disable Mobile VPN with SSL
To disable Mobile VPN with SSL, from WatchGuard Cloud:
- Select Configure > Devices.
- Select your cloud-managed Firebox.
- Click Device Configuration.
- In the VPN section, click the Mobile VPN tile.
The Select VPN page opens.
- Click SSL.
The Mobile VPN with SSL page opens. - Disable Mobile VPN with SSL.

Mobile VPN and Firewall Policies