Applies To: AuthPoint Multi-Factor Authentication, AuthPoint Total Identity Security
You can change the group that an AuthPoint user belongs to. The steps to change the group depend on the type of user.
- Change the AuthPoint Group of LDAP Users
- Change the AuthPoint Group of a WatchGuard Cloud-Hosted User
Change the AuthPoint Group of LDAP Users
To change the AuthPoint group that a set of LDAP synced users belongs to, you must edit the group sync or advanced query that imports the users to AuthPoint.
When you change the AuthPoint group associated with a group sync or advanced query, all of the users from that sync or query are added to the new group.
To change the group of users synced from LDAP, Active Directory, or Azure Active Directory:
- In WatchGuard Cloud, go to the AuthPoint management UI.
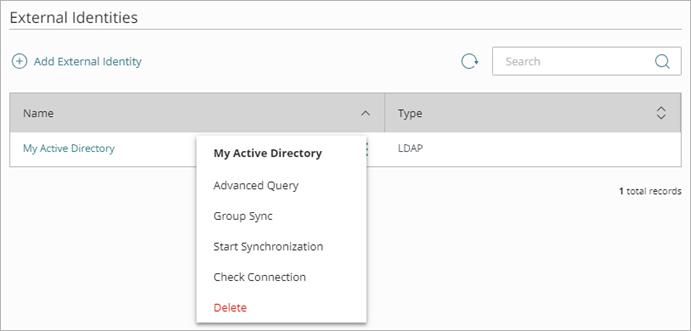
- Select External Identities.
- Next to the external identity, click
 and select Group Sync or Advanced Query.
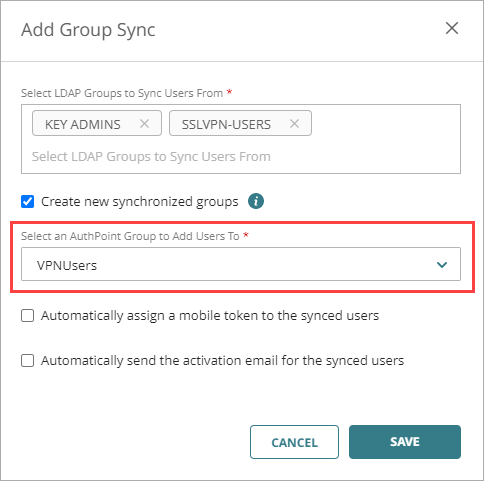
- Select the group sync or query that syncs the users.
- Select a new AuthPoint group to add the users from this query to.
Each group sync or advanced query adds all users to the specified AuthPoint group. To add users to separate AuthPoint groups, you must create separate group syncs for each LDAP group you want to sync to a different AuthPoint group.
- Click Save.
AuthPoint syncs with your Active Directory or LDAP database at the next synchronization interval and adds the users from this group sync or advanced query to the specified AuthPoint group. To start a sync immediately, on the External Identities page, next to the external identity, click ![]() and select Start Synchronization.
and select Start Synchronization.
Change the AuthPoint Group of a WatchGuard Cloud-Hosted User
To change the group that a WatchGuard Cloud-hosted AuthPoint user belongs to, you must edit the user in the WatchGuard Cloud Directory.
- In WatchGuard Cloud, select Configure > Directories and Domain Services.
- Select the WatchGuard Cloud Directory.

- Click the name of a user.
- From the Groups list, select which groups the user should belong to. To remove the user from a group, deselect the group.
- To add the user to a new group, select the group from the Group list.
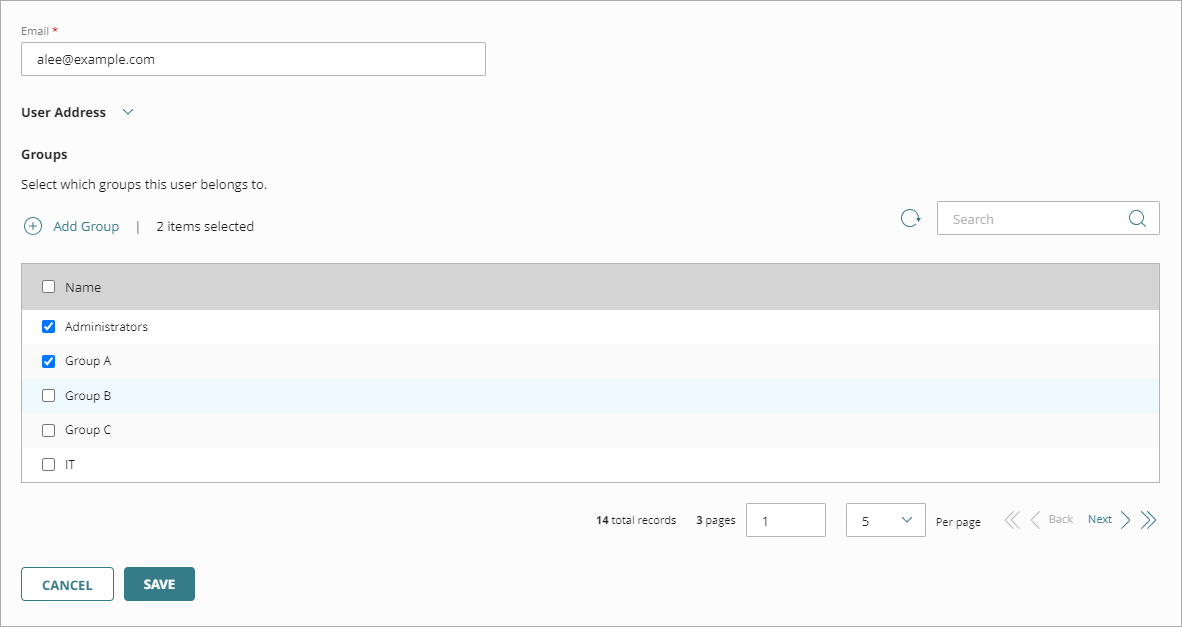
- Click Save.