Applies To: Cloud-managed Fireboxes
For cloud-managed Fireboxes, you can configure content scanning with these security services:
For content scanning to apply to traffic through the Firebox, you must also enable content scanning in firewall policies. For information about policy settings, see Configure Security Services in a Firewall Policy on a Cloud-Managed Firebox.
Configure Gateway AntiVirus
Gateway AntiVirus operates with policies that handle SMTP, IMAP, POP3, HTTP, HTTPS, FTP, and TCP-UDP. When a new attack is identified, the features that make the virus unique are recorded. These recorded features are known as a signature. Gateway AntiVirus uses signatures to find viruses when it scans content. Gateway AntiVirus automatically uses the latest signatures when you enable it.
In WatchGuard Cloud, you can configure the action Gateway AntiVirus takes when a virus is detected, an error occurs, scanned content exceeds the configured size limit, or scanned content is encrypted. For information on how to set the scan size limit, see Configure Advanced Settings. We recommend that you select the Alarm option when a virus is detected.
To configure Gateway AntiVirus:
- Select Configure > Devices.
- Select a cloud-managed Firebox.
Status and settings for the selected Firebox appear. - Select Device Configuration.
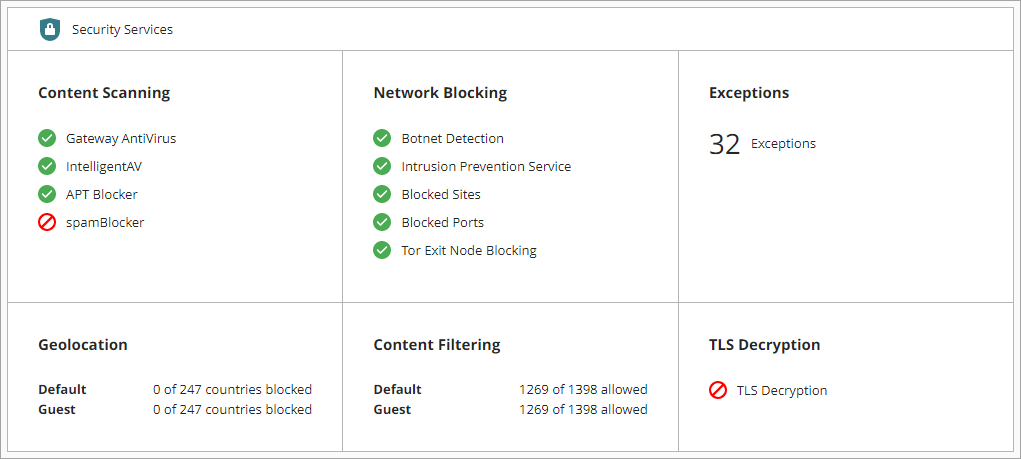
The Device Configuration page opens and shows the WatchGuard Cloud Security Services. - Click the Content Scanning tile.
The Content Scanning page opens.
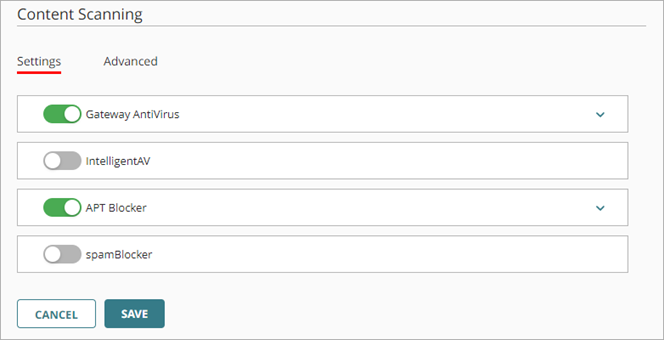
- On the Settings tab, enable Gateway AntiVirus.

- In the Action column, select the Drop check box for each status to specify when you want the Firebox to drop connections:
- When a virus is detected — If Gateway AntiVirus detects a virus in an email message, file, web page, or web upload, the Firebox drops the packet and the connection. No information is sent to the source of the message.
- When a scan error occurs — If the Firebox cannot scan an object or an attachment, the Firebox drops the packet and the connection. No information is sent to the source of the message.
- When content exceeds scan size limit — When content exceeds the configured scan size limit, the Firebox drops the packet and the connection. No information is sent to the source of the message.
- When content is encrypted — When Gateway AntiVirus cannot scan a file because it is encrypted, password-protected, or uses a type of compression that Gateway AntiVirus does not support, such as password-protected ZIP files, the Firebox drops the packet and the connection. No information is sent to the source of the message.
- To generate an alarm, select the Alarm check box.
If you do not want to set an alarm, clear the Alarm check box.
- To save configuration changes to the cloud, click Save.
Configure IntelligentAV
To add another layer of protection to the Gateway AntiVirus security service, enable IntelligentAV. When IntelligentAV is enabled, Gateway AntiVirus uses two scan engines that work together to increase the ability of the Firebox to detect and block malware before it can enter your network.
IntelligentAV uses artificial intelligence, not signatures, to identify and block known and unknown malware. IntelligentAV operates with all proxies supported by Gateway AntiVirus. For more information, see About IntelligentAV.
To enable APT Blocker, you must first enable Gateway AntiVirus.
To configure IntelligentAV:
- Select Configure > Devices.
- Select a cloud-managed Firebox.
Status and settings for the selected Firebox appear. - Select Device Configuration.
- Click the Content Scanning tile.
The Content Scanning page opens.
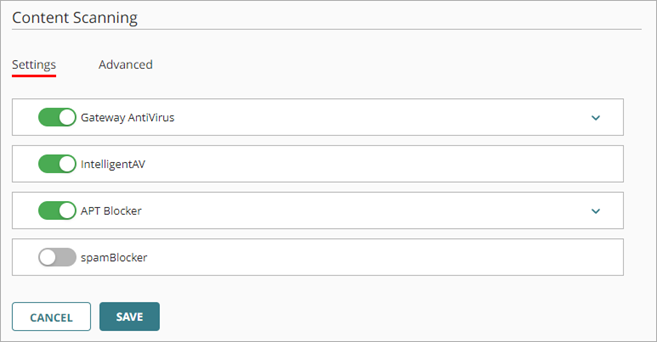
- On the Settings tab, enable IntelligentAV.
There are no individual settings to configure for IntelligentAV.
- To save configuration changes to the cloud, click Save.
Configure APT Blocker
An Advanced Persistent Threat (APT) attack is a type of network attack that uses advanced malware and zero-day exploits to get access to networks and confidential data over extended periods of time. APT Blocker is a subscription service that uses full-system emulation analysis to identify the characteristics and behavior of APT malware in files and email attachments that enter your network. APT Blocker does not use signatures like other traditional scanners, such as antivirus programs. For more information, see About APT Blocker.
APT Blocker categorizes APT activity based on the severity of the threat. In WatchGuard Cloud, you can configure the action to take for each threat level (High, Medium, Low). The Clean threat level helps you track the status of files analyzed by APT Blocker that are determined to be clean and do not contain malware. We recommend that you select the Alarm option for all threat levels in your APT Blocker configuration to monitor APT Blocker activity.
To enable APT Blocker, you must first enable Gateway AntiVirus.
To configure APT Blocker:
- Select Configure > Devices.
- Select a cloud-managed Firebox.
Status and settings for the selected Firebox appear. - Select Device Configuration.
- Click the Content Scanning tile.
The Content Scanning page opens.
- On the Settings tab, enable APT Blocker.
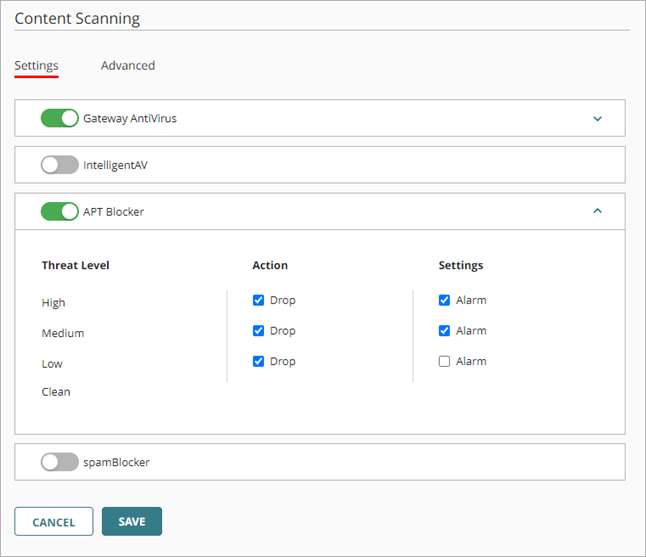
- In the Action column, select the Drop check box for each Threat Level you want APT Blocker to drop the connection for.
- To trigger an alarm for the threat level, select the Alarm check box.
If you do not want to set an alarm, clear the Alarm check box for that threat level. - To save configuration changes to the cloud, click Save.
Configure Advanced Settings
The File Scan setting controls the maximum size of files that Gateway AntiVirus and IntelligentAV can scan. The scan limit also controls the maximum size of files that APT Blocker sends for analysis. Gateway AntiVirus default scan size is set based on the hardware capabilities of each Firebox model. Minimum scan size for all models is 1 MB.
For more information about scan limits, see About Gateway AntiVirus Scan Limits.
To configure file scan size:
- Select the Advanced tab.
The File Scan default and maximum value varies by Firebox model and is set to the recommended value by default.
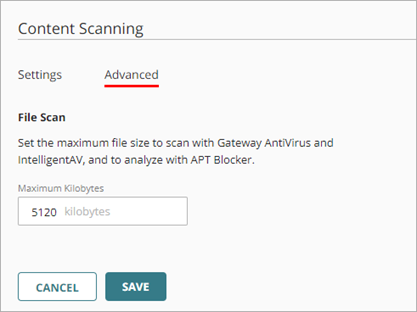
- In the Maximum Kilobytes text box, type the file scan limit in kilobytes.
- To save configuration changes to the cloud, click Save.
Configure spamBlocker
A large volume of spam consumes bandwidth, degrades employee productivity, and wastes network resources. spamBlocker is a subscription service that uses a combination of rules, pattern matching, and sender reputation to accurately identify and block spam messages and keep them away from your email server. You must configure at least one policy to manage POP3, IMAP, or SMTP traffic before you can configure the spamBlocker service. You can define exceptions that allow specific sender and recipient emails to bypass spamBlocker scans.
To configure spamBlocker in WatchGuard Cloud:
- Select Configure > Devices.
- Select a cloud-managed Firebox.
Status and settings for the selected Firebox appear. - Select Device Configuration.
- Click the Content Scanning tile.
The Content Scanning page opens. - On the Settings tab, enable spamBlocker.

- From the Server Region drop-down list, select a region.
WatchGuard Cloud selects the nearest server data center by default. You can select the specific region of the data center to send spamBlocker requests.
- In the When email is spam drop-down list, select what you want spamBlocker to do when it detects spam email:
- Allow — Allows the email message to go through the Firebox.
- Deny — (SMTP only) — Stops delivery of the email message to the mail server. The Firebox sends this 571 SMTP message to the sending email server: Delivery not authorized, message refused.
- Add a subject tag — Allows the email message to go through the Firebox, but inserts text in the subject line of the email message to mark it as spam or possible spam.
- If you select Add a subject tag, the Subject Tag box appears. Enter the text you want to add to the message subject line.

- To send a log message when spamBlocker scans an email but does not designate it as spam, select the Send log message when email is not spam check box.
- From the When spamBlocker is unavailable drop-down list, select the action you want the Firebox to take for incoming email when the Firebox cannot connect to the spamBlocker server, either Allow or Deny.
- Click Save.
For more information about how to configure policies, see Configure Firewall Policies in WatchGuard Cloud.
For more information about how to add spamBlocker exceptions, see Add Exceptions in WatchGuard Cloud.
Add a Cloud-Managed Firebox to WatchGuard Cloud