Applies To: Locally-managed Fireboxes
When you run the Quick Setup Wizard to configure a Firebox, the WatchGuard policy is created automatically. This policy allows you to connect to and administer the Firebox from any computer on the trusted or optional networks. To manage the Firebox from a remote location (any location external to the device), you must modify the WatchGuard policy to allow administrative connections from the IP address of your remote location.
The WatchGuard policy controls access to the Firebox on these TCP ports: 4105, 4117, 4118. When you allow connections in the WatchGuard policy, you allow connections to each of these ports.
Rather than modify the WatchGuard policy, we strongly recommend that you use a VPN to connect to the Firebox. This greatly increases the security of the connection. If this is not possible, we recommend that you allow access from the external network to only certain authorized users and to the smallest number of computers possible. For example, your configuration is more secure if you allow connections from a single computer instead of from the alias Any-External. For more information, go to the Firebox Remote Management Best Practices Knowledge Base article and Secure Firebox Management Access video tutorial.
To disable the ability to manage your Firebox from a specific remote location, remove the IP address or alias of the remote location from the WatchGuard policy. Make sure not to remove the Any-Trusted alias from the policy, because this allows computers on the trusted network to manage the Firebox.
For FireboxV and Firebox Cloud devices, the WatchGuard policy allows connections from Any-External by default so that you can complete the initial configuration. We strongly recommend that you remove Any-External from the WatchGuard policy after you complete your initial FireboxV or Firebox Cloud configuration.
You cannot manage the Firebox configuration from the local Fireware Web UI on a cloud-managed Firebox. You can use Fireware Web UI to troubleshoot the connection to WatchGuard Cloud, download a diagnostic log file, and to upgrade Fireware. For more information, go to Connect to the Local Fireware Web UI from a Remote Location.
To modify the WatchGuard policy, from Fireware Web UI:
- Select Firewall > Firewall Policies.
- Click the WatchGuard policy.
Or, select the WatchGuard policy and from the Action drop-down list, select Edit Policy.
The Firewall Policies/Edit page opens.
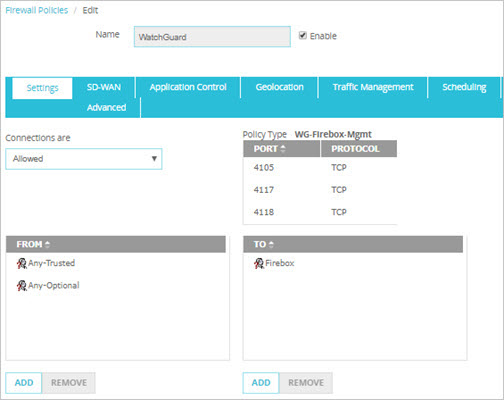
- In the From section, click Add.
The Add Member dialog box opens.
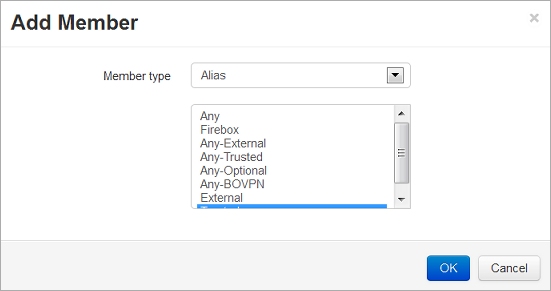
- To add the IP address of the external computer that connects to the Firebox, from the Member type drop-down list, select Host IP, and click OK. Type the IP address.
- To give access to an authorized user, from the Member Type drop-down list, select Alias.
For information about how to create an alias, go to Create an Alias.
To modify the WatchGuard policy from Policy Manager:
- Double-click the WatchGuard policy.
Or, right-click the WatchGuard policy and select Modify Policy.
The Edit Policy Properties dialog box opens.
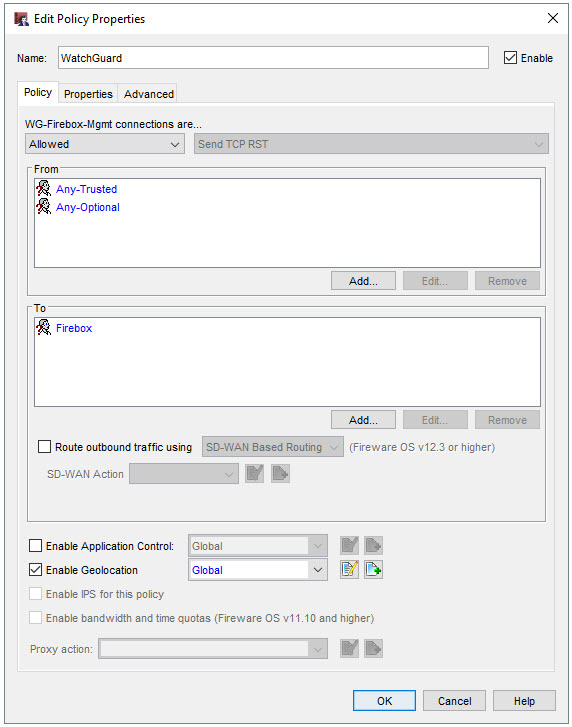
- In the From section, click Add.
The Add Address dialog box opens.
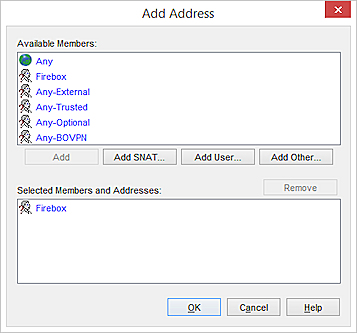
- To add the IP address of the external computer that connects to the Firebox, click Add Other.
The Add Member dialog box opens. - Make sure Host IP is the selected type, and type the IP address. Click OK.
- To give access to an authorized user, in the Add Address dialog box, click Add User.
The Add Users or Groups dialog box opens.
For information about how to create an alias, go to Create an Alias.
Knowledge Base article: Firebox Remote Management Best Practices
Video tutorial: Secure Firebox Management Access
Management Interface Exposure Warnings
Use Authentication to Restrict Incoming Connections
Connect to Fireware Web UI from an External Network
Define Firebox Global Settings