Install the WatchGuard Endpoint Security Plug-in for N-able N-sight
To install the WatchGuard Endpoint Security plug-in for N-able N-sight, WatchGuard provides an onboarding application to connect to the WatchGuard API and map clients between WatchGuard and N-able N-sight. The installation process consists of these steps:
- Before You Begin
- Enable API Access in WatchGuard Cloud
- Download the Plug-in
- Configure the Connection between WatchGuard Cloud and N-able N-sight
- Map Clients
Before You Begin
Before you download and install the WatchGuard Endpoint Security plug-in for N-able N-sight, make sure that:
- You have a valid WatchGuard Endpoint Security license.
- You have an N-able N-sight account with an Administrator role and an All access group.
- Your computer runs Windows 8 or higher.
To avoid permissions issues, we recommend that the N-able Service Organization (SO) runs the WatchGuard Endpoint Security plug-in onboarding application.
Enable API Access in WatchGuard Cloud
WatchGuard public APIs use the Open Authorization (OAuth) 2.0 authorization framework for token-based authentication. To use the Endpoint Security Management API, you must first enable API access in your WatchGuard Cloud account to retrieve the required parameters for your plug-in configuration. For more information, go to Enable API Access in WatchGuard Cloud.
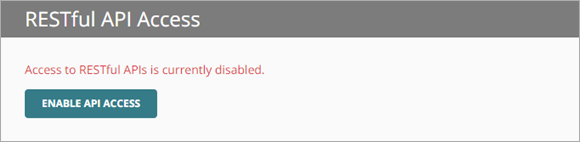
To enable API access in WatchGuard Cloud:
- Log in to WatchGuard Cloud.
If you are a Service Provider, from Account Manager, select My Account or a managed account. - Select Administration > Managed Access.
- Click Enable API Access.
- Specify the readwrite and readonly passwords to use as your API access credentials.
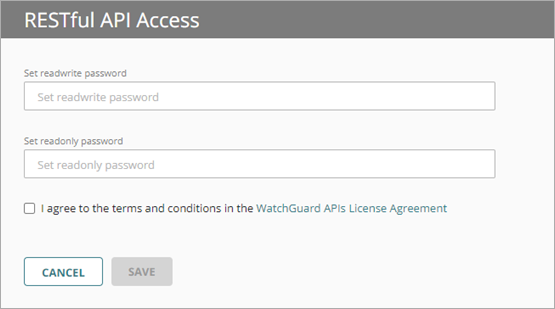
Passwords must include an uppercase letter, a lowercase letter, a number, and a special character. The readwrite password and the readonly password must be different.
You must use the readwrite access ID and password for the plug-in configuration.
- Select the I agree to the terms and conditions in the WatchGuard APIs License Agreement check box.
- Click Save.
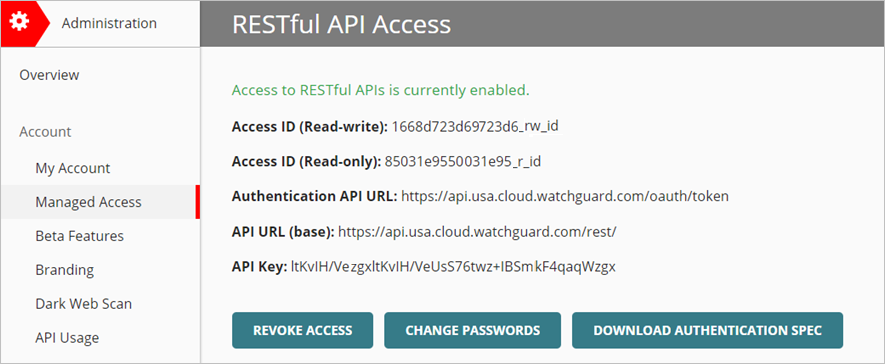
After you enable API access, parameters appear that you must specify in the plug-in onboarding application. You can view these parameters on the Administration > Managed Access page in WatchGuard Cloud.
The base URL varies by region. This example shows a US-based server.
Download the Plug-in
To download the WatchGuard Endpoint Security plug-in onboarding application for N-able N-sight from the WatchGuard Software Downloads page:
- Go to the Software Downloads page.
- Click Endpoint Software.
- Click the N-able N-sight Plug-in link.
- Click N-able N-sight Plug-in (Latest) to download the Nsight .ZIP file.
- Save the Nsight.ZIP file to your computer.
- Extract the contents of the Nsight.ZIP file.
The Nsight folder contains these files:
- WatchGuard Endpoint Security Onboarding for N-able N-sight onboarding application.EXE
- Windows scripts:
- WatchGuard Endpoint Security – Install agent in Windows.PS1
- WatchGuard Endpoint Security – Scan Windows device.PS1
- WatchGuard Endpoint Security – Monitor Windows device.PS1
- macOS scripts:
- WG-Install-Mac.SH (WatchGuard Endpoint Security – Install agent on Mac device)
- WG-Monitor-Mac.SH (WatchGuard Endpoint Security – Monitor Mac device)
- WG-Scan-Mac.SH (WatchGuard Endpoint Security – Scan Mac device)
- Linux scripts:
- WG-Install-Linux.SH (WatchGuard Endpoint Security – Install agent on Linux device)
- WG-Monitor-Linux.SH (WatchGuard Endpoint Security – Monitor Linux device)
To open the onboarding application, from the Nsight folder, double-click NableOnboarding.EXE.
The onboarding application opens.
The onboarding application automatically updates to the latest version available when it opens.
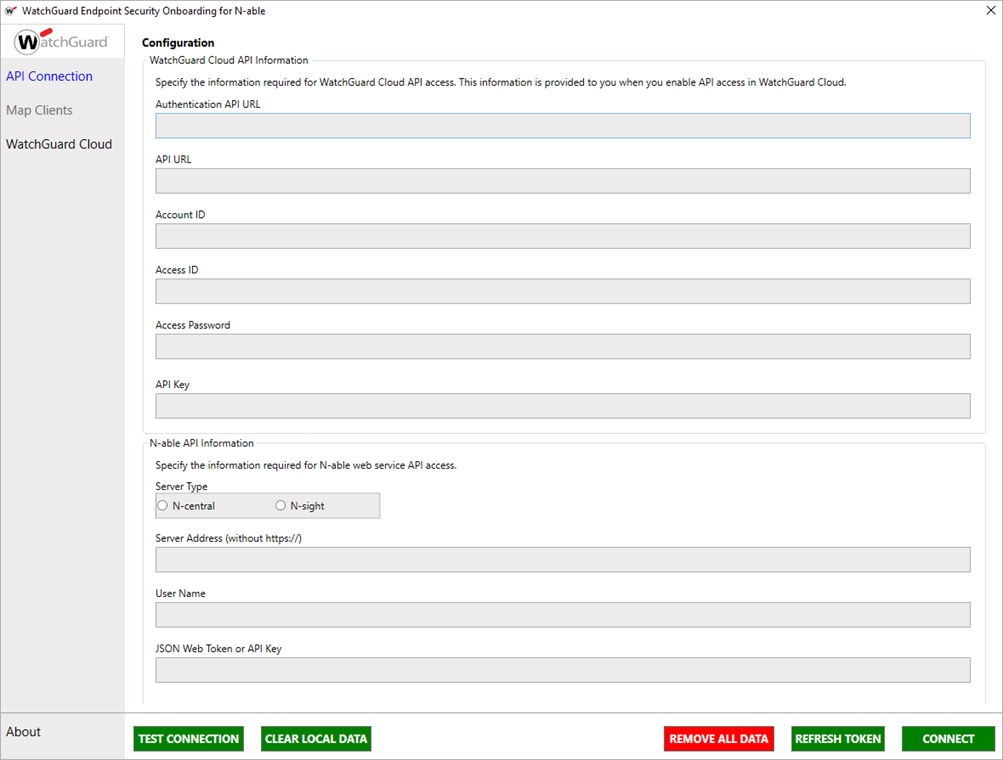
The onboarding application has these options in the navigation pane:
- API Connection — Use this page to configure the connection between WatchGuard Cloud and N-able N-sight.
- Map Clients — Use this page to associate N-able N-sight clients with WatchGuard Cloud accounts you manage. You must successfully establish a connection between WatchGuard Cloud and N-able N-sight before you can use this page.
- WatchGuard Cloud — Click this link to open WatchGuard Cloud in a web browser.
Configure the Connection between WatchGuard Cloud and N-able N-sight
The information necessary to establish a connection between WatchGuard Cloud and N-able N-sight is visible in the Managed Access page in WatchGuard Cloud after you enable API access. For more information about API access in WatchGuard Cloud, go to Enable API Access.
When you enter the API connection information in the onboarding application, we recommend you copy and paste the API parameters directly from the Managed Access page in WatchGuard Cloud to avoid errors.
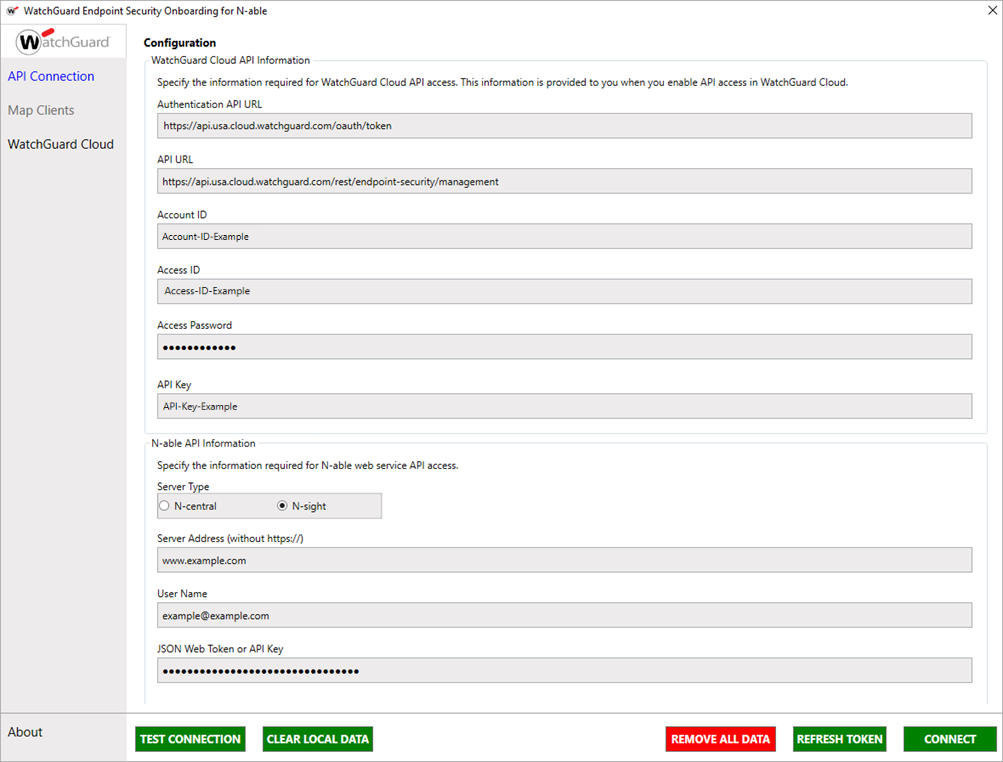
To establish the connection between WatchGuard Cloud and N-able N-sight, from the onboarding application:
- Select API Connection.
- Enter the API information for WatchGuard Cloud:
- Authentication API URL — Type the URL to authenticate API access to WatchGuard Cloud. The URL varies by region.
- APAC Region — https://api.jpn.cloud.watchguard.com/oauth/token
- EMEA Region — https://api.deu.cloud.watchguard.com/oauth/token
- NA/Americas Region — https://api.usa.cloud.watchguard.com/oauth/token
- API URL — Type the base URL of the Endpoint Security API.
The URL varies by region.
- APAC Region — https://api.jpn.cloud.watchguard.com/rest/endpoint-security/management
- EMEA Region —https://api.deu.cloud.watchguard.com/rest/endpoint-security/management
- NA/Americas Region — https://api.usa.cloud.watchguard.com/rest/endpoint-security/management
- Account ID — Type the WatchGuard Cloud Account ID of the managed account for which you want to make API requests.
- Access ID — Type the Access ID for Read-write API access to WatchGuard Cloud.
- Access Password — Type the password for the Read-write Access ID you specified for API access to WatchGuard Cloud.
- API Key — Type the API key associated with your WatchGuard Cloud account.
- Authentication API URL — Type the URL to authenticate API access to WatchGuard Cloud. The URL varies by region.
- Enter the API information for N-able:
- Server Type — Select N-sight.
- N-able Server Address (without https://) — Type the URL, without https://, for the N-able server address.
- User Name — Type the user name for API access to N-able N-sight.
- JSON Web Token or API Key — Type the API key for API access to N-able N-sight.
JSON web tokens are used to connect to N-central. For the N-sight plug-in, enter an API key. For more information on the N-able N-central plug-in, go to About the WatchGuard Endpoint Security Plug-in for N-able N-central.
- Click Test Connection.
If the test connection is successful, a confirmation message appears.
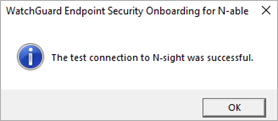
- Click OK.
- Click Connect.
If the connection is successful, a confirmation message appears.
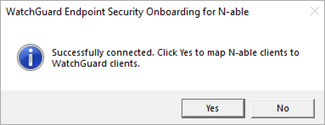
- Click Yes.
Map Clients
After you successfully establish a connection between WatchGuard Cloud and N-able, you must map your N-able N-sight clients to the accounts you manage in WatchGuard Cloud.
To associate N-able clients with WatchGuard Cloud accounts, from the onboarding application:
- Select Map Clients.
- Select an N-able client from the list.
- From the WatchGuard Client drop-down list, select the WatchGuard Cloud account that you want to associate with the N-able client. The WatchGuard Cloud ID and License columns automatically populate when you select a WatchGuard Cloud account.
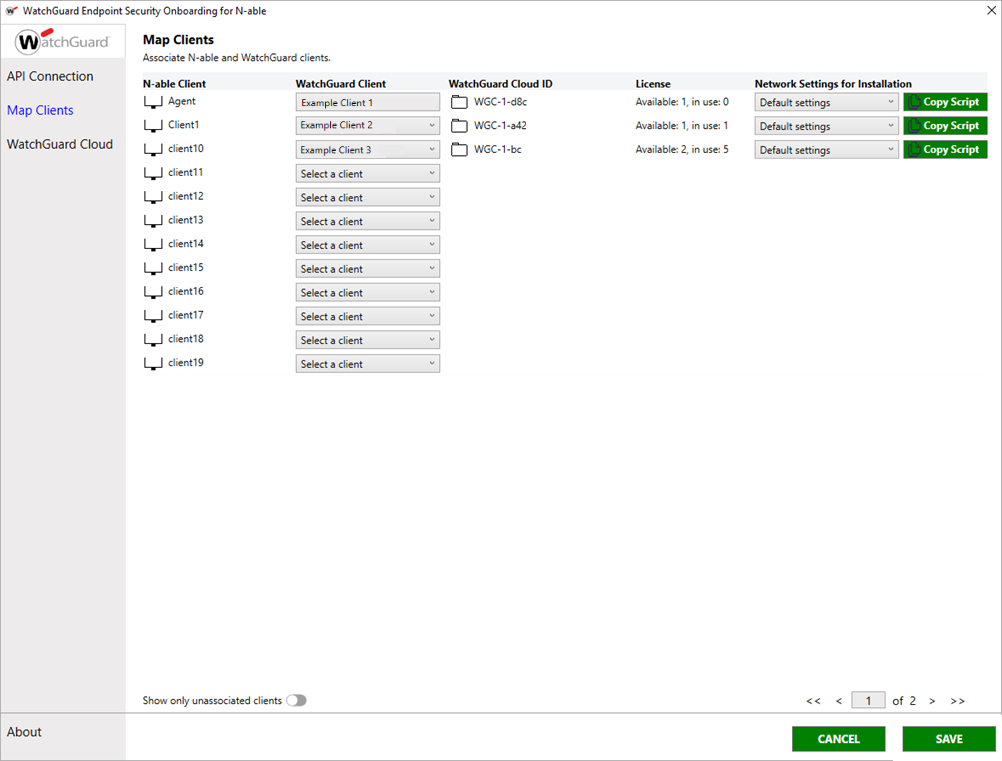
- From the Network Settings for Installation drop-down list, select the Endpoint Security network settings profile to assign to this client.
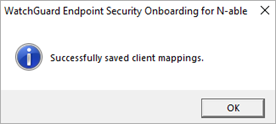
- Click Save.
A confirmation message appears.
After you save, a Copy Script option appears to the right of the successfully saved mappings. Use Copy Script when you configure automatic deployment and tasks in N-sight. For more information, go to Tasks and Automatic Deployment in N-able N-sight.
- Click OK.
- Repeat these steps for all clients you want to map.
Tasks and Automatic Deployment in N-able N-sight
Configure the WatchGuard Endpoint Security Plug-in for N-able N-sight
About the WatchGuard Endpoint Security Plug-in for N-able N-sight