Deployment Overview
WatchGuard provides integration instructions to help our customers configure WatchGuard products to work with products created by other organizations. If you need more information or technical support about how to configure a third-party product, see the documentation and support resources for that product.
This integration guide describes how to configure Firebox and Entrust Datacard SMS PASSCODE.
In our integration, SMS PASSCODE and Network Policy Server (NPS) are installed on one Windows Server. NPS is the Microsoft implementation of RADIUS.
Integration Summary
The hardware and software used to complete the steps outlined in this document include:
- Entrust Datacard SMS PASSCODE
- Version 11.1 (build 26301)
- WatchGuard Firebox
- Firebox with Fireware v12.5.1 or higher
- NPS installed on Windows Server 2016 Standard
Test Topology
This diagram shows the test topology used for this integration.

SMS PASSCODE Server includes:
- SMS PASSCODE Database Service
- SMS PASSCODE Web Administration Interface
- SMS PASSCODE Authentication Backend Service
- SMS PASSCODE Transmitter Service
- SMS PASSCODE RADIUS Protection
SMS PASSCODE Cloud Service does not need to be configured.
Before You Begin
Before you begin these procedures, make sure that you:
- Configure Windows Server 2016 as Active Directory Domain Services (AD DS)
- Add groups and users in AD DS
- Install and configure Network Policy Server (NPS) on Windows Server 2016
- Configure Mobile VPN with SSL on your Firebox
- Download and install the Mobile VPN with SSL client
To configure NPS, see the documentation on the Microsoft website.
To configure Mobile VPN with SSL on the Firebox, see Mobile VPN with SSL.
To install the Mobile VPN with SSL client, see Install and Connect the Mobile VPN with SSL Client.
Configure the Firebox for RADIUS
To configure a RADIUS server connection on Firebox:
- Log in to the Fireware Web UI (https://<your firebox IP address>:8080).
- Select Authentication> Servers > RADIUS.
- Click Add to add a new RADIUS server.
- In the Domain Name text box, type the domain name of the NPS Server.
- Select the Enable RADIUS Server check box.
- In the IP Address text box, type the IP address of the NPS Server.
- In the Port text box, type the port used in NPS Server for RADIUS authentication. The default port is 1812.
- In the Shared Secret and Confirm Secret text boxes, type the shared secret you configured for the RADIUS client on the NPS Server.
- In the Dead Time text box, type 0.
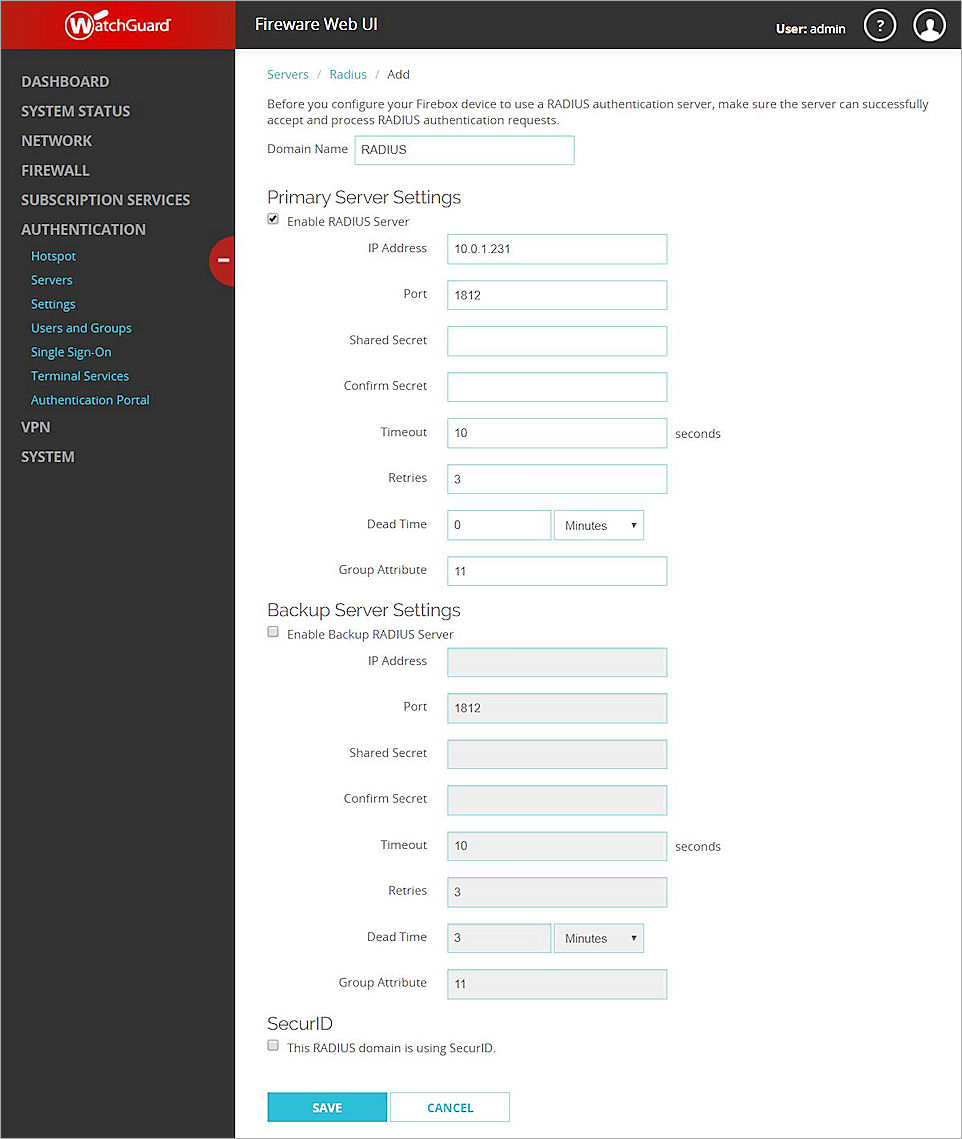
If a user does not respond to a multi-factor authentication (MFA) challenge, the Firebox marks the RADIUS server as dead for the Dead Time duration. The Firebox does not send authentication requests for other users to the RADIUS server during this time. To avoid this issue, specify a Dead Time of 10 minutes if you configure only a primary RADIUS server. If you also configure a backup RADIUS server, specify a Dead Time of 0 minutes.
- Keep all other default settings.
- Click Save.
Next, add RADIUS users and groups on the Firebox:
- Select Authentication> Users and Groups.
- Click Add.
- For Type, select User.
- In the Name text box, type the same user name you created on the NPS Server.
- From the Authentication Server drop-down list, select RADIUS.

- Click OK.
The user is added to the Users and Groups list on the Firebox. - Click Add.
- For Type, select Group.
- In the Name text box, type the same Group name you created on the NPS Server.
- From the Authentication Server drop-down list, select RADIUS.
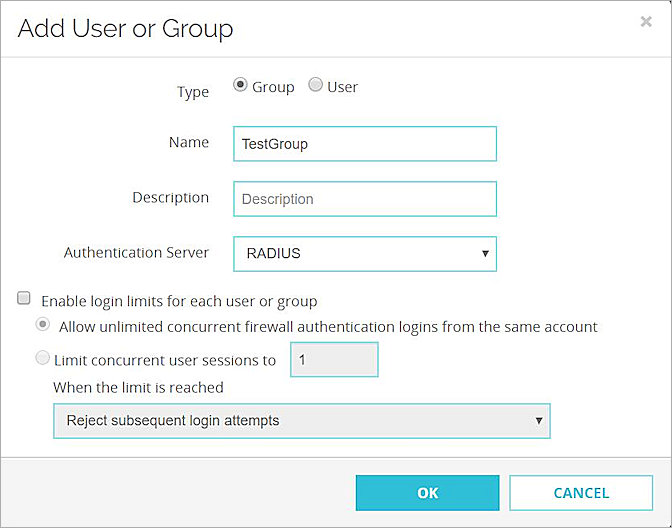
- Click OK.
The Group is added to the Users and Groups list on the Firebox.
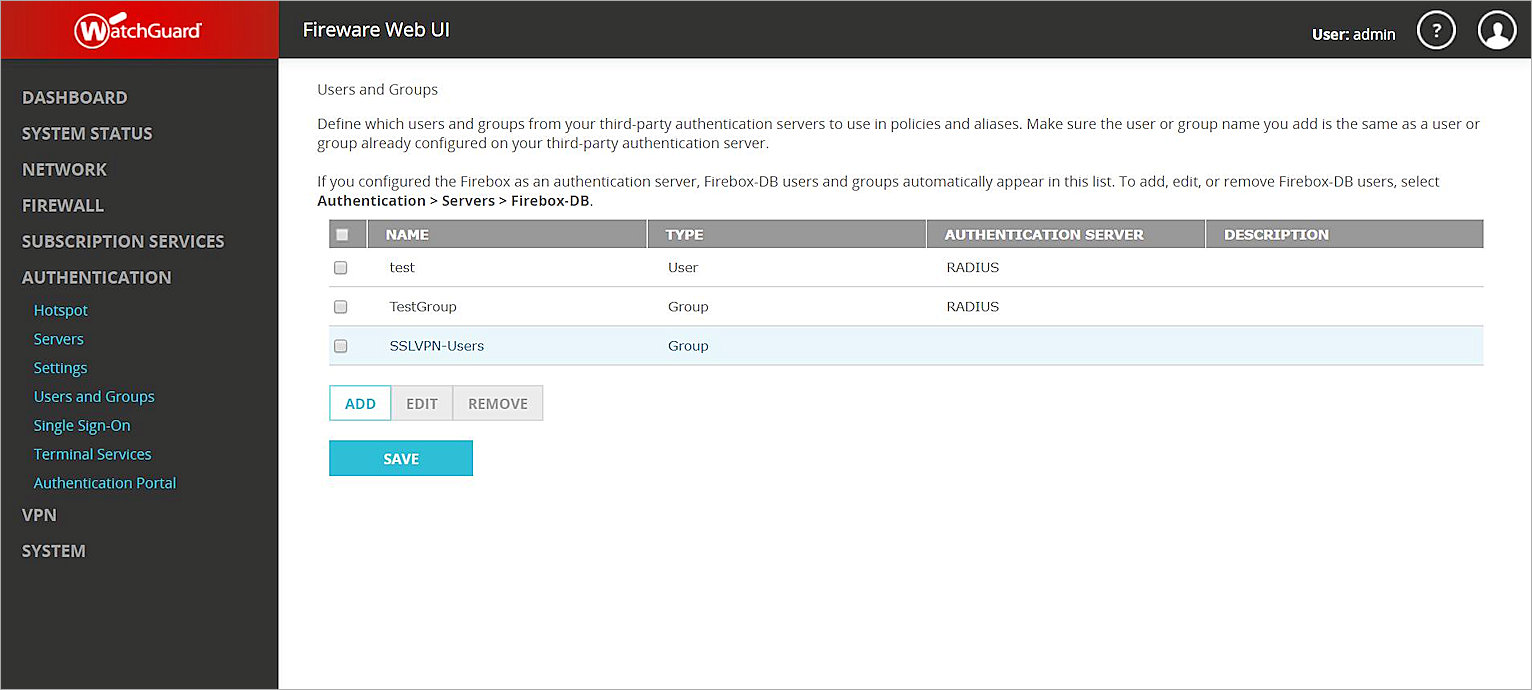
- Click Save.
For more information about RADIUS configuration on the Firebox, see Configure RADIUS Server Authentication.
Install and configure SMS PASSCODE
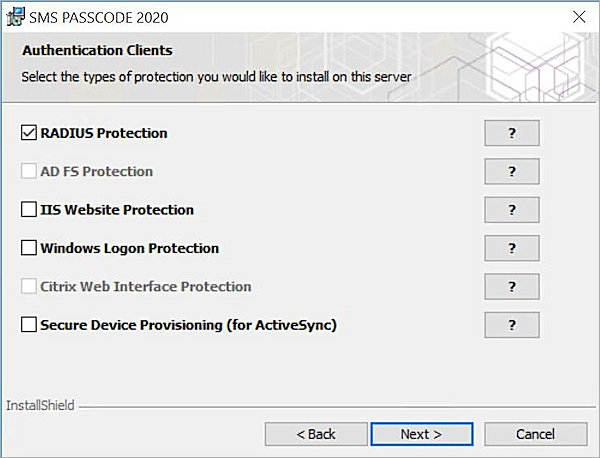
In the SMS PASSCODE installer:
- Select Install Core Components and Install Authentication Client Protections. Click Next.
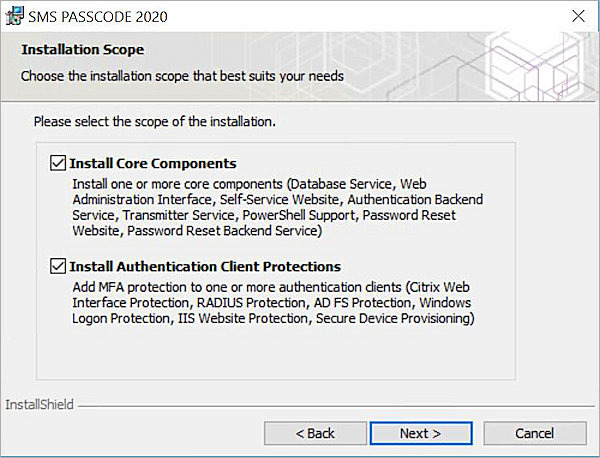
- On the Authentication Clients dialog box, select RADIUS Protection. Click Next.
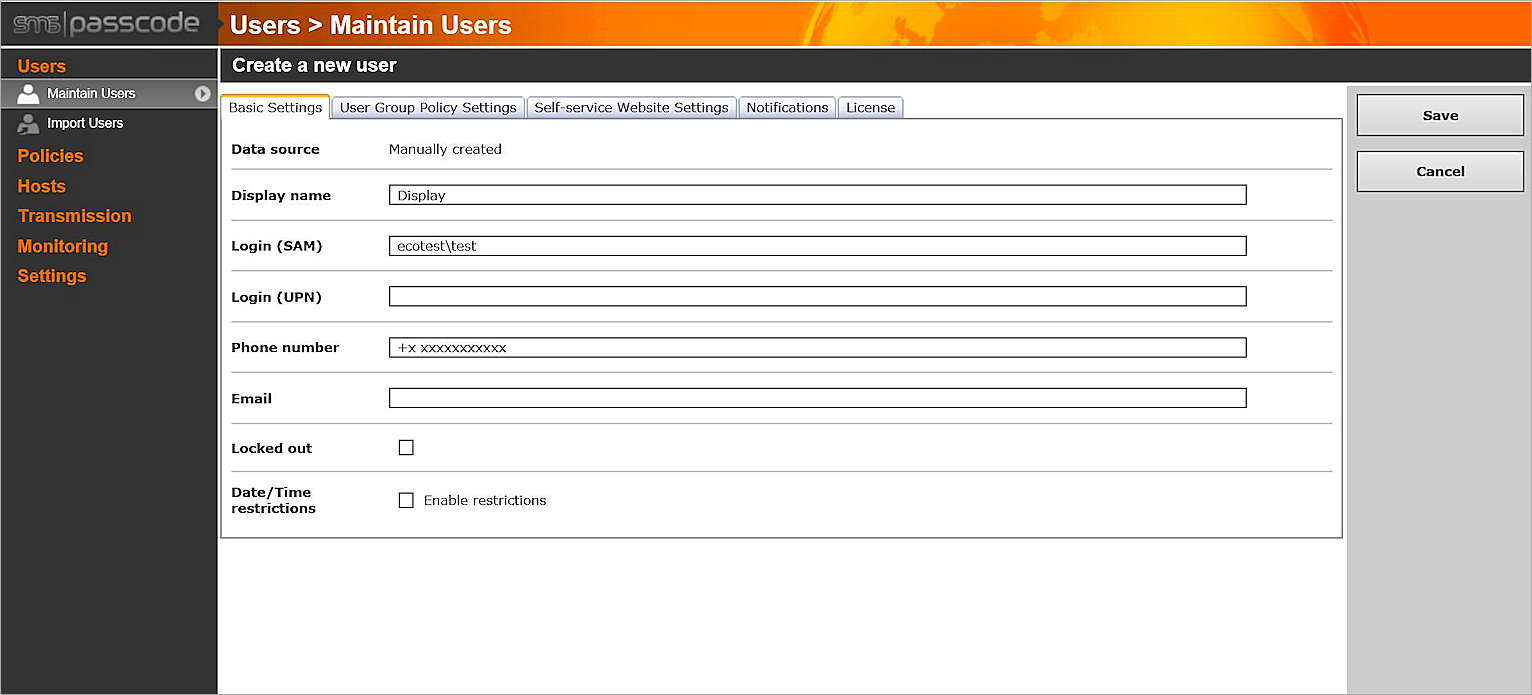
- After SMS PASSCODE installs successfully, open the SMS PASSCODE administration site at http://localhost:2000.
- Select Users > Maintain Users.
- Click Add new user.
- In the Display name text box, type the display name for the user.
- In the Login (SAM) text box, type the domain name followed by the user name that you created on AD DS. Use this format: domainname\username.
- In the Phone number text box, type the mobile phone number that will receive the passcode.
- Keep all other default settings.
- Click Save.
Test the Integration
To test the integration:
- Launch the Mobile VPN with SSL client.
- In the Server text box, type the IP address configured in the Mobile VPN with SSL settings. This IP address should be the Firebox external interface IP address.
- In the User name text box, type the user name configured on the AD DS.
- In the Password text box, type the password.
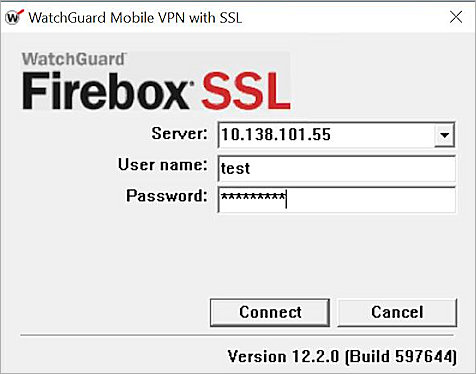
- Click Connect.
A passcode is sent to the mobile phone number you specified in the SMS PASSCODE settings. - In the Enter Passcode dialog box, type the passcode you received on your phone.
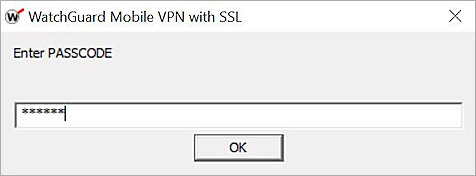
- Click OK. The Mobile VPN with SSL client connects.