Applies To: Cloud-managed Fireboxes, Locally-managed Fireboxes
To manage a FireboxV configuration from WatchGuard Cloud, you must add the virtual Firebox to WatchGuard Cloud as a cloud-managed device and then upload a payload to the device. The payload applies the initial configuration and connection settings so the Firebox can establish a connection with WatchGuard Cloud.
When you add a cloud-managed Firebox, you create a new configuration in WatchGuard Cloud through one of these methods:
- Create a new configuration manually.
- Copy configuration settings from another cloud-managed Firebox in the same account.
- Import many supported settings from a Firebox .XML configuration file to help build the cloud-managed configuration. You can do this when you add the device through the Add Device Wizard, or you can use the Import Configuration wizard after you add the device. This topic describes how to use the Add Device Wizard. For information about Import Configuration wizard workflow, go to Import Configuration Settings from a Firebox Configuration File.
For information about how to change an existing Firebox from local management to cloud management, go to Change a Locally-Managed Firebox to Cloud Management.
For best practices on how to change your locally-managed Firebox to cloud management, go to the Firebox Migration to Cloud Management Guide.
Caution: Do not use a factory reset as a general troubleshooting step for a cloud-managed Firebox. It rarely resolves issues and breaks the WatchGuard Cloud management connection. After a reset, the device cannot reconnect because of a WatchGuard Cloud key mismatch. Recovery might require you to remove and re-add the device to WatchGuard Cloud, which can result in the loss of configuration and logs.
Before You Begin
Before you add a FireboxV device to WatchGuard Cloud, make sure that:
- You have activated the Firebox in your WatchGuard account.
- The Firebox has a valid Standard Support license (Fireware v12.9 or higher) or a current Basic Security Suite, Prime Security Suite, or Total Security Suite subscription.
- The Firebox is allocated to a Subscriber account (Service Providers only). For more information, go to Allocate Fireboxes.
Your operator role determines what you can view and do in WatchGuard Cloud. Your role must have the Devices permissions to view or configure this feature. For more information, go to Manage WatchGuard Cloud Operators and Roles.
To add a FireboxV device as a cloud-managed device, it must meet these requirements:

For a FireboxV device to successfully connect to WatchGuard Cloud as a cloud-managed device, it must run Fireware v12.7.1 or higher.
The Fireware version that was preinstalled on the device appears in the Device Information section of the Product Details page on the WatchGuard website.
If your Firebox runs a lower version of Fireware, you must first set up the Firebox as a locally-managed device and upgrade it to Fireware v12.7.1 or higher before you can add it as a cloud-managed device. For information about Fireware upgrade methods, go to Firebox Upgrade, Downgrade, and Migration.
If you previously configured the FireboxV device as a locally-managed device, you must reset it to factory-default settings before it can connect to WatchGuard Cloud as a cloud-managed device. For the steps to reset your Firebox, go to Reset a Firebox.
Add a Cloud-Managed FireboxV to WatchGuard Cloud
When you add a FireboxV device to WatchGuard Cloud as a cloud-managed device, you configure the device name, time zone, external network settings, and device passwords. WatchGuard Cloud automatically configures other device settings with secure defaults.
To add a FireboxV device to WatchGuard Cloud as a cloud-managed device:
- Log in to your WatchGuard Cloud account.
- For Service Provider accounts, from Account Manager, select My Account.
- Select Manage > Devices or Configure > Devices.
- Click Add Device.
A list of activated devices opens. - Click the Name of the FireboxV device you want to add or click
 .
.
A confirmation dialog box opens. - Click Add Device.
The Add Device to WatchGuard Cloud page opens.
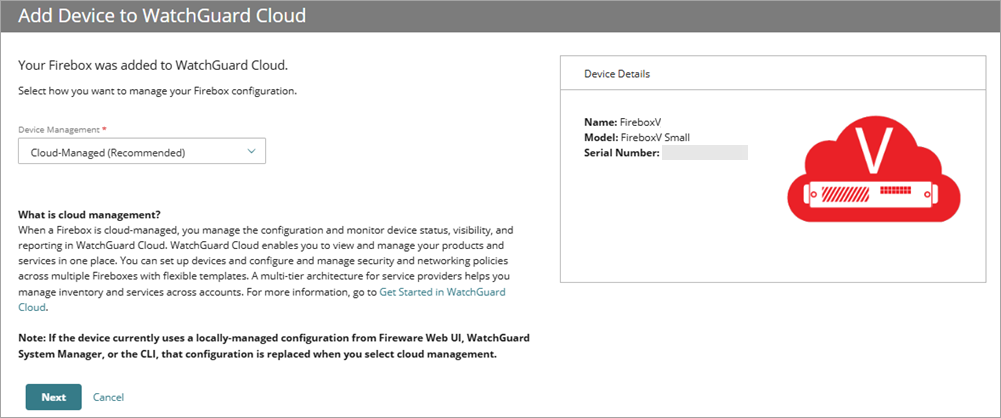
- From the Device Management drop-down list, select Cloud-Managed, then click Next.
The Cloud Management page opens. - From the Configuration Type drop-down list, select one of these configuration types:
- Create a New Configuration
- Copy a Configuration from Another Cloud-Managed Firebox
- Import an .XML Configuration File

- From the Device Management drop-down list, select Cloud-Managed, then click Next.
- From the Configuration Type drop-down list, select Create a New Configuration or Copy a Configuration from Another Cloud-Managed Firebox.
If you copy configuration settings from another cloud-managed Firebox, you must select the Firebox you want to copy from. The Firebox must be in the same account.
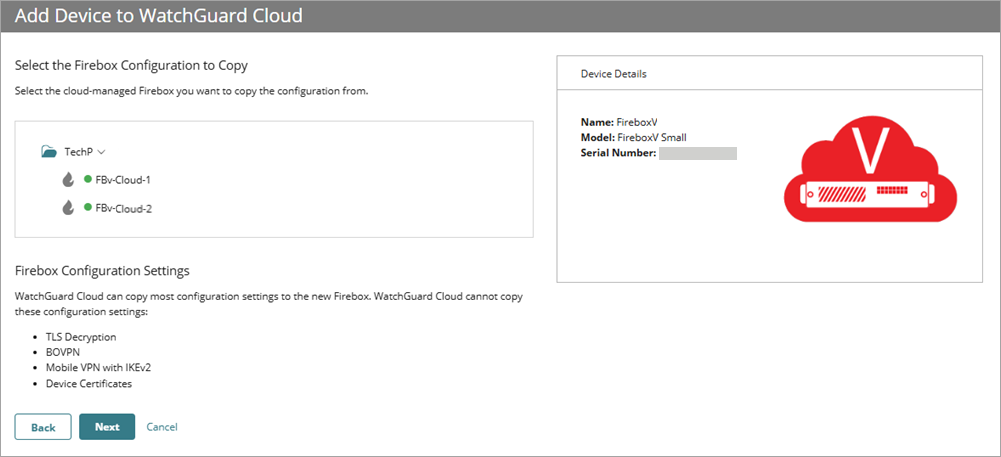
- Click Next.
The Begin Setting Up Your Firebox page opens. - Configure Firebox system settings:
- Device Name — The name to identify the Firebox in WatchGuard Cloud.
- Time Zone — The time zone of the location where the Firebox is installed.
- From the Device Folder drop-down list, select the folder that you want to add your device to. Device Folders help you view status and summary data for groups of devices.
If you only have only one root folder, the folder list does not appear.

- Click Next.
- From the Connection Type drop-down list, select an option for the Firebox external interface. Select and configure one of these options:
DHCP
Select this option to configure the Firebox to use DHCP to request an IP address on the external network.
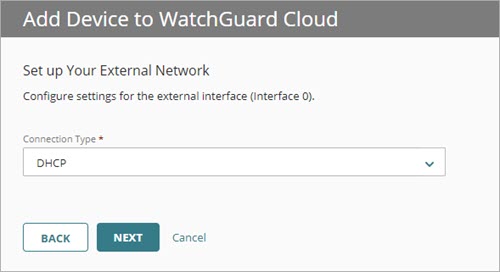
If you select DHCP, there are no other network settings to configure.
Static IP
Select this option to configure the Firebox to use a static IP address on the external network.
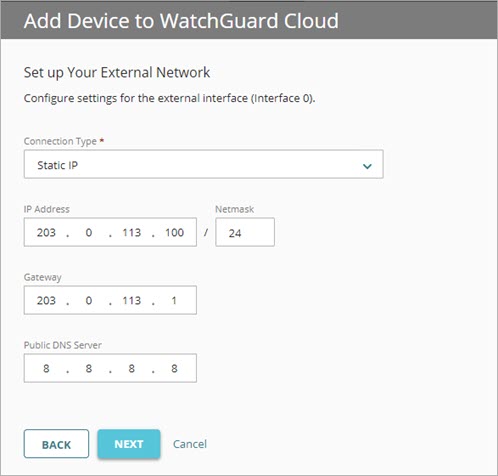
If you select Static IP, configure the Firebox external network IP address and netmask, a network gateway on the same subnet, and the IP address for a public DNS server.
PPPoE
Select this option to configure the Firebox to use PPPoE to get an IP address on the external network.
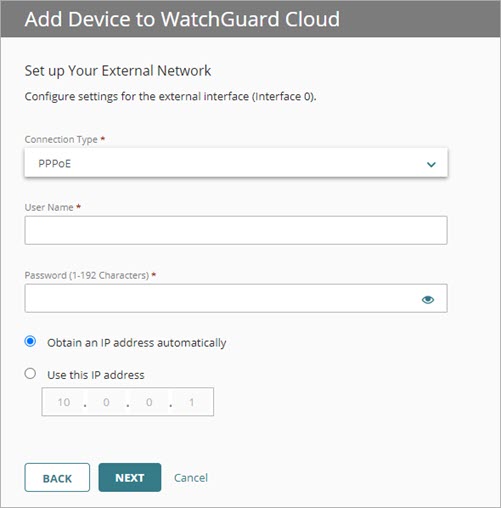
If you select PPPoE, configure the user name and password, and select whether to obtain an IP address automatically or to configure a specific IP address.
- Click Next.
- Set the Status and Admin user device passwords for connections to Fireware Web UI on the Firebox. Device passwords must be 8–32 characters long, and must contain uppercase and lowercase letters, at least one number, and at least one symbol. The Status and Admin passwords cannot be the same.
The admin password you specify encrypts the payload. You must specify the same admin password when you upload the payload in the Web Setup Wizard.

Caution: To keep your device secure, make sure you do not use the default passwords for the admin account (readwrite) and status account (readonly). We recommend that you specify unique passwords for each Firebox you manage and change them frequently.
For a cloud-managed Firebox, you can use Web UI to recover the Firebox connection to WatchGuard Cloud. You cannot use Web UI to modify the Firebox configuration.
- Click Next.
- Click Download Payload.
A dialog box opens for you to save the payload file to your default download folder in your browser. The package has a .TGZ extension. For example, package_FVE1028C0754.
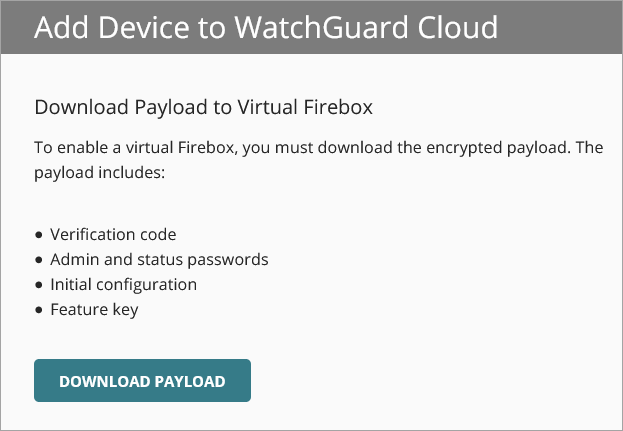
Record the location where you saved the payload file. In the next section, upload the payload in the Web UI to connect your FireboxV to WatchGuard Cloud.
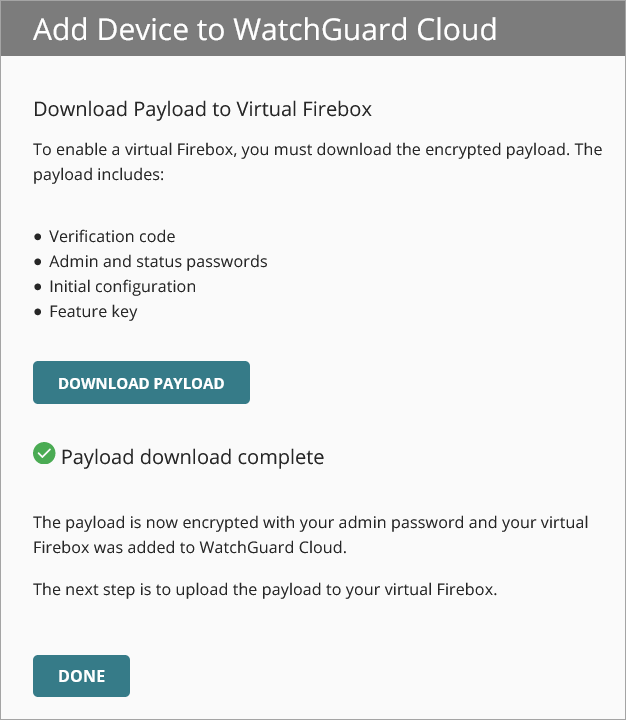
Your device is now added to WatchGuard Cloud, but not yet connected. You must now upload the payload to your FireboxV device in the Web UI.
When you import a configuration from a Firebox, you can import some configuration settings from an existing Firebox configuration file to a cloud-managed Firebox configuration. Some configuration settings are not importable. For more information about how to import configuration settings, go to Import Configuration Settings from a Firebox Configuration File.
If the file contains settings that conflict with Firebox default objects such as a default alias, the Add Device wizard uses the default objects. For more information about duplicate settings, go to Import Configuration Settings from a Firebox Configuration File.
Before you import an .XML configuration file to add a cloud-managed Firebox, make sure that you have exported a valid .XML configuration file from the Firebox that you add to WatchGuard Cloud. For more information, go to Configuration File Requirements.
You cannot use the .XML configuration import in the Add Device wizard for Firebox Cloud.
To import an .XML configuration file from another device:
- From the Device Management drop-down list, select Cloud-Managed, then click Next.
- From the Configuration Type drop-down list, select Import an XML Configuration File.

For more information about importing configuration settings, go to Import Configuration Settings from a Firebox Configuration File.
- Click Next.
- Configure these Firebox system settings:
- Device Name — The name to identify the Firebox in WatchGuard Cloud.
- Time Zone — The time zone of the location where the Firebox is installed.
- From the Device Folder drop-down list, select the folder that you want to add your device to. Device Folders help you view status and summary data for groups of devices.
If you only have only one root folder, the folder list does not appear.
- Click Next.
- Set the Status and Admin user device passwords for connections to Fireware Web UI on the Firebox. Device passwords must be 8–32 characters long, and must contain uppercase and lowercase letters, at least one number, and at least one symbol. The Status and Admin passwords cannot be the same.
Caution: To keep your device secure, make sure you do not use the default passwords for the admin account (readwrite) and status account (readonly). We recommend that you specify unique passwords for each Firebox you manage and change them frequently.
For a cloud-managed Firebox, you can use Web UI to recover the Firebox connection to WatchGuard Cloud. You cannot use Web UI to modify the Firebox configuration.
- Click Next.
The Import Configuration page opens. - Drag the .XML configuration file to the import box, or click the import box and click Browse to select the file.

- Click Next.
The Aliases page opens.
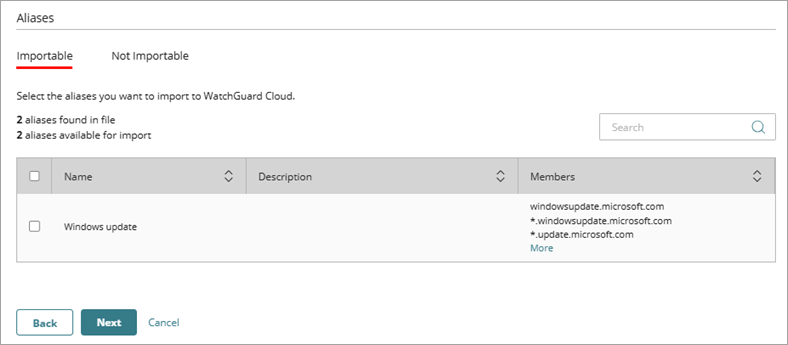
- Select the check box next to each alias to import. The page shows the number of aliases available for import and the number of aliases found in the configuration file.
- Click Next.
The Exceptions page opens. - Select the check box next to each exception to import. The page shows the number of exceptions available for import and the number of exceptions found in the configuration file.
- Click Next.
The Routes page opens. - Select the check box next to each route to import. The page shows the number of routes available for import and the routing distance found in the configuration file.
- Click Next.
The Blocked Ports page opens. - Select the check box next to each blocked port to import. The page shows the number of blocked ports available for import in the configuration file.
- Click Next.
The Blocked Sites page opens. - Select the check box next to each blocked site to import. The page shows the number of blocked sites available for import and their description in the configuration file.
- Click Next.
The Dimension Servers page opens and shows the Dimension servers on the cloud-managed Firebox. - (Optional) To change the list of Dimension servers, click Select Server.
A dialog box opens and shows the list of available Dimension servers.- Select the check box next to the Dimension servers that you want to use with WatchGuard Cloud. You can select up to two Dimension servers from the list.
- Click OK.
- To prioritize Dimension servers, click the move handle for a server and drag it to a new position in the list.
- Click Next.
The Syslog Servers page opens. The list of servers includes syslog servers from both the import file and the cloud-managed configuration. - Select the check box next to each syslog server that you want to use with WatchGuard Cloud. You can select up to three syslog servers.
- Click Next.
The Technology Integrations page opens. - Select the check box next to each technology integration to import.
When you import a technology integration, it replaces an existing technology integration of the same type. For more information, go to About Firebox Technology Integrations.
- Click Next.
The Networks page opens. The page shows the number of networks available for import and the number of networks found in the configuration file.
When you import a network, WatchGuard Cloud imports the network and the associated interface and network settings from the configuration file. Depending on the configuration, this can include:
- Physical, VLAN, bridge, and link aggregation (LAG) interfaces
- Internal, external, and wireless networks
- IP address and secondary network settings
- DHCP client or server settings, including DHCP reservations
- DNS and WINS (Windows Internet Name Service) settings
- MAC address control lists
- Other cloud-supported interface properties, such as maximum transmission unit (MTU) and link speed
You must import an entire network and the network settings. You cannot import only part of a network configuration, such as only DHCP reservations or secondary networks. The Add Device wizard does not import network settings that WatchGuard Cloud does not support. For example, loopback interfaces are not imported. The wizard also does not import SD-WAN actions, even though WatchGuard Cloud supports SD-WAN actions. Unsupported or non-imported settings can appear as not importable in the Import Configuration wizard. For more information, go to Not Importable Settings.

- Select the check box next to each network you want to import.
- (Optional) If you want to manually configure an external network or create a default internal network:
- To configure an external network later in the wizard, select Manually Configure.
- To create a default internal network, select Default Internal.
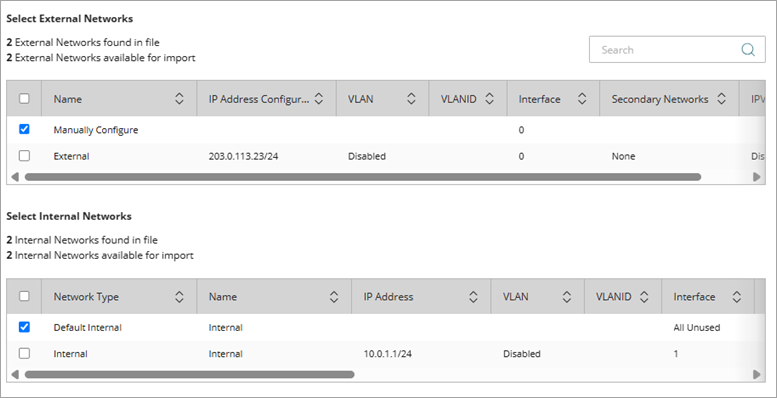
- If you import an Optional or Custom network from a locally-managed Firebox configuration, the Import Configuration wizard prompts you to select a different network type.
WatchGuard Cloud does not support Optional or Custom network types. If the configuration file includes an Optional or Custom network, select Internal or Guest as the network type for the cloud-managed configuration.
To select a different network type, from the Optional or Custom drop-down list, select Internal or Guest.

- Click Next.
The Finish page opens.

- Click Next.
- If the imported XML configuration contains unused interfaces, select how to handle them. By default, the Disable Unused Interfaces check box is selected.
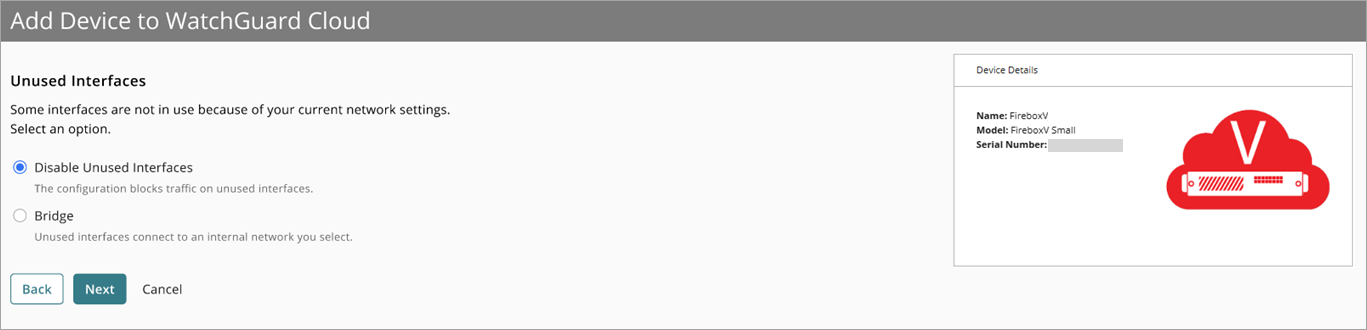
If you select Bridge, a drop-down list opens with all networks currently associated with the configuration. From the drop-down list, select the network to which you want to bridge the unused interfaces.

- Click Next.
- If you did not import an external network, configure an external network manually. From the IP Address Configuration drop-down list, select Static, DHCP, or PPPoE, then complete the settings. For more information, go to Select External Interface Connection Type.

- Click Next.
The Finish page opens.

- Click Download Payload.
A dialog box opens for you to save the payload file to your default download folder in your browser. The package has a .TGZ extension. For example, package_FVE1028C0754.
Record the location where you saved the payload file. In the next section, upload the payload in the Web UI to connect your FireboxV to WatchGuard Cloud.
- Click Done.
Your device is now added to WatchGuard Cloud, but not yet connected. To connect, you must upload the payload to your FireboxV device in the Web UI.
Upload the Payload and Connect the Firebox
Before you can manage your FireboxV device in WatchGuard Cloud, you must upload the payload you downloaded in WatchGuard Cloud.
The payload includes:
- Verification code
- Admin and status passwords
- Initial configuration
- Feature key
To upload the payload and connect your FireboxV device to WatchGuard Cloud:
- Open a web browser and go to https://<Firebox IP address>:8080.
A security certificate notification appears in the browser. Click Continue or add an exception. - Log in with the user name admin and the password readwrite.
The Web Setup Wizard opens. - Select the Enable Cloud Management check box and accept the end-user license agreement.
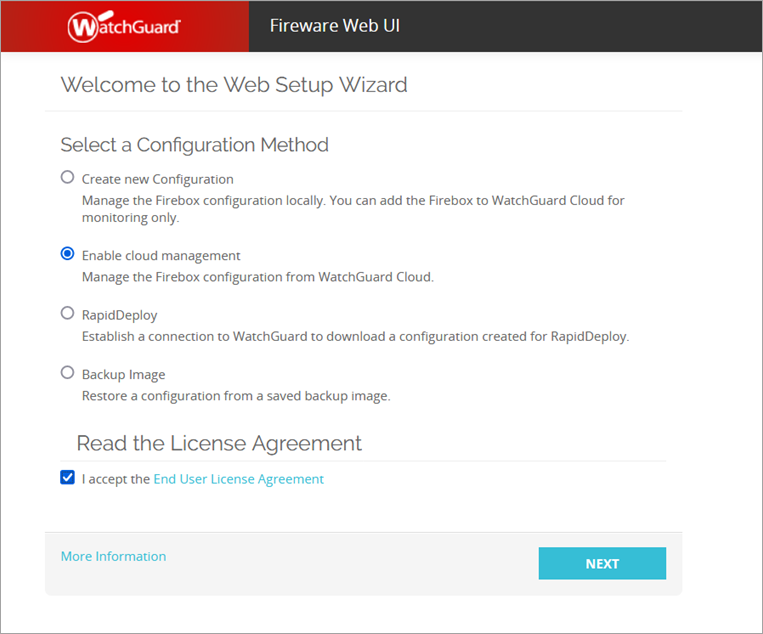
- Click Next.
- Upload the payload to the device.
- Type the admin password you created in the Add Device wizard in WatchGuard Cloud. This password decrypts the payload.
- Click Browse, navigate to the location where you saved the payload, and select the payload file.

- Click Next.
The payload file uploads and applies changes to the Firebox. When the process finishes, you receive a message.

Verify the FireboxV Status
After you upload the payload and connect the FireboxV in the Web UI, log in to WatchGuard Cloud to verify the device connection status and other summary information on the Device Settings page and Live Status page in WatchGuard Cloud.
For more information:
About the WatchGuard Cloud User Interface
Recover the Firebox Connection to WatchGuard Cloud
Add a Cloud-Managed Firebox to WatchGuard Cloud