Deployment Overview
This document describes how to set up multi-factor authentication (MFA) for Ericom Connect with AuthPoint as an identity provider. Ericom Connect must already be configured and deployed before you set up MFA with AuthPoint.
This integration was tested with V9.5.0.61221 of Ericom Connect.
Ericom Connect only supports identity provider single sign-on. To configure AuthPoint MFA for Ericom Connect, you must configure an IdP portal resource in AuthPoint. End-users must use the AuthPoint IdP portal to log in to Ericom Connect.
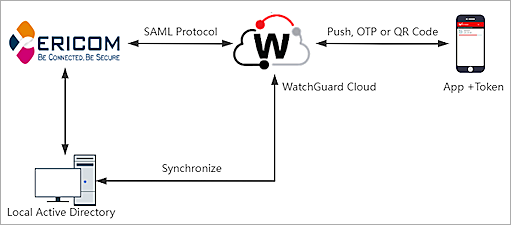
Ericom Connect Authentication Data Flow with AuthPoint
AuthPoint communicates with various cloud-based services and service providers with the SAML protocol. This diagram shows the data flow of an MFA transaction for Ericom Connect.
Before You Begin
Before you begin these procedures, make sure that:
- You have configured your local Active Directory with a local AD service account for Ericom Connect to use, a local AD limited user account for NLA authentication, an Enrollment Agent Certificate Template, and a Smartcard Login Certificate Template
- You have a Windows RDS session host with Ericom RemoteAgent and Ericom SSO Server installed
- You have added the local Active Directory service account to the RDS session host's local Administrators group
- You have added the NLA user to the RDS session host's local Remote Desktop Users group
- You have an Ericom Connect administrator account
- You have added and configured the published applications and desktops (also known as resources) in Ericom Connect
- You have assigned the published applications and desktops to your Active Directory users in Ericom Connect
- You have installed and configured the AuthPoint Gateway (see About Gateways)
- A token is assigned to a user in AuthPoint
- You have an AuthPoint identity provider (IdP) certificate (go to Certificate Management)
Configure Ericom Connect
To start, you must download the metadata file from the Certificate Management page in the AuthPoint management UI. After you have that, you can configure Ericom Connect.
- Log in to WatchGuard Cloud.
- From the navigation menu, select Configure > AuthPoint. If you have a Service Provider account, you must select an account from Account Manager.
- Select Resources.
- Click Certificate.

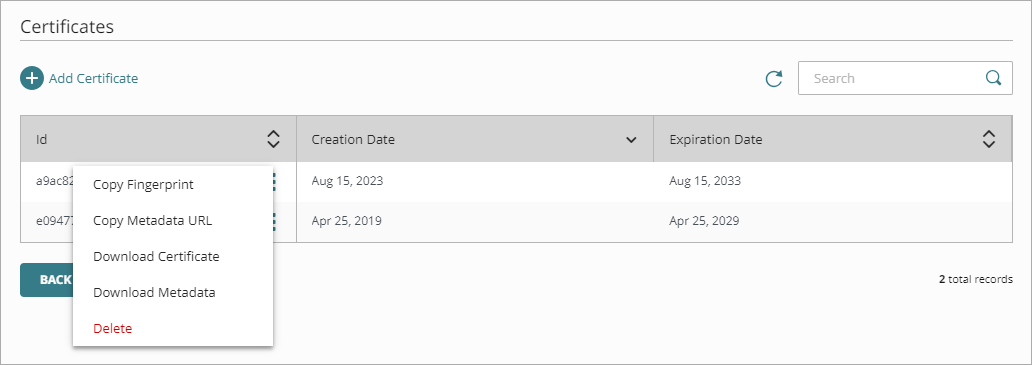
- Next to AuthPoint certificate you will associate with your resource, click
 and select Download Metadata. We recommend that you choose the certificate with the latest expiration date. If you do not have a certificate, or if all of your certificates have expired, click Add Certificate and use the newly created certificate.
The AuthPoint metadata provides your resource, in this case Ericom Connect, with information necessary to identify AuthPoint as a trusted identity provider.
- Log in to the Ericom Connect admin UI.
- From the navigation menu, select Configuration > Settings > Secondary Settings.
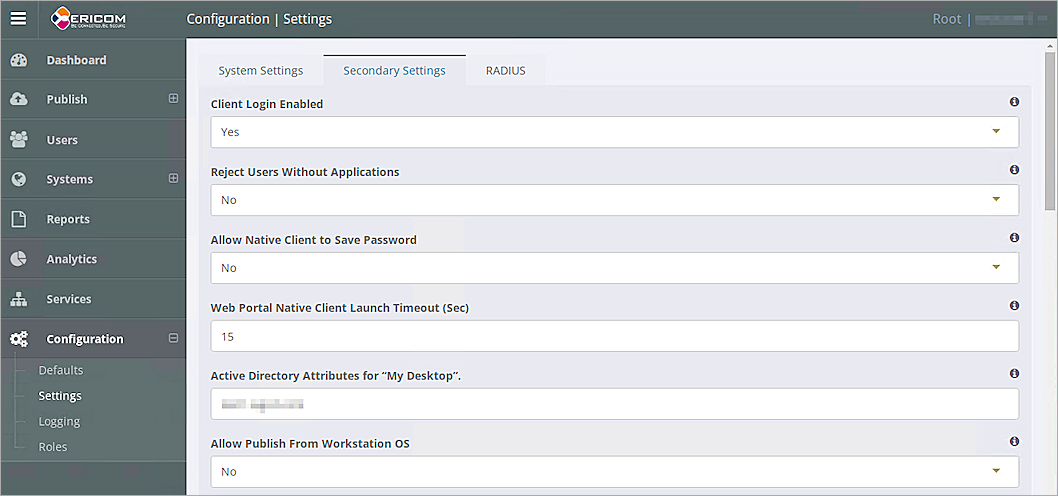
- From the Allow Authentication With SAML drop-down list, select Yes.
- Open the AuthPoint metadata file you downloaded and find the X509Certificate and SingleSignOnService Location values.
- In the SAML Endpoint text box, type or paste the SingleSignOnService Location value from the AuthPoint metadata file.
- In the SAML Metadata text box, paste the X509Certificate value from the AuthPoint metadata file with no spaces.

- Click Save.
- Select Systems > Hosts.
- Select your host, and select the Settings tab.
- In the NLA User Account Name for SSO Functionality text box, type your NLA user name.
- In the NLA User Password for SSO Functionality text box, type your NLA user password.
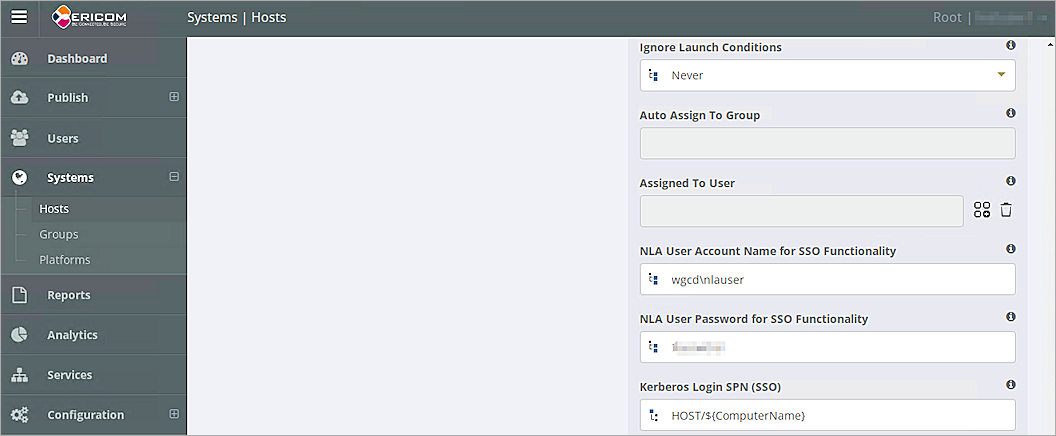
- Click Save.
Configure AuthPoint
Before AuthPoint can receive authentication requests from Ericom Connect, you must add a SAML resource in AuthPoint. You must also create a Zero Trust authentication policy for the Ericom Connect resource to determine which users can authenticate and log in to Ericom Connect and which authentication methods they can use (Push, QR code, and OTP).
Add a SAML Resource in AuthPoint
From the AuthPoint management UI:
- From the navigation menu, select Resources.
Click Add Resource.
The Add Resource page opens.
- From the Type drop-down list, select SAML.
Additional fields appear.

- On the SAML page, in the Name text box, type a name for this resource. In our example, we type Ericom Connect.
- From the Application Type drop-down list, select Others.
- In the Relay State text box, type https://YourEricomConnect.domain.com/ericomxml/accesssso/accessnowsso_saml.htm. If you want to enable SSO for Ericom AccessPortal, type https://YourEricomConnect.domain.com/ericomxml/accesssso/accessportalsso_SAML.htm.
- In the Service Provider Entity ID text box, type SAML_Auth.
- In the Assertion Consumer Service text box, type https://YourEricomConnect.domain.com/ericomxml/accessnowssosamlexternal.aspx.
- From the User ID sent on redirection to service provider drop-down list, select User Name.
- From the Signature Method drop-down list, select SHA-256.
- From the AuthPoint Certificate drop-down list, select the certificate to associate with your resource. This must be the same certificate that you downloaded the metadata for in the previous section.
- In the Custom Attributes section, click Add Attribute.
The Add Attribute window opens. - In the Attribute Name text box, type username.
- From the Get Value From drop-down list, select User name.
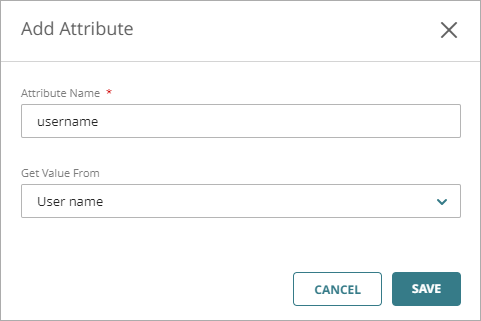
- Click Save.
The Add Attribute window closes. - Click Save.
Add an IdP portal Resource in AuthPoint
Ericom Connect only supports identity provider single sign-on. To configure AuthPoint MFA for Ericom Connect, you must configure an IdP portal resource in AuthPoint. End users must use the AuthPoint IdP portal to log in to Ericom Connect. To learn more about the AuthPoint IdP portal, see Configure the IdP Portal.
If you have already configured the IdP portal in AuthPoint, skip this section.
- From the navigation menu, select Resources.
- From the Choose a resource type drop-down list, select IDP Portal. Click Add Resource.
- In the Name text box, type a descriptive name for the resource.
- In the Account Alias text box, type a unique value to append to the URL for your IdP portal. The URL for the IdP portal is always https://authpoint.watchguard.com/account_alias. In our example, the account alias is washington, so the URL for the IdP portal is https://authpoint.watchguard.com/washington.
- Click Save.
Add a Group in AuthPoint
You must have at least one user group in AuthPoint to configure MFA. If you already have a group, you do not have to add another group.
To add a WatchGuard Cloud-hosted group to the WatchGuard Cloud Directory:
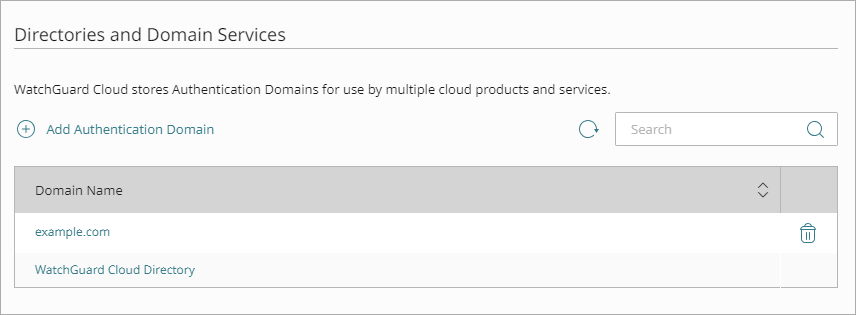
- Go to Configure > Directories and Domain Services.
- Click the WatchGuard Cloud Directory domain name. If you have not yet added the WatchGuard Cloud Directory, click Add Authentication Domain and select the WatchGuard Cloud Directory.
The New Group page appears.
- In the Groups tab, click Add Group.
- In the Group Name text box, type a descriptive name for the group.
- (Optional) In the Description text box, type a description of the group.
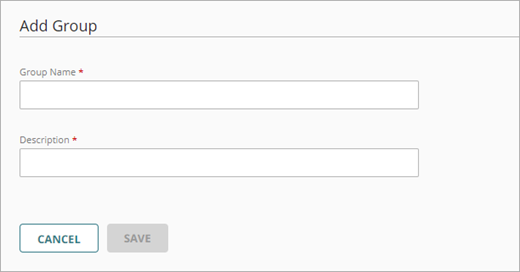
- Click Save.
Your group is added to the WatchGuard Cloud Directory and to AuthPoint.
Add a Zero Trust Authentication Policy
Zero Trust policies specify which resources users can authenticate to and which authentication methods they can use (Push, QR code, and OTP).
You must have at least one Zero Trust authentication policy that includes the Ericom Connect resource and your IdP portal resource. If you already have Zero Trust authentication policies, you do not have to create a new authentication policy. You can add these resources to your existing authentication policies.
Users that do not have an authentication policy for a specific resource cannot authenticate to log in to that resource.
To configure a Zero Trust authentication policy:
- Go to Configure > Zero Trust. If you have a Service Provider account, you must select an account from Account Manager.
- Click Add Policy.
- Type a name for this policy.
- In the Target section, from the Content drop-down list, select which groups this policy applies to. You can make multiple selections to add multiple groups.
- In the Resources section, select the AuthPoint resources this policy applies to.
- In the Conditions section, select the conditions that apply to this policy. When you add a condition to an authentication policy, the policy applies only to user authentications that match the policy and the policy conditions. For example, if you add a Network Location to a policy, the policy only applies to user authentications that come from that Network Location. Users who only have a policy that includes a Network Location do not get access to the resource when they authenticate outside of that Network Location (because they do not have a policy that applies, not because authentication is denied). For more information, go to About Zero Trust Conditions.
- (Optional) To create a new condition, click Add New Condition. After you create a new condition, you must still add the condition to the policy.
- From the Type drop-down list, select the type of condition to add to the policy.
- From the Name drop-down list, select which condition of the chosen type to add to the policy.
- To add more conditions, repeat Step 6.
If you add conditions to a policy, we recommend that you create a second policy for the same groups and resources without the conditions. Assign a higher priority to the policy with the policy objects. For more information about priority, go to About Zero Trust Policy Precedence.
- In the Action section, select an option to specify whether to allow or deny authentications for the resources in this policy. In our example, we want to allow authentications.
- Allow — Allow user groups in this policy access to the resources associated with this policy.
- Deny — Deny authentications when users in the groups associated with this policy try to authenticate to the resources associated with this policy.
- If you allow access with this policy, select the check box for each authentication option users can select when they authenticate to resources in this policy with MFA.
For SAML resources, if you select more than one authentication option, users must select one of the available options when they authenticate. For example, if you select OTP and Push, users can choose to type their OTP or approve a push to authenticate. You cannot require that they do both.
- Click Save.
Your policy is created and added to the end of the policy list. - Review the order of your policies and adjust as necessary. For more information about priority, go to About Zero Trust Policy Precedence.
Sync Users to AuthPoint from Active Directory
To sync users to AuthPoint from Active Directory, you must add an external identity in AuthPoint. External identities connect to user databases to get user account information and validate passwords.
For detailed instructions to sync users from Active Directory, see Sync Users from Active Directory or LDAP.
Test the Integration
To test AuthPoint MFA with Ericom Connect, you can authenticate with a mobile token on your mobile device. For SAML resources, you can choose any method (push, QR code, or one-time password).
In this example, we show the push authentication method (users receive a push notification in the mobile app that they must approve to authenticate).
- In a web browser, go to the IdP portal. You can see the URL for the IDP portal when you edit your IdP portal resource in the AuthPoint management UI.
- Type your email address or AuthPoint user name. Click Next.
- If required, in the Password text box, type your password.
- For the authentication method, select Send Push.
- Approve the authentication request that is sent to your mobile device.
- In the IdP portal, select Ericom Connect.
You are logged in to the Ericom Connect Desktop.