Applies To: Cloud-managed Fireboxes
Firebox devices with built-in wireless capabilities enable you to provide wireless access directly from the Firebox for wireless clients.
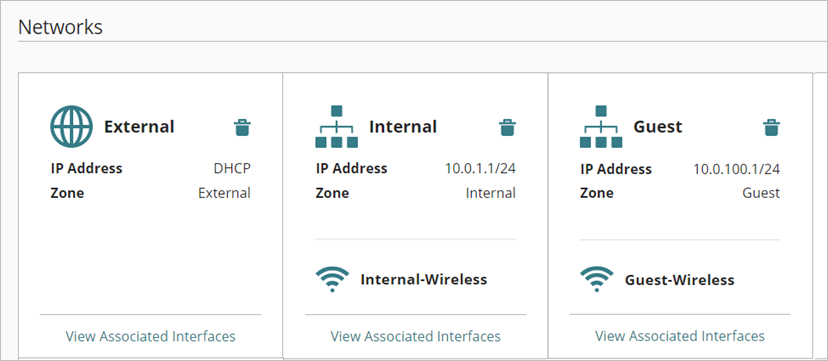
You can enable up to three wireless networks in these security zones:
- Internal — An internal network is a private network protected by the Firebox. If you enable wireless on an internal network, wireless clients will have the same access as wired clients connected to the same physical network on the Firebox. You can also create internal wireless networks that are not associated with a physical Firebox network interface.
- Guest — A guest network is a private network that enables guests to connect to external networks and prevents access to internal networks. If you enable wireless on a guest network, you can secure guest access so that wireless clients only have access to the Internet and cannot access any internal networks.
You can enable and configure an internal trusted wireless network and guest wireless network when you add your Firebox to WatchGuard Cloud and set up the Firebox. For more information, go to Add a Cloud-Managed Firebox to WatchGuard Cloud.
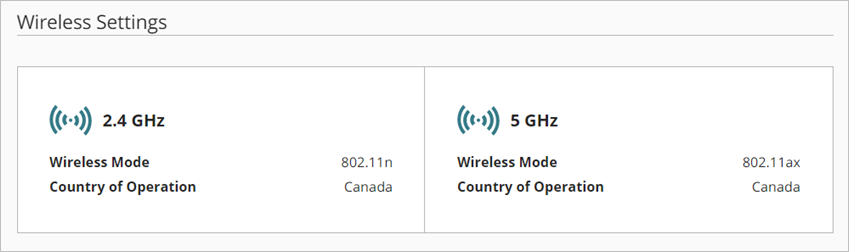
Radio Settings
To configure global wireless radio settings that are applied to all your configured wireless networks, go to Configure Wireless Radio Settings.
Enable Wireless on an Internal Firebox Network
You can enable wireless access on any internal or guest Firebox network. From the Firebox configuration page, you can select the network where you want to enable wireless. In this example, we enable a wireless network on the primary internal network.
To enable wireless on the primary internal network, from WatchGuard Cloud:
- Select Configure > Devices.
- Select the cloud-managed Firebox.
- Click Device Configuration.
- Click the Networks tile.
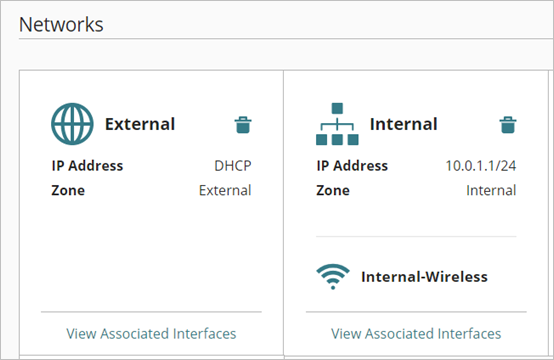
The Networks configuration page opens. - To edit the network, click the tile for the Internal network.
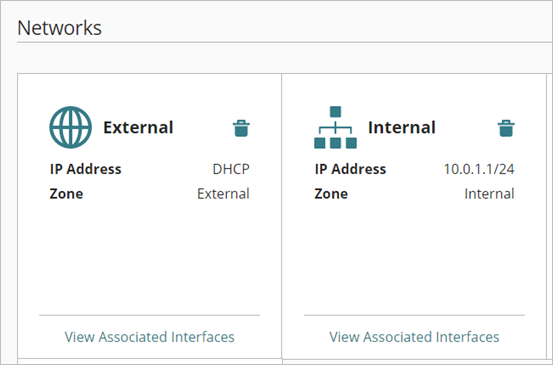
You can also create a new internal network for your wireless network. For more information, go to Configure a Firebox Internal or Guest Network.
- In the Wireless section of the network configuration, click Add SSID.
The Add SSID page opens.
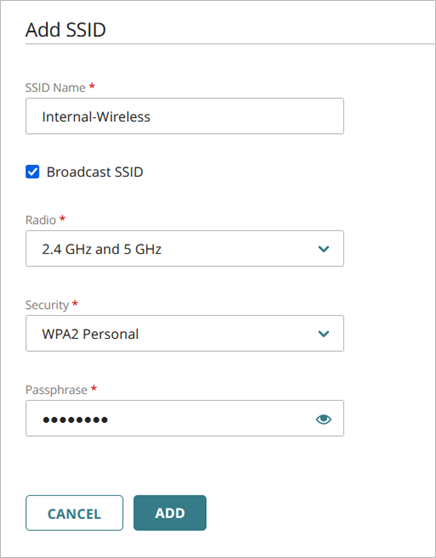
- Configure the wireless settings:
- SSID Name — Type a unique SSID name to identify your wireless network.
- Broadcast SSID — To configure the wireless interface to send and answer SSID requests, select the Broadcast SSID check box. This enables your wireless clients to view the wireless network name when they search for a network. For security, you can disable this option to hide your network name. However, most wireless network scanners are able to detect the network name even if it is not broadcast.
- Radio — Select the radio that will broadcast this SSID. You can select the 2.4 GHz radio, the 5 GHz radio, or both.
- Security — From the Security drop-down list, select the security setting to enable for connections to this wireless interface.
- Open — An Open network with no passphrase or encryption. Select Open only if you want to provide a guest wireless network without encryption.
- OWE — Opportunistic Wireless Encryption (OWE), also known as Enhanced Open, is the latest and most secure open protocol for Wi-Fi 6 (802.11ax) and higher devices that provides each user with encryption that protects data exchange between the client and the wireless network. This enables you to create an open network that provides data privacy without authentication. Clients that do not support OWE cannot connect with an SSID configured with OWE. Both the Firebox and client must support OWE.
- WPA2 Personal — WPA2 is the latest and most secure protocol for 802.11a/b/g/n/ac devices. You must type a passphrase that wireless users will use to connect to this SSID.
- WPA3 Personal — WPA3 is the latest and most secure protocol for Wi-Fi 6 (802.11ax) devices. WPA3 enables Protected Management Frames (802.11w) for higher security. Wireless clients must also support 802.11ax to use WPA3. You must type a passphrase that wireless users will use to connect to this SSID.
- WPA2 Enterprise — With WPA2 Enterprise, you can use a RADIUS server for wireless authentication to the Firebox. You must select a RADIUS Authentication Domain. Make sure you have a RADIUS server configured in your Authentication Domain servers on your Firebox. For more information, go to Configure Enterprise RADIUS Authentication for a Wireless Firebox.
- WPA3 Enterprise — With WPA3 Enterprise, you can use a RADIUS server for wireless authentication to the Firebox. WPA3 is the latest and most secure protocol for Wi-Fi 6 (802.11ax) and higher devices. You must select a RADIUS Authentication Domain. Make sure you have a RADIUS server configured in your Authentication Domain servers on your Firebox. For more information, go to Configure Enterprise RADIUS Authentication for a Wireless Firebox.
- Passphrase — If you select WPA3 Personal or WPA2 Personal as the security mode, type a secure Passphrase to access the wireless network.
- RADIUS Authentication Domain — If you select the WPA2 Enterprise or WPA3 Enterprise security mode, select your RADIUS authentication domain from the drop-down list. Make sure you have a RADIUS server configured in your Authentication Domains on your Firebox. If the Authentication Domain contains more than one RADIUS Authentication Server, you can only choose the primary RADIUS server. For more information, go to Configure RADIUS Authentication for a Firebox.
- EAP Authentication Timeout — If you select the WPA2 Enterprise or WPA3 Enterprise security mode, you can change the timeout value for a wireless client authentication session after which the client reauthenticates to the RADIUS server. The default is 3600 seconds. To disable reauthentication, set the timeout to 0.
- To save the wireless settings, click Add.
- To save configuration changes to the cloud, click Save.
The networks page shows the internal network with wireless enabled.
Enable Guest Wireless on a Firebox Network
You can enable a guest wireless network on your Firebox. This guest network has limited policies that only allow outbound access to the external networks (such as the Internet), and prevents access to other internal trusted wired or wireless networks.
To add a guest wireless network, from WatchGuard Cloud:
- Select your wireless, cloud-managed Firebox from the Device Manager list.
- Select Device Configuration.
- In the Networking section of the Device Configuration page for your Firebox, select Networks.
- Click Add Network.
- Select Add Guest Network from the drop-down list.
The Add Guest Network page opens.
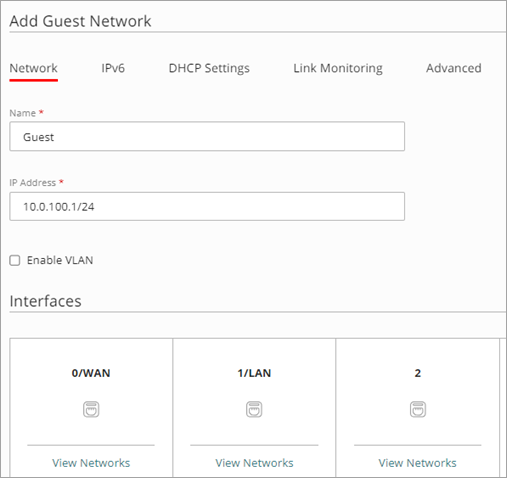
- Configure the guest network settings:
- Name — Type a name for the guest network.
- IP Address — Type an IP address for the guest network. You can configure DHCP settings for this network on the DHCP Settings tab.
- Enable VLAN — To enable a VLAN for this network, select the Enable VLAN check box, and select a VLAN ID. For more information about VLANs, go to Configure Firebox VLANs.
- Interfaces — You can optionally associate a physical Firebox network interface with this guest network. If you only want to provide Internet access for guest wireless users, you do not have to assign a physical network interface. Assign a physical interface if you want to enable guest access to the resources on the network you select.
- In the Wireless section of the network configuration, click Add SSID.
The Add SSID page opens.
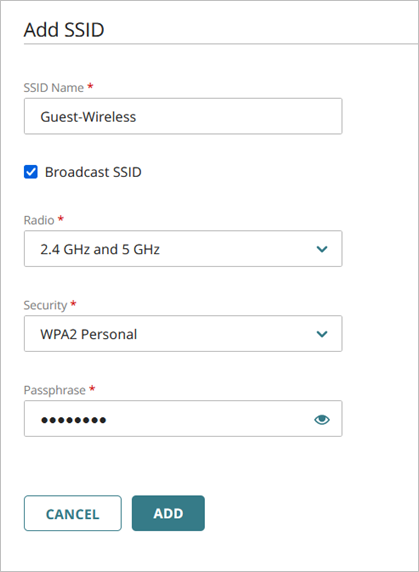
- Configure the guest wireless settings.
- SSID Name — Type a unique SSID name to identify your guest wireless network.
- Broadcast SSID — To configure the wireless interface to send and answer SSID requests, select the Broadcast SSID check box. This enables your wireless clients to view the wireless network name when they search for a network. To improve security, you can disable this option to hide your network name. However, most wireless network scanners are able to detect the network name even if it is not broadcast.
- Radio — Select the radio that will broadcast this SSID. You can select the 2.4 GHz radio, the 5 GHz radio, or both.
- Security — From the Security drop-down list, select the security setting to enable for connections to this wireless interface.
- Click Add.
- To save configuration changes to the cloud, click Save.
The networks page shows the new guest network with wireless enabled.