Applies To: Cloud-managed Fireboxes, Locally-managed Fireboxes
To manage a Firebox configuration from WatchGuard Cloud, you must add the Firebox to WatchGuard Cloud as a cloud-managed device. You can manage a cloud-managed Firebox from WatchGuard Cloud only.
For best practices on how to change your locally-managed Firebox to cloud management, go to the Firebox Migration to Cloud Management Guide.
Caution: When you add a cloud-managed Firebox, you create a new configuration in WatchGuard Cloud. You cannot migrate an existing locally-managed device configuration to WatchGuard Cloud. For information about how to change an existing Firebox from local management to cloud management, go to Change a Locally-Managed Firebox to Cloud Management. When you add a device to WatchGuard Cloud, you can copy configuration settings from another cloud-managed Firebox in the same account. After you add the device to WatchGuard Cloud, you can also import settings from a Firebox configuration file.
Caution: Do not use a factory reset as a general troubleshooting step for a cloud-managed Firebox. It rarely resolves issues and breaks the WatchGuard Cloud management connection. After a reset, the device cannot reconnect because of a WatchGuard Cloud key mismatch. Recovery might require you to remove and re-add the device to WatchGuard Cloud, which can result in the loss of configuration and logs.
Before You Begin
Before you add a Firebox to WatchGuard Cloud, make sure that:
- You have activated the Firebox in your WatchGuard account.
- The Firebox has a valid Standard Support license (Fireware v12.9 or higher) or a current Total Security or Basic Security Suite subscription.
- The Firebox is allocated to a Subscriber account (Service Providers only). For more information, go to Allocate Fireboxes.
- The Firebox is connected to the network and has reliable Internet access.
Your operator role determines what you can see and do in WatchGuard Cloud. Your role must have the Devices permissions to view or configure this feature. For more information, go to Manage WatchGuard Cloud Operators and Roles.
To add a Firebox as a cloud-managed device, it must meet these requirements:
For a Firebox to successfully connect to WatchGuard Cloud as a cloud-managed device, it must run Fireware v12.5.7 or higher.
The Fireware version your new Firebox was manufactured with is printed on a sticker on the Firebox packaging. The version of Fireware originally manufactured on the device also appears in the Device Information section of the Product Details page in the WatchGuard website.
If your Firebox uses a lower version of Fireware, you must first set up the Firebox as a locally-managed device and upgrade it to Fireware to v12.5.7 or higher before you can add it as a cloud-managed device. The device will auto-upgrade to the latest firmware version for that device. For information about Fireware upgrade methods, go to Firebox Upgrade, Downgrade, and Migration.
If you previously configured the Firebox as a locally-managed device, you must reset it to factory-default settings before it can connect to WatchGuard Cloud as a cloud-managed device. For the steps to reset your Firebox, go to Reset a Firebox.
Add a Cloud-Managed Firebox to WatchGuard Cloud
When you add a Firebox to WatchGuard Cloud as a cloud-managed device, you configure the device name, time zone, external network settings, wireless, and device passwords. Other device settings are automatically configured with secure defaults.
To add a Firebox to WatchGuard Cloud as a cloud-managed device:
- Log in to your WatchGuard Cloud account.
- For Service Provider accounts, from Account Manager, select My Account.
- Select Monitor > Devices or Configure > Devices.
- Click Add Device.
A list of activated Fireboxes opens.
If the device is activated but does not show, make sure the Firebox is allocated to a Subscriber account if you are a Service Provider. For more information, go to Allocate Fireboxes.
- Click the Name of the Firebox you want to add or click
 then select Add Device.
A confirmation dialog box opens.
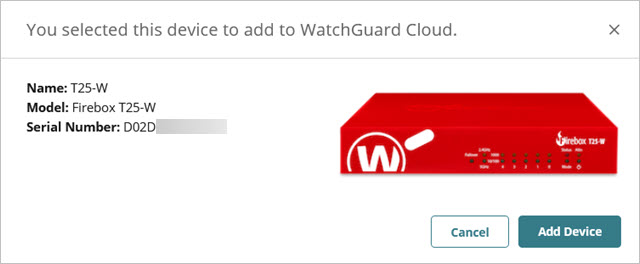
- Click Add Device.
The Add Device to WatchGuard Cloud page opens.
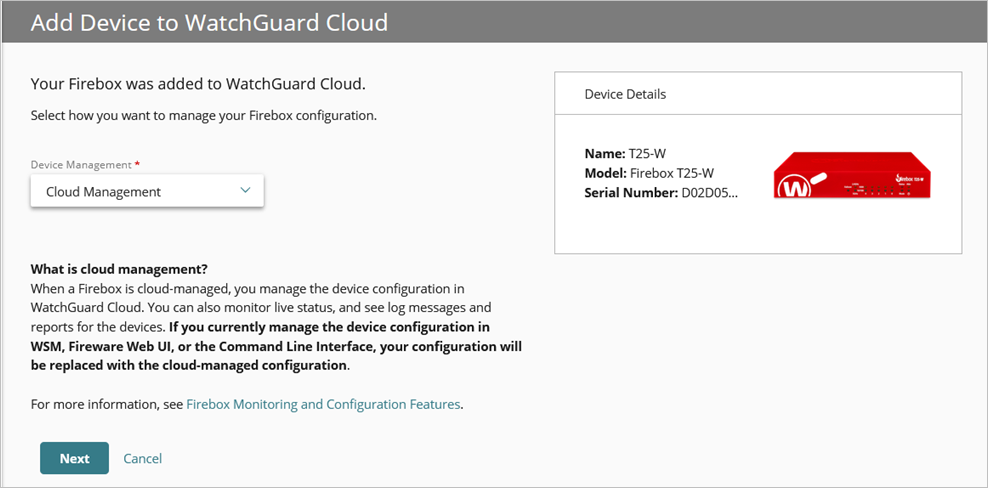
- Select Cloud Management, then click Next.
- You can Create a new configuration, or you can Copy a configuration from another cloud-managed Firebox.
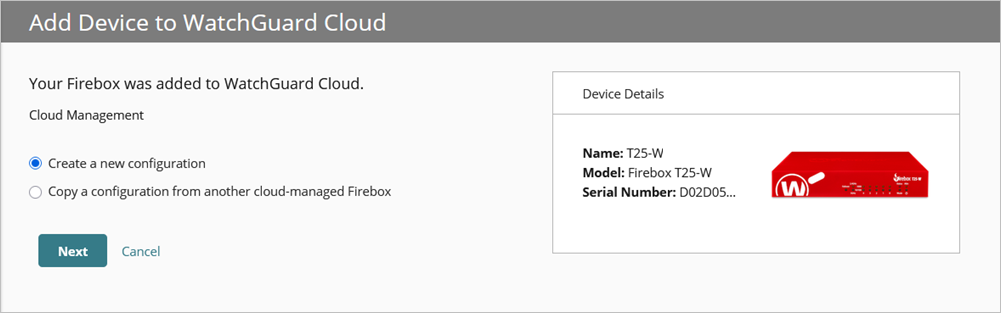
If you copy configuration settings from another cloud-managed Firebox, you must select the Firebox you want to copy from. The Firebox must be in the same account.

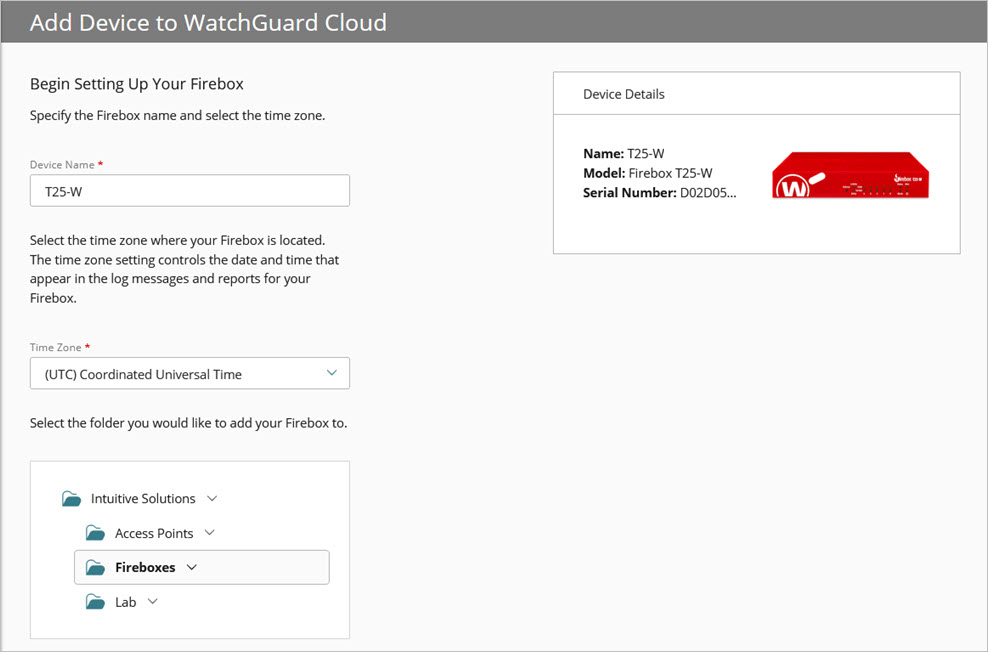
- Configure Firebox system settings:
- Name — The name to identify the Firebox in WatchGuard Cloud
- Time Zone — The time zone of the location where the Firebox is installed.
- Device Folder — Select the folder that you want to add your device to. Device Folders help you to view status and summarized data for groups of devices.
If you only have one root folder, the folder list does not appear.
- Select the Connection Type for the Firebox external interface. Select and configure one of these options:
DHCP
Select this option to configure the Firebox to use DHCP to request an IP address on the external network.
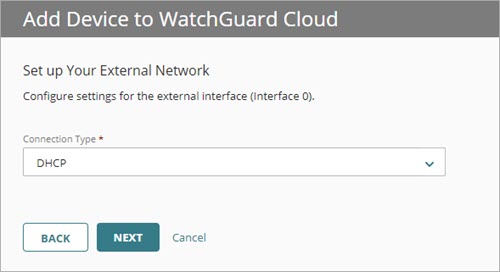
If you select DHCP, there are no other network settings to configure.
Static IP
Select this option to configure the Firebox to use a static IP address on the external network.
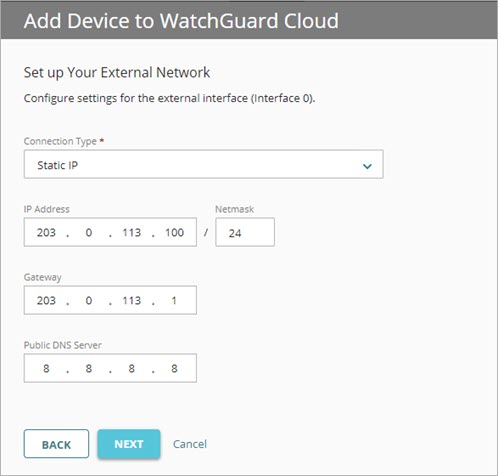
If you select Static IP, configure the Firebox external network IP address and netmask, a network gateway on the same subnet, and the IP address for a public DNS server.
PPPoE
Select this option to configure the Firebox to use PPPoE to get an IP address on the external network.
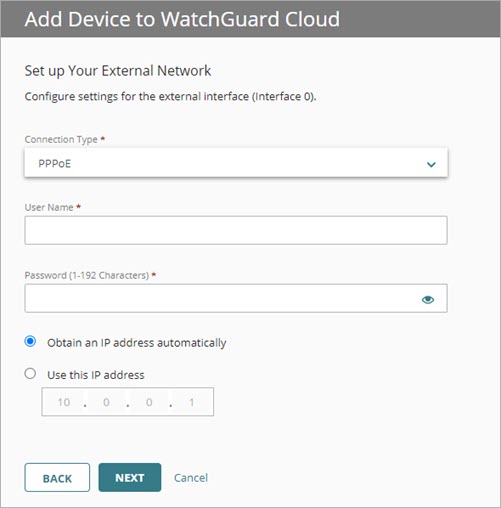
If you select PPPoE, configure the user name and password, and select whether to obtain an IP address automatically or to configure a specific IP address.
4G LTE or 5G Modem
If you have a Firebox with a 4G LTE interface module or integrated 5G modem, you can enable the cellular connection.
To establish a connection for a cellular modem, some wireless service providers require an Access Point Name (APN). To determine the requirements to configure your cellular modem, verify with your provider if an Access Point Name (APN) is required to connect.
- For a wireless Firebox, you can enable wireless on the internal and guest networks.
- Enable Wireless — Enable this option to configure an SSID and passphrase for wireless connections to the internal network.
- Enable Guest Wireless — Enable this option to configure an SSID and passphrase for wireless connections to the guest network.

- Set Firebox device passwords for connections to Fireware Web UI on the Firebox. Device passwords must be 8-32 characters long, and must contain upper and lowercase letters, at least one number, and at least one symbol.
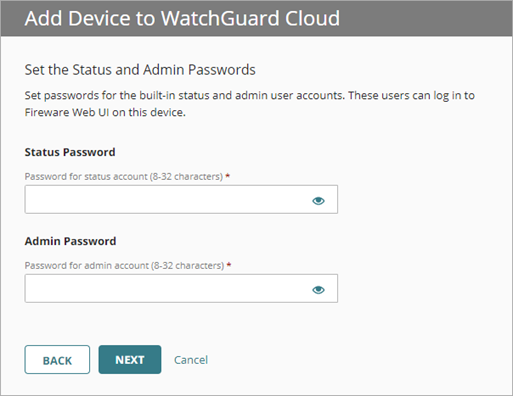
Caution: We recommend you specify unique passphrases for each Firebox you manage and change them frequently.
For a cloud-managed Firebox, you can use Fireware Web UI to recover the Firebox connection to WatchGuard Cloud. You cannot use Fireware Web UI to modify the Firebox configuration.
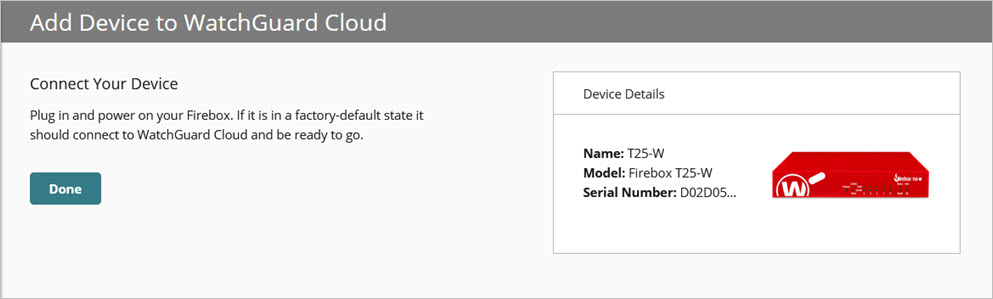
- On the last page of the Add Device wizard, review the steps to connect the Firebox.
If the Firebox is in a factory-default state and you created a new configuration, the Firebox connects to WatchGuard Cloud and the new configuration deploys to it.
When you copy a configuration from an existing Firebox, review the additional steps you might need to complete before you deploy your configuration. WatchGuard Cloud holds the configuration update until you deploy it to Firebox.

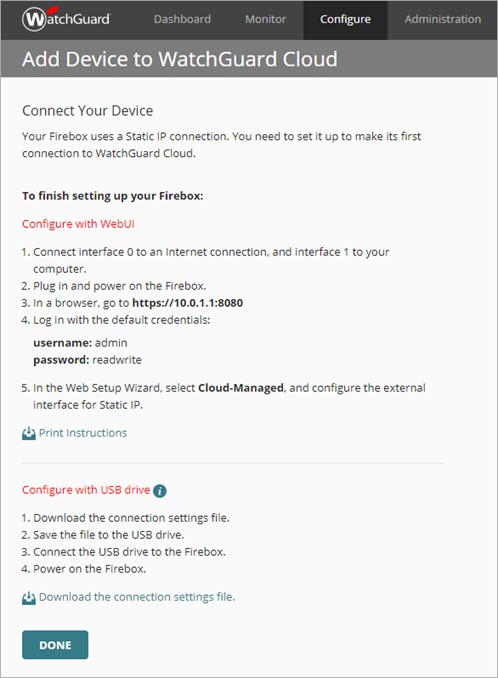
If the Connection Type is Static IP or PPPoE, you must complete additional steps to configure the Firebox to connect.
- To print the entire page of instructions, click Print instructions.
- To download the connection settings, click Download the connection settings file. The following are required for correct downloads:
- The USB drive must be formatted with the FAT, VFAT, or FAT32 file system and must be writable.
- The file must be saved as the CSV (Comma Delimited) (*.csv) file type.
For more information, go to Use a USB Drive to Configure Interface Settings.
After you add a cloud-managed Firebox, the device configuration is immediately deployed and available for the Firebox to download.
If you re-add a Firebox that you removed from WatchGuard Cloud, and if the current configuration does not include a BOVPN, you can revert to a previous configuration version that includes a BOVPN. The BOVPN tunnel rejoins if you did not remove the BOVPN configuration on the peer endpoint Firebox. If you made any deployments on the peer endpoint Firebox after you removed the other Firebox, but before you re-added the other Firebox, you must schedule a deployment on the peer endpoint Firebox if you receive a message about undeployed BOVPN changes.
The availability of previous configuration versions depends on your data retention settings. For information about data retention, go to About Data Retention and Data Deletion.
If the configuration was not successfully deployed, a default name for the new device displays in the WatchGuard Cloud list of devices.
Firebox Default Configuration Settings
The initial configuration for a cloud-managed Firebox includes these settings:
Networks:
- External (Interface 0) — IP address settings you configured
- Internal (all other interfaces, bridged) — IP address 10.0.1.1/24
- Guest (wireless, if supported and enabled) — IP address 10.0.1.2/24
Policies:
- Outgoing — Allows outbound TCP, UDP, and Ping connections from the internal network to the external networks
- Guest — Allows outbound TCP, UDP, and Ping connections from guest networks
Security Services:
- Security Services are enabled in the default policies
After you add the cloud-managed Firebox, you can edit the configuration and deploy the updates for the Firebox to download.
Connect the Firebox
Connect the Firebox to a network with reliable Internet access. The steps to set up and connect the Firebox depend on how the Firebox gets an IP address for the external interface.
To connect a Firebox that can use DHCP to get an IP address:
- Connect interface 0 to the network.
- Start the Firebox with factory-default settings.
The Firebox automatically tries to connect to WatchGuard Cloud to download its configuration.
For steps to reset the Firebox to factory-default settings, see Reset a Firebox.
If your Firebox cannot get an address through DHCP, you can use the Web Setup Wizard to configure connection settings, or you can use the connection settings file.
To use the Web Setup Wizard:
- Connect Firebox interface 0 to a network with Internet access.
- Start the Firebox with factory-default settings.
- Connect Firebox interface 1 to your computer.
- Open a web browser and go to https://10.0.1.1:8080.
- Log in with the user name admin and the passphrase readwrite.
- Select Cloud-Managed as the configuration method.
- Configure external network settings required for the Firebox to connect to your network.
The Firebox uses these settings to connect to the local network, and then connects to WatchGuard Cloud to download its configuration.
For information about how to use the connection settings file to set up your Firebox, see Use a USB Drive to Configure Interface Settings.
Automatic Firmware Upgrade
The minimum version of Fireware required for WatchGuard Cloud to deploy a configuration might be higher than the version currently installed on the Firebox. The minimum firmware version required for cloud management is v12.5.7 (M series) or v12.6.4 (T series).
The first time the Firebox connects, WatchGuard Cloud determines if your Firebox requires an upgrade before it can download the configuration. If an upgrade is required (for example, v12.5.4 to v12.5.6 or v12.6.1 to v12.6.3), WatchGuard Cloud automatically upgrades the Firebox to the latest Fireware version for cloud-management. After the upgrade is complete, the Firebox connects to WatchGuard Cloud to download its configuration.
Verify the Firebox Status
After you connect the Firebox, verify the Firebox connection status and other summary information on the Device Summary page and Live Status pages.
For more information, go to:
About the WatchGuard Cloud User Interface
Recover the Firebox Connection to WatchGuard Cloud
Add FireboxV to WatchGuard Cloud (Cloud-Managed)
Add Firebox Cloud to WatchGuard Cloud (Cloud-Managed)
(Video) Cloud-Managed Firebox: Configuration Overview