Applies To: Cloud-managed Fireboxes
For a cloud-managed Firebox, internal and guest networks are both private networks protected by the Firebox. These network types enable you to configure separate networks for trusted users and guest users, with different firewall policies applied by default for traffic for each network.
Internal — For network connections from trusted users or hosts
- Network zone: Internal
- A member of the built-in alias Any-Internal
- The default Outbound firewall policy applies to traffic for this network
Guest — For network connections from guest users
- Network zone: Guest
- Not a member of any alias
- The default Guest firewall policy allows outbound traffic from Guest networks
The network configuration settings for Internal and Guest networks are the same.
Edit or Add an Internal or Guest Network
To open the Networks configuration, from WatchGuard Cloud:
- Select Configure > Devices.
- Select the cloud-managed Firebox.
- Click Device Configuration.
- Click the Networks tile.
The Networks configuration page opens.
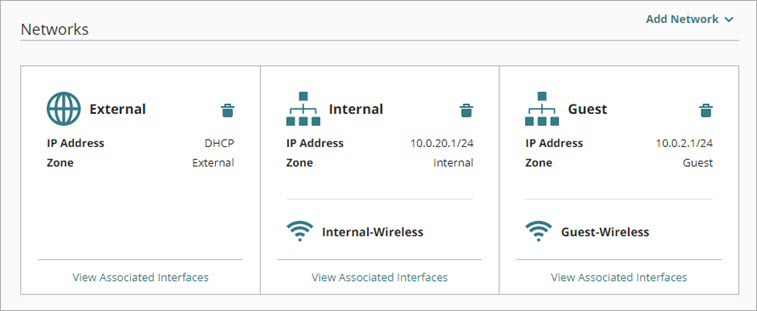
To edit an internal or guest network, from WatchGuard Cloud:
- On the Networks page, click the tile of the network to edit.
The network configuration page opens. - Configure the network settings.
- To save configuration changes to the cloud, click Save.
To add an internal or guest network, from WatchGuard Cloud:
- At the top of the Networks page, click Add Network.
- From the drop-down list, select the network type:
- To add an Internal network. select Add Internal Network.
- To add a Guest network, select Add Guest Network.
The Add Internal Network or Add Guest Network page appears.
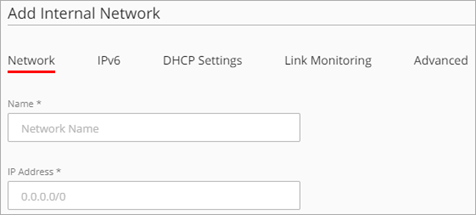
- In the Name text box, type a name for the network.
- Configure the network settings, as described in the next section.
- To save configuration changes to the cloud, click Save.
Configure Network IPv4 Address Settings
In the Network tab, you can configure the network IP address, VLAN settings, and associated interfaces. For a wireless Firebox, you can also add a wireless SSID.
Configure Network IP Address Settings
For an Internal or Guest network, the network IP address is the host IP address you want to assign to the Firebox, and a netmask in slash notation. For more information about slash notation, see About Slash Notation.
To configure network IP address settings for an Internal or Guest network, from WatchGuard Cloud:
- Add or edit an Internal or Guest network.

- In the IP Address text box, type the IP address and netmask to use for this network.
To configure the Firebox to assign IP addresses to network clients, enable the DHCP Server on the DHCP Settings tab. For more information, see Configure Firebox Network DHCP Settings.
Configure VLAN Settings
You can configure any Firebox network as a virtual local area network (VLAN). When you enable VLAN for an internal network, all interfaces associated with the network are configured to handle untagged VLAN traffic by default. You can edit each interface to change whether it handles tagged or untagged VLAN traffic for this network.
For more information, see Configure Firebox VLANs.
Configure Network Interfaces
For each network, you select which Firebox interfaces are associated with the network. If you associate more than one interface to a network, network traffic is bridged between all associated interfaces.
When you add an Internal network, the lowest numbered available interface is automatically associated with the network.
Additional interfaces will appear for Fireboxes that support network interface expansion modules, even if the module is not currently installed. To avoid potential issues, do not configure these additional interfaces for a cloud-managed Firebox unless the Firebox has a module installed.
In the settings for a network, the Interfaces section shows which interfaces are currently associated with the network, and which are available.
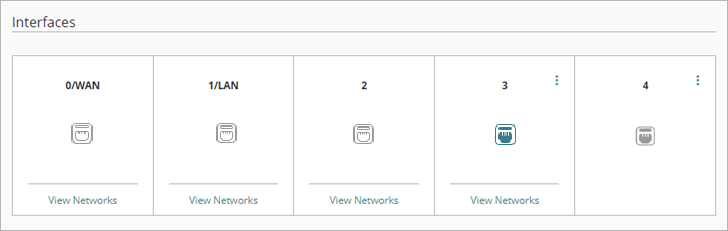
The interface icon color indicates interface status in relation to this network.
|
|
Interface is associated with another network |
|
|
Interface is associated with this network |
|
|
Interface is available to associate with this network |
To see associated networks for an interface, point to View Networks for the interface.
By default, all interfaces are associated with a network. Before you can associate an interface with a different network, you must remove that interface from the network it was previously associated with.
If you associate more than one interface with a network, network traffic is bridged between all associated interfaces.
To configure the interface settings for a network, from WatchGuard Cloud:
- In the tile for an associated or available interface, click
 .
.
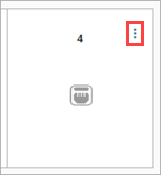
- Select one of these options:
- No Traffic — Remove the interface from this network.
- Add Network Traffic — Add the interface as the first interface associated with this network.
- Bridged Network Traffic — Add this interface to a network that already has another associated interface or SSID.
For a VLAN, the interface options are Untagged VLAN or Tagged VLAN. For more information, see Configure Firebox VLANs.
Enable Wireless
For a wireless Firebox, you can enable wireless access to up to three Internal or Guest networks. The wireless SSID is bridged to any other interfaces enabled for the network.
SSIDs on all networks share the same wireless radio settings. To configure wireless radio settings, go to the main Networks configuration page. For more information, see Configure Wireless Radio Settings.
For more information on how to configure Firebox wireless networks, see Configure Firebox Wireless Networks.
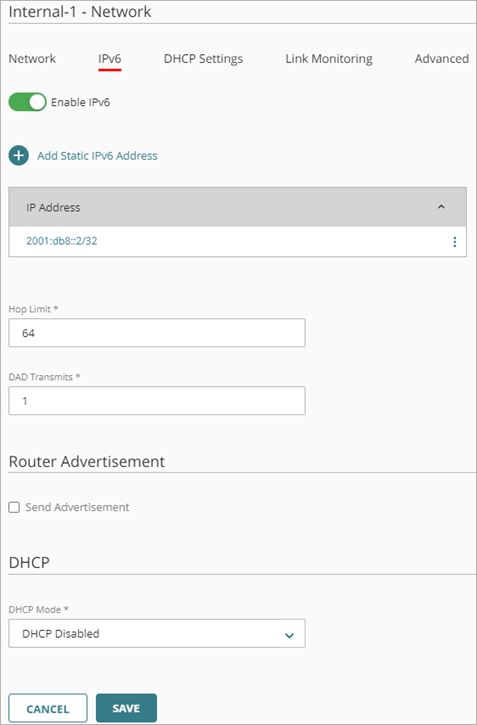
Configure IPv6
On the IPv6 tab, you can enable IPv6 for the network and add one or more static IPv6 addresses to the configuration. You can also configure router advertisement of the IP address prefix.
For information about IPv6 addresses, see About IPv6.
To enable IPv6, from WatchGuard Cloud:
- Select the IPv6 tab.
- Select Enable IPv6.
- Click Add Static IPv6 Address.
The Add Static IPv6 Address dialog box opens. - In the IP Address text box, type an IPv6 address and prefix.
- Click Add.
- To add more IPv6 addresses, repeat Steps 3–5.
- To edit an IPv6 address, click it.
- Enter the Hop Limit, which is the number of network segments a packet can travel over before a router discards the packet. The default value is 64.
- Enter the DAD Transmits, which is the number of Duplication Address Detection transmits for this link. The default value is 1.
- (Optional) To send configured IP address prefixes in router advertisements on the local network, in the Router Advertisement section, select Send Advertisement. Router Advertisement is used for IPv6 neighbor discovery and IPv6 address autoconfiguration.
- (Optional) To indicate host addresses are available through DHCPv6, select M Flag. This is the Managed Address Configuration flag. If you select M Flag, O Flag is ignored because DHCPv6 returns all available configuration information.
- (Optional) To indicate that other configuration information is available through DHCPv6, such as a DNS-related information, select O Flag. This is the Other Configuration flag.
- Enter the Default Lifetime, which is the lifetime associated with the default router. The default value is 30 minutes.
- Enter the Maximum Interval, which is the maximum time allowed between unsolicited multicast router advertisements sent from the interface. The default value is 10 minutes.
- Enter the Minimum Interval, which is the minimum time allowed between unsolicited multicast router advertisements sent from the interface. The default value is 200 seconds.
- (Optional) To add the prefix for this IP address to the Prefix Advertisement list, click Add Prefix Advertisement.
- Enter an IPv6 Prefix. The prefix must be a network IP address in the format x:x::/xx.
- Enter the Valid Lifetime. The default value is 30 days.
- Enter the Preferred Lifetime. The default value is 7 days.
- (Optional) Select Autonomous. If enabled, a host can use this prefix for stateless autoconfiguration of the link-local address. This option is selected by default.
- (Optional) Select Onlink. If enabled, a host can use this prefix to determine whether a destination is onlink as opposed to reachable only through a router. This option is selected by default.
- Click Add.
- (Optional) To enable the Firebox to function as a DHCPv6 server, from the DHCP Mode drop-down list, select DHCP server. The default option is DHCP Disabled.
Configure a DNS Server for DHCPv6
A DNS server resolves DNS requests from the network. When you configure the Firebox as a DHCP server, DHCP clients use the IP address of the Firebox as the DNS server by default. If you want DHCP clients to use a different DNS server, you can add DNS servers to the configuration.
In the DNS Servers section of the DHCP settings, you can select one of these options:
Use Firebox IP Address
Use the IP address of the Firebox as the DNS server.
Specify DNS Servers
Specify a new DNS server for DHCP.
For redundancy, you can configure up to three DNS servers. The Firebox uses the DNS servers in the order they show in the list, and sends DNS requests to the first server in the list. If a DNS server does not respond, the Firebox uses the next DNS server in the list.
To specify a DNS server for DHCP, from WatchGuard Cloud:
- From the DHCP Mode drop-down list, select DHCP server.
- From the DNS Servers tab, in the DNS Servers section, click Specify DNS Servers.
The Add DNS Servers option appears.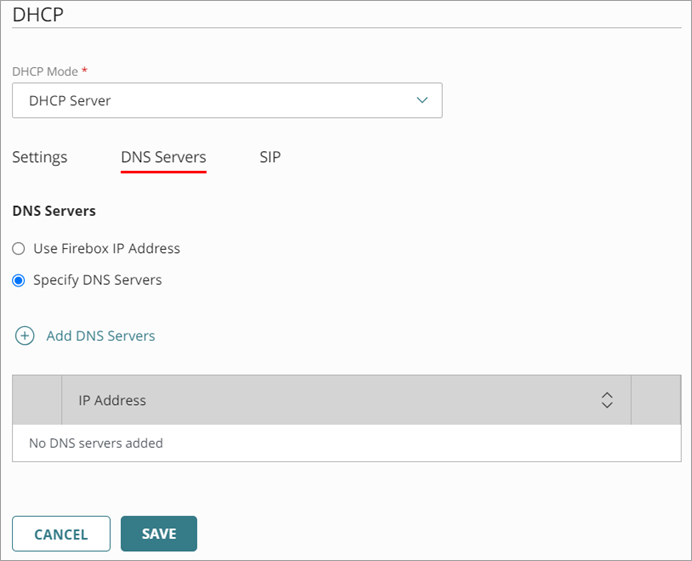
- Click Add DNS Servers.
The Add DNS Server dialog box appears.
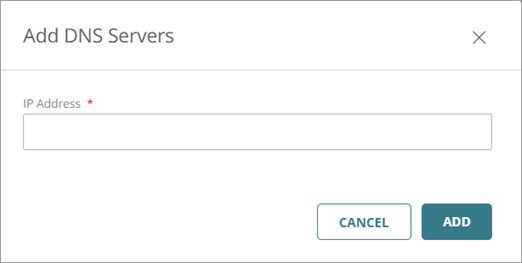
- Type the IPv6 address of the DNS server in the IP Address text box. Click Add.
The DNS server is added to the DNS Servers list.
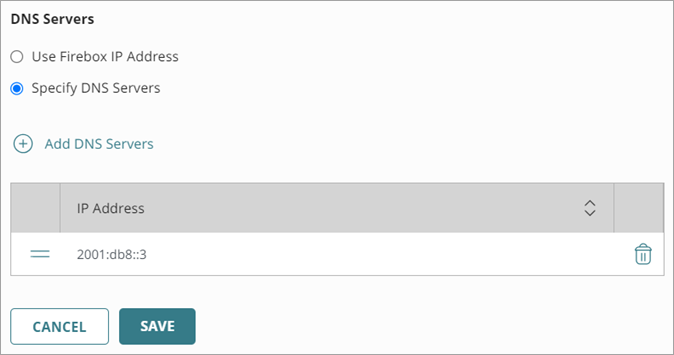
- To add any additional DNS servers, click Add DNS Servers.
You can add up to three DNS server. - (Optional) To change the order of the DNS servers:
- In the DNS Servers list, click the move handle
 for the server you want to move.
 - Drag the DNS server up or down in the list.
- In the DNS Servers list, click the move handle
- To save configuration changes to the cloud, click Save.
To delete a DNS server, from WatchGuard Cloud:
- In the row for the DNS server, click
 .
. - To save configuration changes to the cloud, click Save.
Configure DHCP Settings
On the DHCP Settings tab you configure DHCPv4 settings for the internal or guest network. In the DHCP settings, you can configure the Firebox to assign IPv4 address to clients on the network, forward DHCP requests to a DHCP server, or configure a DNS server for DHCP.
For more information about DHCPv4, see Configure Firebox Network DHCP Settings.
For information about DHCPv6, see the Configure IPv6 section on this page.
Configure Link Monitoring
On the Link Monitoring tab, you can enable link monitoring. When link monitoring is enabled, the Firebox sends traffic to a link monitor target to test network connectivity.
For more information, see Configure Firebox Network Link Monitoring.
Configure Advanced Settings
On the Advanced tab you can configure these network settings:
- Web UI Access
- Ping
- MAC Access Control
- Intra-Network Traffic
- Secondary Networks
For more information, see Configure Advanced Network Settings.
Configure Link Aggregation
A link aggregation group (LAG) is a group of physical interfaces that you configure to work together as a single, logical interface. You can use a LAG interface to increase the cumulative throughput beyond the capacity of a single physical interface and to provide redundancy if there is a physical link failure. For more information, go to About Link Aggregation in WatchGuard Cloud.
To add a LAG to an existing or new Internal or Guest network:
- Add or edit an Internal or Guest network as described in Edit or Add an Internal or Guest Network.
- In the Interfaces section, you can remove the network interface currently associated with the network from the configuration to make this interface available for link aggregation. Set the interface to No Traffic to remove the interface from the network.
When you remove the only interface selected for a network, a warning message "You need at least one interface associated to this network." appears. You can continue to add a LAG and your selected LAG interfaces to the network in the next steps.
- From the Link Aggregation Groups (LAG) section in the network configuration, click Add LAG.
- In the Name text box, type a name for the LAG configuration. You can use this name in Firebox policies as you would any other interface name.
- From the Mode drop-down list, select the link aggregation mode to use. You can select Static, Dynamic (802.3ad), or Active-backup. For information about link aggregation modes, go to the Link Aggregation Modes section of About Link Aggregation in WatchGuard Cloud.
- Click Next.
The select interfaces page opens. - Select the interfaces you want to add to the LAG for this network.
The list of interfaces contains only interfaces that are available and not used by another network.
- Click Done.
The LAG configuration appears in the Link Aggregation Groups (LAG) section for the network.
For more information, go to Configure Link Aggregation in WatchGuard Cloud.