Applies To: Cloud-managed Fireboxes, Locally-managed Fireboxes
This document applies to Fireboxes you manage in WatchGuard Cloud. For information that applies to Fireboxes managed in Fireware Web UI or WatchGuard System Manager, go to:
For a cloud-managed Firebox, you can configure these advanced network settings:
Web UI Access
The Allow Connections to Fireware Web UI from This Network setting controls whether the Firebox accepts connections to the local Web UI from users connected to this network. Web UI Access is enabled on internal networks by default. It is disabled by default on external and guest networks.
We recommend that you do not enable Web UI Access on an external network because this adds the network to the Source list of the WatchGuard Web UI system policy and allows connections to Fireware Web UI from any IP address on the network. To connect to Fireware Web UI from a remote location, we recommend that you add a new policy to allow administrative connections from your specific location. For more information, go to Connect to the Local Fireware Web UI from a Remote Location.
Ping
The Allow the Firebox to Respond to Pings from This Network setting controls whether the Firebox responds to ping requests that originate from this network. Ping is enabled on all networks by default.
Intra-Network Traffic
The Apply Firewall Policies to Intra-Network Traffic setting controls whether the Firebox inspects and applies firewall policies to intra-network traffic that enters and exits the same network. This setting is enabled on external networks by default. It is disabled by default on internal and guest networks.
You can enable or disable intra-network traffic inspection on stand-alone, bridge, and VLAN networks.
When you enable this setting, the Firebox:
- Applies firewall policies to the network traffic of the specified network.
- Applies firewall policies to network traffic that passes between bridge member interfaces, which is known as intra-bridge traffic.
- Applies firewall policies to VLAN network traffic between internal networks, specifically traffic from a VLAN that is destined for the same VLAN.
Spanning Tree Protocol
Administrators who deploy high‑availability networks often add redundant links between switches to prevent downtime. Incorrect configurations can create network loops that interrupt traffic. To prevent loops, enable Spanning Tree Protocol (STP), which identifies redundant paths and keeps a single active forwarding path.
You can enable STP for a VLAN or bridged network.
STP supports these VLAN designs:
- Single tagged VLAN between Fireboxes
- Single untagged VLAN between Fireboxes
- Single untagged VLAN between a Firebox and a third‑party switch
- Multiple tagged or untagged VLANs between Fireboxes
STP does not support these VLAN designs:
- Multiple tagged or untagged VLANs between a Firebox and a third‑party switch
- A single tagged VLAN between a Firebox and a third‑party switch
FireCluster does not support Spanning Tree Protocol.
MAC Access Control
MAC Access Control is supported only on networks with one standalone interface. It is not supported for networks with wireless, bridged interfaces, or VLAN enabled.
You can configure MAC access settings to configure the Firebox to restrict traffic from an internal or guest network by MAC address. When you enable this feature, your Firebox checks the MAC address of each computer or device that connects to the network. If the MAC address of that device is not on the MAC Access Control list for that network, the device cannot send traffic through the Firebox.
For more information, go to Restrict Network Traffic by MAC Address.
Secondary Networks
You can add secondary networks to any external, internal, or guest network. When you add a secondary network, you create a specific IP address on which the Firebox listens for requests. The Firebox is also part of the specified subnet on that IP address.
For more information, go to Add a Secondary Network.
To configure advanced settings for a Firebox network, from WatchGuard Cloud:
- Select Configure > Devices.
- Select the cloud-managed Firebox.
- Click Device Configuration.
- Click the Networks tile.
The Networks configuration page opens. - Click the tile for the network to edit.
- In the network settings, select the Advanced tab.
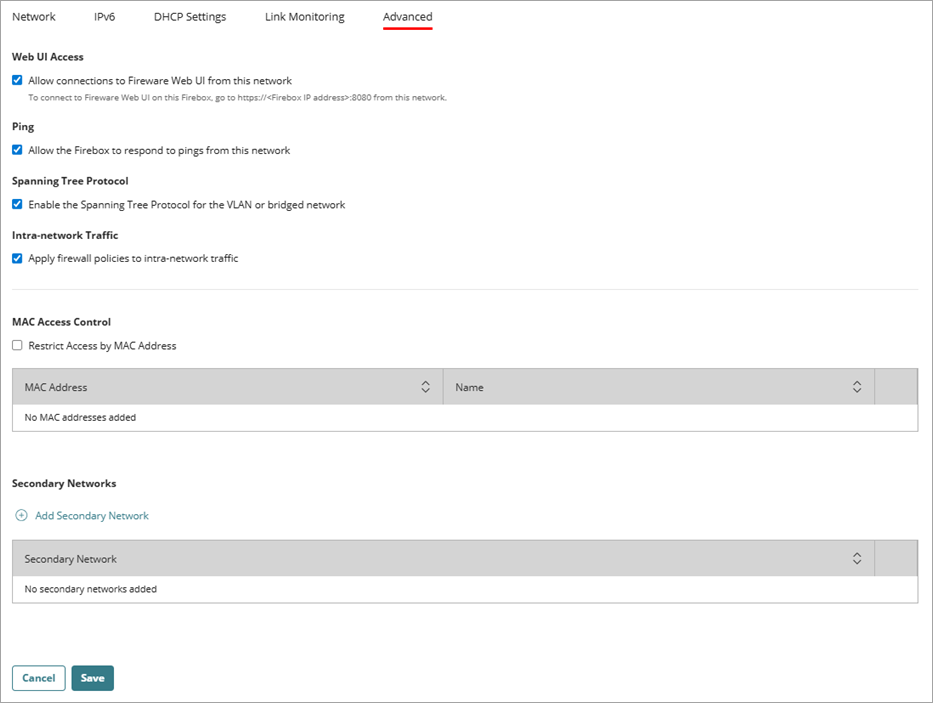
- To allow connections to the Firebox Web UI from this network, select the Allow Connections to Fireware Web UI from This Network check box.We recommend that you do not select this check box for external networks.
- To allow the Firebox to respond to pings from this network, select the Allow the Firebox to Respond to Pings from This Network check box.
- To apply firewall policies to intra-network traffic, select the Apply Firewall Policies to Intra-Network Traffic check box.
- To enable STP, select the Enable the Spanning Tree Protocol for the VLAN or Bridged Network check box.
- To enable MAC access control on a standalone network:
- Select the Restrict Access by MAC Address check box.
- Add the MAC addresses allowed to connect to this network.
- To configure a secondary network:
- Click Add Secondary Network.
- Type the secondary network IP address.
- To save configuration changes to the cloud, click Save.