Bitwarden Integration with AuthPoint
Deployment Overview
This document describes how to set up multi-factor authentication (MFA) for Bitwarden with AuthPoint, and configure SAML authentication with AuthPoint as an identity provider.
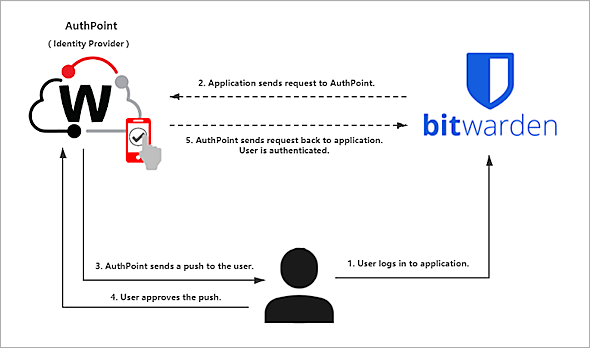
Bitwarden Authentication Data Flow with AuthPoint
AuthPoint communicates with various cloud-based services and service providers with the SAML protocol. This diagram shows the data flow of an MFA transaction for Bitwarden.
Before You Begin
Before you begin these procedures, make sure that:
- A user can log in to the Bitwarden portal and the user has permission to configure Single Sign-On
- You have an AuthPoint identity provider (IdP) certificate (go to Certificate Management)
- An AuthPoint user has been created with the activated token in WatchGuard Cloud (the AuthPoint and Bitwarden user accounts must have the same email address)
Configure Bitwarden
To start, you must download the metadata file from the Certificate Management page in the AuthPoint management UI. After you have that, you can configure Bitwarden.
- Log in to WatchGuard Cloud.
- From the navigation menu, select Configure > AuthPoint. If you have a Service Provider account, you must select an account from Account Manager.
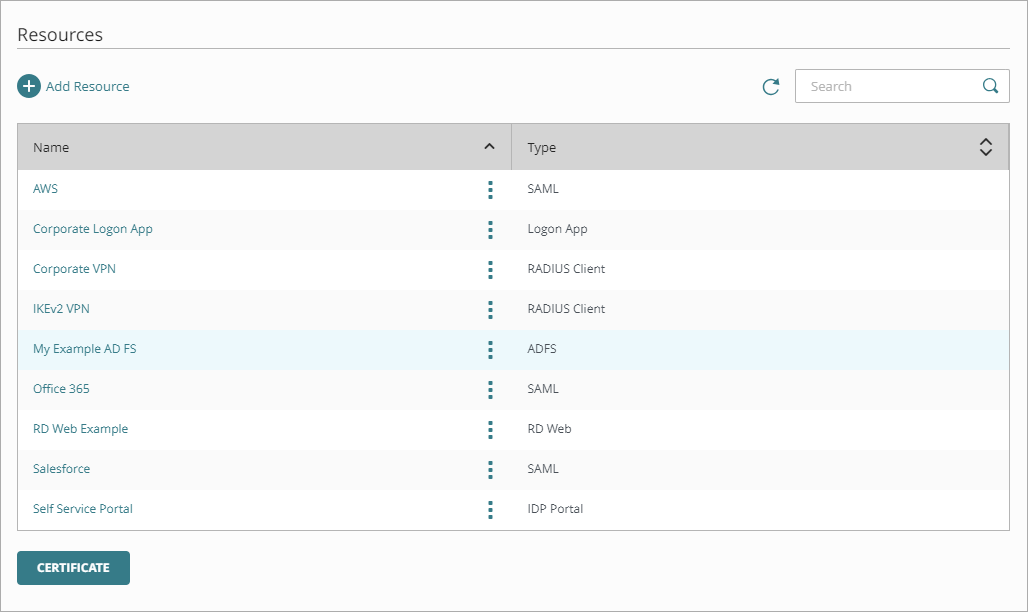
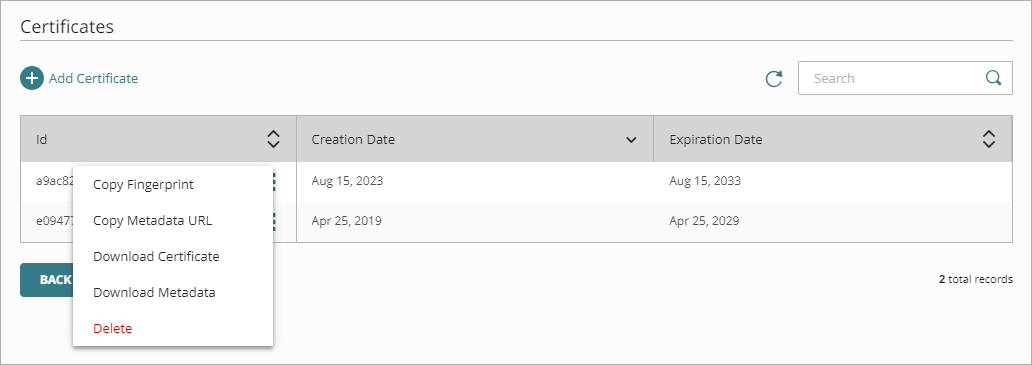
- Select Resources.
- Click Certificate.
- Next to the AuthPoint certificate you will associate with your resource, click
 and select Download Metadata and Download Certificate. We recommend that you choose the certificate with the latest expiration date. If you do not have a certificate, or if all of your certificates have expired, click Add Certificate and use the newly created certificate.
The AuthPoint metadata provides your resource, in this case Bitwarden, with information necessary to identify AuthPoint as a trusted identity provider.
- Log in to your Bitwarden web vault.
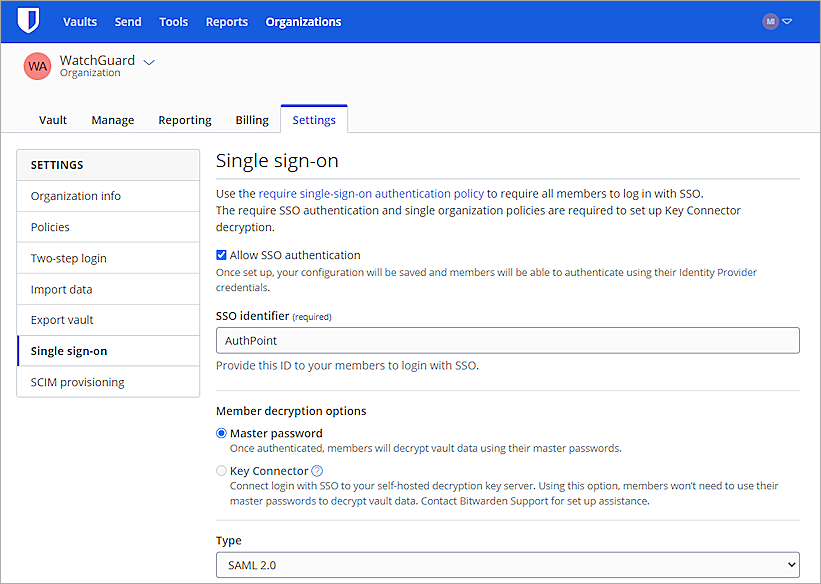
- Select Organizations > Settings > Single sign-On.
- Select the Allow SSO authentication check box.
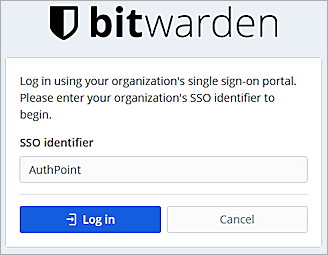
- In the SSO identifier text box, type a unique identifier name. In this example, we type AuthPoint.
- From the Type drop-down list, select SAML 2.0.
- In the SAML service provider configuration section, copy the SP entity ID and Assertion consumer service(ACS) URL values. These values will be used when configuring AuthPoint.
- From the Name ID format drop-down list, select Email Address.
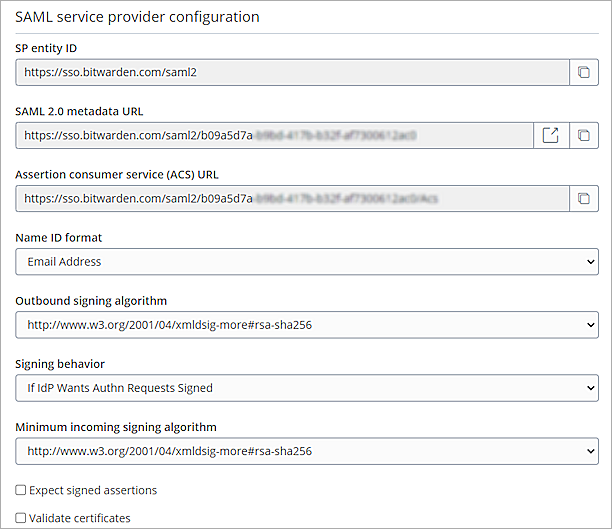
- Scroll down and find the SAML identity provider configuration section, and from the Binding Type drop-down list, select one of the methods. In this example, we select Redirect.
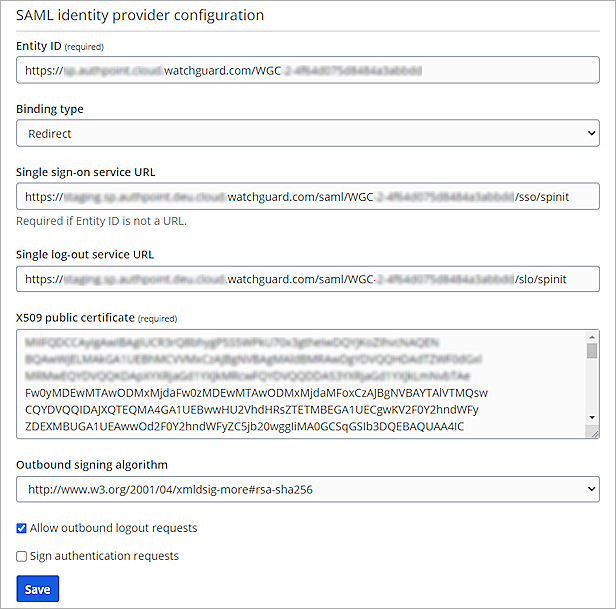
- Open the AuthPoint metadata file that you downloaded in Step 5, and then find the entityID and the SingleSignOnService Location and SingleLogoutService Location values.
- In the Entity ID text box, type or paste the entityID value from the AuthPoint metadata file.
- In the Single sign-on service URL text box, type or paste the SingleSignOnService Location value from the AuthPoint metadata file.
- (Optional)In the Single log-out service URL text box, type or paste the SingleLogoutService Location value from the AuthPoint metadata file.
- Open the AuthPoint certificate file that you downloaded in Step 5 and copy the certificate content.
Only copy the certificate data. Do not copy the BEGIN CERTIFICATE or END CERTIFICATE lines.
- In the X509 Public Certificate text box, paste the certificate.
- Leave the default values for all other fields.
- Click Save.
Configure AuthPoint
Before AuthPoint can receive authentication requests from Bitwarden, you must add a SAML resource in AuthPoint. You must also create an authentication policy for the Bitwarden resource to determine which users can authenticate and log in to Bitwarden and which authentication methods they can use (Push, QR code, and OTP).
Add a SAML Resource in AuthPoint
From the AuthPoint management UI:
- From the navigation menu, select Resources.
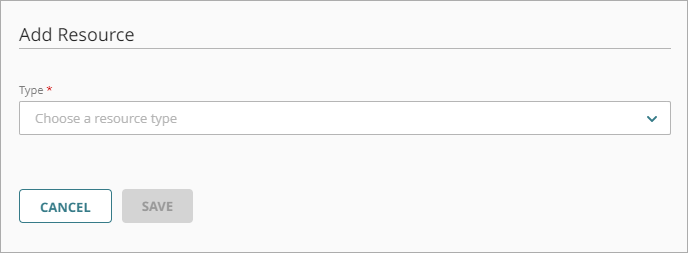
Click Add Resource.
The Add Resource page opens.
- From the Type drop-down list, select SAML.
Additional fields appear.
- In the Name text box, type a name for this resource.
- From the Application Type drop-down list, select Bitwarden.
- In the Service Provider Entity ID text box, paste the SP entity ID value from the SAML service provider configuration section of Bitwarden.
- In the Assertion Consumer Service text box, paste the Assertion consumer Service (ACS) URL value from the SAML service provider configuration section of Bitwarden.
- From the User ID sent on redirection to service provider drop-down list, select Email.
- Leave the Logout URL text box empty.
- From the Signature Method drop-down list, select SHA-256.
- From the AuthPoint Certificate drop-down list, select the certificate to associate with your resource. This must be the same certificate that you downloaded the metadata for in the previous section.
- Click Save.
Add a Group in AuthPoint
You must have at least one user group in AuthPoint to configure MFA. If you already have a group, you do not have to add another group.
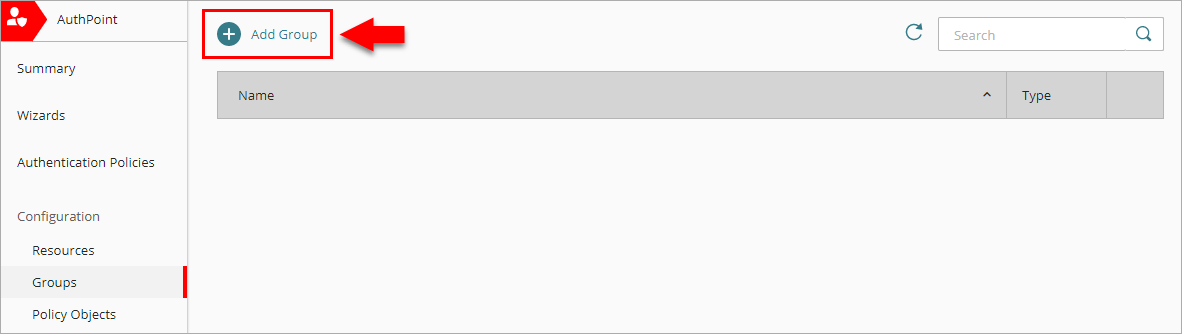
To add a group to AuthPoint:
- From the navigation menu, select Groups.
- Click Add Group.
The New Group page appears.
- In the Name text box, type a descriptive name for the group.
- (Optional) In the Description text box, type a description of the group.
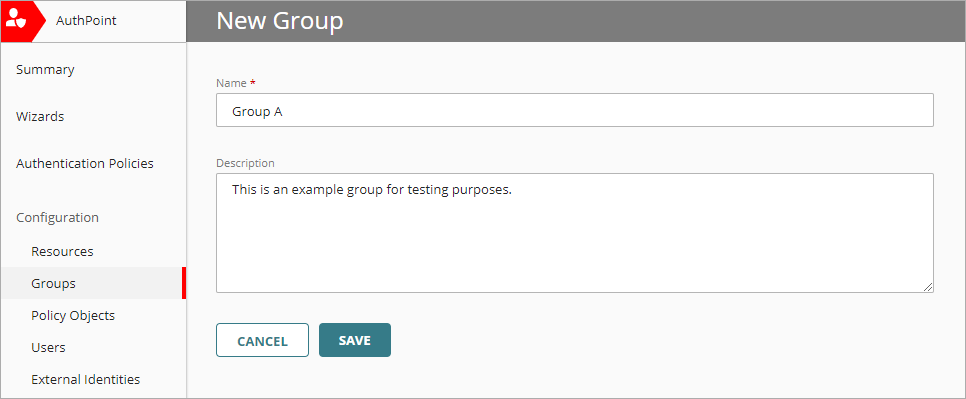
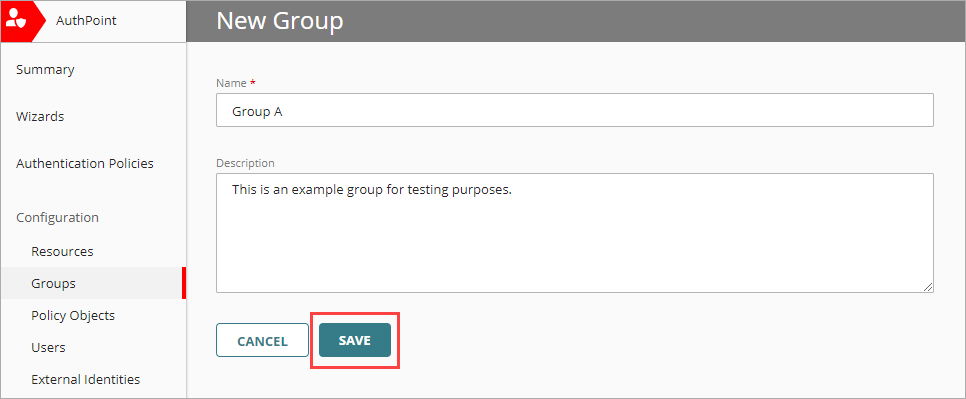
- Click Save.
Your group is listed on the Groups page.
Add an Authentication Policy to AuthPoint
Authentication policies specify which resources users can authenticate to and which authentication methods they can use (Push, QR code, and OTP).
You must have at least one authentication policy in AuthPoint that includes the Bitwarden resource. If you already have authentication policies, you do not have to create a new authentication policy. You can add this resource to your existing authentication policies.
Users that do not have an authentication policy for a specific resource cannot authenticate to log in to that resource.
To configure an authentication policy:
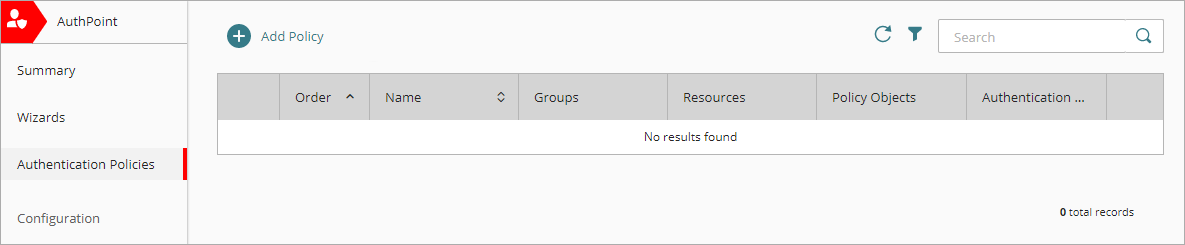
- From the navigation menu, select Authentication Policies.
- Click Add Policy.
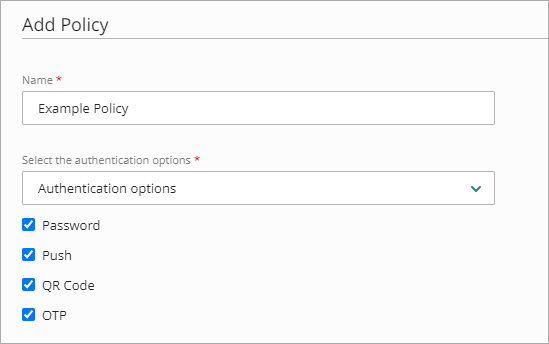
- Type a name for this policy.
- From the Select the authentication options drop-down list, select Authentication options and select which authentication options users can choose from when they authenticate.
For SAML resources, if you select more than one authentication option, users must select one of the available options when they authenticate. For example, if you select OTP and Push, users can choose to type their OTP or approve a push to authenticate. You cannot require that they do both.
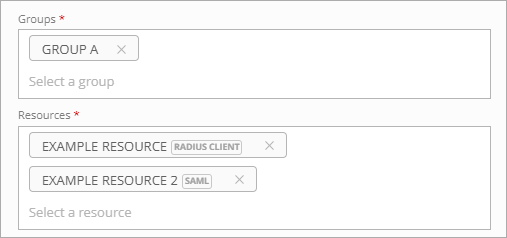
- Select which groups this policy applies to. You can select more than one group. To configure this policy to apply to all groups, select All Groups.
- Select the resource that you created in the previous section. If you want this policy to apply to additional resources, select each resource this policy applies to. To configure this policy to apply to all resources, select All Resources.
-
(Optional) If you have configured policy objects such as a Network Location, select which policy objects apply to this policy. When you add a policy object to a policy, the policy only applies to user authentications that are the same as the conditions of the policy objects. For example, if you add a Network Location to a policy, the policy only applies to user authentications that come from that Network Location. Users who only have a policy that includes a Network Location do not get access to the resource when they authenticate outside of that Network Location (because they do not have a policy that applies, not because authentication is denied).
If you configure policy objects, we recommend that you create a second policy for the same groups and resources without the policy objects. The policy with the policy objects should have a higher priority.
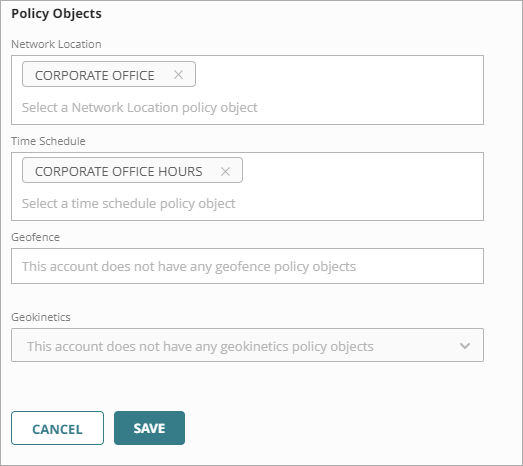
- Click Save.
Your policy is created and added to the end of the policy list.When you create a new policy, we recommend that you review the order of your policies. AuthPoint always adds new policies to the end of the policy list.

Add Users to AuthPoint
Before you assign users to a group, you must add the users to AuthPoint. There are two ways to add AuthPoint user accounts:
- Sync users from an external user database
- Add local AuthPoint users
Each user must be a member of a group. You must add at least one group before you can add users to AuthPoint.
To import users from Active Directory, Microsoft Entra ID, or an LDAP database, you must add an external identity in the AuthPoint management UI. External identities connect to user databases to get user account information and validate passwords.
- To sync users from Active Directory or an LDAP database, you must add an LDAP external identity
- To sync users from Microsoft Entra ID, you must add a Microsoft Entra ID external identity
When you sync users from an external user database, you can sync any number of users and they are all added to AuthPoint at one time. Users synced from an external user database use the password defined for their user account as their AuthPoint password.
To learn how to sync users, go to Sync Users from Active Directory or LDAP and Sync Users from Azure Active Directory.
You can create local AuthPoint users on the Users page in the AuthPoint management UI. Because you can create only one user at a time, you most commonly do this when you want to create test users or to add only a small number of users.
Unlike users synced from an external user database, local AuthPoint users define and manage their own AuthPoint password. When you add a local user account, the user receives an email that prompts them to set their password.
To learn how to add local AuthPoint user accounts, go to Add Local AuthPoint Users.
Test the Integration
To test AuthPoint MFA with Bitwarden, you can authenticate with a mobile token on your mobile device. You can choose any method (one-time password, QR code, or push).
In this example, we show the push authentication method (users receive a push notification in the mobile app that they must approve to authenticate).
- In a web browser, go to https://vault.bitwarden.com.
- In the Email address text box, type your email address and click Continue.
- Click Enterprise single sign-on.
- In the SSO identifier text box, type the identifier name you specified in Step 9 of the Configure Bitwarden section.
- Click Log in.
- Type your email address or AuthPoint user name. Click Next.
- If required, in the Password text box, type your password.
- For the authentication method, select Send Push.
- Approve the authentication request that is sent to your mobile device.
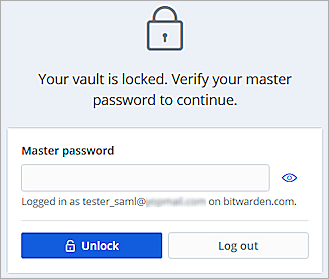
- In the Master password text box, type your Bitwarden master password to decrypt your vault.
- Click Unlock.
You are logged in to Bitwarden vault portal.