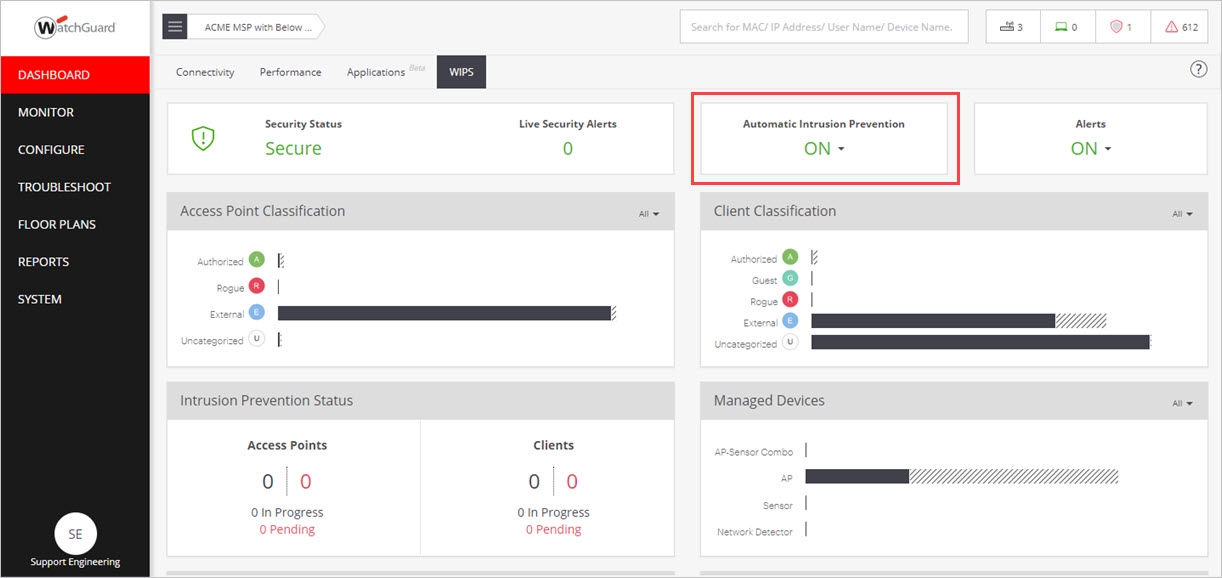
Activate Automatic Intrusion Prevention
Intrusion Prevention is disabled by default, and you must activate the feature for a location before your Intrusion Prevention policy settings take effect.
To activate Intrusion Prevention for a location:
- Open Discover.
- From the Navigator, select the location where you want to enable Intrusion Prevention. Make sure this location folder contains the APs that you want to protect with WIPS. Intrusion Prevention activation settings are location-specific and cannot be inherited from a parent location, but you can apply Intrusion Prevention activation recursively to subfolders of the current location when you save the settings.
- Select Configure > WIPS > Automatic Intrusion Prevention.

- Select the Automatic Intrusion Prevention drop-down.
- (Optional) Select the Apply recursively to subfolders check box if you want this action to apply to all subfolders of your current location folder.
- Click Activate.
You can also enable Automatic Intrusion Prevention directly from the Dashboard page on the WIPS tab.
Test Intrusion Prevention
When you have activated Intrusion Prevention for a location, you can perform a simple test to make sure that WIPS is functioning correctly.
In this example, to test the Neighborhood APs threat, you will attempt to connect to a mobile hotspot classified as an External AP with an Authorized client. Authorized clients must not be able to connect to external neighbor APs in the vicinity of your Wi-Fi network.
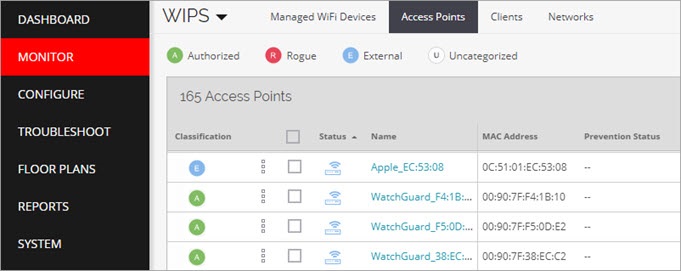
- Create a mobile hotspot on a personal device that will act as the External access point.
When the hotspot is enabled, the hotspot device should be classified as an External device and appear in blue on the Monitor > WIPS > Access Points page in Discover.
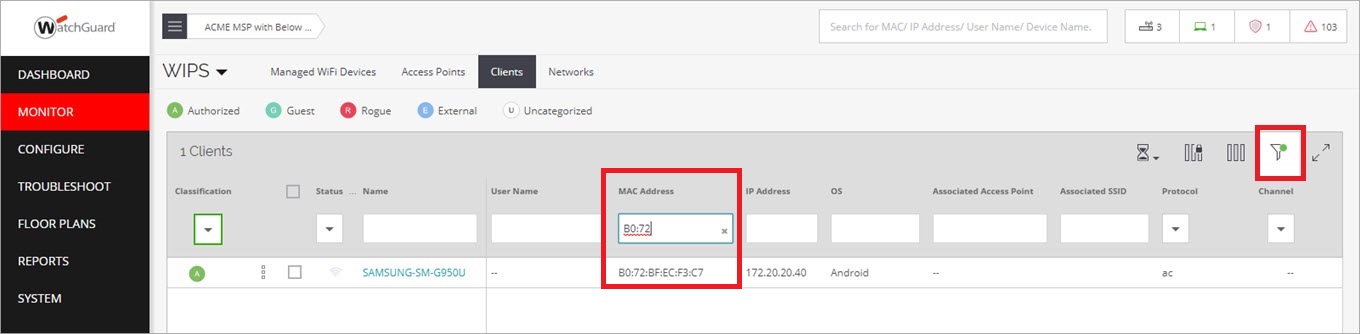
- Make sure the wireless client that you want to test with is classified as an Authorized client.
To become an Authorized client, you must have previously connected to an Authorized AP on your network. The client should appear in green in the Monitor > WIPS > Clients page in Discover.
To find the specific client, search for the device name or MAC address using the page filters.
- From your Authorized client, attempt to connect to the SSID broadcast by the mobile hotspot classified as External. The connection should be prevented.
In the Monitor > WIPS > Clients page in Discover, you should see that the client has been classified as a misbehaving client and is displayed in orange. After a short time, the client will be released from quarantine and reconnected to an Authorized AP.
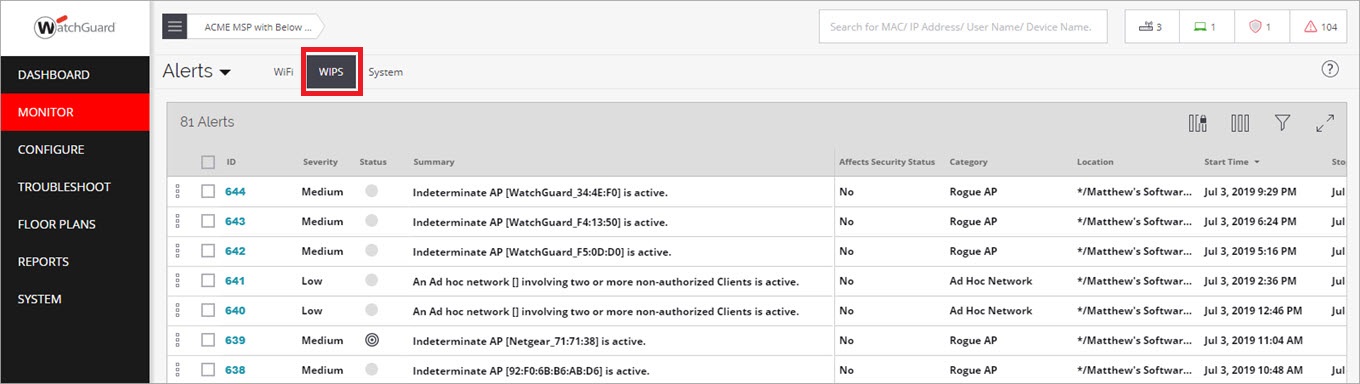
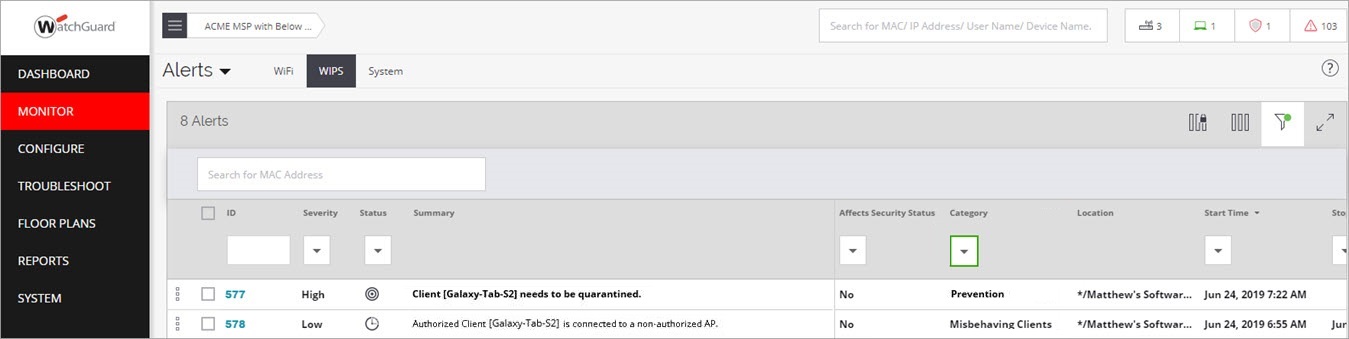
To see the related security event in Discover, select Monitor > Alerts > WIPS. The event logs should indicate a misbehaving client event.
If the client was not correctly prevented from connecting to the External AP, check the following:
- Make sure you are in the vicinity of a dedicated WIPS sensor and that it is correctly powered. AP325 and AP420 devices require PoE+ power or a power adapter for best effectiveness when they operate as a WIPS sensor.
- Make sure Intrusion Prevention is enabled in the correct location.
- Make sure the option to prevent Authorized Client connection to External or Potentially External Access Point is enabled in your Intrusion Prevention settings. This option is enabled by default.
- Make sure the hotspot AP is correctly classified as External and the client is correctly classified as Authorized before you attempt a connection.
- Check the WIPS alerts for any related security events.
Monitor WIPS Alerts
After you have enabled Automatic Intrusion Prevention, continue to monitor WIPS alerts as described in the Monitor WIPS Activity section for potential security or configuration issues.
To monitor WIPS alerts:
- Open Discover.
- Select Monitor > Alerts, then select the WIPS tab.