Monitor WIPS Activity
Monitor AP Classifications
To monitor WIPS classifications for your APs, in Discover, select Monitor > WIPS > Access Points.
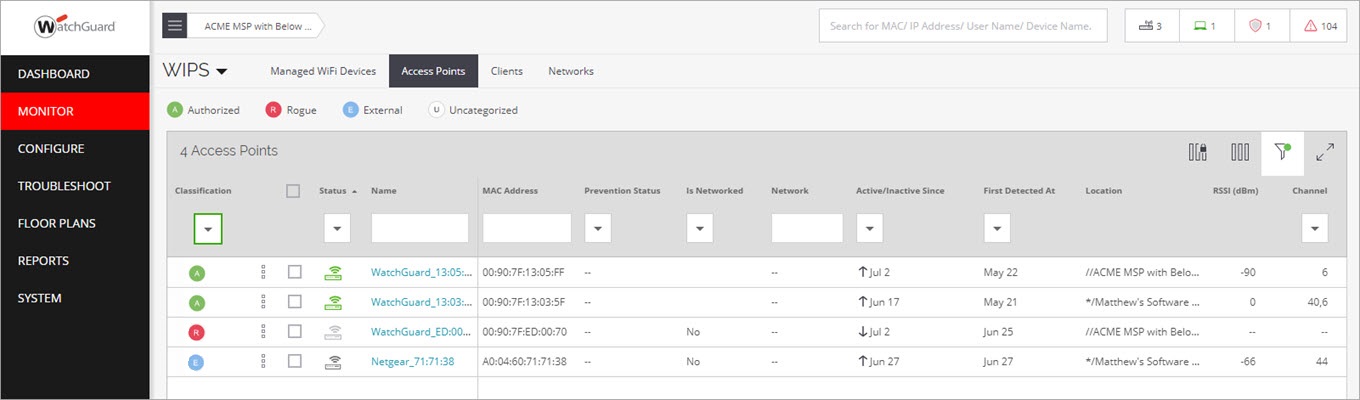
The color coding makes it easy to view AP classifications:
- Authorized APs (Green)
- Guest APs (Light Green)
- Misconfigured APs (Orange)
- Rogue APs (Red)
- External Neighbor APs (Blue)
- Uncategorized (White)
This enables you to correct misconfigured APs, make sure your known APs are classified as authorized, and confirms that external and rogue APs are correctly identified.
Change AP Classification
If a known AP in your environment is classified as Misconfigured, this means the AP has a configuration that does not conform to your SSID Profiles or Authorized WiFi Policy. This can occur if the AP has been reset or tampered with, or if there is a configuration error or change in your SSID settings or Authorized WiFi Policy. Verify the configuration of the AP to make sure it conforms to your policies.
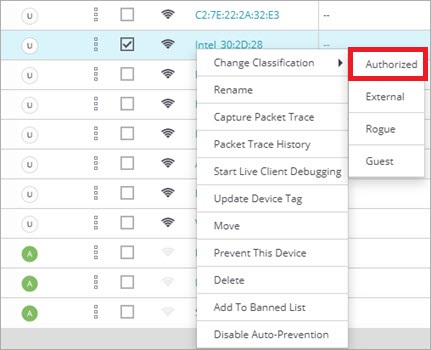
If you have known APs that are listed as Uncategorized, you can manually set the classification category of the AP to set it as Authorized. Make sure you verify the location and configuration of the device before you change an AP classification category.
- Open Discover.
- Select Monitor > WIPS > Access Points.
- Right-click the AP that is classified as Uncategorized.
- Select Change Classification.
- Select Authorized.
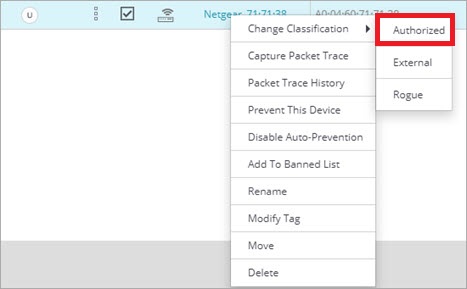
You can perform this procedure for other misclassified APs, but to prevent security vulnerabilities on your wireless network, you must make sure that the AP is a known AP connected to your network and the configuration conforms to your security policies.
Monitor Client Classifications
To monitor WIPS classifications for your clients, in Discover, select Monitor > WIPS > Clients.
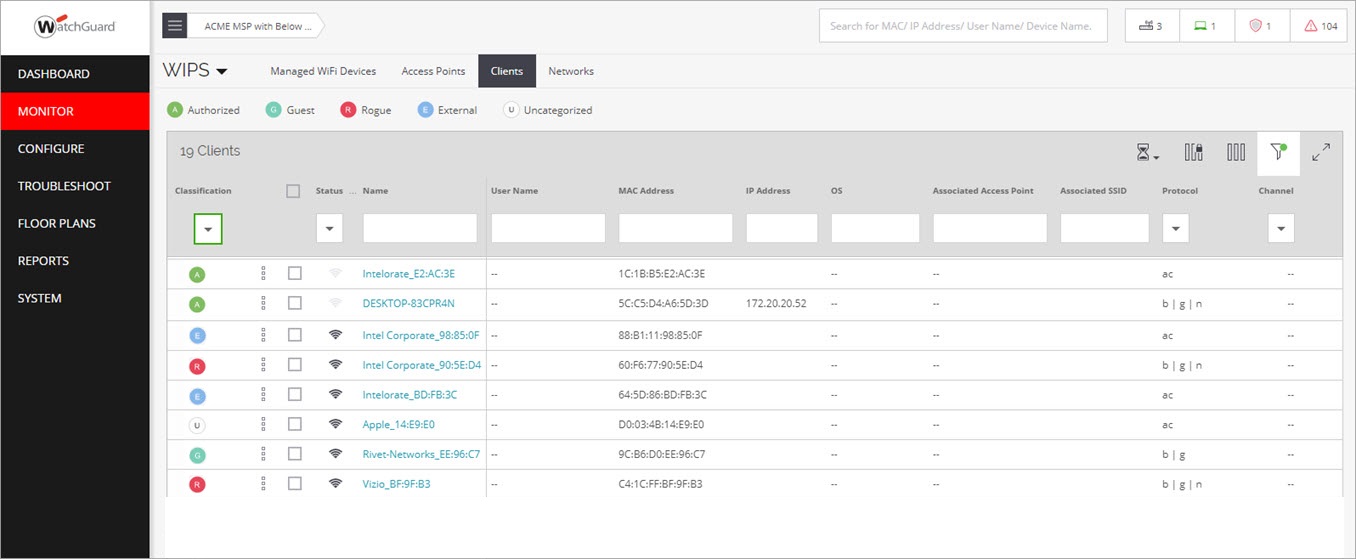
The color coding makes it easy to view client classifications:
- Authorized Clients (Green)
- Guest Clients (Light Green, connected to an authorized guest network)
- Rogue Client (Red)
- Misbehaving Clients (Orange)
- External Neighbor Clients (Blue)
This enables you to make sure clients are properly classified and helps you detect any rogue or external clients connected to your Wi-Fi network.
Change Client Classification
You can manually change the classification of a client if it is Uncategorized or incorrectly classified. Before you perform this action, make sure that the client is a known client to prevent security vulnerabilities on your wireless network.
- Open Discover.
- Select Monitor > WIPS > Clients.
- Right-click the client, then select Change Classification.
- Select Authorized.
Configure and Monitor WIPS Security Alerts
In Discover, you can configure and monitor WIPS alerts to see detailed information about rogue APs, rogue clients, and other security-related events for your Wi-Fi network.
There are three methods for alert notification in Discover:
- Email — An email about the alert is sent to the recipients configured in the Email Recipients tab of the Alerts configuration page.
- Display — The alert is displayed on the Monitor > Alerts page and on the respective widgets in Discover.
- Syslog — Discover sends alert events to the syslog servers configured in System > Third-party Servers > Syslog.
You can also set the Security Status for alerts. For WIPS and System events, select the Affects Security Status option to enable an alert to change the security status of a device's location.
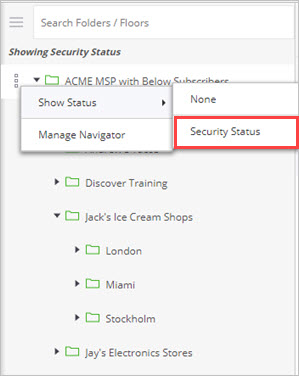
In the location tree, you can view the security status of a location by the color code. Red indicates a location with a live security alert to indicate a vulnerable device. Green indicates no live security alerts for that location. To view the security status in the location tree, select Show Status > Security Status for the top-level location folder.
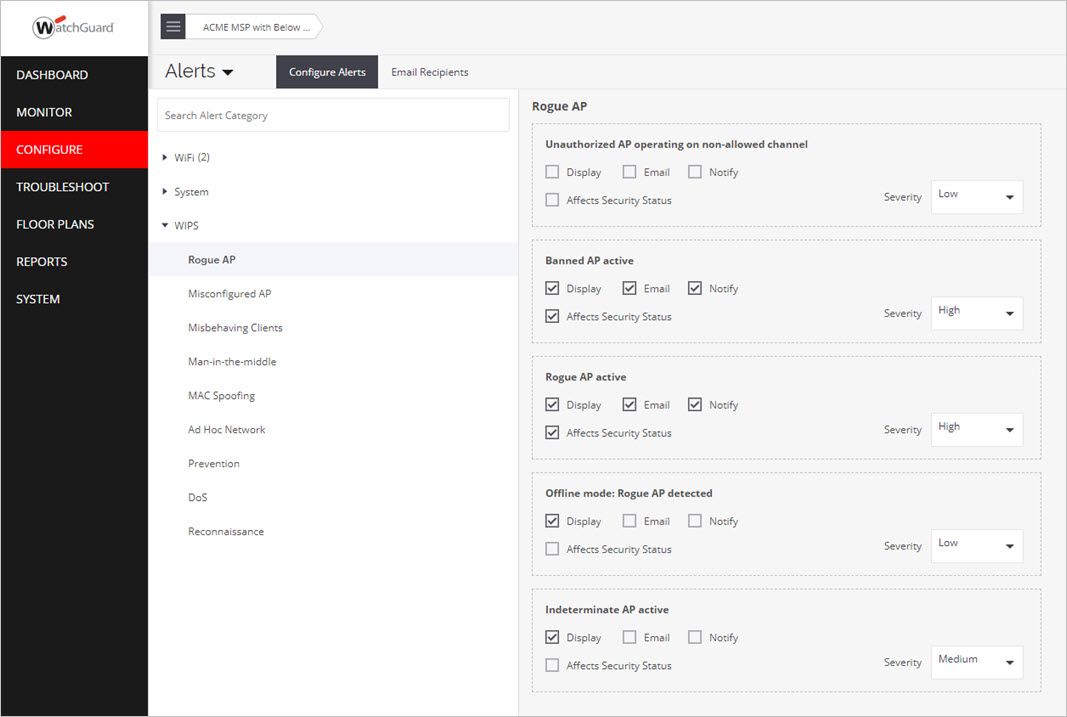
Configure WIPS Alerts
To configure WIPS alerts:
- Open Discover.
- Select Configure > Alerts.
- In the Alert Category pane, expand the WIPS section.
- For each type of WIPS event, review your alert notification settings, then click Save.
Monitor WIPS Alerts
To monitor WIPS alerts:
- Open Discover.
- Select Monitor > Alerts, then select the WIPS tab.
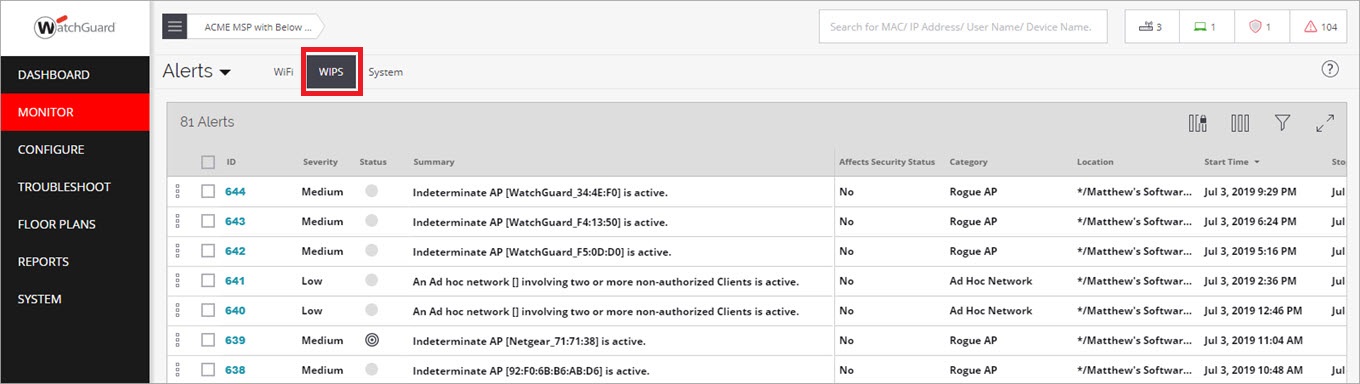
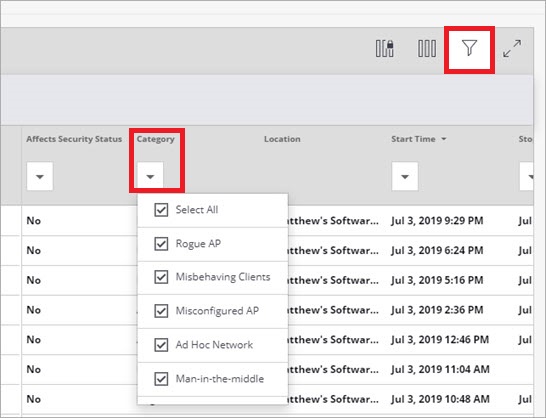
You can filter the events based on the security category type.