Configure a Payment Gateway
Applies To: Wi-Fi Cloud-managed Access Points (AP125, AP225W, AP325, AP327X, AP420)
Wi-Fi Cloud currently only supports Stripe for the payment gateway.
When you use Paid WiFi or Free & Paid WiFi, make sure you add the recommended sites in the Walled Garden settings of your Captive Portal. This ensures that guest users are not forced into an "in-app" or OS specific mini-browser that may by incompatible with the payment site.
- Open Discover.
- Select Configure > WiFi, then select the SSID tab.
- Edit an existing SSID, or create a new SSID.
- Select the Captive Portal tab.
- Select the Captive Portal check box.
- Select Cloud Hosted as the portal mode.
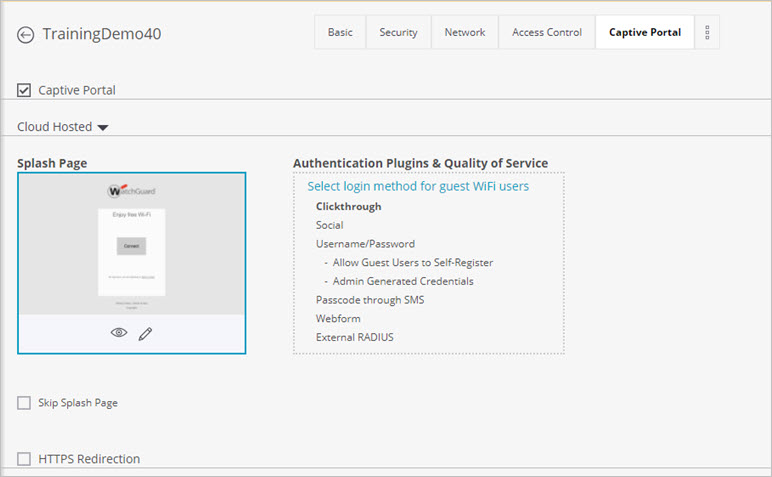
- In the Authentication Plugins & Quality of Service section, click Select login method for guest WiFi users.
The Plugins and QoS settings appear.
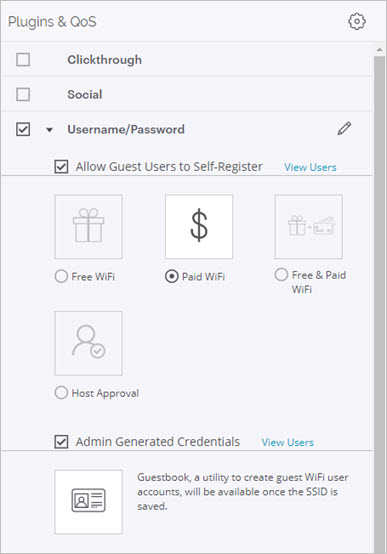
- Select the Username/Password plug-in check box, select Allow Guest Users to Self-Register, then select one of the paid Wi-Fi methods (Paid WiFi or Free & Paid WiFi).
- Click
 in the top-right corner for Common Settings for the plug-ins. Icons appear for Email, SMS/MMS, Payment Gateway, Country Code, and Marketing Opt-in/Opt out.
 - Click the icon for the Payment Gateway.
![]()
- From the Stripe Account drop-down list, select an existing account or select Add New to add a new Stripe account.
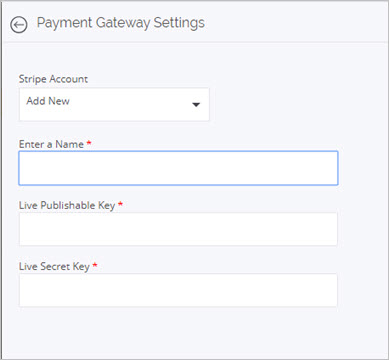
- Type a Name for the account.
- From a web browser, open the Stripe website and log in to your Stripe account.
- From the Stripe menu, select API.
- For the Live key, copy the Publishable Key and the Secret Key.
- Paste the keys in the Live Publishable Key and the Live Secret Key fields on the Payment Gateway Settings page in Discover.
- Click Save to save the Payment Gateway settings.
You can now select this Payment Gateway account when you configure the Paid WiFi or Free & Paid WiFi settings in your portal configuration.