Configure the Username/Password Plug-in
Applies To: Wi-Fi Cloud-managed Access Points (AP120, AP125, AP225W, AP320, AP322, AP325, AP327X, AP420)
With the self-registration option, you can also configure a Payment Gateway for paid and free Wi-Fi options for guest users, or use a host approval system to approve guest user access. For more information on how to set up a Payment Gateway, see Configure a Payment Gateway.
To use the Username/Password plug-in, you must select the Cloud Hosted portal mode in your SSID captive portal settings.
To configure the Username/Password plug-in:
- Open Discover.
- Open the Navigator, and select a location where to apply the SSID settings.
- Select Configure > WiFi.
- Select the SSID tab.
- Select an existing SSID or add a new SSID.
- Select the Captive Portal tab.
- Select the Captive Portal check box.
- Select Cloud Hosted as the portal mode.
- In the Authentication Plugins & Quality of Service section, click Select login method for guest WiFi users.
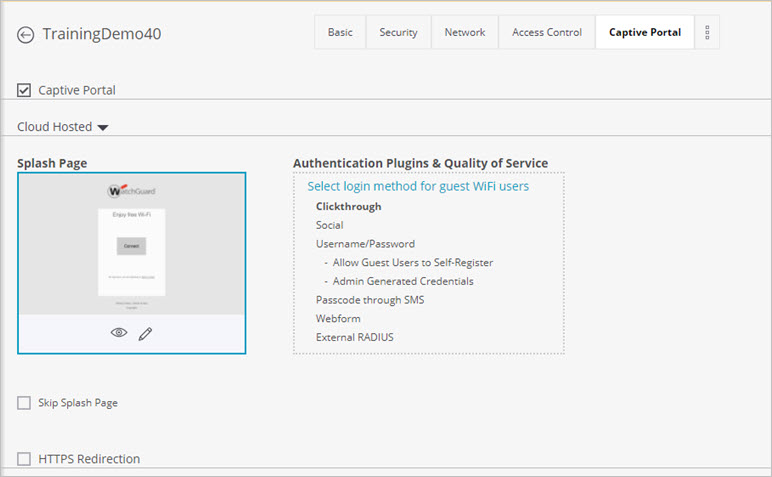
- Select the Username/Password check box in the list of plug-ins.
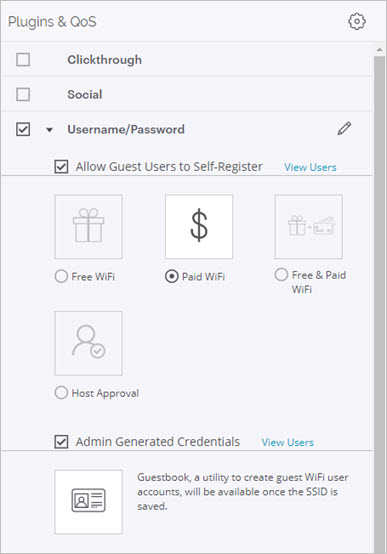
- You can select from these two methods for guest user access:
- Allow Guest Users to Self-Register — Enables guest users to self-register for access with free or paid Wi-Fi options, or host approval.
- Free Wi-Fi — Guest users can access Wi-Fi with no payment required.
- Paid Wi-Fi — Guest users must pay for Wi-Fi access. You can define different payment tiers for Wi-Fi access time. You must Configure a Payment Gateway to use this option.
- Select the currency for payment.
- Click the "+" icon to add a payment tier.
- Configure the Amount, and the access Duration for the specified amount.
- Type the Email Content you want to include in the Paid Wi-Fi welcome message.
- Type the SMS Content you want to include in the Paid Wi-Fi welcome message.
- Free and Paid Wi-Fi — You can provide free Wi-Fi for a specified time period, then require payment for further access. You must Configure a Payment Gateway to use this option.
- Expand the Free for first option.
- Select the Free WiFi Duration.
- Select Renew Every, then select the time period after which free access is renewed.
- Click the "+" icon to add a payment tier.
- Configure the Amount, and the access Duration for the specified amount.
- Type the Email Content you want to include in the Paid Wi-Fi welcome message.
- Type the SMS Content you want to include in the Paid Wi-Fi welcome message.
- Host Approval — Enables guest users to request host approval for access via email.
- Type a comma-separated list of Email domains to receive approval requests for guest access. This makes sure that guest user requests are only sent to authorized domains.
- Type a comma-separated list of Approver Email Addresses that receive the request for access.
- Admin Generated Credentials — Guest users use credentials generated by the administrator using the Guestbook plug-in. For more information, see Guestbook Plug-in.
- You configure these additional options:
- Allow Self-registered User to Set Password — If you select this option, the guest user can set the password. This password can be set only once and cannot be changed after it has been set. An email with a one-time password (OTP) is sent to the guest user. The user must set the password within 10 minutes of receiving the OTP. If the guest user is not allowed to set the password, the email sent to the user contains a system-generated password that the user must use to log in to the portal.
- Enable Forgot Password Link — If you select this option, a Forgot Password link is displayed to the guest users. The check box is disabled if Domain Restrictions are enabled.
- Allow guest users to activate expired account — If you select this option, self-registered guest users are provided with a link to re-activate their account if it is expired. Guest users that register themselves must log in within the account expiry duration. If they fail to do so, the guest user account expires.
- Allow self-registered guest users to auto login — Select this option to automatically log in the self-registered guest user for the first time.
- Show credentials to a self-registered guest user on a web page — Select this option if you want to redirect the guest user to a web page with the login credentials after successful registration.
- Click Save to save the plug-in settings.
- Click Save to the SSID settings.