Applies To: Wi-Fi Cloud-managed Access Points (AP125, AP225W, AP325, AP327X, AP420)
The tasks you must complete to create a wireless mesh network with Discover are:
- Connect all Mesh APs to the Wired Network
- Create an AP Group for the Mesh APs
- Create a Mesh Profile
- Enable the Mesh Profile
- Disconnect Non-Root Mesh APs from the Wired Network
- Monitor APs in the Wireless Mesh Network
For an overview of how mesh networks work, see About Mesh Networks.
Connect all Mesh APs to the Wired Network
You must initially connect all the APs to the wired network so that they can be configured for your wireless mesh network. Configure the APs with the necessary network settings and connect them to your wired network (LAN). Power on all APs and check whether they are visible in Manage.
When your network mesh configuration is complete at the end of these procedures, you will disconnect the non-root mesh APs from the wired network and deploy them as wireless-only. (If you use PoE power, make sure the data-in port is disconnected for your PoE power source.) Make sure that the root APs are still connected to the wired network in your environment.
Create an AP Group for the Mesh APs
In Discover, you can only configure mesh profiles for APs that belong to an AP group. You must first create an AP group, then add the APs that you want to use in the mesh network. For more information on AP groups, see AP Groups.
- Select System > Navigator.
- Select a location from the Folders/Floors location tree where you want to add the mesh AP group and mesh APs.
- Right-click the location, then select Add Group.
You can also create AP groups from the Groups tab.
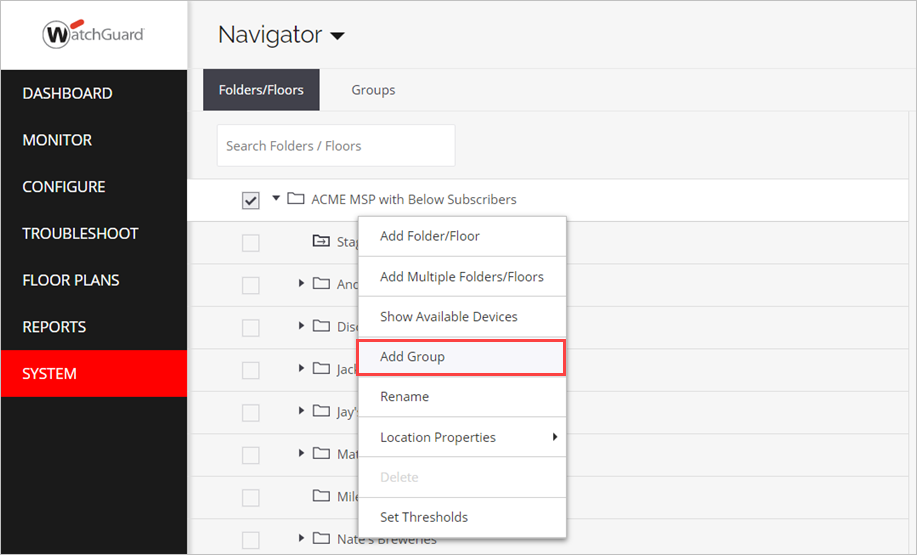
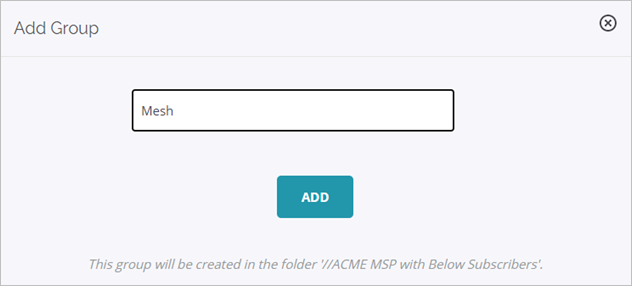
- Type the name of the AP group that will contain your mesh APs, then click Add.
- From the Navigator, right-click the location where you created your AP group, then select Show Available Devices.
A list of APs in the selected location appears.
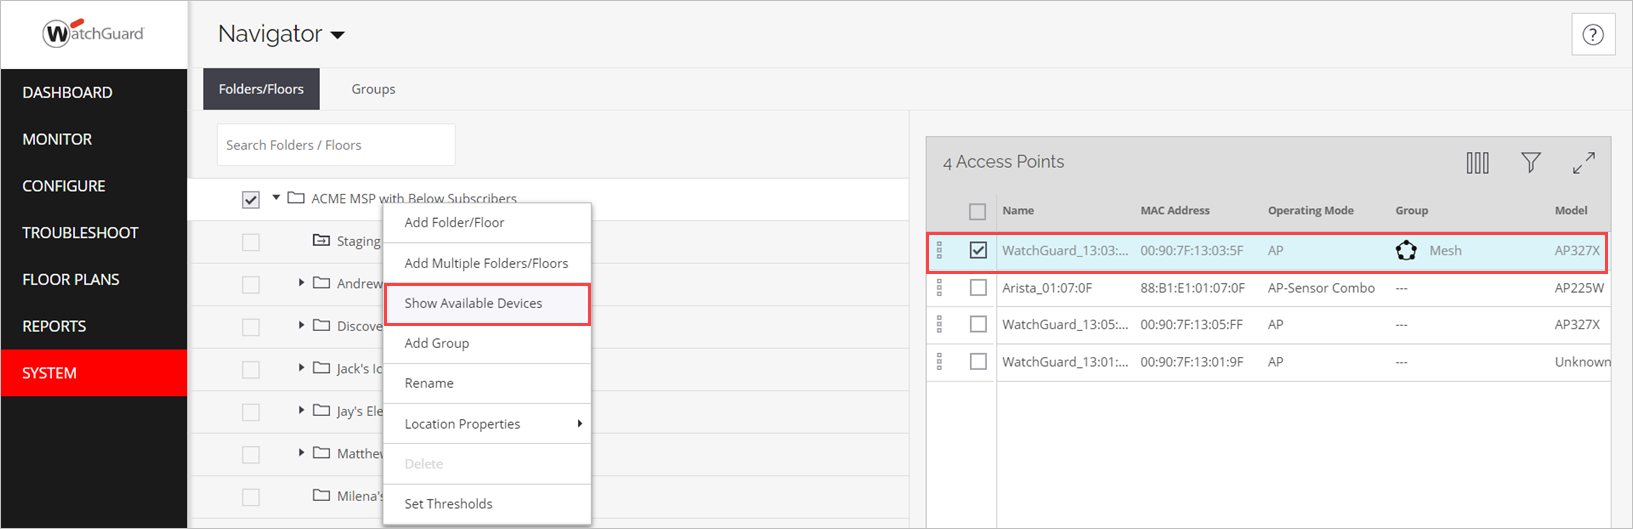
- Right-click an AP, then select Assign/Reassign to a Group.
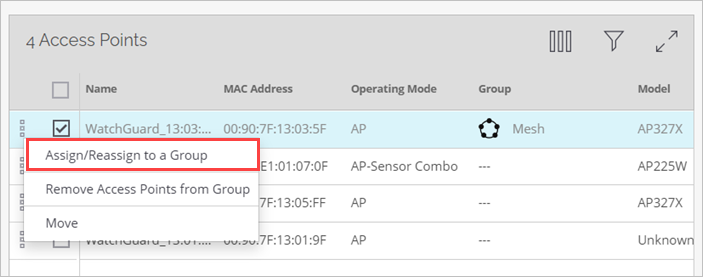
- Select the group you created for your mesh APs.
- Repeat this procedure for each AP you want to add to the mesh network.
You can also add APs to a group from the Monitor pages.
Create a Mesh Profile
You must create a mesh profile that contains the parameters for the mesh network. The mesh profile defined for the wireless mesh network must be applied to one of the radios of the mesh APs. This radio acts as the dedicated radio to communicate with the other APs on the mesh network.
We recommend you use the 5 GHz radio for mesh networks. While you can add SSIDs to the mesh radio, we recommend that for the best performance, you dedicate this radio to mesh communications and do not add an SSID Profile to broadcast on the same radio.
- From the Navigator, select your mesh AP group.
- Select Configure > WiFi, then select the Mesh tab.
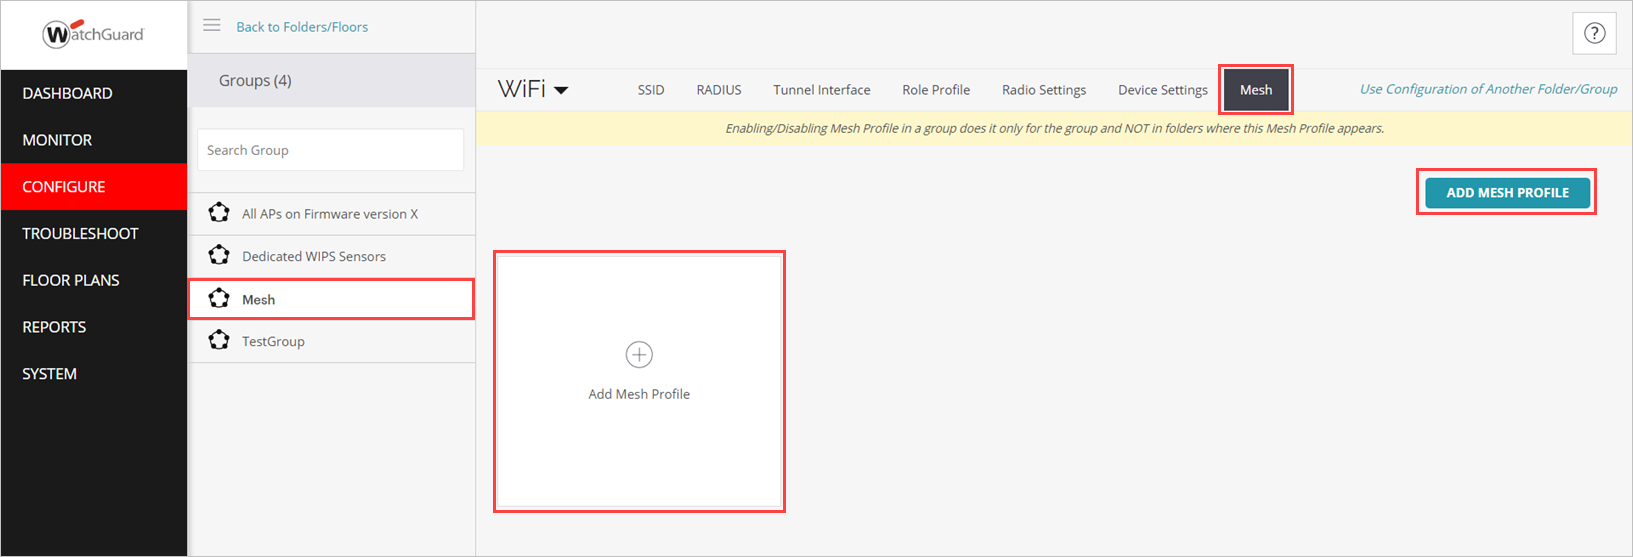
The Mesh tab only appears when you have selected an AP group from the Navigator.
- Click Add New Mesh Profile.
- Specify the mesh profile parameters:
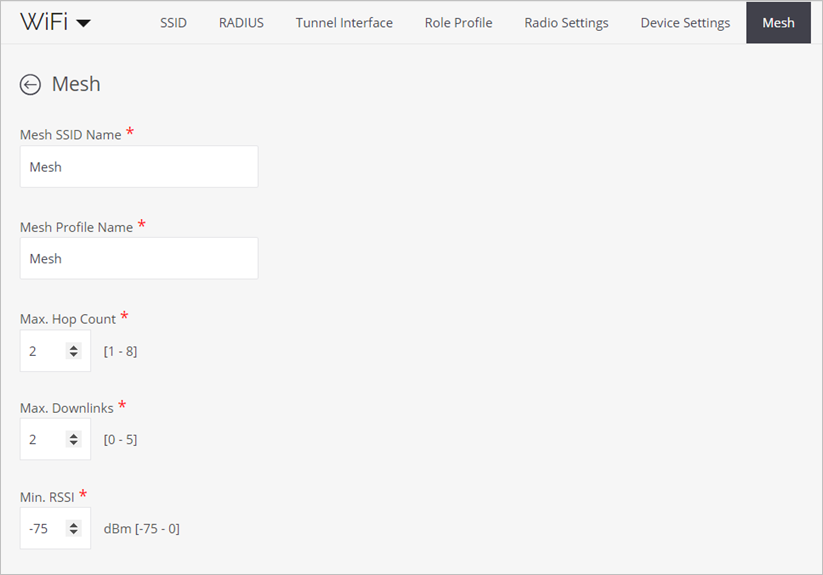
- Mesh SSID Name — SSID of the mesh profile. This is the network name of the mesh network.
- Mesh Profile Name — Name of the mesh profile.
- Max. Hop Count — Maximum number of hops in which the wired network can be reached. For example, the number of hops for a root AP would be 0 as it is directly connected to the wired network. Similarly, the hops for a non-root AP directly communicating with the root AP is 1.
- Max. Downlinks — Maximum number of mesh APs that can directly connect to a non-root or root AP in the mesh network. This indicates the maximum number of child nodes that a parent node can have in the mesh tree topology. You can type a value between 0 and 5.
- Min. RSSI — Minimum RSSI for an AP to connect to another AP in the mesh. An AP requesting to connect to another AP should have the specified RSSI to be able to connect to the other AP. You can type a value between -100 and 0 dbm.
- Click Save.
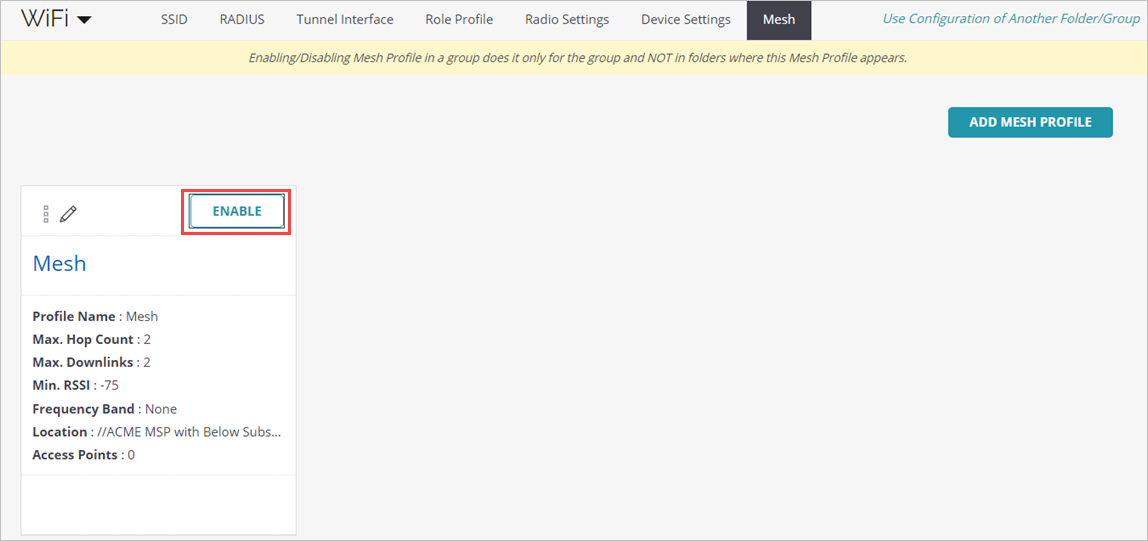
Enable the Mesh Profile
After you create the Mesh Profile, you must enable the profile on a mesh AP radio.
- From the Navigator, select your mesh AP group.
- Select Configure > WiFi, then select the Mesh tab.
- Click Enable on the mesh profile.
- Click Continue to configure all APs with this mesh profile in mesh mode.
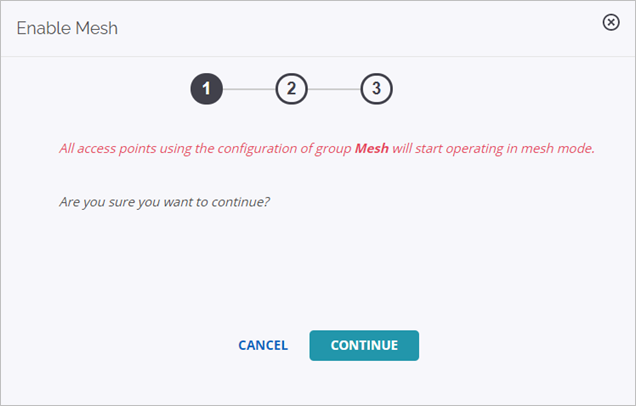
- Select the AP radio to use for mesh networking.
You can only add a mesh profile to one of the radios on the AP. We recommend you configure the mesh radio on the 5 GHz band radio.
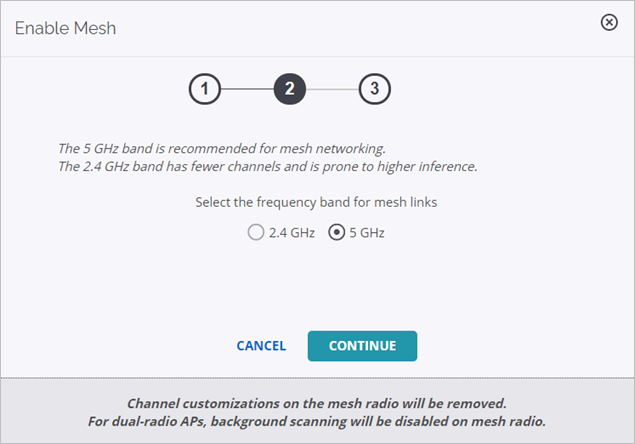
- From the Select Mesh Channel drop-down list, select the operating channel for the mesh radio.
- Click Enable Mesh.

- From the list of APs in the mesh network, select an AP that will be the root node for the mesh network.
- Click Save.
You must add your service SSIDs (the SSIDs you want Wi-Fi clients to use) to the mesh AP group so that the SSIDs get pushed to all APs in the mesh network.
Disconnect Non-Root Mesh APs from the Wired Network
When your network mesh configuration is complete, disconnect the non-root mesh APs from the wired network and deploy them using wireless only.
If you use PoE power for your non-root mesh APs, make sure the data-in port is disconnected for your PoE power source to make sure the mesh APs are not connected to the network.
Root APs must still be connected to the wired network.
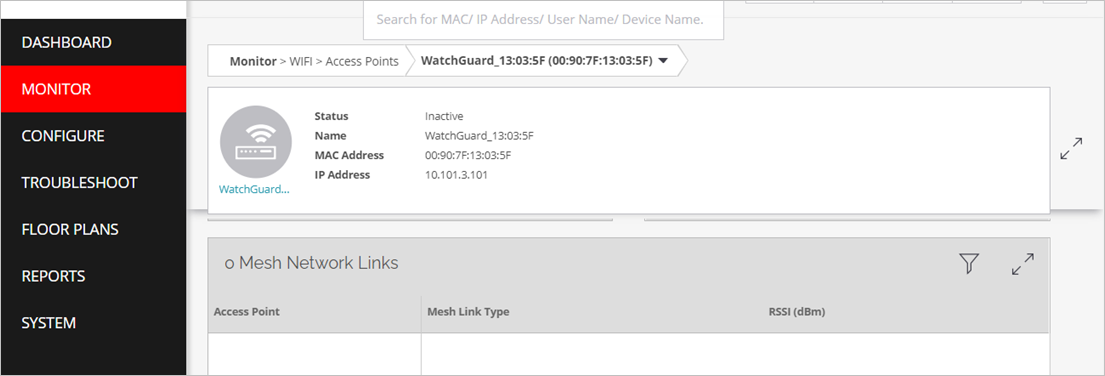
Monitor APs in the Wireless Mesh Network
To monitor mesh links, select Monitor > WiFi > Access Points, then click an AP that is configured in mesh mode.
The Mesh Network Links widget enables you to review the uplink and downlinks with other APs in the mesh network and their corresponding RSSI values.
You can add a location floor and layout for your wireless mesh network in Discover from the Floor Plans menu. You can place your mesh devices on the floor layout.
To view the mesh topology and links:
- From Discover, select Floor Plans.
- Select Locate Devices from the drop-down list.
- Select Mesh Topology from the Show drop-down list to see the mesh network topology.
For more information, see Locate APs and Clients.