Applies To: WatchGuard Cloud
When you add an authentication domain you specify one authentication server. If your authentication domain has multiple authentication servers, you can add the other servers to the authentication domain in WatchGuard Cloud.
WARNING: If you change the configured servers for an authentication domain, it could affect devices or services that use the authentication domain.
For each authentication server, the settings control how cloud-managed devices can connect to the server for user authentication.
You cannot add servers to the WatchGuard Cloud Directory.
Add a Server
To add a server to an authentication domain, from WatchGuard Cloud:
- If you are a Service Provider, select the name of the managed subscriber account.
- Select Configure > Directories and Domain Services.
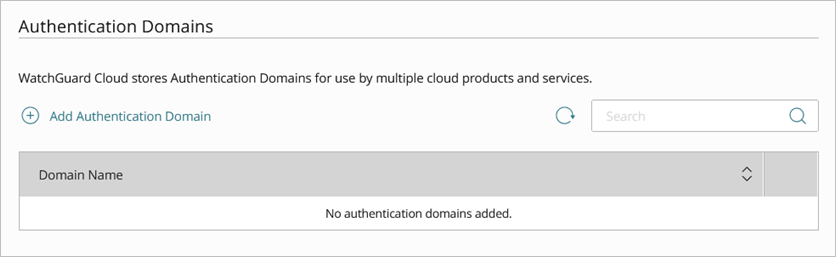
The Authentication Domains page opens.
- Click the authentication domain name to edit.
- Select the Servers tab.
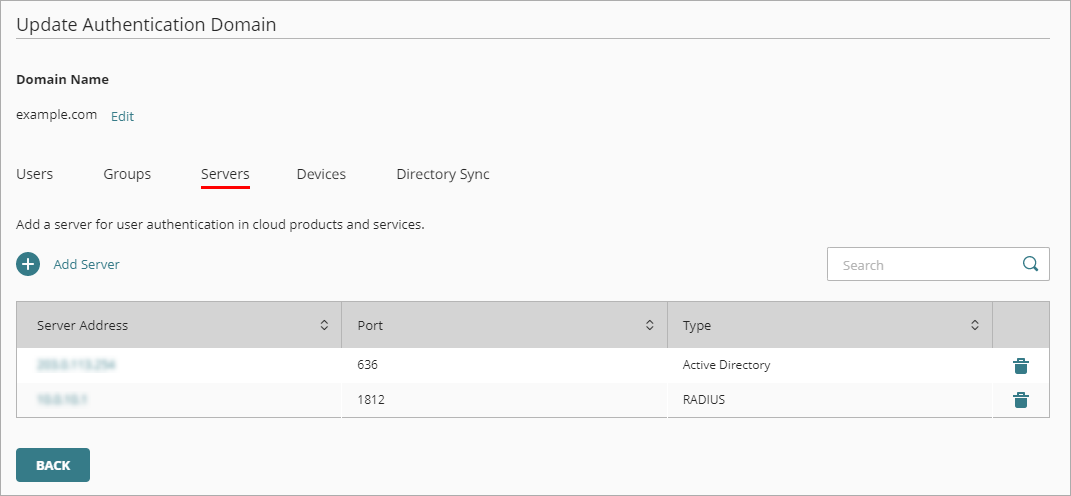
- Click Add Server.
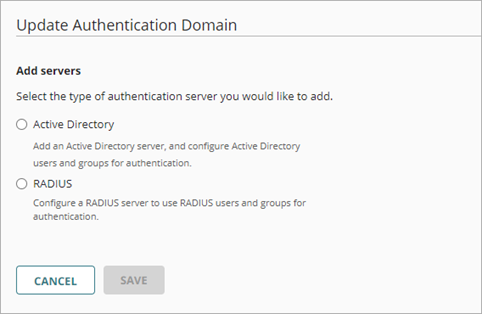
- Select the server type.
- Configure the settings for the selected server type.
Configure RADIUS Server Settings
To configure settings for a RADIUS server:
- In the Add Servers settings, select RADIUS.

- In the Domain Name text box, type the domain name to add. The domain name must include a domain suffix. For example, type example.com, not example.
- From the RADIUS Server Type drop-down list, select RADIUS Authentication Server.
For WatchGuard access points, you can also add a RADIUS Accounting Server. A RADIUS accounting server monitors RADIUS traffic and collects data about client sessions, such as when sessions begin and end. Make sure you add a RADIUS authentication server to the authentication domain before you add a RADIUS accounting server. In many deployments, the Authentication and Accounting services are on the same RADIUS server and run on different ports.
- From the Type drop-down list, select the Host IPv4 or Host IPv6 IP address type.
- In the IP Address text box, type the IP address of the RADIUS server.
- In the Port text box, type the port number RADIUS uses for authentication. Most RADIUS servers use port 1812 by default (older RADIUS servers might use port 1645). Most RADIUS accounting servers use port 1813.
- In the Shared Secret text box, type the shared secret for connections to the RADIUS server.
- In the Confirm Shared Secret text box, type the shared secret again.
- (Fireware v12.11.1 or higher) To require RADIUS authentication servers to use the Message-Authenticator attribute, select the Require Message-Authenticator Attribute check box. The Message-Authenticator attribute is a field in RADIUS packets that verifies the integrity of the packet and prevents spoofing.
- Click Save.
Make sure your RADIUS server is also configured to accept connections from each cloud-managed Firebox or access point as a RADIUS client.
Additional RADIUS Server Options
After you have configured and saved your RADIUS server basic settings, you can also edit the server to configure these additional options:
Radius Authentication Server Options
- Timeout (Seconds) — In the Timeout text box, type a value in seconds. The timeout value is the amount of time the device waits for a response from the authentication server before it tries to connect again. The default value is 10 seconds.
- Retries — In the Retries text box, type the number of times the device tries to connect to the RADIUS server before it reports a failed connection for one authentication attempt. The default value is 3.
- Dead Time — In the Dead Time text box, type the amount of time after which an inactive server is marked as active again. The default value is 10 minutes.
- Group Attribute — In the Group Attribute text box, type a value for the group attribute for the RADIUS server to retrieve group membership for users. The group the user is a member of is returned in the RADIUS FilterID attribute. This default RADIUS group attribute is 11.
Radius Accounting Server Options
- Interim Accounting Interval (Seconds) — In the Interim Accounting Interval text box, type the number of seconds between updates sent to a RADIUS accounting server. The default is 600 seconds (10 minutes).
For more information, go to:
Configure Active Directory Server Settings
To configure settings for an Active Directory server:
- In the Add Servers settings, select Active Directory.
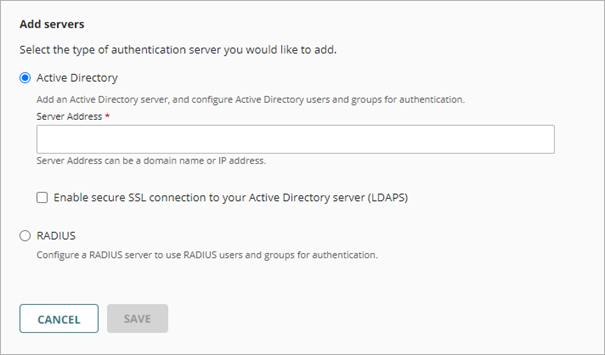
- In the Domain Name text box, type the domain name to add. The domain name must include a domain suffix. For example, type example.com, not example.
- In the Server Address text box, type the domain name or IP address of your Active Directory server.
- (Optional) To enable secure SSL connections to your Active Directory server, select the Enable Secure SSL Connections to Your Active Directory Server (LDAPS) check box.
- Click Save.
Additional Active Directory Server Options
After you have configured and saved your Active Directory server basic settings, you can also edit the server to configure these additional options:
- Port — In the Port text box, type a port number.
If you selected the Enable Secure SSL Connection to Your Active Directory Server (LDAPS) check box, the port is automatically set to 636. Otherwise, the default is port 389.
If your Active Directory server is a global catalog server, it can be useful to change the default port. For more information, go to Change the Default Port for the Active Directory Server in Fireware Help.
Connection Settings
- Timeout (Seconds) — In the Timeout text box, type the number of seconds the device waits for a response from the Active Directory server before it closes the connection and tries to connect again. The default is 10 seconds.
- Dead Time — In the Dead Time text box, type a time after which an inactive server is marked as active again. From the Dead Time drop-down list, select Minutes or Hours to set the duration. The default is 10 minutes.
After an authentication server has not responded for three separate authentication attempts, it is marked as inactive. Additional authentication attempts do not try this server until it is marked as active again after the dead time has elapsed and the server is marked as active again.
Search Base and Login Attributes
- Search Base — In the Search Base text box, type the location in the directory to begin the search.
Tip!
For more information about how to use a search base to limit the directories on the authentication server where the device can search for an authentication match, go to Find Your Active Directory Search Base in Fireware Help. - Group String — If you have not changed your Active Directory schema, the Group String is always tokenGroups. If you have changed your schema, type the attribute string that is used to hold user security group information on the Active Directory server.
- Login Attribute — From the Login Attribute drop-down list, select an Active Directory login attribute to use for authentication. The login attribute is the name used for the bind to the Active Directory database. The default login attribute is sAMAccountName. If you use sAMAccountName, you do not need to specify a value for the DN of Searching User and Password of Searching User settings.
- DN of Searching User — In the DN of Searching User text box, type the distinguished name (DN) for a search operation.
If you keep the login attribute of sAMAccountName, you do not need to type anything in this text box.
If you change the login attribute, you must add a value in the DN of Searching User text box. You can use any user DN with the privilege to search LDAP/Active Directory, such as an administrator. However, a weaker user DN with only the privilege to search is usually sufficient. For example: cn=Administrator,cn=Users,dc=example,dc=com - Password of Searching User — In the Password of Searching User text box, type the password associated with the distinguished name for a search operation.
Configure Entra ID Server Settings
Before you configure an Entra ID authentication domain, you need to register an application in Entra ID. This is necessary to connect WatchGuard Cloud and Entra ID.
- Log in to the Microsoft Azure Portal.
- Select the Azure Active Directory service.
- From the navigation menu, select App registrations.
- Click New Registration.
The Register an application page appears. - Type a name for the application.
- For Supported account types, select the types of user accounts that can use this application to log in. Your selection should represent the users that you sync to AuthPoint.
- Click Register.
A page appears that shows the details for your app. - Copy the Application (client) ID value. You need this value to create the Azure AD external identity in AuthPoint.
- From the navigation menu, select Manifest.
- Select the Microsoft Graph App Manifest tab, and in the manifest editor, set the isFallbackPublicClient property to true. This property was previously called allowPublicClient.
- Click Save.
- From the navigation menu, select API permissions.
- Click Add a permission.
- Select Microsoft Graph.
- Select these permissions:
- Delegated Permissions
- User.Read
- Device.Read.All (Optional)
- Application Permissions
- Group.Read.All
- User.Read.All
- Directory.ReadWrite.All (Optional)
The Device.Read.All and the Directory.ReadWrite.All permissions are not required to sync users, groups, and devices, but if they are not granted the directory sync shows an error that says Insufficient privileges to fetch devices.
- Delegated Permissions
- Click Add permissions. The permissions you add require Administrator approval. If you see the status message "Not granted for <name>", click Grant admin consent for <name>.
- From the navigation menu, select Certificates and Secrets.
- Click New client secret.
- (Optional) Type a description of the client secret.
- Select when the secret expires.
- Click Add.
Details of the new client secret. appear - Copy the Value of the client secret. You need this value to create the Azure AD external identity in AuthPoint.
You need the Value of the client secret. This is different from the client secret ID.
To configure settings for an Entra ID server:
- In the Add servers settings, select Entra ID.
- In the Domain Name text box, type your Entra ID domain name. The domain name must include a domain suffix. For example, type example.com, not example.
- In the Application ID text box, type the Application (client) ID value from Entra. To find this value in Entra, go to App registrations > All Applications and click the name of your application in the list. This value is shown as Application (client) ID
- In the Client Secret text box, type the client secret value from Entra. This is a value that you would have saved from the initial configuration, because you can only see the client secret when you initially create it. If you do not have this value, in Entra you can go to Certificates and secrets and create a new client secret.
- Click Save.
- To sync your Entra ID users and groups, you must configure a directory sync for the newly added authentication domain.