Applies To: Cloud-managed Fireboxes
This document applies to Fireboxes you manage in WatchGuard Cloud. For information that applies to Fireboxes managed in Fireware Web UI or WatchGuard System Manager, go to:
Overview
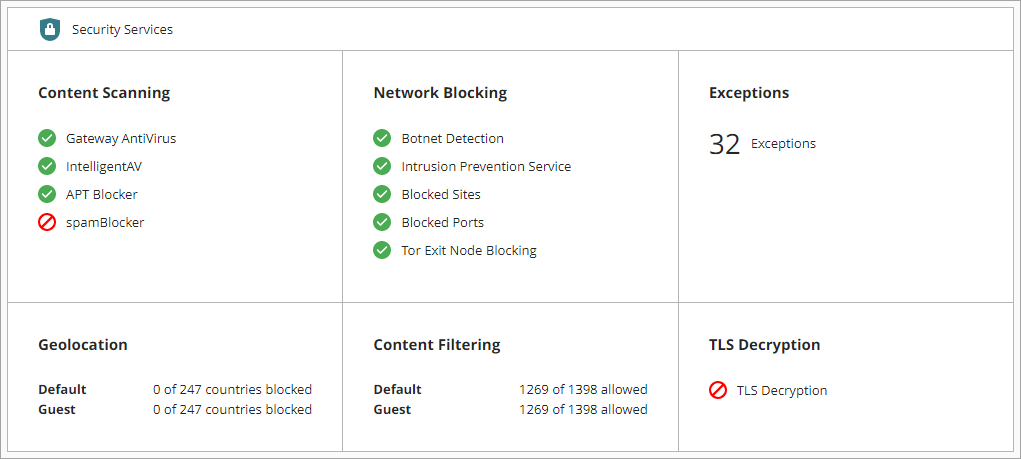
For cloud-managed Fireboxes, you can enable and configure network blocking with these security services:
- Botnet Detection
- Intrusion Prevention Service
- Tor Exit Node Blocking
You can enable these security services globally, and all policies enforce them, but you cannot enable or disable Intrusion Prevention Service or Botnet Detection at the policy level.
For network blocking services, the configured settings apply to all policies that have these services enabled. For more information, go to Configure Security Services in a Firewall Policy on a Cloud-Managed Firebox.
You can also manually block ports and sites. For more information, go to Add Blocked Sites and Blocked Ports on a Cloud-Managed Firebox.
Enable Botnet Detection
A botnet comprises a large number of malware-infected client computers that a remote server controls and uses to perform malicious acts. The Botnet Detection security service adds a list of known botnet site IP addresses to the Blocked Sites list, which enables the Firebox to block these sites at the packet level.
To enable Botnet Detection:
- Select Configure > Devices.
- Select a cloud-managed Firebox.
Status and settings for the selected Firebox appear. - Select Device Configuration.
The Device Configuration page opens and shows the WatchGuard Cloud Security Services. - Click the Network Blocking tile.
The Network Blocking page opens. - Enable Botnet Detection.
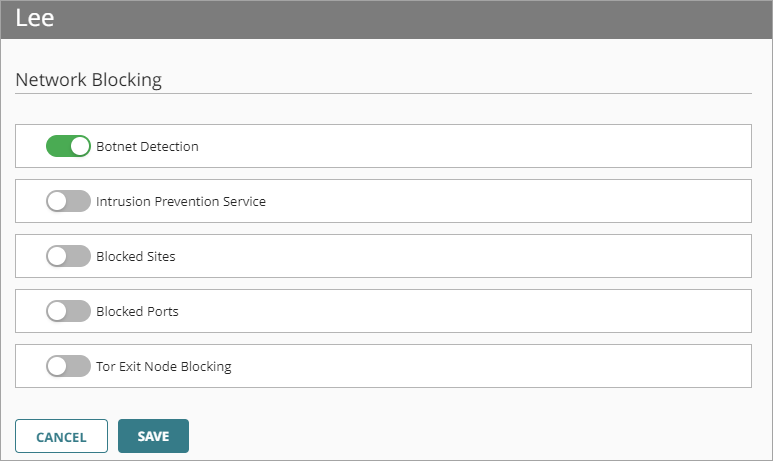
- To save configuration changes to the cloud, click Save.
Configure Intrusion Prevention Services
Intrusion Prevention Service (IPS) uses signatures to provide real-time protection against network attacks, including spyware, SQL injections, cross-site scripting, and buffer overflows. Configure the action IPS takes when it detects a threat, as well as the type of scan.
IPS automatically uses the latest signatures when you enable it.
To configure Intrusion Prevention Service:
- Select Configure > Devices.
- Select a cloud-managed Firebox.
Status and settings for the selected Firebox appear. - Select Device Configuration.
The Device Configuration page opens and shows the WatchGuard Cloud Security Services. - Click the Network Blocking tile.
The Network Blocking page opens.
- Enable Intrusion Prevention Service.
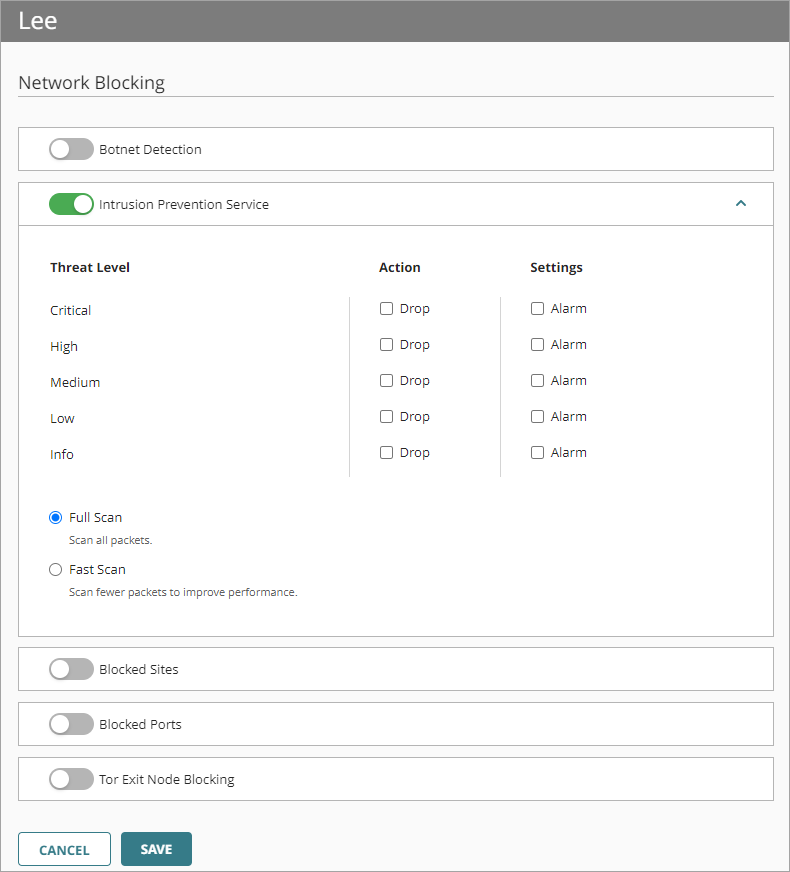
- In the Action column, select the Drop check box for each security threat level (Status) you want to drop the connection for. There are 5 security threat levels, from highest to lowest:
- Critical
- High
- Medium
- Low
- Info
- To generate an alarm for the security threat level, select the Alarm check box.
If you do not want to set an alarm, clear the Alarm check box for that status. - Select the scan mode to use:
- Full Scan – Scans all packets for policies that have IPS enabled
We recommend you use Full scan mode in most environments. - Fast Scan — Scans fewer packets
Fast scan mode inspects a smaller portion of each file that in most cases is enough to identify all threats, and provides better IPS performance.
- Full Scan – Scans all packets for policies that have IPS enabled
- To save configuration changes to the cloud, click Save.
Enable Tor Exit Node Blocking
Tor software provides anonymity to users by moving encrypted traffic across a network of Tor servers. A Tor exit node is the final node that routes Tor traffic to a destination. Because some Tor traffic can be malicious, you can use the Tor Exit Node Blocking service to block inbound Tor exit node traffic to the Firebox (Fireware v12.8.1 and higher and Fireware v12.5.10 and higher). The Firebox uses a database of Tor exit node IP addresses to identify this traffic. You can choose to disable Tor Exit Node Blocking because you might not want to block Tor exit node traffic for legitimate reasons.
When you first upgrade to a Fireware version that supports Tor Exit Node Blocking, and you enabled Botnet Detection previously, the upgrade process enables the Tor Exit Node Blocking feature and applies it to all policies by default.
If you want to disable Tor Exit Node Blocking for a specific policy, go to Configure Security Services in a Firewall Policy on a Cloud-Managed Firebox.
To enable Tor Exit Node Blocking globally in all policies:
- Select Configure > Devices.
- Select a cloud-managed Firebox.
Status and settings for the selected Firebox appear. - Select Device Configuration.
The Device Configuration page opens and shows the WatchGuard Cloud Security Services.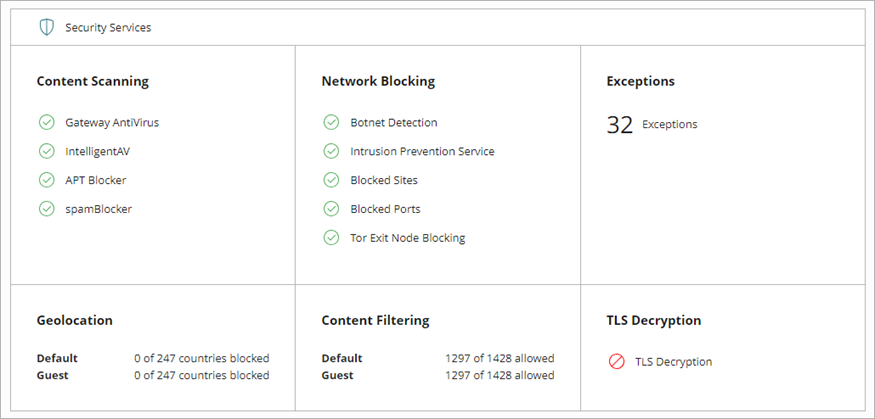
- Click the Network Blocking tile.
The Network Blocking page opens. - Enable Tor Exit Node Blocking.
The feature blocks inbound traffic from Tor exit nodes for all policies. - To save configuration changes to the cloud, click Save.
When you enable the Tor Exit Node Blocking service globally, unless you have disabled the feature in a specific policy, Tor Exit Node Blocking is enabled in all policies automatically. To configure the feature for a specific policy, go to Configure Security Services in a Firewall Policy on a Cloud-Managed Firebox.
When you disable the Tor Exit Node Blocking service globally, Tor Exit Node Blocking is disabled in all policies automatically.
Add a Cloud-Managed Firebox to WatchGuard Cloud
Add Blocked Sites and Blocked Ports on a Cloud-Managed Firebox
Configure Default Packet Handling on a Cloud-Managed Firebox