Applies To: Cloud-managed Fireboxes
When users connect to your Firebox with a web browser, they often see a security warning. This warning occurs because the default certificate is not trusted, or because the certificate does not have the same IP address or domain name used by the Firebox for authentication. You can use a third-party or self-signed certificate that has the same IP address or domain name for user authentication. You must import that certificate on each client browser or device to prevent the security warnings.
If you use a third-party certificate for authentication, it is important to track when the certificates expire. This helps to avoid disruptions in critical services such as VPN.
For more information on how to import and install a third-party Web Server certificate, see Import and Install a Third-Party Web Server Certificate.
To configure the web server certificate for Firebox authentication:
- Select Configure > Devices.
- Select a cloud-managed Firebox.
Status and settings for the selected Firebox appear. - Select Device Configuration.
The Device Configuration page opens. - In the Certificates tile, click Device Certificates.
The Device Certificates page opens. - Select the Web Server Certificate tab.
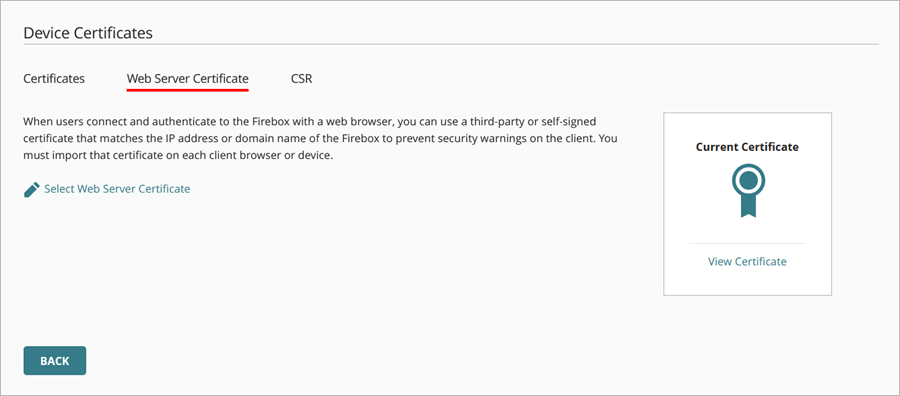
- Click Select Web Server Certificate.
The Select Web Server Certificate dialog box opens. - Select the default certificate signed by the Firebox or a third-party certificate you imported to WatchGuard Cloud.
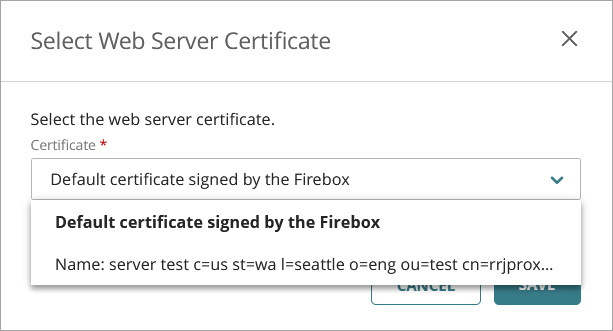
- Click Save.