Applies To: Cloud-managed Fireboxes
You can manage your account certificates and Firebox certificates for cloud-managed devices in WatchGuard Cloud.
You can perform these actions:
- View a list of current certificates
- Add a certificate
- Delete a certificate
- Export a certificate for resigning or distribution
- Update a certificate
- Create a certificate signing request (CSR)
- Configure the Firebox Web Server certificate
From the Subscriber view, you can manage certificates for your account or managed accounts in the Administration menu, or for your cloud-managed devices on the Device Configuration page. From the Service Provider view, you can access certificate management on the Device Configuration page only.
View Certificates
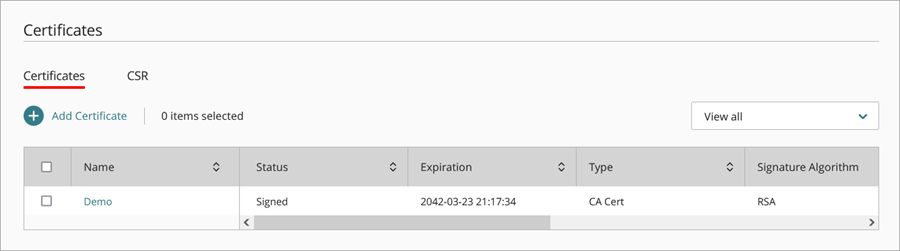
To view the current list of certificates for your subscriber account, select Administration > Certificates.
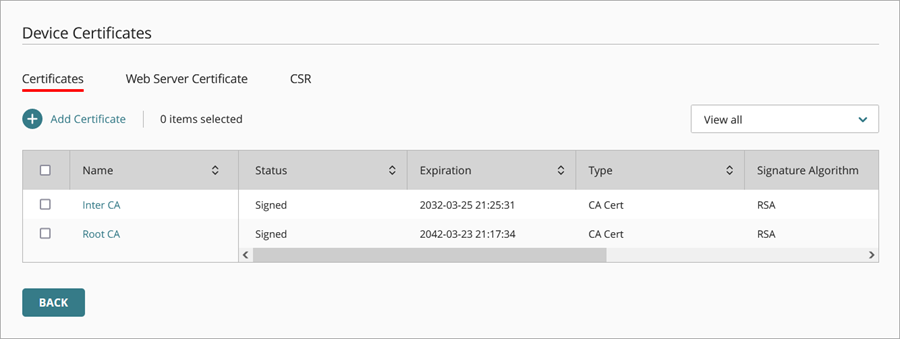
To view device certificates, go to Configure > Devices > Device Configuration > Device Certificates.
Use the drop-down list to filter the display based on certificate type. To sort the list of certificates, click a column name.
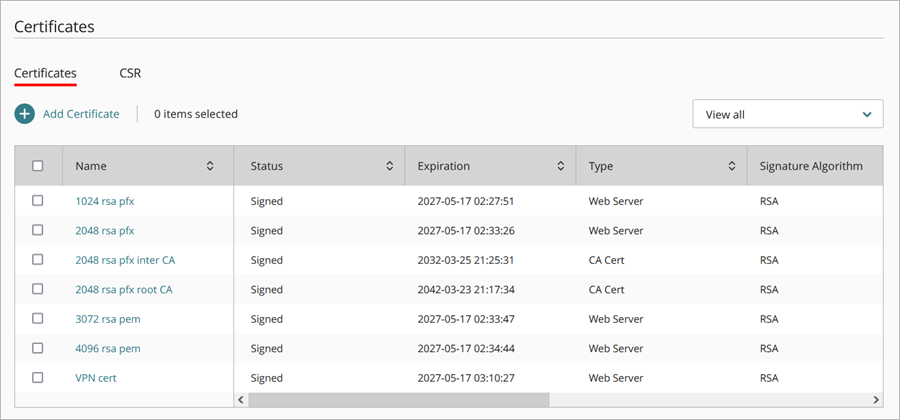
The Certificates page includes these columns:
- Name — Name of the certificate.
- Status — Status of the certificate:
- Signed — The certificate is valid and available for use.
- Revoked — The certificate has been revoked through the Certificate Revocation List (CRL) by the issuing Certificate Authority (CA) before the expiration date.
- Expired — The certificate has expired.
- Not yet valid — The certificate start date is in the future and is not the same date and time of the Firebox.
- Subject — The subject name or identifier of the certificate.
- Expiration — The expiration date of the certificate.
- Type — The type of certificate.
- Algorithm — The algorithm used by the certificate (EC, RSA, or DSS)
- Device — The number of devices that have the certificate installed.
The Device column is only available when you access certificates at the account level.
- Description — The description of the certificate.
To view certificate details, or to update the certificate name or description, select a certificate in the list.
Add a Certificate
You can import a certificate from the Windows clipboard or from a file on your local computer. Certificates must be in Base64 PEM encoded format or PFX file format.
CSRs created for your account can only be imported at account level. CSRs created for a device can only be imported at device level.
- Select Administration > Certificates.
The Certificates page opens. - Click Add Certificate.
The Add Certificates page opens.
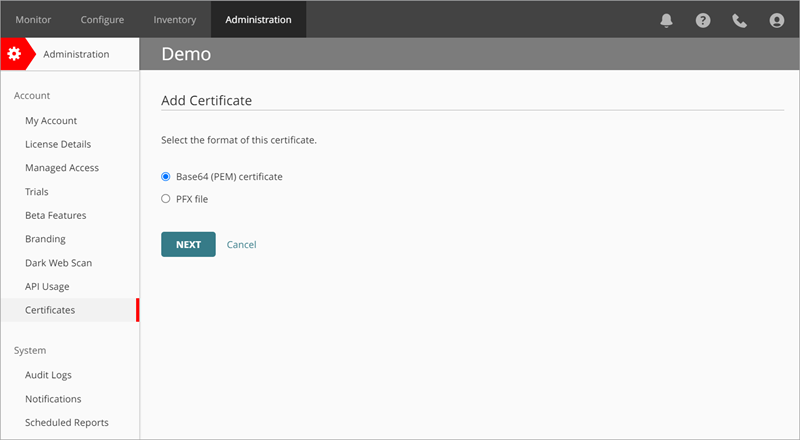
- Select either the Base64 (PEM) certificate or PFX file certificate type. The default format is Base64 (PEM) certificate.
- Click Next.
- Enter a Name and an optional Description for your certificate.
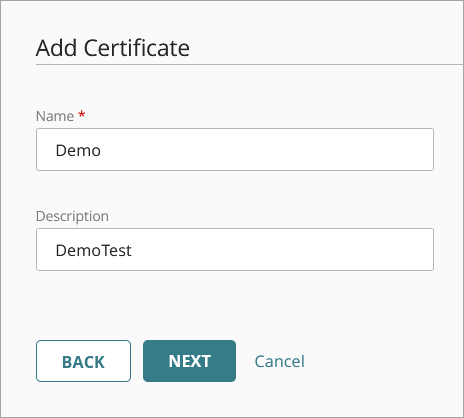
- Click Next.
- To verify the certificate, drag and drop or select the file, or paste the certificate text into the text box.
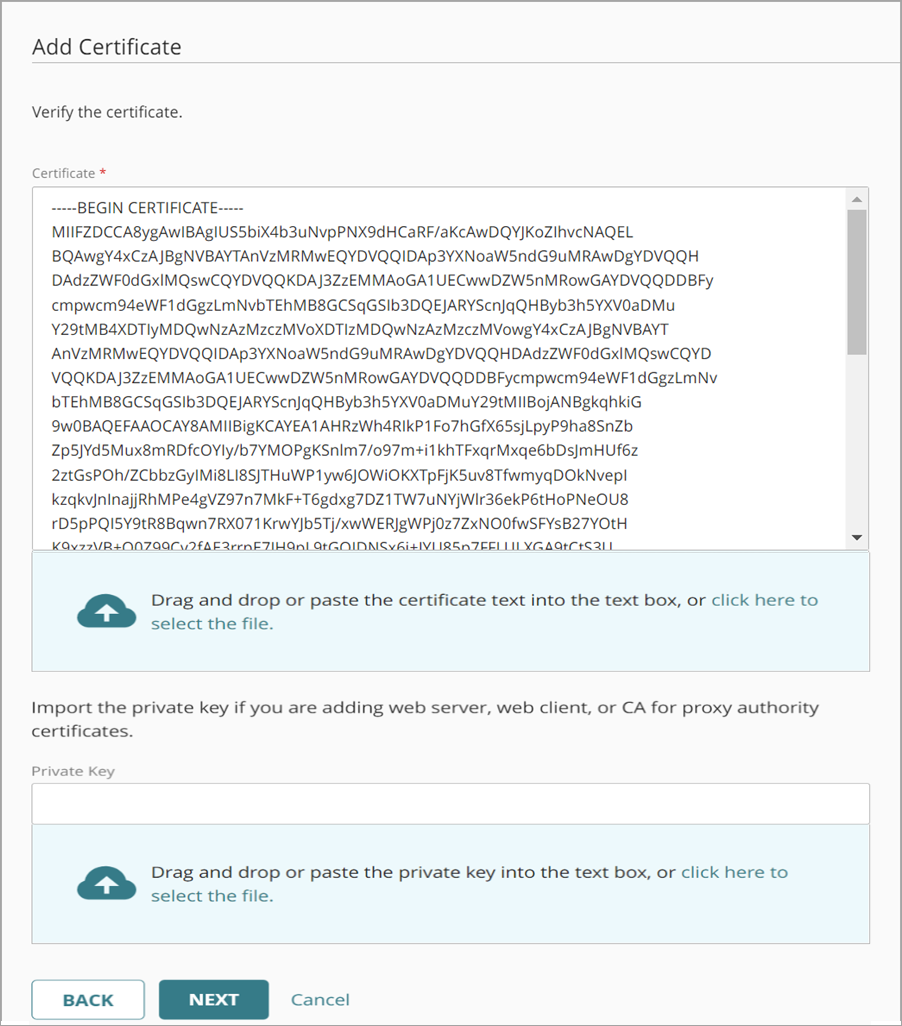
- If you selected PFX file, drag and drop or select the file, and enter the PFX File Password to decrypt the file.
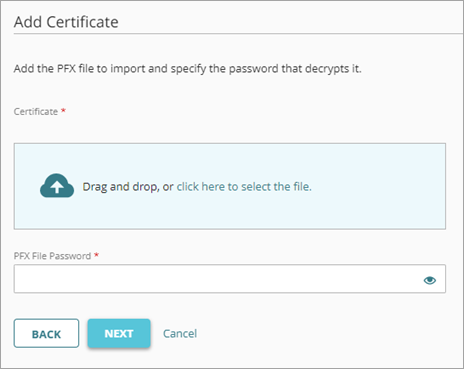
- Click Next.

- Click Save.
- Your certificate is added to the certificate list in WatchGuard Cloud.
To add a certificate for a specific device only, you must add a certificate on the Device Configuration page.
- Select Configure > Devices.
- Select a cloud-managed Firebox.
Status and settings for the selected Firebox appear. - Select Device Configuration.
The Device Configuration page opens. - In the Certificates tile, click Device Certificates.
The Device Certificates page opens. - Click Add Certificate.
The Add Certificates page opens. - Select one of these options:
- Upload a new certificate for this device only
- Upload a new certificate to WatchGuard Cloud to share with other devices
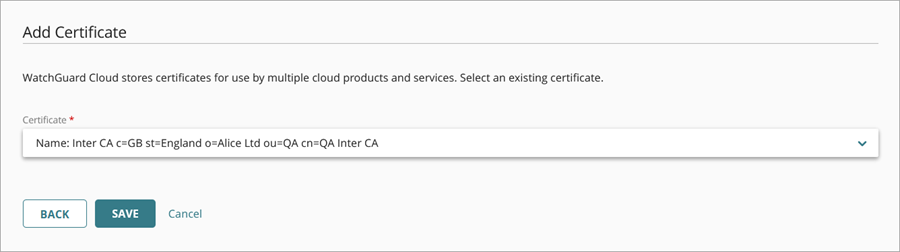
- Import a certificate from WatchGuard Cloud

The Import a certificate from WatchGuard Cloud option only appears if you have existing certificates stored in WatchGuard Cloud.
- If you selected Upload a new certificate for this device only, or Upload a new certificate to WatchGuard Cloud to share with other devices, you must select the certificate format and import your certificate.
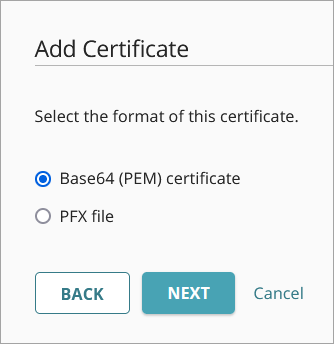
- Select either the Base64 (PEM) certificate or PFX file certificate type. The default format is Base64 (PEM) certificate.
- Click Next and enter a name for your certificate.
- (Optional) Enter a description for your certificate.
- Click Next.
- To verify your certificate, drag and drop, select the file, or paste the certificate text into the text box.
- If you selected PFX file, drag and drop or select the file, and enter the PFX File Password to decrypt the file.
- Click Next.
- If you selected Import a certificate from WatchGuard Cloud, select the certificate to import to your device.
-
Click Save.
The certificate is added to the Device Certificates list.
Delete a Certificate
When you delete a certificate, you can no longer use the certificate for authentication. If you delete one of the automatically generated certificates, such as the self-signed certificate used by default for the proxy, your Firebox creates a new self-signed certificate for this purpose the next time it reboots. The device does not create a new self-signed certificate automatically if you have imported a different certificate.
The Proxy Authority certificate must not be deleted and the Firebox left with no certificate. The Firebox automatically replaces the missing certificate with a default certificate if the device restarts.
If you delete a trusted CA certificate for proxies, some security services might not work.
You cannot delete a certificate from the Firebox if it is used in a Branch Office VPN (BOVPN) IPSec tunnel configuration.
- Select Administration > Certificates.
The Certificates page opens. - Click Administration > Certificates.
The Certificates page opens. - Select the certificate you want to delete.

- Click Delete.
A Delete Certificates confirmation dialog box opens.
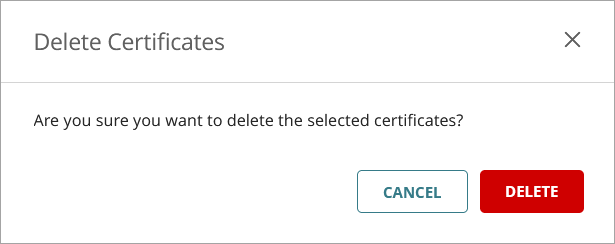
- Click Delete.
You can delete certificates from the Device Certificates page if the certificate is imported to a specific device. To delete a certificate added to an account, go to Administration > Certificates.
- Select Configure > Devices.
- Select a cloud-managed Firebox.
Status and settings for the selected Firebox appear. - Select Device Configuration.
The Device Configuration page opens. - In the Certificates tile, click Device Certificates.
The Device Certificates page opens. - Select the device certificate you want to delete.
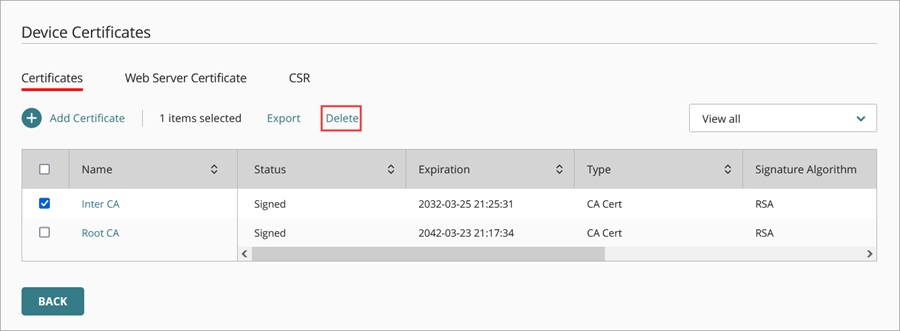
- Click Delete.
A Delete Certificates confirmation dialog box opens.
- Click Delete.
Export a Certificate
You can export a certificate for resigning by a trusted CA, or for distribution to clients on your network. The certificate is saved in PEM format.
- Select Administration > Certificates.
The Certificates page opens. - Select the certificate you want to export.
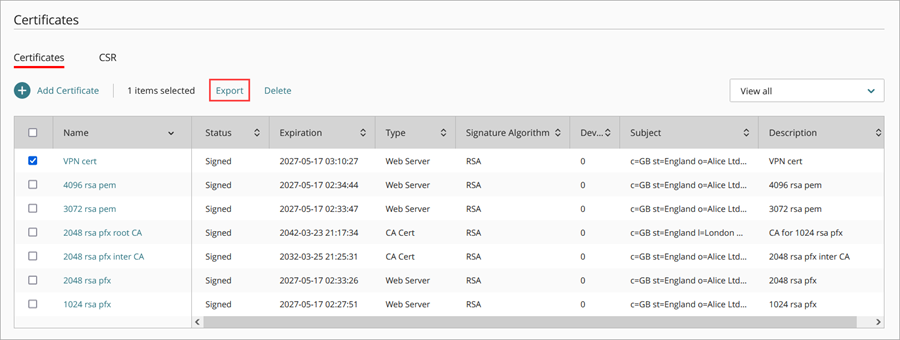
- Click Export.
The certificate is downloaded to your default download folder in PEM format.
You can export certificates from Device Manager if the certificate is imported to a specific device.
- Select Configure > Devices.
- Select a cloud-managed Firebox.
Status and settings for the selected Firebox appear. - Select Device Configuration.
The Device Configuration page opens. - In the Certificates tile, click Device Certificates.
The Device Certificates page opens. - Select the device certificate you want to export.
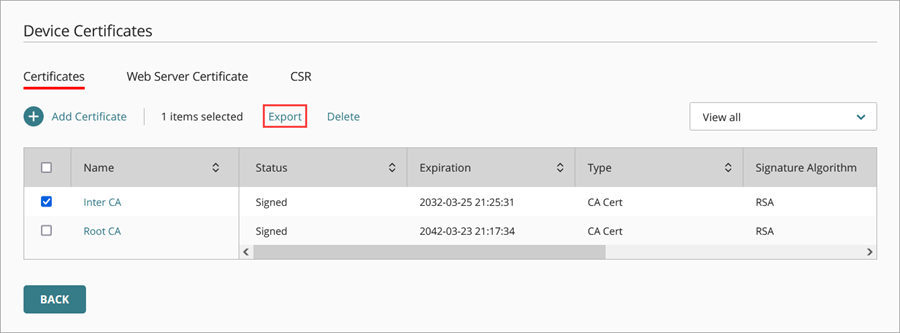
- Click Export.
The certificate is downloaded to your default download folder in PEM format.
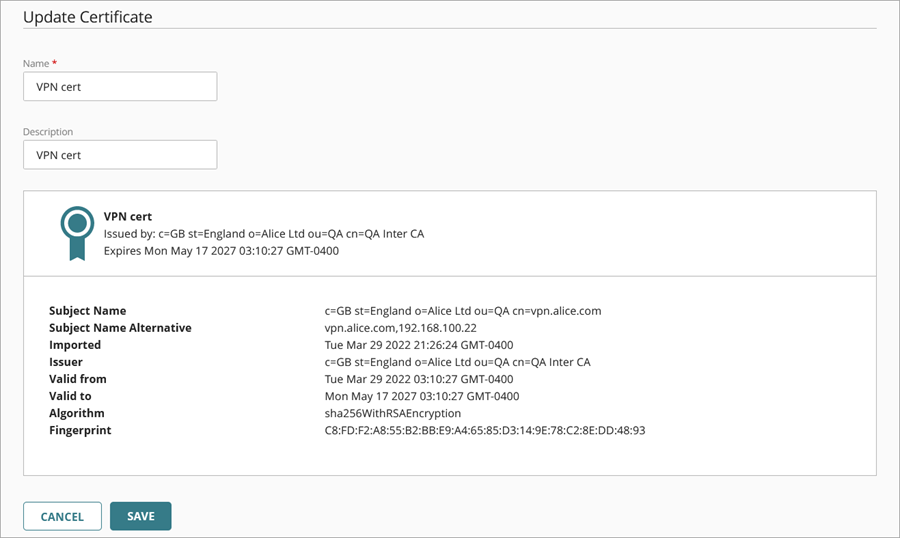
Update a Certificate
You can edit the name and description fields of certificates in WatchGuard Cloud.
- In the Administration menu, you can edit all certificate names and descriptions.
- For devices, you can edit only certificates that are imported to devices. If you select a certificate on the Device Certificates page that was imported through the Administration menu, you can view the certificate details, but cannot edit the name or description.
To update the name or description of a certificate:
- Click the certificate name.
- Edit the name or description.
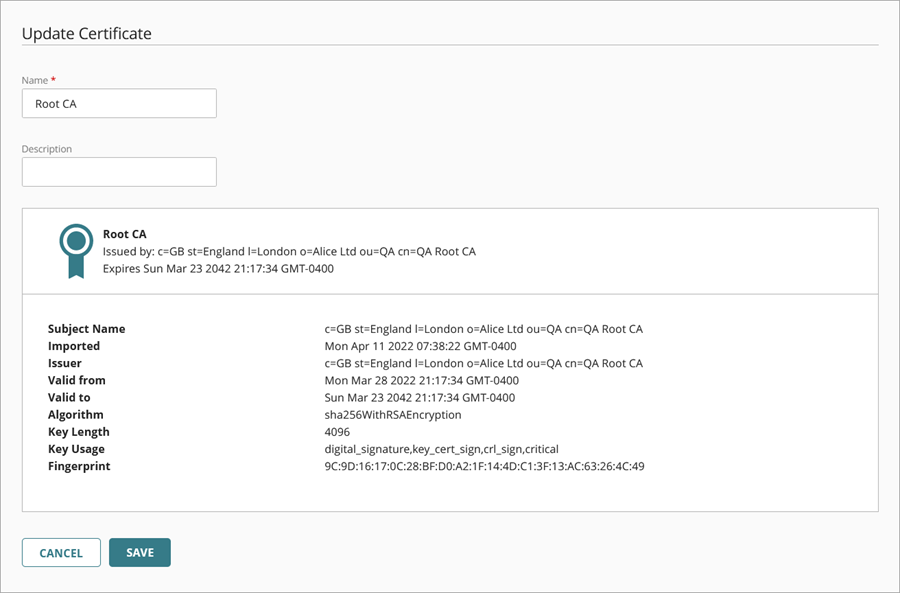
- Click Save.
Create a Certificate Signing Request (CSR)
You can create a certificate signing request (CSR) from your Firebox with WatchGuard Cloud. To create a self-signed certificate, you add part of a cryptographic key pair in a CSR and send the request to a CA (Certificate Authority). The CA issues a certificate after the CA receives the CSR and verifies your identity.
For more information about how to create a certificate signing request, see Create a Certificate Signing Request (CSR).
Configure the Firebox Web Server Certificate
The Firebox uses a default Web Server certificate for user connections to the Firebox, such as management connections.
When users connect to your Firebox with a web browser, they often see a security warning. This warning occurs because the default certificate is not trusted, or because the certificate is not the same IP address or domain name used by the Firebox for authentication. To configure the Firebox Web Server certificate, see Configure the Web Server Certificate for Firebox Authentication.
You can also use a third-party or self-signed certificate that has the same IP address or domain name for user authentication. You must import that certificate on each client browser or device to prevent the security warnings. For more information on how to import and install a third-party Web Server certificate, see Import and Install a Third-Party Web Server Certificate.
Create a Certificate Signing Request (CSR)
Configure the Web Server Certificate for Firebox Authentication