You use VPN firewall policy templates to create a set of one or more bidirectional firewall policies that restrict the type the traffic allowed across a VPN. Note that policy templates do not support proxy policies.
If you use the default "Any" VPN firewall policy, a log message is generated for all traffic through the managed VPN tunnel. If you want to control what traffic is recorded in the logs, you must create your own VPN firewall policy template and use the Enable logging for this traffic check box. You cannot turn off logging for the default "Any" VPN firewall policy or change it in any way.
To create a VPN Firewall policy template:
- On the Device Management tab, expand Managed VPNs, and select VPN Firewall Policy Templates.
The VPN Firewall Policy Templates page appears with a list of currently defined policy templates, if any are available. - At the upper-right corner of the page, click Add.
The VPN Firewall Policy Template dialog box appears.
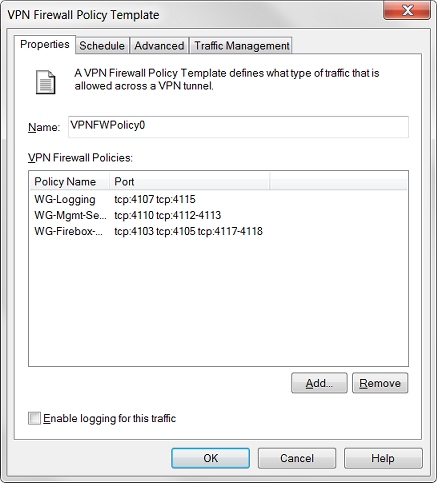
- In the Name text box, type a name for the Policy Template. This is the name that appears in the VPN Firewall Policy Templates list and in the Add VPN Wizard.
- To add a policy to the template, click Add.
The Add Policy wizard starts. - Select from a list of pre-defined policies or create a custom policy. If you create a custom policy, on the next page of the wizard, type a name and select a port and protocol for the policy.
- After you add the policy, you can repeat Steps 2–5 to add more policies.
- Click OK.
Set a Schedule for the Policy Template
By default, the policy template schedule is set to Always On. If you want to restrict the operational hours of this policy, you can configure the policy template to use a custom schedule.
- Select the Schedule tab.
The Policy Schedule Settings appear. - To change the operational hours, select Use custom schedule.
The custom schedule chart appears.
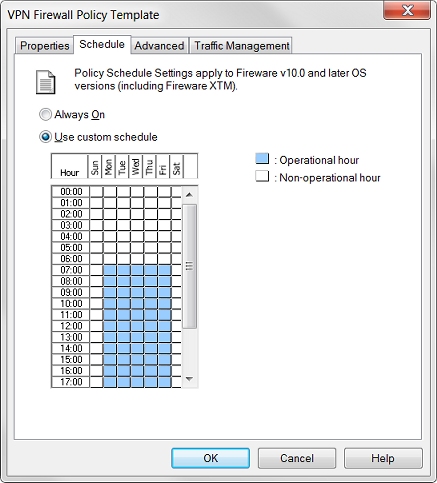
- The custom schedule chart shows days of the week along the X-axis (horizontal) and increments of the day on the Y-axis (vertical). Click the boxes in the chart to change them between operational hours (when the policy is active) and non-operational hours (when the policy is not in effect).
Use QoS Marking in a Policy Template
You can use QoS Marking to mark traffic that uses a VPN firewall policy template. The marking action you select is applied to all traffic that uses the policy.
- Select the Advanced tab.
- Select the Override per-interface settings check box.
- Configure the QoS Marking settings as described in Enable QoS Marking for a Managed BOVPN Tunnel.
Configure Traffic Management in a Policy Template
- Select the Traffic Management tab.
- Select Specify Custom Traffic Management Action.
- Configure the custom traffic management settings as described in Use Traffic Management for Managed BOVPN Tunnels.