Applies To: Locally-managed Fireboxes
After you add a Guest Administrator user account, the Guest Administrator can connect to the Guest Administration portal on the Firebox. From the Guest Administration portal, a Guest Administrator can configure the settings for the guest user accounts and customize the vouchers guest users receive with their user account information. The Guest Administrator can also delete guest user accounts before they expire.
If you remove a hotspot, or change the hotspot authentication settings, all existing guest user accounts for that hotspot are removed.
Connect to the Guest Administration Portal
To manage hotspot guest user accounts, Guest Administrators connect to the Firebox in a web browser. The web browser must support TLS 1.2 or higher.
There are different URLs to access the Guest Administration Portal depending on your version of Fireware:
- Open a web browser and go to https://<Firebox-IP-address>:8080.
Make sure to replace <Firebox-IP-address> with the IP address for your Firebox.
For example, type https://192.168.1.10:8080.
The Log In page appears. - Type the User Name and Passphrase, and select the Authentication Server for the Guest Administrator user account. Tip!
- Click Log In.
- Open a web browser and go to https://<Firebox-IP-address>:8080/wirelessguest.
Make sure to replace <Firebox-IP-address> with the IP address for your Firebox.
For example, type https://192.168.1.10:8080/wirelessguest.
The Log In page appears. - Type the User Name and Passphrase, and select the Authentication Server for the Guest Administrator user account. Tip!
- Click Log In.
The Guest Administration page appears with a list of the hotspots that require user authentication.
The Guest Administration page appears with a list of the hotspots that require user authentication.
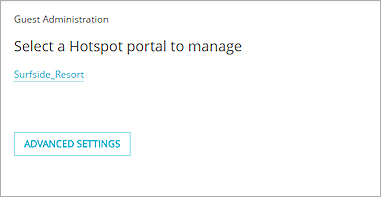
On the main Guest Administration portal page, the Guest Administrator can:
- Customize guest user account settings
- Select the hotspot to manage guest user accounts for
If you specify the management IP address of a FireCluster backup master to connect to the Guest Administration Portal, the portal is read-only, and this error message appears: The Firebox is a backup master of a FireCluster. Please log in to the management IP address of the FireCluster.
Configure the Settings for Guest User Accounts
Before the Guest Administrator generates guest user accounts for the hotspot users, the Guest Administrator can specify the settings for guest user accounts. If the Guest Administrator does not specify different settings, the settings specified in the Advanced Settings are used when new guest user accounts are generated.
User Name Prefix
This is the prefix for all guest user account user names. When guest user accounts are generated, each user name begins with this prefix. The user name suffix is randomly generated and unique for each guest user account.
The default guest user name prefix is guest. The user name prefix can include these characters (A-Z, a-z) (0-9) and (-,_,+,.,*), but cannot include spaces or other special characters.
Account Lifetime
This is the amount of time that each guest user account can be used after it is activated for the first time. When the user logs in with the guest user account credentials, the countdown starts. When the specified account lifetime amount is reached, the user is logged out and cannot reconnect to the hotspot with that guest user account.
The default account lifetime is 8 hours. You cannot specify a value of less than 1 minute for the account lifetime.
Account Expiration
This is the amount of time after which the guest user account expires and is removed from the Guest Accounts list. If the guest user account has not been activated before the account expiration time is reached, the guest user account still expires. If the guest user account is in use when the account expires, the user is logged out and cannot reconnect to the hotspot with that guest user account.
The default account expiration is 30 days. You cannot specify a value of less than 1 minute for the account expiration.
Number of connected devices
You can limit the number of devices that can use each guest account to connect at the same time. The Firebox uses the MAC address to identify connected devices. You can see the current and maximum number of connected devices for each guest user account in the Guest Accounts list.
To configure the default guest user account settings:
- On the Guest Administration page, click Advanced Settings.
The Advanced Settings page appears.
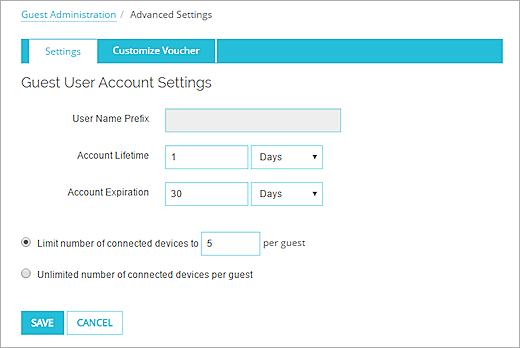
Example of the Advanced Settings page when the Passphrases only option is selected in the Authentication settings for a hotspot.
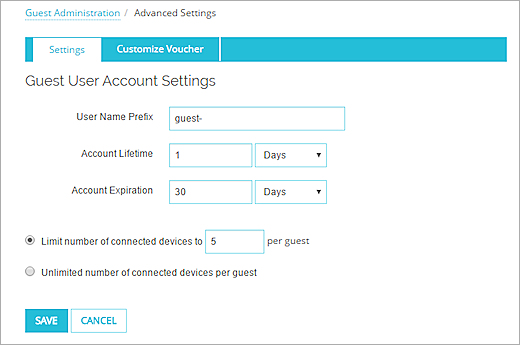
Example of the Advanced Settings page when the User names and passphrases option is selected in the Authentication settings for a hotspot.
For more information about the Hotspot Authentication settings, see Enable a Hotspot.
- In the User Name Prefix text box, type the prefix for all guest user accounts.
This option is only available if you selected the User names and passphrases option in the Hotspot Connections settings. - In the Account Lifetime text box, type or select the amount of time each guest user account is valid. From the drop-down list, select a time increment:
- Seconds
- Minutes
- Hours
- Days
- In the Account Expiration text box, type or select the amount of time after which each user account expires. From the drop-down list, select a time increment:
- Seconds
- Minutes
- Hours
- Days
- Specify the maximum number of connected devices for each guest user account.
- To limit the number of devices that can connect, select Limit number of connected devices. In the adjacent text box, type the maximum number of connected devices to allow for each guest account.
- To allow an unlimited number of connected devices, select Unlimited number of connected devices per guest.
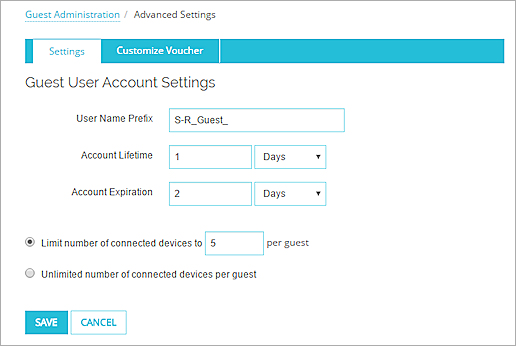
Example of user-defined Guest User Account Settings
- Click Save.
The Guest Accounts page appears.
Customize Guest User Account Vouchers
When a Guest Administrator adds guest user accounts, the Guest Administrator can print a voucher with the user name and passphrase for each user account, the maximum number of connected devices, and contact information for the company.
In the settings for the voucher, you can select a company logo file to include on the voucher. The logo file can include a simple image, or include an image and more information about the business or the hotspot. You can customize the information included in the logo image file as necessary for your business.
The logo file must be a .JPG, .GIF, or .PNG file. There is no size constraint on the logo file, but the recommended size is 90 x 50 pixels.
To configure settings for the voucher:
- Click Advanced Settings.
The Guest User Account Settings page appears. - Select the Customize Voucher tab.
The Customize Printed Voucher page appears.
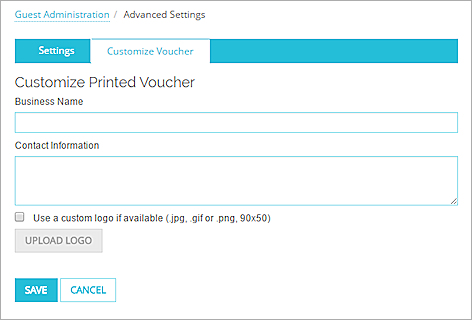
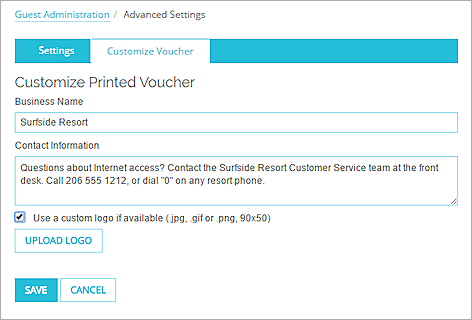
- In the Business Name text box, type the name of the company where the hotspot is located.
- In the Contact Information text box, type the contact information for the company. This text can include instructions to get help with the connection, as well as contact numbers or addresses.
- To add a company logo to the voucher, select the Use a custom logo if available check box.
- To select the custom logo file, click Upload Logo.
The Upload Logo page opens in a new browser tab.
![]()
- To select the logo file, click Choose File and select the JPG, GIF, or PNG image file.
- Click Upload.
The selected image file is uploaded and the file name appears adjacent to the Choose File button. The Upload Logo page closes automatically, and the Customize Printed Voucher page appears. The logo file name does not appear on the Customize Printed Voucher page.
- Click Save.
The main Guest Administration page appears.
Manage Guest User Accounts
After a Guest Administrator has completed the guest user account settings and configured the settings for the printed vouchers, the Guest Administrator can manage guest user accounts for each hotspot that requires authentication.
For each hotspot, the Guest Administrator can add guest user accounts and then print a voucher for each guest user account. After guest user accounts are added, the accounts are automatically removed when the hotspot user session expires. Each session expires when the amount of time the user has been connected to the hotspot reaches the session timeout value that the Firebox administrator specified in the Firebox hotspot configuration. To remove guest user accounts before they expire, the Guest Administrator can delete the active user accounts. The Guest Administrator can also print a new voucher for one or more guest user accounts.
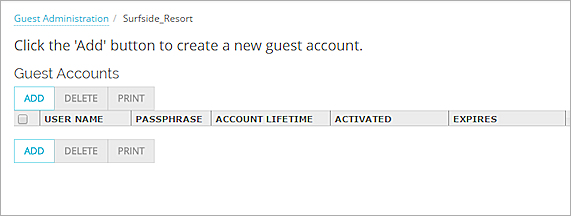
To manage guest accounts for a hotspot, from the Guest Administration page, click the name of the hotspot.
The Guest Accounts page appears for the hotspot.
Add a Guest User Account
To add guest user accounts:
- On the Guest Accounts page, click Add.
The Add and Print New Guest User Accounts dialog box appears.
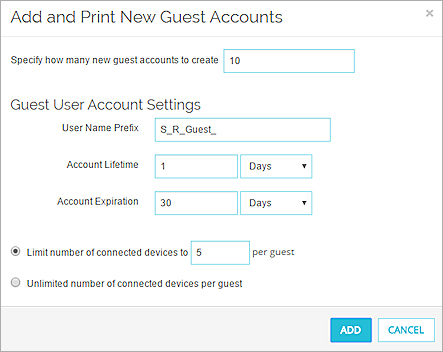
- In the Specify how many new guest accounts to create text box, type or select the number of user accounts to add.
- To specify user account settings that are different from the global settings, configure the options in the Guest User Account Settings section.
For more information about these settings, go to Configure the Settings for Guest User Accounts. - Click Add.
A page with printable vouchers appears. You can print the vouchers from this page, or you can print them later. - To print vouchers for the new user accounts, click Print.
- To close the voucher page, click Close.
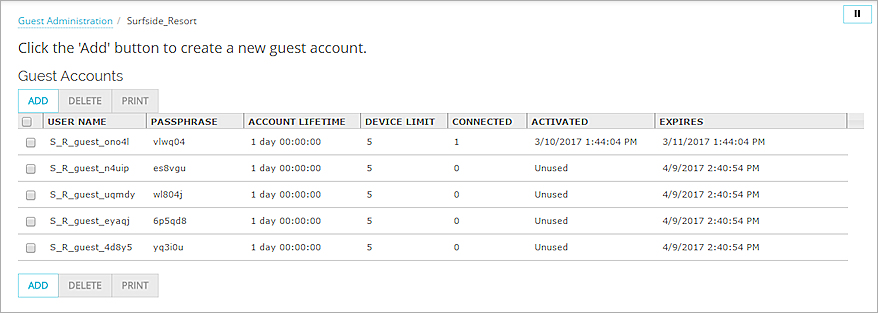
The Guest Accounts page appears with the new guest user accounts in the Guest Accounts list.
Print a Voucher
The Guest Administrator can print a voucher for any guest user account in the list. To more easily sort the Guest Accounts list, the Guest Administrator can click a column header to sort the list by that column.
To print vouchers for guest user accounts:
- To sort the Guest Accounts list by a particular column, click that column header.
- From the Guest Accounts list, select the check box for one or more guest user accounts.
- Click Print.
The Print Guest Account dialog box appears.
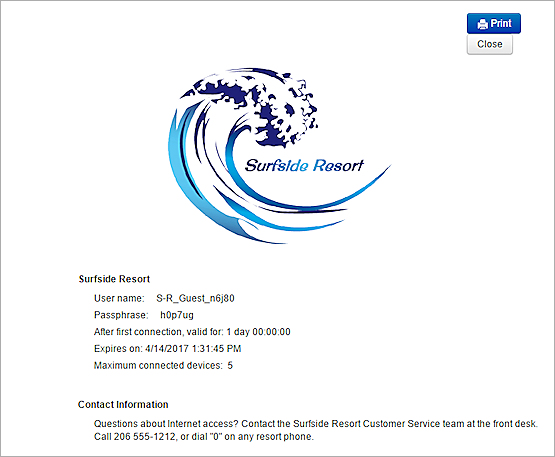
An example of a voucher with an image only logo file.
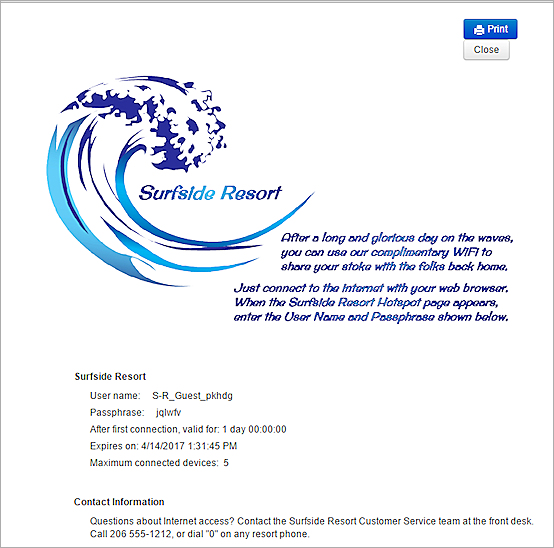
An example of a voucher with a logo file that includes an image and additional explanatory text.
- Click Print.
The Printer settings page appears. - Specify the printer settings and click Print.
The voucher is sent to the selected printer and the Print Guest Account dialog box closes automatically.
Monitor Connected Devices
In the Guest Accounts list, you can see information about connected devices and account expiration for each guest account.
- Device Limit — The maximum number of connected devices allowed for each account.
- Connected — The number of devices currently connected for each guest user account.
- Activated — When the first device connected for a guest user account. After a device connects, the account is activated.
- Expires — When the guest account expires. For an activated account, the expiration date is calculated based on the date and time in the account was activated plus the Account Lifetime. Unused accounts expire on the Account Expiration Date specified in the Guest User Account Settings when the account was added.
Delete Guest User Accounts
The Guest Administrator can delete guest user accounts from the Guest Accounts list. When a guest user account is deleted, the guest can no longer connect to the hotspot with that guest user account. To more easily sort the Guest Accounts list, the Guest Administrator can click a column header to sort the list by that column.
To delete guest user accounts:
- To sort the Guest Accounts list by a particular column, click that column header.
- From the Guest Accounts list, select the check box for one or more guest user accounts.
- Click Delete.
A confirmation message appears. - Click Delete.
The selected guest user accounts are removed from the list.