Applies To: Endpoint Security Elite, Endpoint Security 360, Endpoint Security Prime, WatchGuard EDR, WatchGuard EDR Core, Endpoint Security Basic
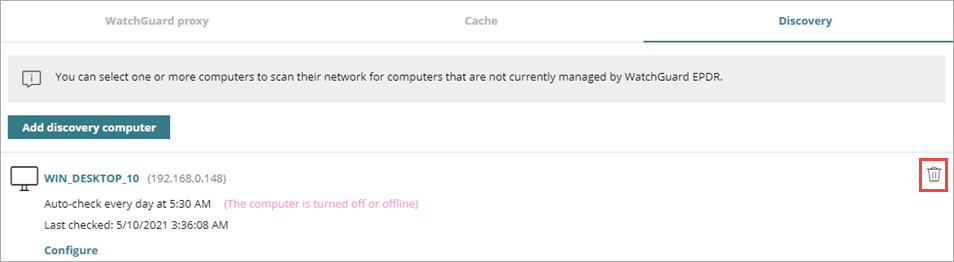
Discovery computers search for computers on the network that WatchGuard Endpoint Security does not yet manage. The first Windows computer that you add to WatchGuard Endpoint Security is automatically designated as the discovery computer. For more information, go to Designate a Discovery Computer.
This topic helps you to troubleshoot issues with a designated discovery computer or the discovery process.
Discovery Computer Does Not Discover Devices
If the discovery computer does not discover other devices on the network, and known unprotected computers exist, make sure that your discovery computer meets the minimum system requirements. For more information, go to Installation Requirements.
Discovery Computer Discovers Already Found Devices
When the discovery process queries a computer, the information it retrieves contains the MAC address, hostname, and IP address of the computer. If the found information is not the same as that of an already discovered computer, the discovery process might consider the computer as new and unprotected.
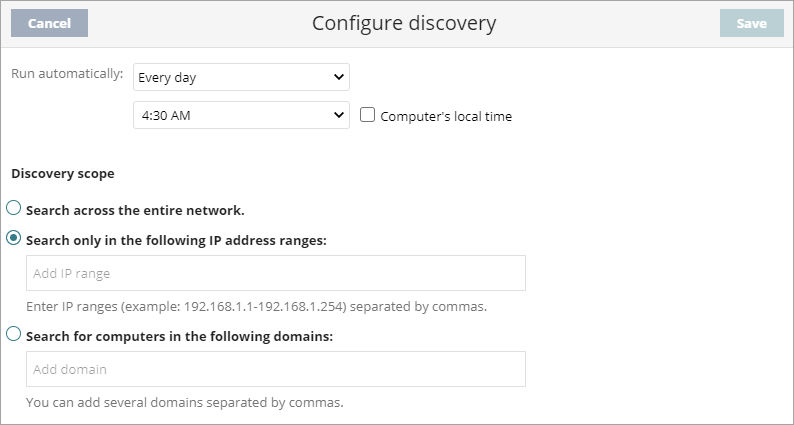
However, the discovery process might incorrectly identify a previously discovered device as a new device. A possible cause is when you set Settings > Network Services > Discovery > Configure Discovery > Discovery Scope > Search Only in the Following IP Address Ranges, the ranges that you specify might be out of the broadcast domain of the discovery computer.
If you enable Discover Computers on the Network and Discover Computers in Active Directory on the Configure Discovery page, the discovery computer might identify the same device on the network more than one time.
If the ranges that you specify are out of the broadcast domain of the discovery computer, you might have to use a router to provide network connectivity. If so, the network information that the discovery computer then receives contains the MAC address of the router, and not the MAC address of the computer that connects to the router. The discovery process records the MAC address of the router as the MAC address of any computer that you connect to the router. Because of this, the discovery process sees the router-connected computers as new.
To correct this issue:
- Make sure to use a discovery computer for each network segment. For more information, go to About Network Segmentation.
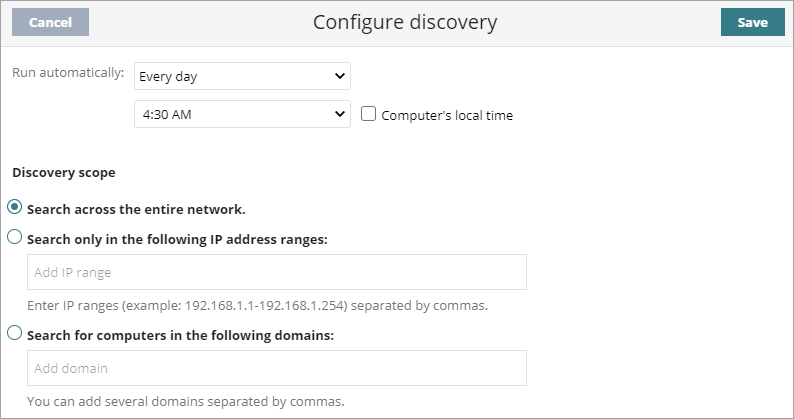
- Select Settings > Network Services > Discovery > Configure Discovery > Discovery Scope > Search Across the Entire Network.
- Click Save.
- Remove all previously discovered devices.
- The next scheduled discovery search now correctly identifies devices.
High CPU Usage on the Discovery Computer
Sometimes, from the Windows Task Manager of the discovery computer, you might notice high CPU usage from the Agent Service.exe process (the communication agent). This is because the communication agent broadcasts over the network as it searches for unprotected computers. Although this is a low-priority process, the process uses CPU resources.
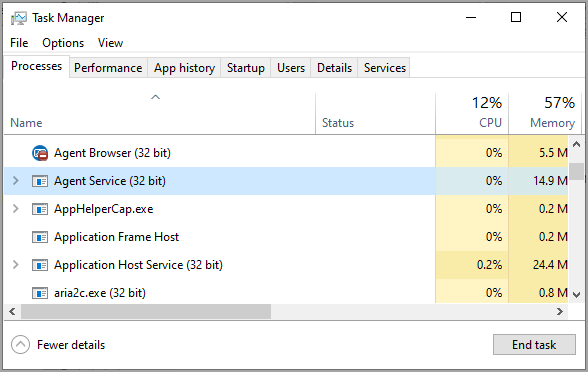
You might also see a scenario where all computers on the network have endpoint security protection, but the discovery computer continues to search for unprotected computers, and generates CPU usage. In this case, use Windows Task Manager to see the Agent Service.exe process CPU usage percentage on the discovery computer. If CPU usage is high, and you have no active current installs of endpoint protection software, you can remove the discovery computer from its role. This lowers CPU usage on the discovery computer. For more information, go to Designate a Discovery Computer.
Persistent Discovery Computer Issues
If a discovery issue still exists after you troubleshoot, gather this information to help with a Support case:
- Enable the advanced logs tool.
- Run the PSErrortrace tool.
- Run a discovery search.
- Wait until the Add Discovery Computer dialog box opens with a list of the Windows computers on the network.
- Stop the PSErrortrace tool.
- Disable the advanced logs tool.
- Use the PSInfo tool to provide diagnostic logs to help Support troubleshoot your issue. For more information, go to Get Started with PSInfo.