Applies To: Endpoint Security Elite, Endpoint Security 360, Endpoint Security Prime, WatchGuard EDR, WatchGuard EDR Core, Endpoint Security Basic
Discovery computers find computers on the network that WatchGuard Endpoint Security does not manage. The first Windows computer that you add to WatchGuard Endpoint Security is automatically designated as the discovery computer.
On the Network Services > Discovery tab, you can select one or more Windows computers to scan the network for computers that are not managed by WatchGuard Endpoint Security.
For information on the role of the discovery computer and remote installation, see Install the Endpoint Software Remotely (Windows Computers).
Your operator role determines what you can see and do in WatchGuard Cloud. Your role must have the Add, Discover, and Delete Computers permission to view or configure this feature. For more information, go to Manage WatchGuard Cloud Operators and Roles.
Designate a Computer as a Discovery Computer
To search for unmanaged devices across all subnets on the network, add at least one discovery computer from each subnet.
To designate a discovery computer:
- In WatchGuard Cloud, select Configure > Endpoint Security.
- Select Settings.
- From the left pane, select Network Services.
- Select the Discovery tab.
The Discovery page opens with a list of existing discovery computers. - Click Add Discovery Computer.
The Add Discovery Computer dialog box opens with a list of all the Windows computers on the network.
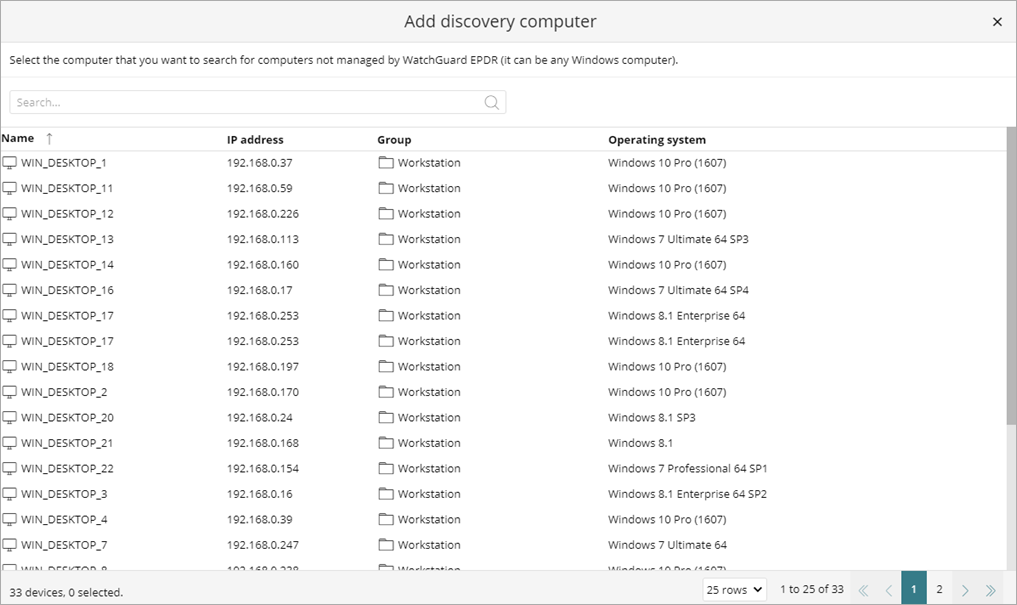
- In the search bar, type search terms, such as the name of the computer you want to designate as a discovery computer.
- Select the computer you want to add.
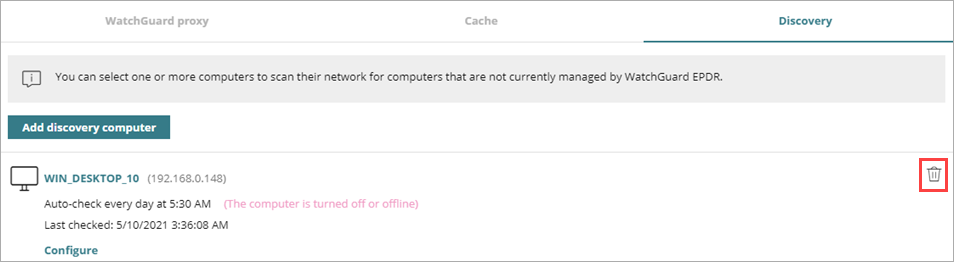
To remove a discovery computer from the list:
- In WatchGuard Cloud, select Configure > Endpoint Security.
- Select Settings.
- From the left pane, select Network Services.
- Select the Discovery tab.
The Discovery page opens with a list of existing discovery computers - In the list of computers, next to the discovery computer you want to remove, click
 .
.
Use Active Directory to Discover Computers
The discovery computer connects to Active Directory to search for computers on the network. Each discovery computer can connect to a maximum of three servers to launch queries against directories.
To designate a discovery computer with Active Directory:
- In WatchGuard Cloud, select Configure > Endpoint Security.
- Select Settings.
- From the left pane, select Network Services.
- Select the Discovery tab. The Discovery page opens with a list of existing discovery computers.
- Click Add Discovery Computer.
The Add Discovery Computer dialog box opens with a list of all the Windows computers on the network.
- In the search bar, type search terms, such as the name of the computer you want to designate as a discovery computer.
- Select the computer you want to add.
- Click Configure.
The Configure Discovery page opens. - Enable the Discover Computers in Active Directory toggle.
- Click Add Active Directory Server.
The Add Active Directory server dialog box opens. - Enter the name or IP address of the server you want to search. You can use the private IP address of the server.
- Enter the server credentials, if required.
- Click Save.
The discovery computer queries Active Directory for computers on the network every four hours.
Schedule and Run Discovery Computer Tasks
You can configure the discovery computer to run at regular intervals or you can run a discovery task on demand.
To schedule and run discovery computer tasks:
- In WatchGuard Cloud, select Configure > Endpoint Security.
- Select Settings.
- From the left pane, select Network Services.
- Select the Discovery tab.
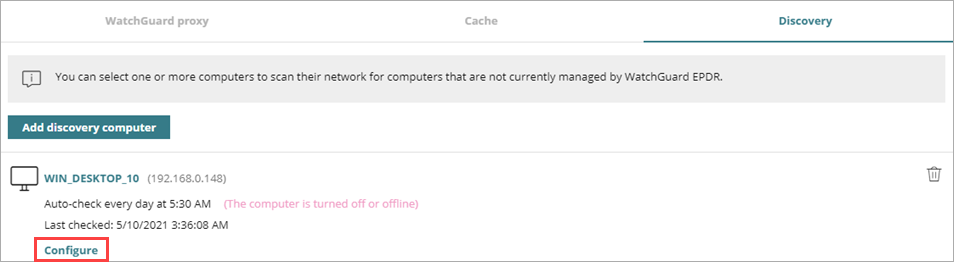
The Discovery page opens with a list of existing discovery computers. - In the list of computers, next to the discovery computer you want to configure, click Configure.
- To enable the discovery computer to search for unprotected computers every day, from the Run automatically drop-down list, select Every Day.

- Select the time of day when the search runs.
To specify the time based on the time on the discovery computer, select the Computer's local time check box. If you do not select this check box, the time is based on WatchGuard Cloud server time. - To discover computers on demand, from the Run automatically drop-down list, select No.
- In the Discovery Scope section, select an option to limit the scope of the discovery computer search. For more information, see Limit Discovery Scope.
- Click Save.
The discovery computer shows a summary of the scheduled task in its description. If you selected to not run the task automatically, select Check Now to discover computers on demand. Computers discovered through network scanning or Active Directory show in the Unmanaged Computers Discovered list.
Schedule and Run Discovery Computer Tasks for an Active Directory Server
To schedule and run discovery computer tasks on an Active Directory server:
- In WatchGuard Cloud, select Configure > Endpoint Security.
- Select Settings.
- From the left pane, select Network Services.
- Select the Discovery tab.
The Discovery page opens with a list of existing discovery computers. - In the list of computers, next to the discovery computer you want to configure, click Configure.
- Select the Active Directory server you want to configure.
The Edit Active Directory server dialog box opens. - From the Recurrence drop-down list, select how often searches are run (hours).
- Click Save.
Computers discovered through network scanning or Active Directory show in the Unmanaged Computers Discovered list.
Limit Discovery Scope
The scope settings only affect the subnet where the discovery computer resides. In the Discovery Scope section, you can limit where the discovery computer searches.
Search across the entire network
The discovery computer uses the network mask configured on the interface to scan its subnet for unmanaged computers.
Search only the following IP addresses
Enter an IP address or IP address range, separated by commas. The IP ranges must have a dash or hyphen in the middle (for example, 192.168.1.1-192.168.1.254). You can only specify private IP address ranges.
Search for computers in the following domains
Enter the Windows domains for the discovery computer to search, separated by commas.
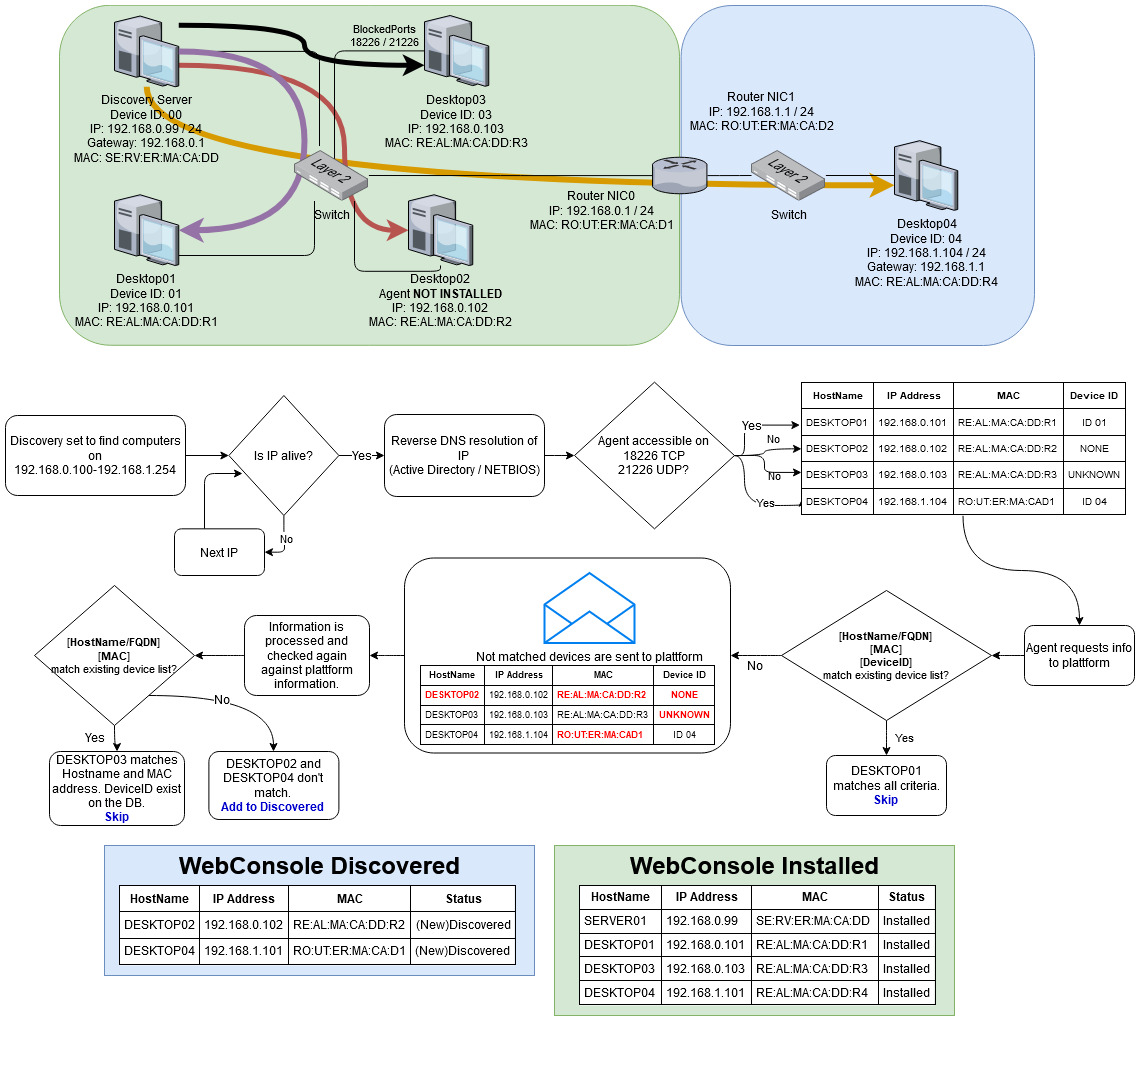
How Remote Discovery Works
This image shows how the discovery computer searches a network with subnets and evaluates whether to add a computer to the Undiscovered Computers list.