Applies To: Endpoint Security Elite, Endpoint Security 360, Endpoint Security Prime, WatchGuard EDR, WatchGuard EDR Core, Endpoint Security Basic
After you successfully establish a connection to WatchGuard Cloud you can download script parameters for your WatchGuard client accounts. You use these script parameters to run scripts in NinjaOne. Before you can use Endpoint Security installation scripts in NinjaOne you must:
After you get the script parameters and import the Endpoint Security scripts to NinjaOne, you can Run Scripts in NinjaOne
Get WatchGuard Client Script Parameters
You can get WatchGuard Client script parameters in these ways:
Copy Individual Client Script Parameters
You can copy script parameters for a client on the Client Settings page of the NinjaOne Onboarding application.
To copy script parameters for a WatchGuard Cloud client account, from the NinjaOne Onboarding application:
- Select Client Settings.
- From the WatchGuard Client list, select the WatchGuard Cloud account that you want to copy the script parameters for.

- From the Network Settings for Installation drop-down list, select the Endpoint Security network settings profile to assign to this client.
After you select a network settings profile for a client, a Copy button appears in the Script Parameters column.

- In the Script Parameters column, click Copy.
A confirmation message appears.

- Click OK.
Download All Client Script Parameters
You can copy script parameters for all your WatchGuard client accounts on the Client Settings page of the NinjaOne Onboarding application.
To copy script parameters for all WatchGuard Cloud client accounts, from the NinjaOne Onboarding application:
- Select Client Settings.
- Select a client from the list.
- From the Network Settings for Installation drop-down list, select the Endpoint Security network settings profile to assign to the client. Repeat these steps for each client.
If you do not assign a network settings profile to a client in the NinjaOne Onboarding application, the Default Settings profile is used in the script parameters for the .CSV file.
- Click Download CSV.

- Save the WatchGuardClients.CSV file to your computer.
A confirmation message appears.

- Click OK.
The WatchGuardClients.CSV file contains the script parameters for every client, along with the client name, WatchGuard Cloud ID, license information, and the network settings profile assigned to the client.

Import Scripts to NinjaOne
When you download the WatchGuard Endpoint Security integration for NinjaOne, the downloaded folder includes WatchGuard scripts. Use these installation scripts in NinjaOne to deploy the WatchGuard Agent to your client devices.
Create Script Category
Before you import WatchGuard Scripts into NinjaOne, create a category for the scripts.
To create a category, from NinjaOne:
- Select Home > Administration > Library > Automation.
- Select the Categories tab.
- Click Create New Category.

- In the Name text box, enter WatchGuard Endpoint Security Installation.

- Click Save.
Import Scripts
This script table includes the script name, description, category, file name, language, operating system, and architecture information for each WatchGuard script available to use in NinjaOne. Use the data in this table when you import scripts into NinjaOne.
| Script Name | Description | Category | File Name | Language | Operating System | Architecture |
|---|---|---|---|---|---|---|
| WatchGuard Endpoint Security Agent - Windows | Install the WatchGuard Agent on Windows devices | WatchGuard Endpoint Security Installation | WG-Install-Windows.PS1 | PowerShell | Windows | All |
| WatchGuard Endpoint Security Agent - Mac | Install the WatchGuard Agent on Mac devices | WatchGuard Endpoint Security Installation | WG-Install-Mac.SH | ShellScript | macOS | 64-bit |
| WatchGuard Endpoint Security Agent - Linux | Install the WatchGuard Agent on Linux devices | WatchGuard Endpoint Security Installation | WG-Install-Linux.SH | ShellScript | Linux | All |
To import scripts, from NinjaOne:
- Select Home > Administration > Library > Automation.
- Select the Automations tab.

- Click Add.
- From the drop-down list, select Import From File.

- Select the WG-Install-Windows.ps1 script from the NinjaOne folder.

- Click Open.
The Create Script page opens.

- In the Name text box, enter WatchGuard Endpoint Security Agent - Windows.
- In the Description text box, enter Install the WatchGuard Agent on Windows devices.
- From the Categories drop-down list, select WatchGuard Endpoint Security Installation.
- From the Language drop-down list, select PowerShell.
- From the Operating System drop-down list, select Windows.
- From the Architecture drop-down list, select All.
- Click Save.
- Click Close to return to the Automations tab.
- Repeat this procedure for the macOS and Linux installation scripts. Use the data from the script table to enter the required information.
Run Scripts in NinjaOne
To run the WatchGuard Endpoint Security installation scripts in NinjaOne, you must create groups for each of your clients that search for devices without Endpoint Security products installed, and then create tasks to install the Endpoint Security Agent on those devices. You must create separate groups and tasks for the Endpoint Security Agent to install on Windows, Mac, and Linux devices.
You need at least one Windows, Mac, and Linux device with Endpoint Security installed in your NinjaOne inventory to configure groups and tasks.
- Select Home > Administration > Devices > Groups.

- Click Create New Group.
The Devices page for a new group opens.

- From the Organization drop-down list, select the organization (the WatchGuard client) you want to create the group for.
- From the Location drop-down list, select the locations you want to create the group for.
- From the Type drop-down list, select:
- Windows Desktop
- Windows Laptop
- Windows Server
- From the Role drop-down list, select All.
- From the Status drop-down list, select All.
- From the Additional Filters drop-down list, select Software Inventory.
The Software Inventory section opens.

- From the Contains drop-down list, select Does Not Contain.
- From the All drop-down list, select Any.
- Click Add.

- In the Search text box of the Software dialog box, type WatchGuard Agent.
- Select the WatchGuard Agent check box.

- Click Add.
- Click Close.
- On the Devices page, click Save.
The Save as Group dialog box opens. - In the Name text box, enter a name for the group.
- In the Description text box, enter a description for the group.
- Click Save.

- Select Home > Administration > Devices > Groups.
- Click Create New Group.
The Devices page for a new group opens.
- From the Organization drop-down list, select the organization (the WatchGuard client) you want to create the group for.
- From the Location drop-down list, select the locations you want to create the group for.
- From the Type drop-down list, select:
- Mac Desktop
- Mac Laptop
- Mac Server
- From the Role drop-down list, select All.
- From the Status drop-down list, select All.
- From the Additional Filters drop-down list, select Software Inventory.
The Software Inventory section opens.
- From the Contains drop-down list, select Does Not Contain.
- From the All drop-down list, select Any.
- Click Add.
- In the Search text box of the Software dialog box, type Management-Agent.
- Select the Management-Agent check box.

- Click Add.
- Click Close.
- On the Devices page, click Save.
The Save as Group dialog box opens. - In the Name text box, enter a name for the group.
- In the Description text box, enter a description for the group.
- Click Save.

- Select Home > Administration > Devices > Groups.
- Click Create New Group.
The Devices page for a new group opens.
- From the Organization drop-down list, select the organization (the WatchGuard client) you want to create the group for.
- From the Location drop-down list, select the locations you want to create the group for.
- From the Type drop-down list, select:
- Linux Desktop
- Linux Laptop
- Linux Server
- From the Role drop-down list, select All.
- From the Status drop-down list, select All.
- From the Additional Filters drop-down list, select Software Inventory.
The Software Inventory section opens.
- From the Contains drop-down list, select Does Not Contain.
- From the All drop-down list, select Any.
- Click Add.
- In the Search text box of the Software dialog box, type protection-agent-dkms.
- Select the protection-agent-dkms check box.

- Click Add.
- Click Close.
- On the Devices page, click Save.
The Save as Group dialog box opens. - In the Name text box, enter a name for the group.
- In the Description text box, enter a description for the group.
- Click Save.

Create Tasks
Create tasks in NinjaOne to install the Endpoint Security Agent on all devices in a corresponding group. You can schedule tasks to run on a daily, weekly, or monthly basis. You must create separate tasks to install the Endpoint Security Agent on Windows, Mac, and Linux devices.
To create tasks to install the Endpoint Security Agent on client devices, you must use the script parameters you copied or downloaded for the client. For more information, go to Get WatchGuard Client Script Parameters.
After the Endpoint Security Agent is installed on a device, it no longer appears in the group filter results.
To create a task to install the WatchGuard Endpoint Security Agent, from NinjaOne:
- Select Home > Administration > Tasks.
- Click New Task.
The New Scheduled Task window opens.

- Enable the General Enabled toggle.
- In the Name text box, enter a name for the installation task. For this example, enter Install Agent on Windows Devices.
- In the Description text box, enter a description for the task.
- Select the Allow Groups check box.
- From the Repeats drop-down list, select how often you want the task to run.
- In the Automations section, click Add.
The Automation Library window opens.

- From the Automations list, select a WatchGuard Endpoint Security Agent installation script from the list. For this example, select WG-Install-Windows.
The WG-Install_Windows dialog box opens. - In the Run As drop-down list, select System.
- In the Preset Parameter text box, enter the script parameters for the client you created the group for. For more information about the script parameters, go to Get WatchGuard Client Script Parameters.

- Click Apply.
- Select Targets.

- Click Add.

- From the Targets drop-down list, select Group.

- In the Targets text box, enter the name of the Windows group you created. For this example, select the group you created for Windows devices.
- Select the check box next to the name of the group.
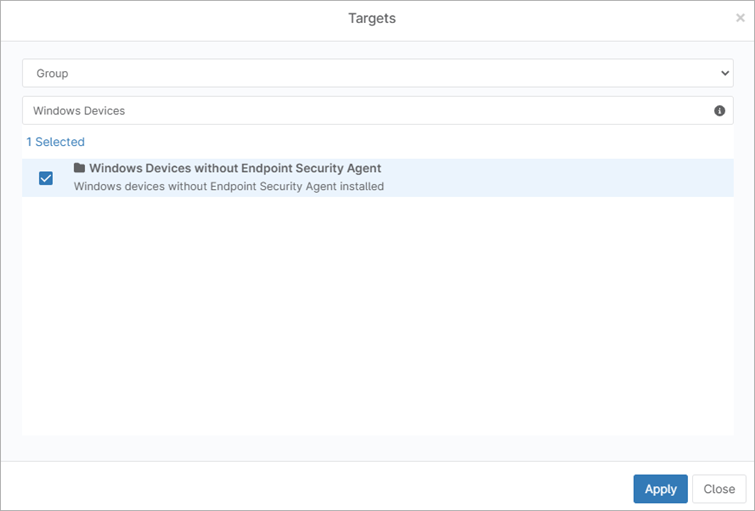
- Click Apply.
- Click Save. Click Close.
- Repeat this procedure to create installation tasks for Mac and Linux devices.
About the WatchGuard Endpoint Security Integration with NinjaOne