Applies To: WatchGuard Advanced EPDR, WatchGuard EPDR, WatchGuard EDR, WatchGuard EDR Core, WatchGuard EPP
The My Lists section of the Status page provides quick links to detailed lists filtered for specific information. Most dashboard tiles have an associated list, so you can quickly see information graphically in the tile and then get more detail and perform actions on the devices from the list. For more information, go to Manage Rows in a List.
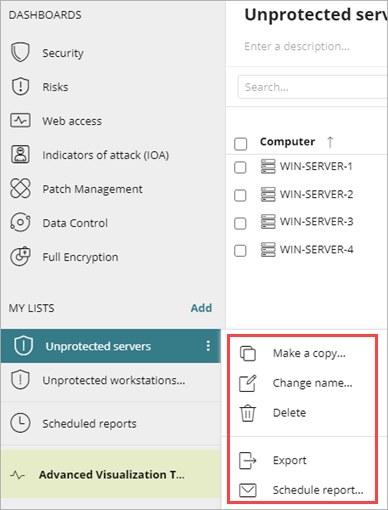
Some predefined lists appear by default in the left pane. Click ![]() next to a list to open the options menu. From the options menu, you can make a copy of a list, rename it, delete it, export it to a CSV file, and schedule and email a report of the list results.
next to a list to open the options menu. From the options menu, you can make a copy of a list, rename it, delete it, export it to a CSV file, and schedule and email a report of the list results.
Different feature areas can include more details in the exported file than other features.
Your operator role determines what you can see and do in WatchGuard Cloud. Your role must have the Add Filters, Lists, and Scheduled Reports permission to view or configure this feature. For more information, go to Manage WatchGuard Cloud Operators and Roles.
Add a List
For quick access, add new lists to the left pane.
The available lists you can add are different for Advanced EPDR, EPDR, EDR, EDR Core, and EPP.
To add a list to My Lists:
- In WatchGuard Cloud, select Monitor > Endpoint Security.
- Select Status.
- In the My Lists section, click Add.
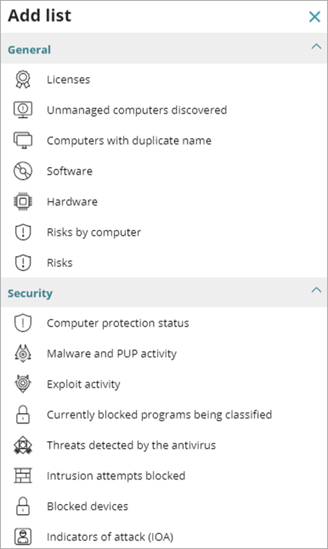
- Select a predefined list.
Available predefined lists differ for each Endpoint Security product.
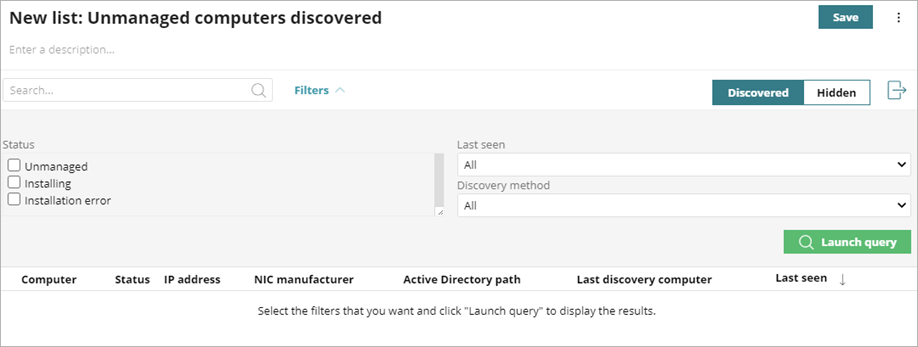
- Type a new Name for the list, if required.
- Enter a description, if required.
- Edit the filters for the list, if required.
- To view the results of the filter, click Launch Query.
Results appear in the table at the bottom of the page. - To export the results to a CSV file, click
 .
. - To schedule a report of the selected list, click
 .
. - Click Save.
The new list appears in the My Lists section.
Copy or Delete a List
To copy or delete a list:
- Select Status.
- In the My Lists section, select the list you want to delete or copy.
- In the upper-right corner, click
 and select Copy or Delete.
If you delete a predefined list, you cannot restore it.
Manage Rows in a List
You can click a row in a list to open the computer details page. The computer details page provides specific information on the computer. For more information, go to Computer Details in Endpoint Security.
You can perform actions on a single computer in the list or on multiple selected computers.
To select a computer, select the check box next to the computer name. In the same row, click ![]() and select an option from the menu (for example, Move to, Delete, Scan Now, or Schedule Scan). The available menu depends on the operating system and Endpoint Security product and modules installed.
and select an option from the menu (for example, Move to, Delete, Scan Now, or Schedule Scan). The available menu depends on the operating system and Endpoint Security product and modules installed.
To perform actions on multiple computers, select the check box next to the computer name of multiple devices, or to select all devices in the list, select the check box next to the Computer column heading.

Depending on the list and the operating system of the selected devices, some of these actions might be available:
- Move to
- Move to Active Directory path
- Delete
- Scan now
- Schedule scan
- Restart
- Isolate computers
- Stop isolating the computer
- End RDP attack containment mode
- Assign license
- Schedule patch installation
- Reinstall protection
- Reinstall agent