Applies To: Endpoint Security Elite, Endpoint Security 360, Endpoint Security Prime, Endpoint Security Basic
In the Web Access Control settings of a workstations and servers settings profile, you can limit access to specific web content categories, and configure a list of URLs to allow and deny access to.
Each computer on the network keeps a database of the URLs accessed from it. This database can only be accessed from the computer for a period of 30 days.
If a website is uncategorized or miscategorized, you can submit a change request to Forcepoint from the WatchGuard Security Portal. For more information, go to Manage Content Categories for Web Access Control.
Your operator role determines what you can see and do in WatchGuard Cloud. Your role must have the Configure Security for Workstations and Servers permission to view or configure this feature. For more information, go to Manage WatchGuard Cloud Operators and Roles.
To configure web access control:
- In WatchGuard Cloud, select Monitor > Endpoint Security.
- Select Settings.
- Select Workstations and Servers.
- Select an existing security settings profile to edit, copy an existing profile, or in the upper-right corner of the window, click Add to create a new profile.
The Add Settings or Edit Settings page opens. - Enter a Name and Description for the profile, if required.
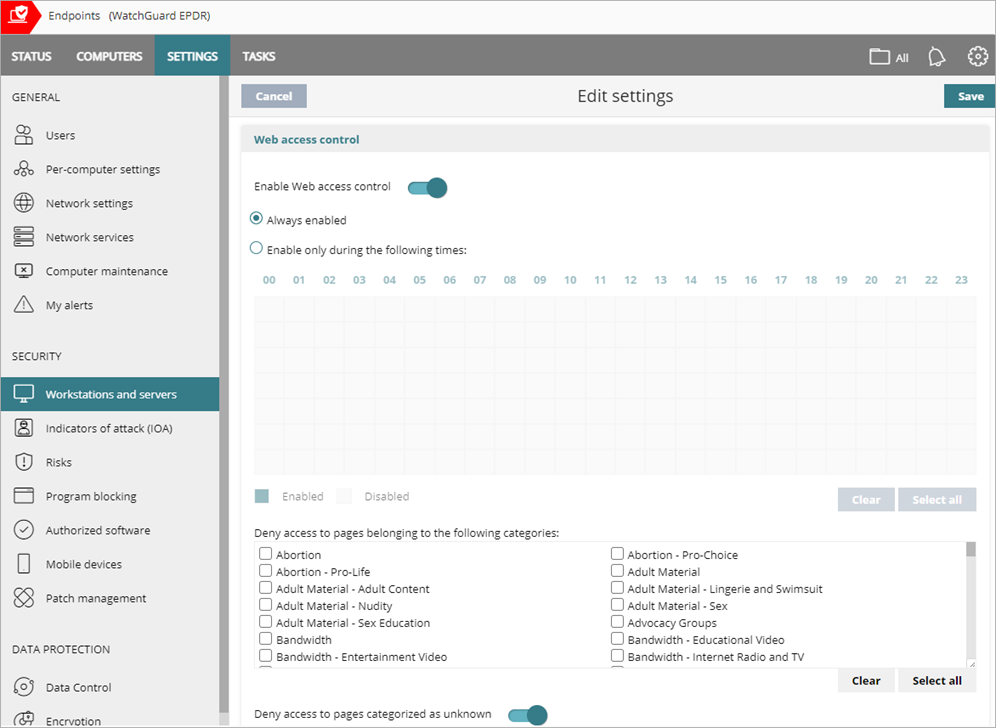
- Select Web Access Control.
- Enable the Enable Web Access Control toggle.
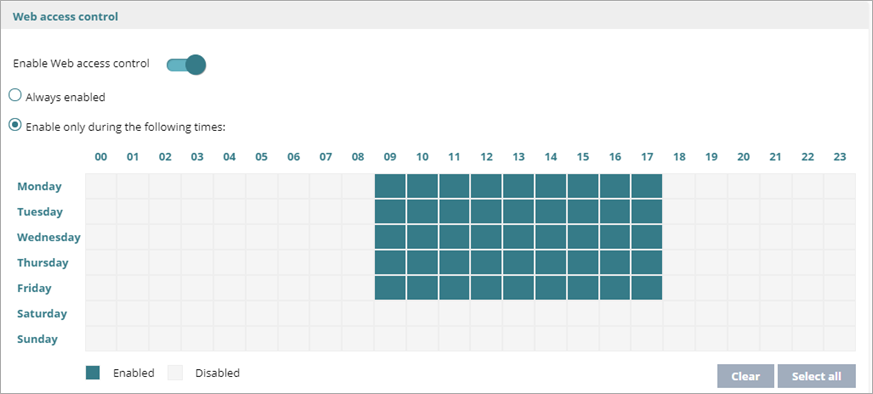
- To specify when you want to enable web access control:
- Select Enable Only During the Following Times.
- On the calendar, select the days and hours when you want to enable web access control.
Click the day to select the whole day. Click and drag the squares to select multiple days and times. Click Clear to disable web access control for all of the times selected.
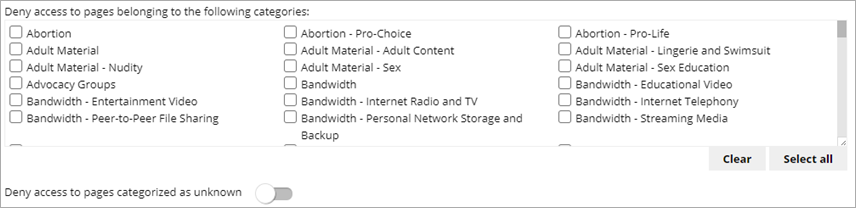
- Select the categories you want to deny computers access to.
- To Deny Access to Pages Characterized as Unknown, enable the toggle.
Internal and intranet sites accessible on ports 80 and 8080 could be categorized as unknown. To avoid this, add exclusions for internal pages you want to allow. - To exclude sites from web access control and always allow access to them, in the Always allow access to the following addresses and domains text box, enter the URLs.
Access is allowed to all addresses that start with the specified addresses and domains, even if the full URL is longer. if the specified address is shorter, then the site is not allowed. For example, if you enter www.example.com/ and the user enters www.example.com, they might not be allowed access to the site. - To always deny access to an IP address or domain, in the Deny access to the following addresses and domains text box, enter the IP address or domain.
Access is denied to all addresses that start with the specified addresses and domains, even if the full URL is longer. However, if the specified address is shorter, then the site is allowed. For example, if you enter www.example.com/ and the user enters www.example.com, they are allowed access to the site.
- Click Save.
- Select the profile and assign recipients, if required.
For more information, go to Assign a Settings Profile.
Domain Names Examples
You can add multiple similar domains to a list with a single domain entry. To do this, you add the part of the domain name that is common to all of the domains you want to add. For example, if you enter mydomain.com, it can represent these additional domains and sub-domains:
- thisismydomain.com
- entermydomain.com
- www.tommydomain.com
- downloads.mydomain.com
- https://www.mydomain.com
- ftp://ftp.mydomain.com
- images.mydomain.com
The wildcard character (*) is not supported.
About Web Access Control Categories