Deployment Overview
This guide demonstrates how to integrate WatchGuard Wi-Fi Cloud with an Octopus WiFi captive portal.
Platform and Software
The hardware and software used to complete the steps in this document include:
- Octopus WiFi:
- Octopus WiFi account
- WatchGuard:
- WatchGuard AP320 version 8.8.0-179
- WatchGuard Wi-Fi Cloud account
Test Topology

Octopus WiFi Configuration
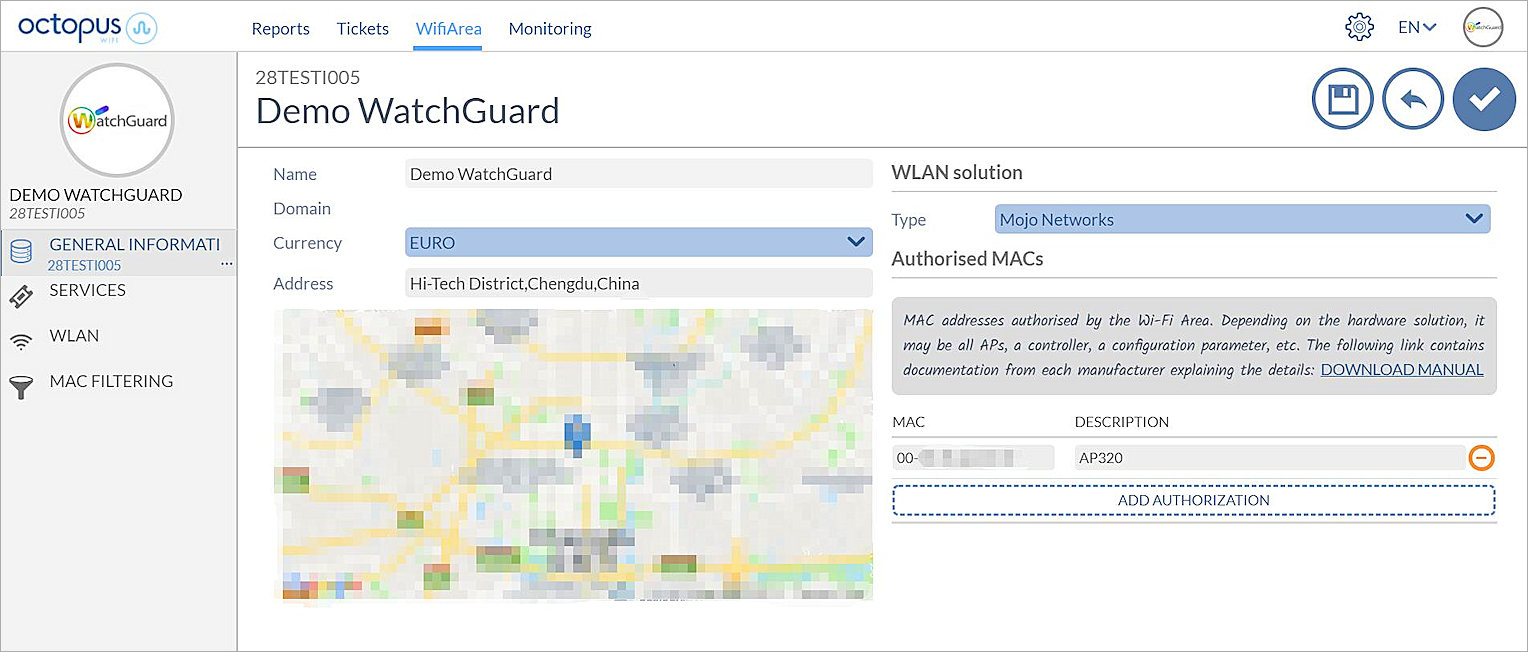
- Log in to the Octopus WiFi Management Portal.
- Select WifiArea.
- Click Edit.
- From the WLAN solution drop-down list, select Mojo Networks.
- In the Authorised MACs section, add the MAC address and a description for your AP.
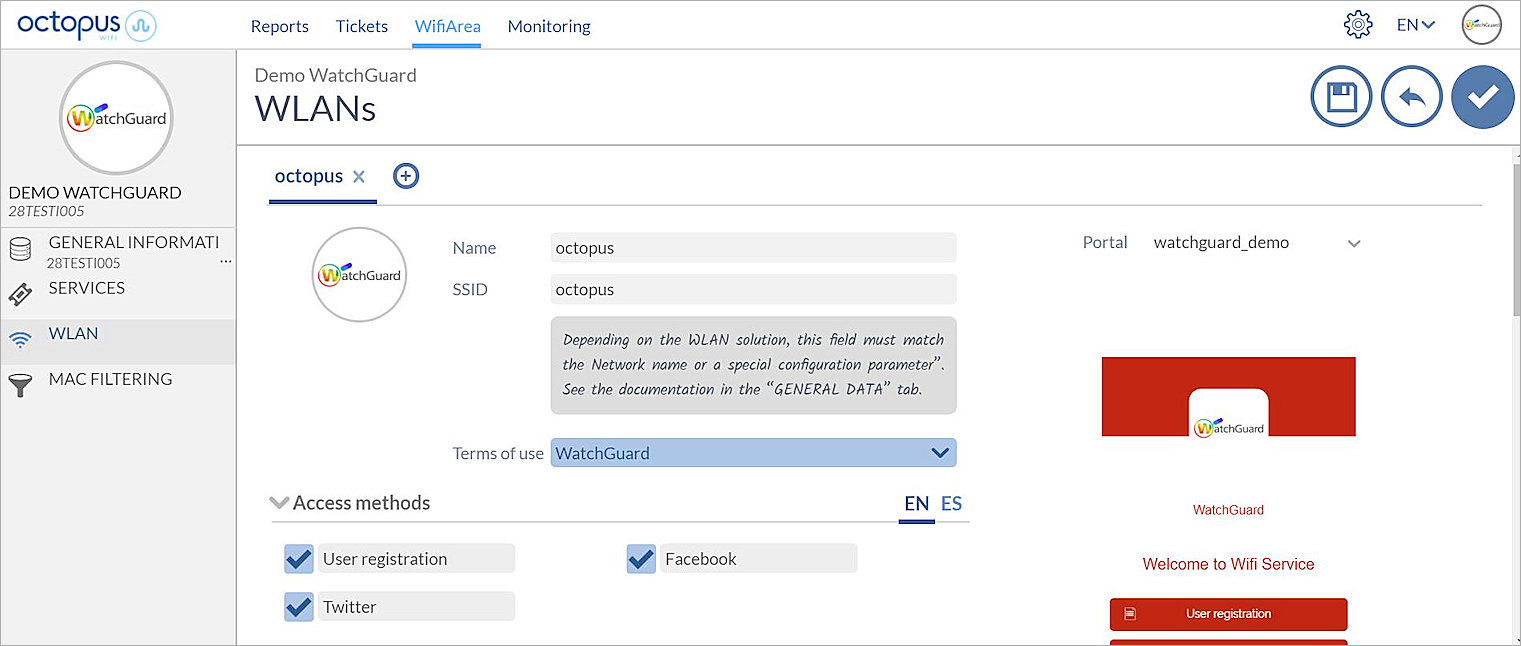
- Select WLAN.
- Change the WLAN Name and SSID to match your SSID configuration in WatchGuard Wi-Fi Cloud.
In this example, we use the SSID octopus.
- Click
 to save your settings.
For information on other settings in the Octopus WiFi Captive Portal configuration, please see the Octopus WiFi help documentation.
Configure WatchGuard Wi-Fi Cloud to Integrate with Octopus WiFi
These instructions describe how to configure WatchGuard Wi-Fi Cloud for integration with Octopus WiFi.
For detailed information on WatchGuard Wi-Fi Cloud AP deployment, see the Getting Started Guide.
- Log in to WatchGuard Wi-Fi Cloud.
- Open Discover.
- Select a location where you want to apply the settings.
- Select Configure > WiFi, then select the RADIUS tab.
- Click Add RADIUS Server.
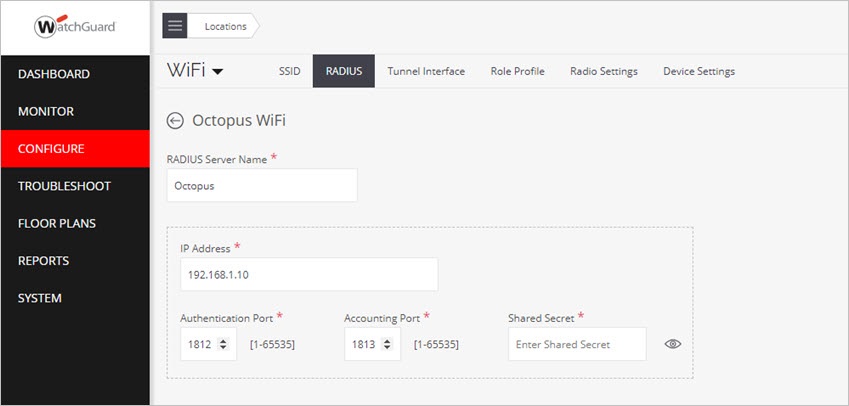
- In the Profile Name text box, type a descriptive name for the profile.
- In the IP Address text box, type the Primary IP address of the Octopus WiFi server used for RADIUS authentication.
- In the Authentication Port text box, use the default port number of 1812.
- In the Accounting Port text box, use the default port number of 1813.
- In the Shared Secret text box, type the shared secret of the Octopus WiFi server used for RADIUS authentication.
The IP address, Port, and Shared Secret information is provided by Octopus WiFi. Go to the Octopus WiFi support documentation for your account for more information.
- Click Save.
- Repeat these steps for the secondary Octopus WiFi RADIUS server.
- Select Configure > WiFi, then select the SSID tab.
- Click Add SSID.
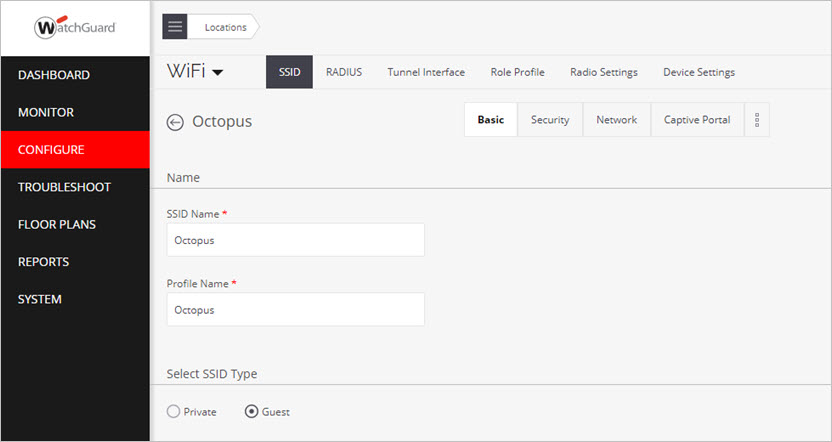
- Type the Profile Name and SSID name.
- Select the Guest SSID type.
- Select the Security tab, then from the Security Level for Associations drop-down list, select Open.
- Select the Access Control tab, then select the Client Isolation check box.
- Select the Captive Portal tab.
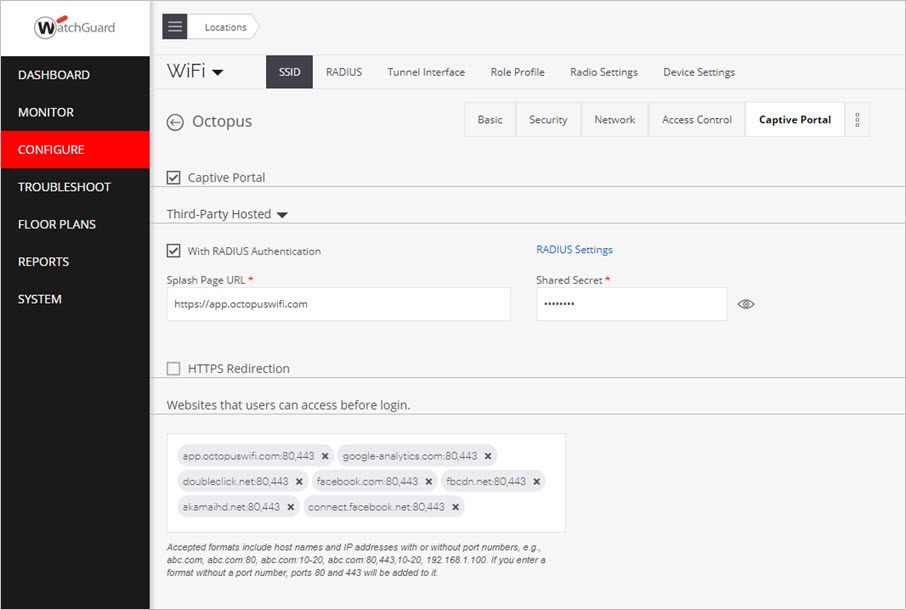
- Select the Captive Portal text box.
- Select Third-Party Hosted from the drop-down list.
- In the Splash Page URL text box, type the URL provided by Octopus WiFi .
- In the Shared Secret text box, type the shared secret provided by Octopus WiFi .
- In the Websites that users can access before login section, add these domains:
- Basic configuration
- app.octopuswifi.com (domain of the Octopus WiFi server)
- google-analytics.com
- doubleclick.net
- Facebook
- facebook.com
- fbcdn.net
- akamaihd.net
- connect.facebook.net
- Twitter
- twitter.com
- twimg.com
- Linkedin
- linkedin.com
- linkedin.com
- licdn.com
- Instagram
- instagram.com
- akamaihd.net
- Google+
- google.com
- gstatic.com
- googleapis.com
- googleusercontent.com
- Captive Portal Apple
- captive.apple.com
- Captive Portal Android
- connectivitycheck.android.com
- connectivitycheck.gstatic.com
- clients3.google.com
- clients.google.com
- Download App Store
- apple.com
- aaplimg.com
- mzstatic.com
- itunes.com
- itunes.apple.com
- icloud.com
- akamaiedge.net
- akamaitechnologies.com
- verisign.net
- verisign.com
- entrust.net
- edgesuite.net
- llnwd.net
- akamaihd.net
- Download Play Store
- akamaihd.net
- ggpht.com
- gvt1.com
- android.clients.google.com
- googleapis.com
- l.google.com
- googleusercontent.com
- play.google.com
- gstatic.com
- Basic configuration
- In the Captive Portal settings, click the RADIUS Settings link.
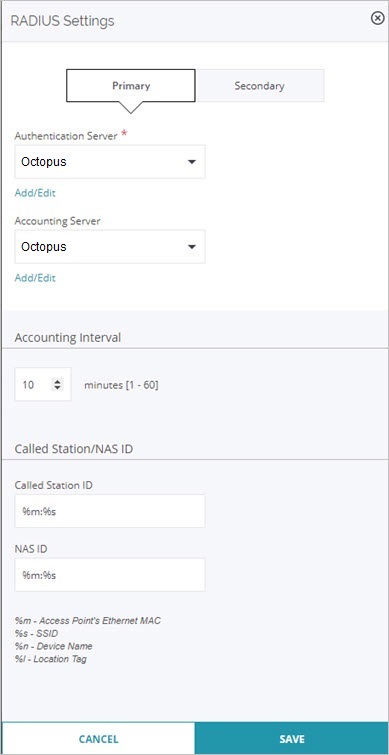
- From the Primary and Secondary Authentication Server drop-down list, select the RADIUS server you configured for Octopus WiFi.
- From the Primary and Secondary Accounting Server drop-down list, select the RADIUS server you configured for Octopus WiFi.
- In the Called Station ID text box, type %m:%s.
- In the NAS ID text box, type %m:%s.
- Click Save to save the RADIUS settings.
- Click Save to save the SSID Profile.
- Select the Device Settings tab.
- In the Device Password section, type and confirm a password to use for the AP.
This is your AP password and is not related to Octopus WiFi. - Click Save to save your device settings.
The SSID and device settings are now configured for your Wi-Fi Cloud APs in the location you selected.
Test the Octopus WiFi Integration
- Use a wireless client device to connect to Wi-Fi Cloud with the guest SSID you configured.
- Log in using the user registration or social media authentication method.
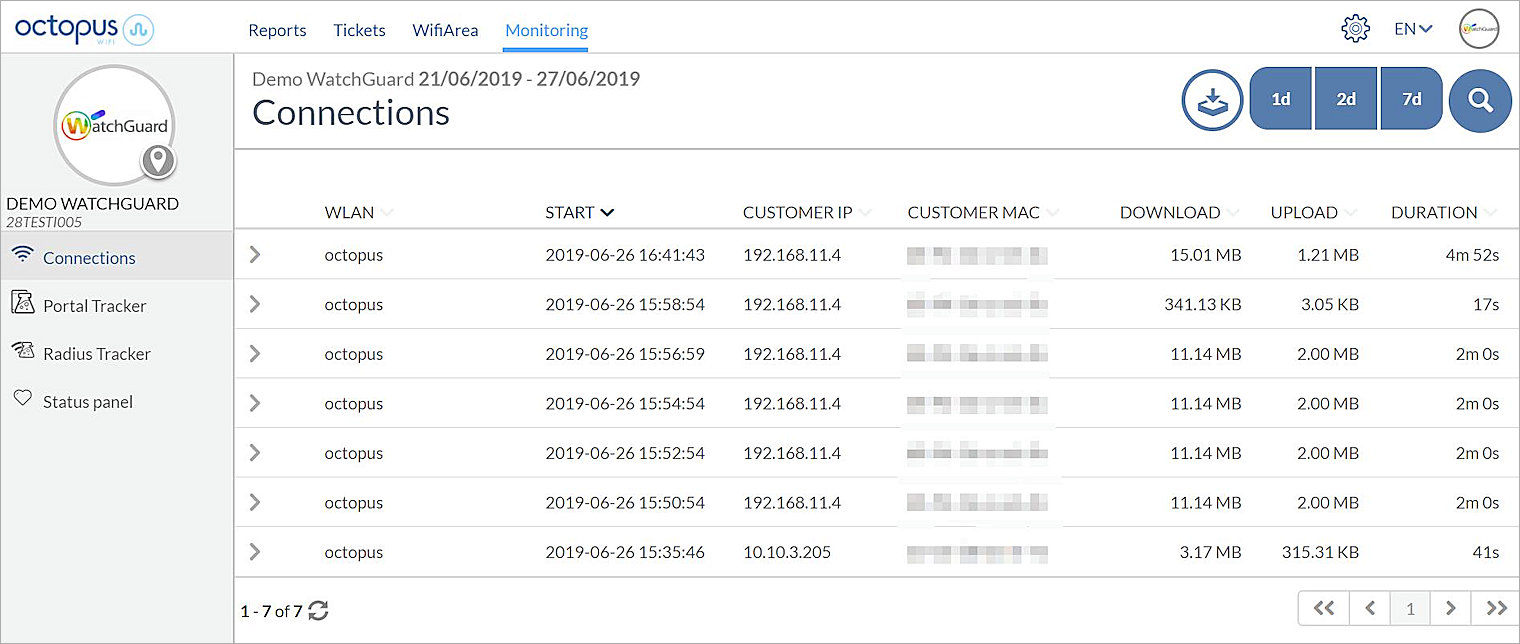
- After you successfully log in, from the Octopus WiFi management portal, select Monitoring > Connections.
The client's IP address, AP MAC address, and client activity should appear.