This document describes how to set up multi-factor authentication (MFA) for your WatchGuard accounts with Okta as an identity provider.
Contents
WatchGuard Account Authentication Data Flow with Okta
Okta communicates with various cloud-based services and service providers with the SAML protocol. This diagram shows the data flow of an MFA transaction for WatchGuard Cloud.

Before You Begin
Before you begin these procedures, make sure that:
- A token is assigned to a user in Okta.
- You have a tier-1 WatchGuard Cloud account and an operator with the Owner or Administrator role.
Additional charges might apply to use Okta.
Configure Okta
Before you configure Okta, you must copy the WatchGuard Service Provider SAML Metadata URL from the WatchGuard Account SSO Configuration Wizard.
To copy the WatchGuard Service Provider SAML Metadata URL:
- Log in to the WatchGuard Cloud with your WatchGuard user account credentials.
- Select Administrator > SSO.
The SAML SSO page opens.
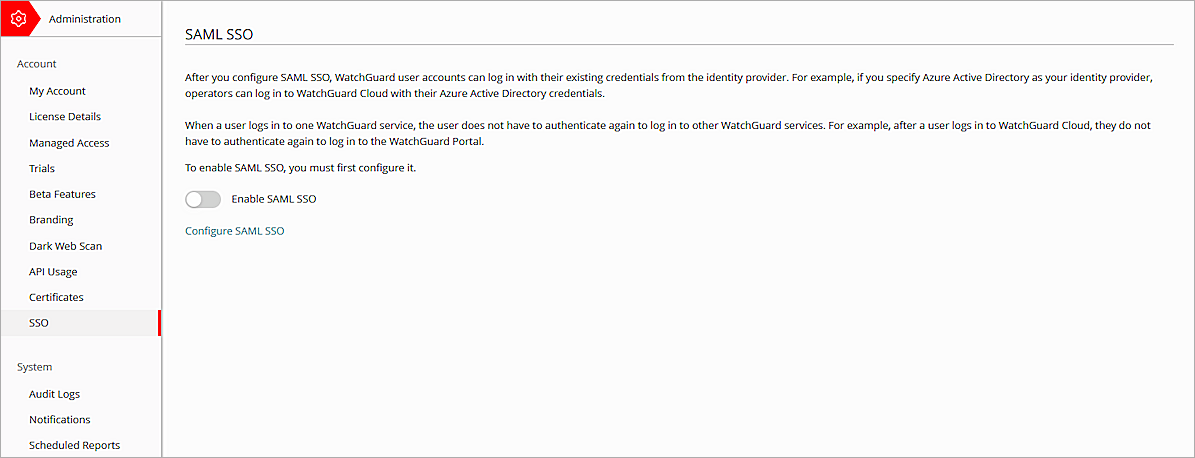
- Click Configure SAML SSO.
The Important dialog box opens.

- Click Continue.
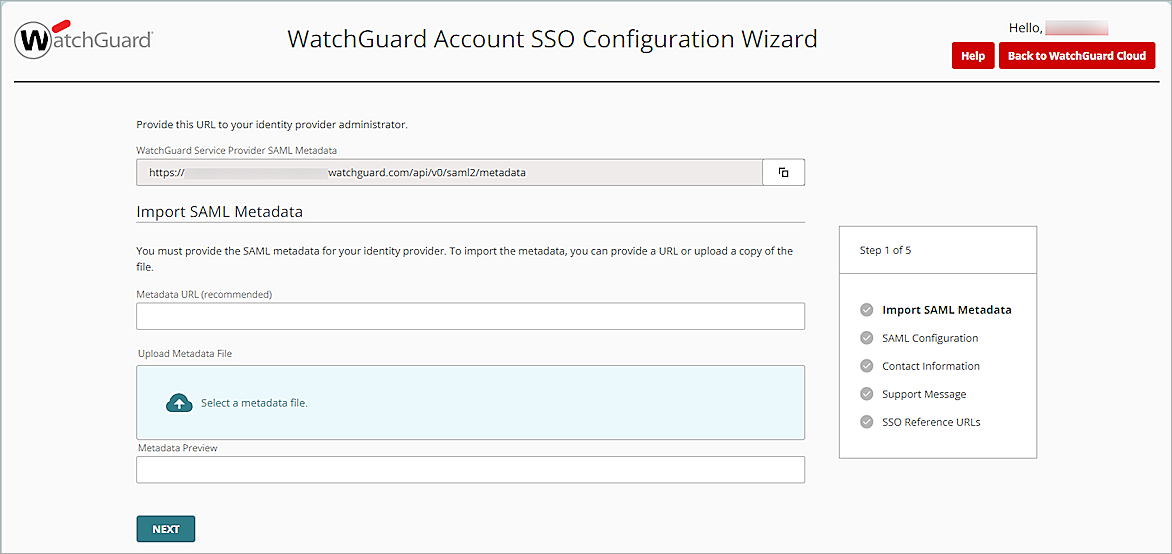
The WatchGuard Account SSO Configuration Wizard page opens. - In the WatchGuard Service Provider SAML Metadata text box, copy the WatchGuard Service Provider SAML Metadata URL.
- On a new tab on your browser, enter the WatchGuard Service Provider SAML Metadata URL you copied in the previous step.
- To save the WatchGuard Service Provider SAML metadata file to your local computer, right-click the file, then select Save As.
Keep the WatchGuard Account SSO Configuration Wizard page open. You need to complete the configuration on this page after the Okta configuration is complete.
To configure Okta:
- Log in to the Okta Admin Console.
- Select Directory > Groups > Add Group.
The Add Group page opens.
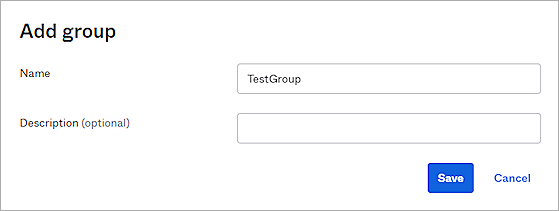
- In the Name text box, type a group name.
- Click Save.
- To add a user in Okta, select Directory > People > Add Person.
The Add Person page opens.For every user you add in Okta, you must create a user with the same information in WatchGuard Cloud as an operator.
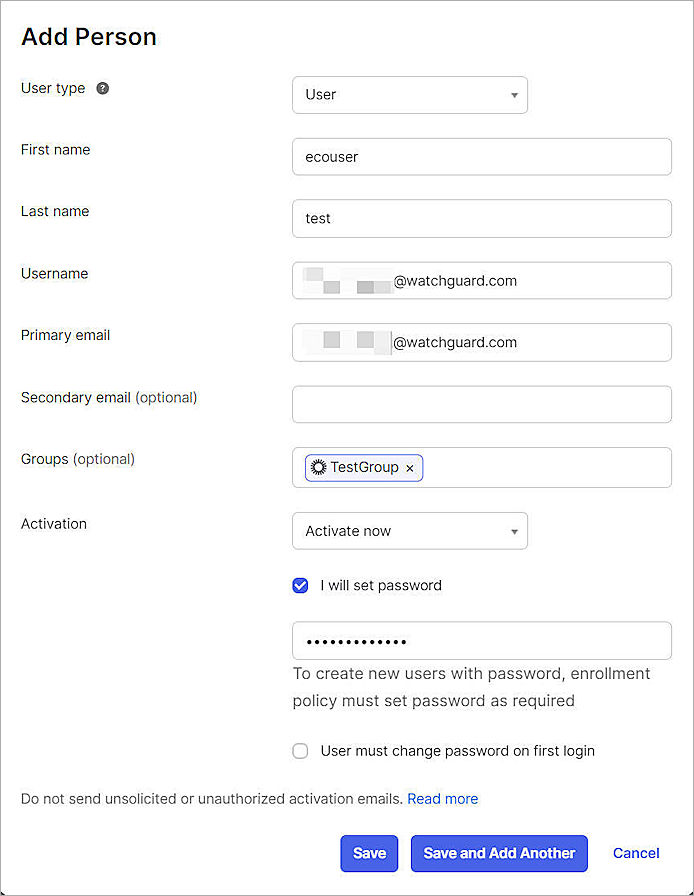
- To set the password, select the I Will Set Password check box. To set the password later, do not select this check box.
- Click Save.
- Select Applications > Applications.
The Applications page opens.
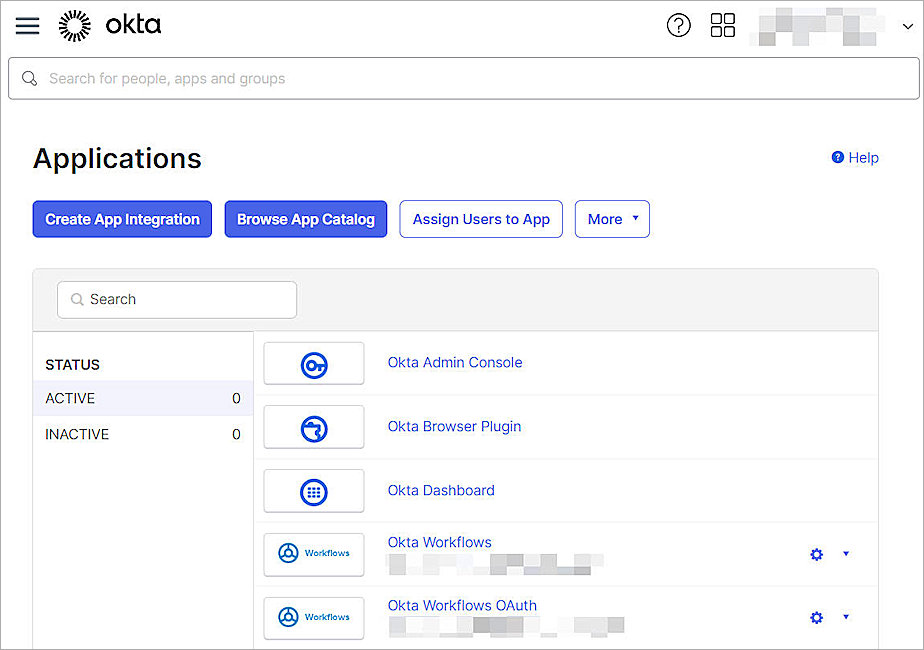
- Click Create App Integration.
The Create a New App Integration page opens.
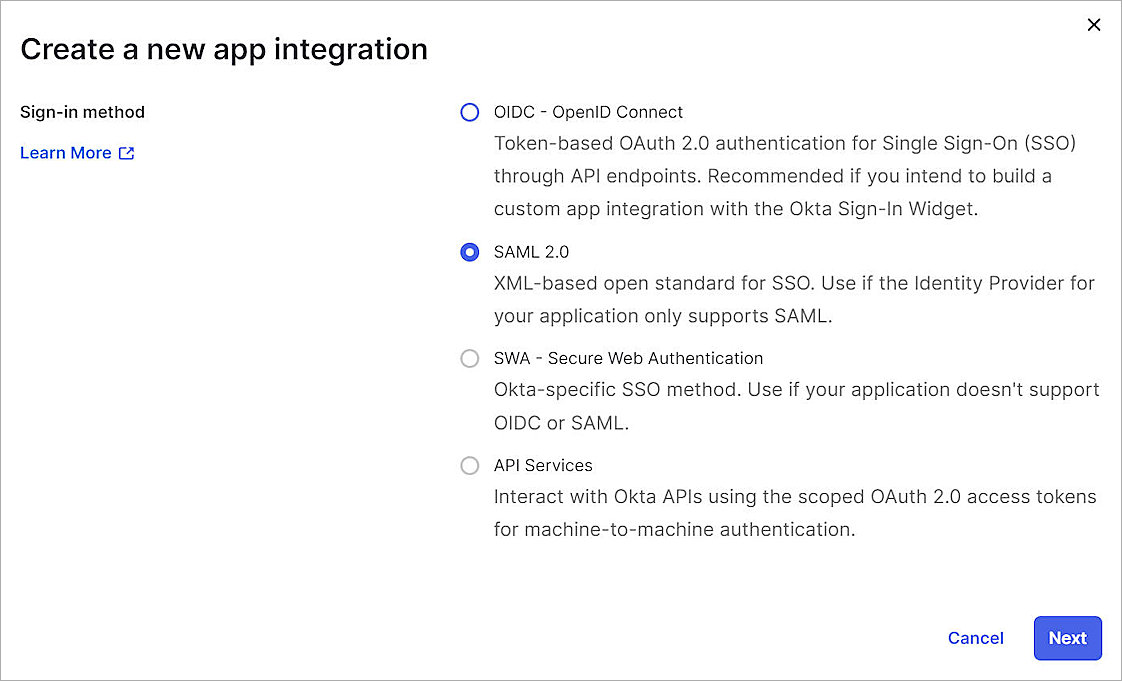
- For the sign-in method, select SAML 2.0.
- Click Next.
The Create SAML Integration page opens.
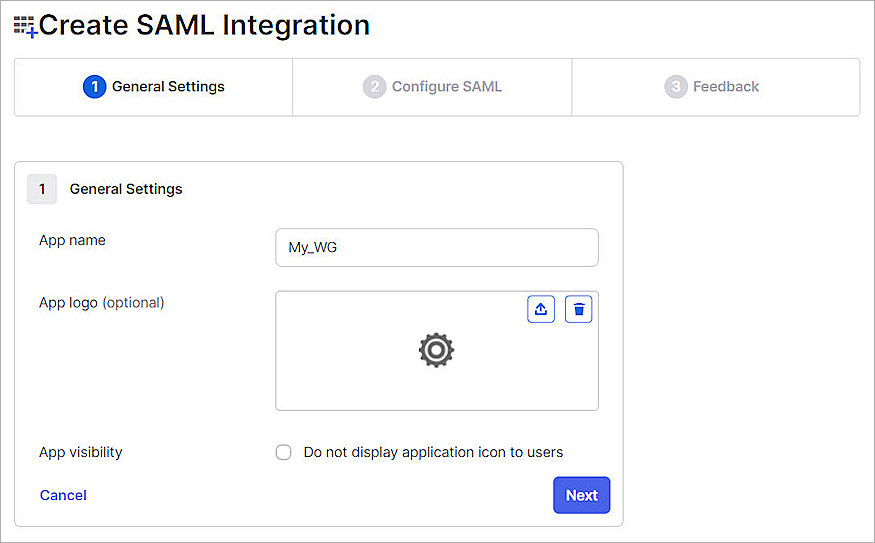
- In the App Name text box, type a name.
- (Optional) To upload a logo, in the App Logo option, click the Upload icon, then select an image to upload.
- Click Next.
The Configure SAML page appears.
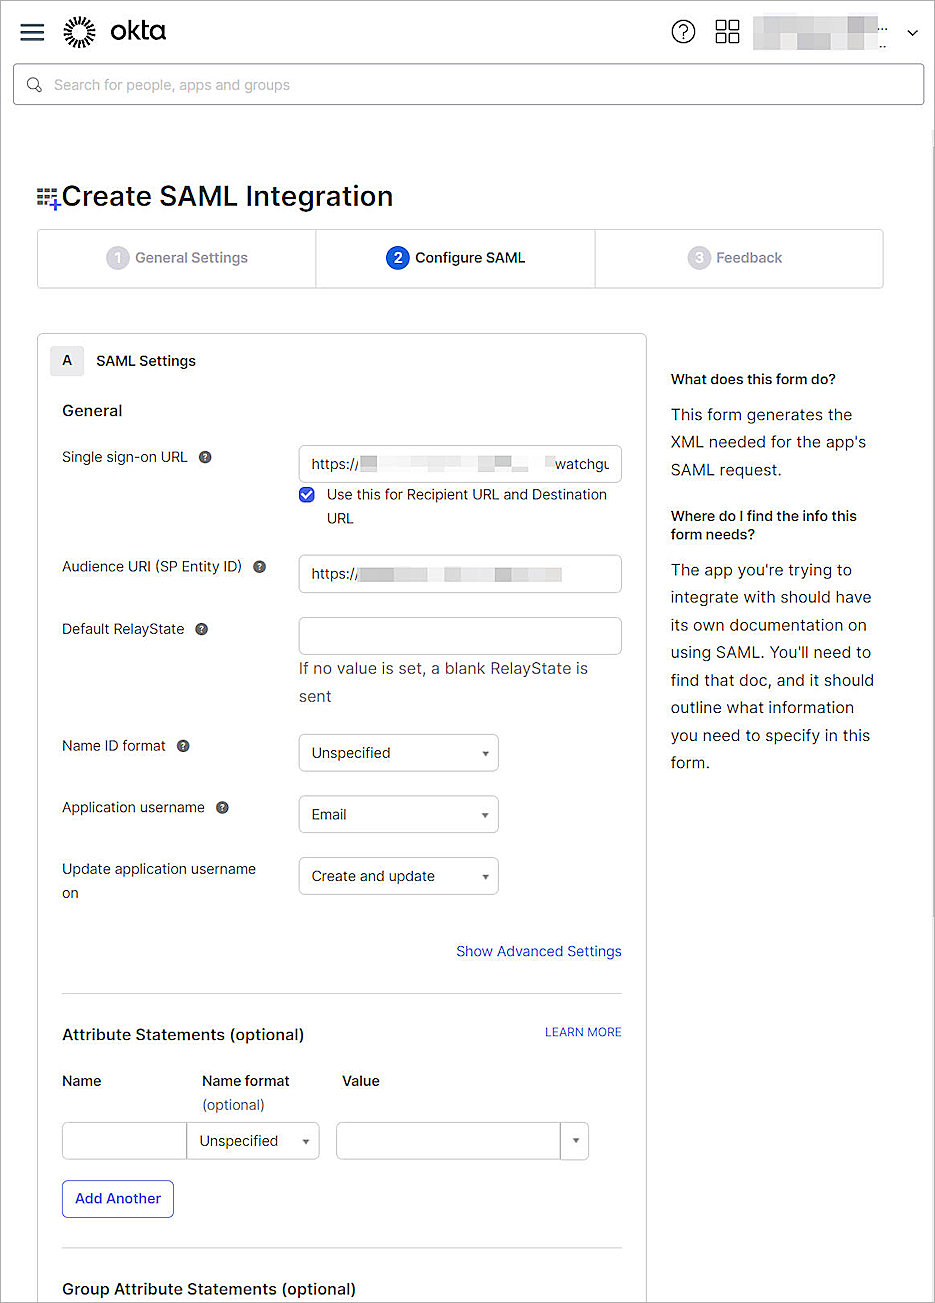
- In the Single Sign On URL text box, type or paste the value of the AssertionConsumerService Location parameter. You can copy this value from the WatchGuard Service Provider SAML Metadata file you saved in this section.
- In the Audience URI (SP Entity ID) text box, type or paste the value of the entityID parameter. You can copy this value from the WatchGuard Service Provider SAML Metadata file you saved in this section.
- From the Application Username drop-down list, select Email.
- Keep the default values for all other settings.
- Click Next.
The Feedback page opens.
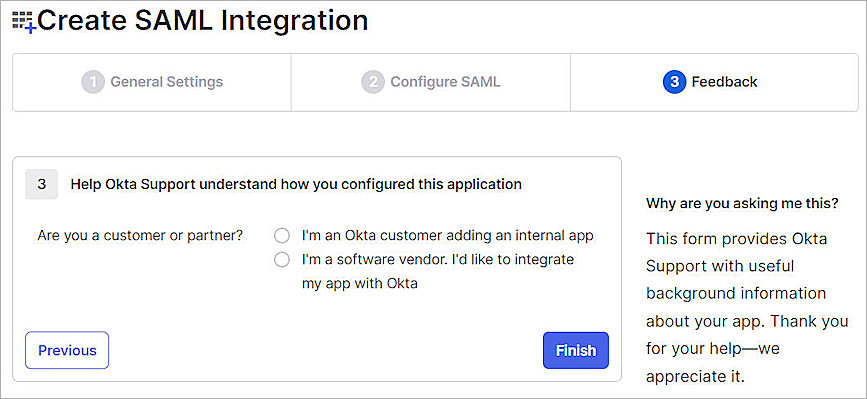
- From the Are You a Customer or Partner? section, select one of these options:
- I'm an Okta Customer Adding an Internal App — Most deployments are in this category.
- I'm a Software Vendor. I'd Like to Integrate My App With Okta — Select this option if your company is deploying a service for general public use.
- Click Finish.
The application you created opens.
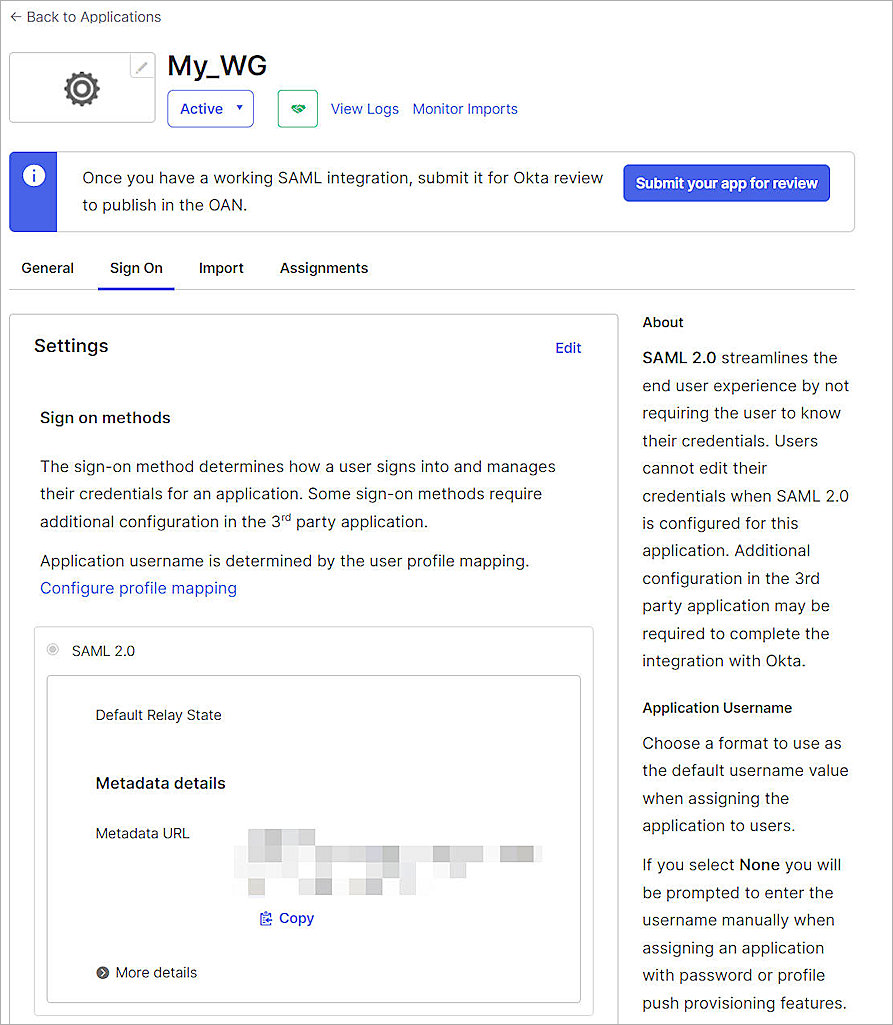
- Select the Sign On tab.
- From the SAML 2.0 section, copy the Metadata URL.
The link is in this format: https://<okta account name>.okta.com/app/<random value>/sso/saml/metadata - Select the Assignments tab.

- Select Assign > Assign to Groups.
You can also select Assign to People. - Select a group, then click Assign.
- Click Done.
Configure SSO for Your WatchGuard Account
To configure SSO for your WatchGuard account:
- From the WatchGuard Account SSO Configuration Wizard page, in the Metadata URL text box, type or paste the Okta metadata URL you copied in the previous section.
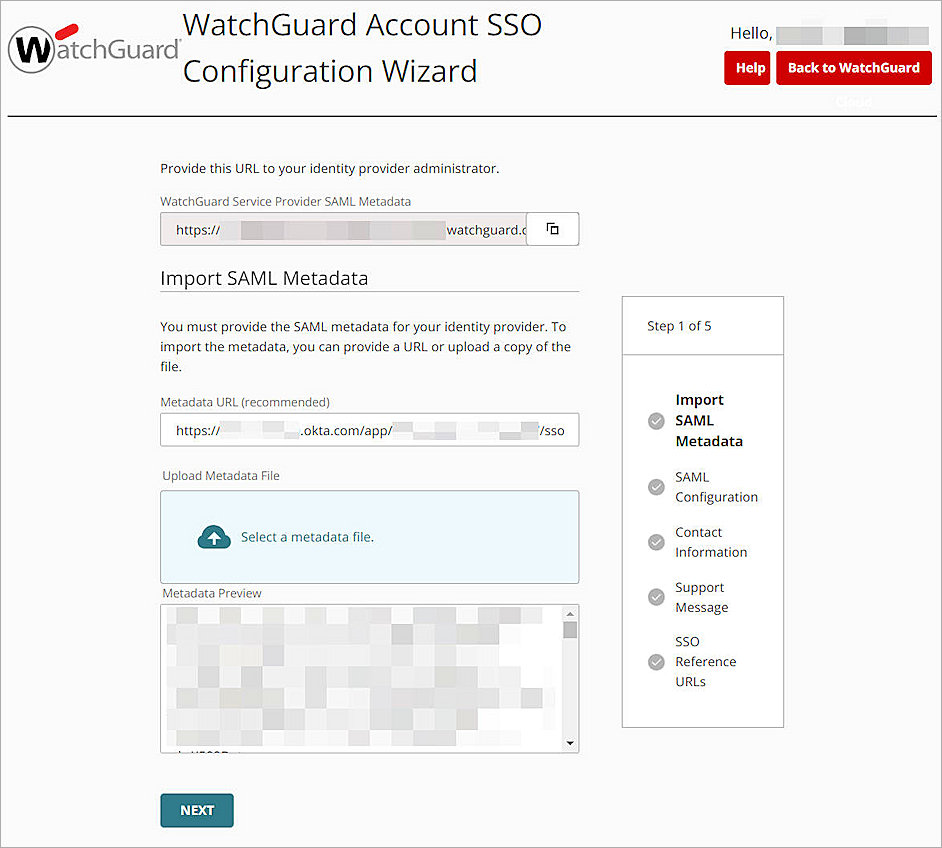
- Click Next.
The SAML Configuration options open.
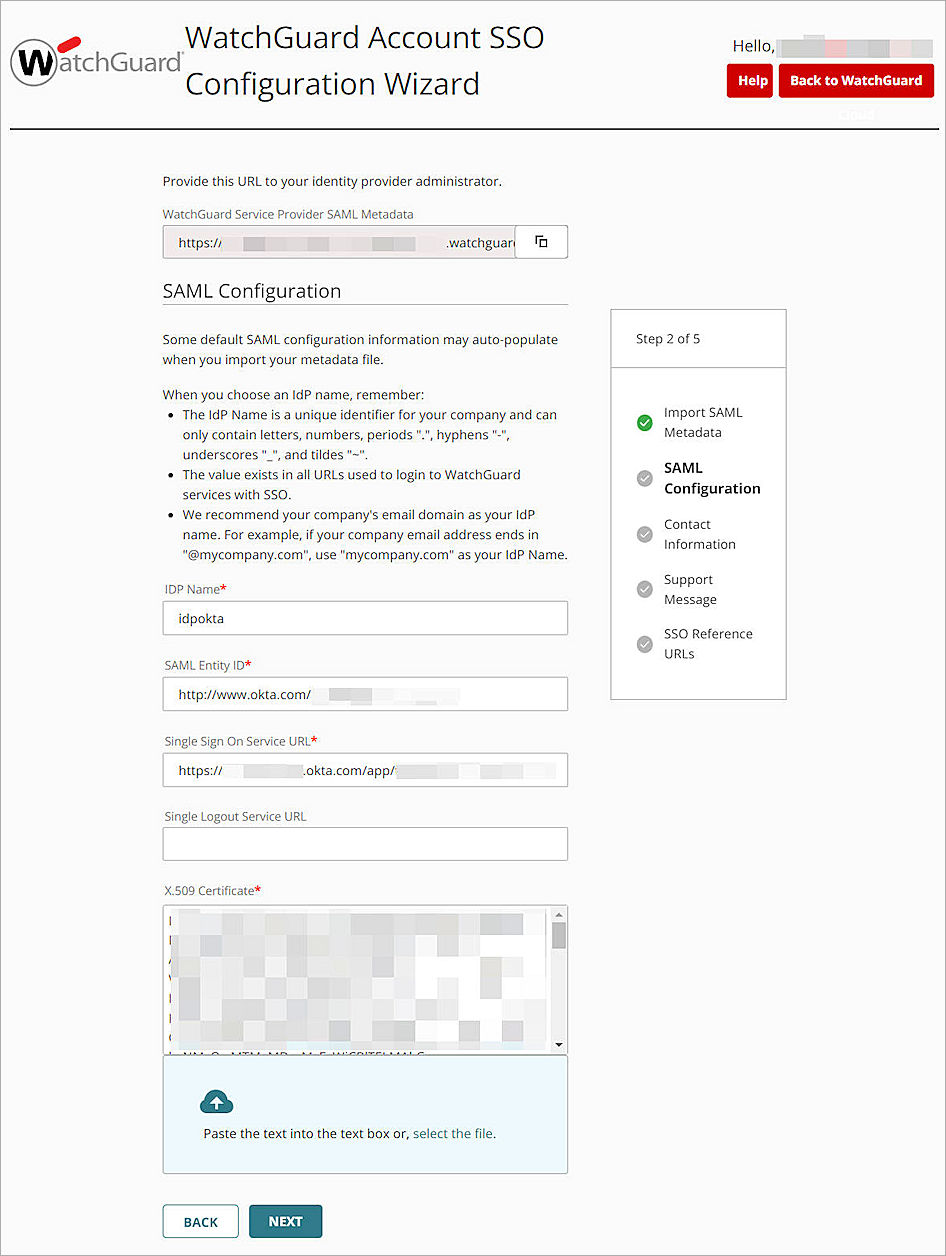
- In the IDP Name text box, type a name to identify your identity provider. In our example, we name the IDP idpokta.
- Keep the default values for all other settings.
- To proceed through the Contact Information, Support Message pages and the SSO Reference URLs page, click Next three times.
The SSO Reference URLs page opens.The SSO reference URLs provide you with the direct links to the SSO log in pages for each account.
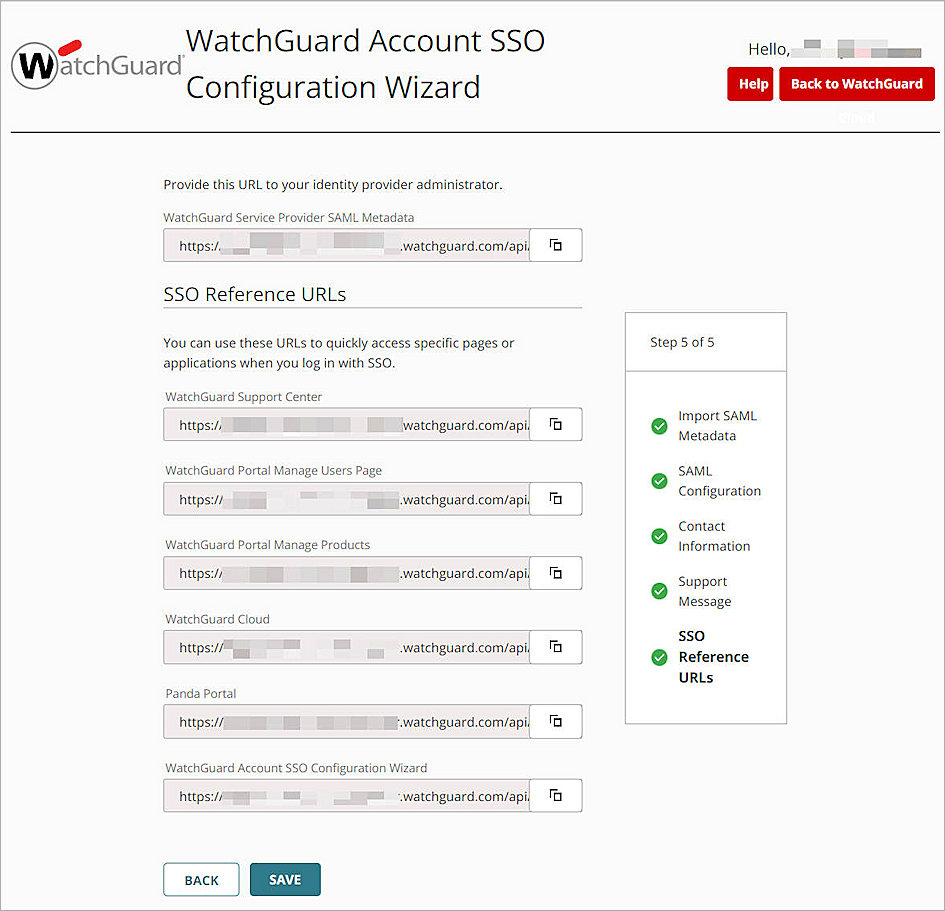
- Click Save.
- Click Back to WatchGuard Cloud.
- Select
 > My Account.
 - Select SSO. Make sure the Enable SAML SSO toggle status is green.
- To add the operators in WatchGuard Cloud, follow the steps in Add Operators to your Account. After you add an operator, make sure the Enable Login With SAML SSO check box is selected.
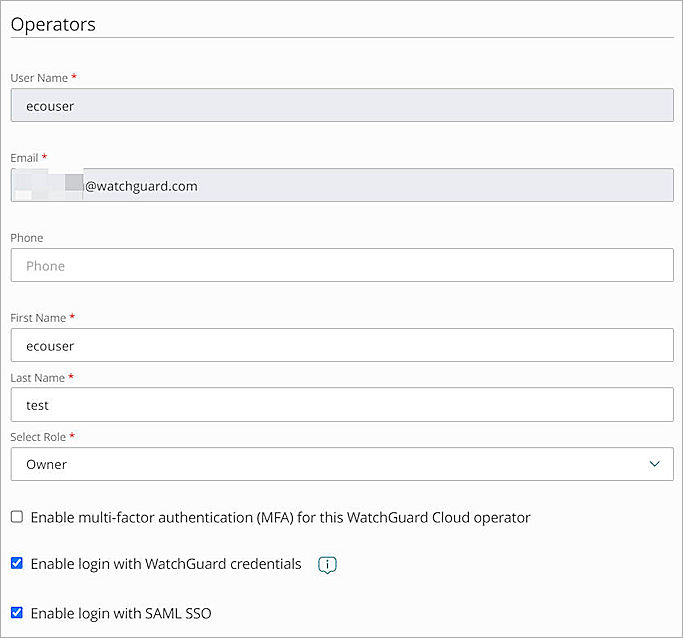
To log in with SSO, you must have a WatchGuard Cloud Operator account and an Okta person account. Both accounts must have the same email address.
When you configure SAML SSO for your WatchGuard account, users can either log in with SSO or with their local user account. We recommend users log in with SSO so they do not have to re-authenticate after their initial login.
Test the Integration
To test Okta MFA with WatchGuard account, you can authenticate with a mobile token on your mobile device. You can choose push, or Time-based one-time password (TOTP).
In this example, we show the push authentication method.
- In a web browser, go to WatchGuard Cloud.
- Click Log In With SSO.
The Log In With SSO page opens.
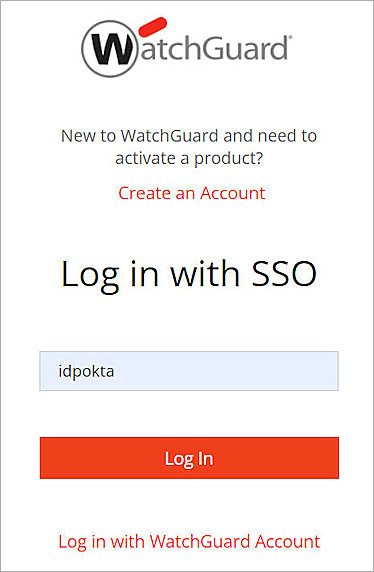
- In the IDP Name text box, type the IDP name.
- Click Log In.
- In the Sign In text box, type your email address.
- Click Next.
- Select Get a Push Notification.
- Open your Okta Authenticator app, then click Yes, It's Me.
- In the Password text box, type your password.
- Click Verify.
You are logged in to WatchGuard Cloud.