Deployment Overview
N-able N-sight RMM is a Remote Monitoring and Management (RMM) tool.
This document describes how to use N-able N-sight RMM to remotely monitor a WatchGuard Firebox.
Integration Summary
The hardware and software used in this guide include:
- WatchGuard Firebox
- Fireware v12.8.1
- Advanced Monitoring Agent installed on Windows Server 2019
- Version 10.12.4
- N-able N-sight RMM Cloud
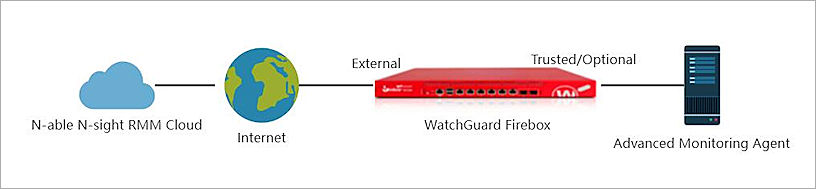
Test Topology
Configure Your Firebox
You must use Fireware Web UI to configure the SNMP settings on the WatchGuard Firebox before you use the Advanced Monitoring Agent to discover the Firebox. The URL to connect to the Web UI in your web browser is https://<Firebox IP address>:8080.
Enable SNMP on the Firebox
- Open Fireware Web UI and log in to the Firebox.
- Select System > SNMP.
The SNMP Settings page appears.
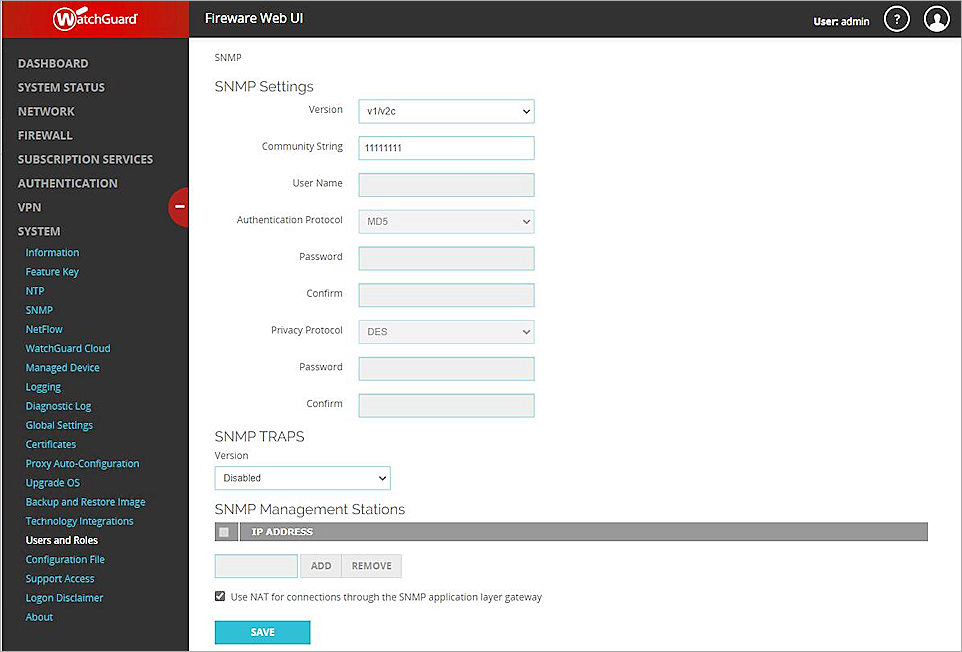
- From the Version drop-down list, select v1/v2c.
N-able N-sight RMM supports v1 and v2c only. - In the Community String text box, type the Community String.
The Community String is a password that allows access to the statistics of a device.
Add an SNMP Policy
To enable the Firebox to receive SNMP polls from the Windows server, you must add an SNMP packet filter policy.
- Select Firewall > Firewall Policies.
- Click Add Policy.
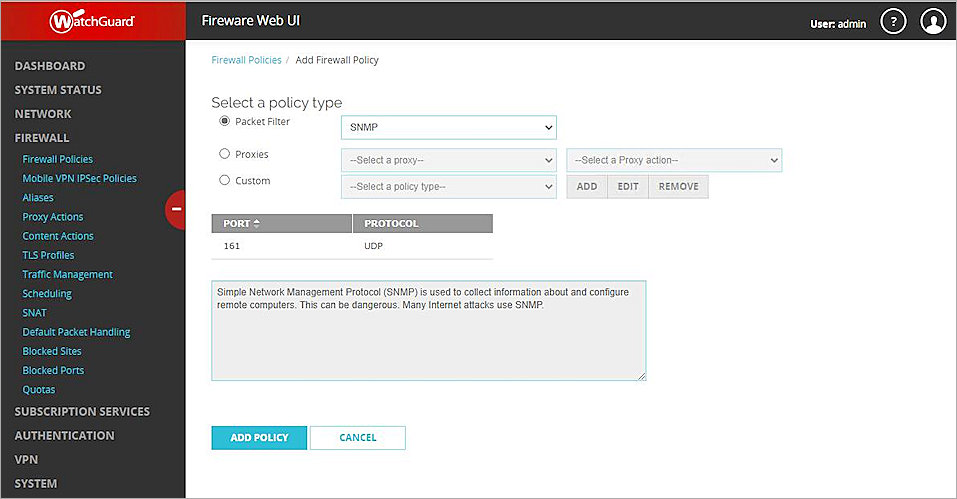
- From the Packet Filter drop-down list, select SNMP.
- Click Add Policy.
- In the From section, select Any-Trusted or Any-Optional depending on which port is connected to the Advanced Monitoring Agent.
- In the To section, select Firebox.
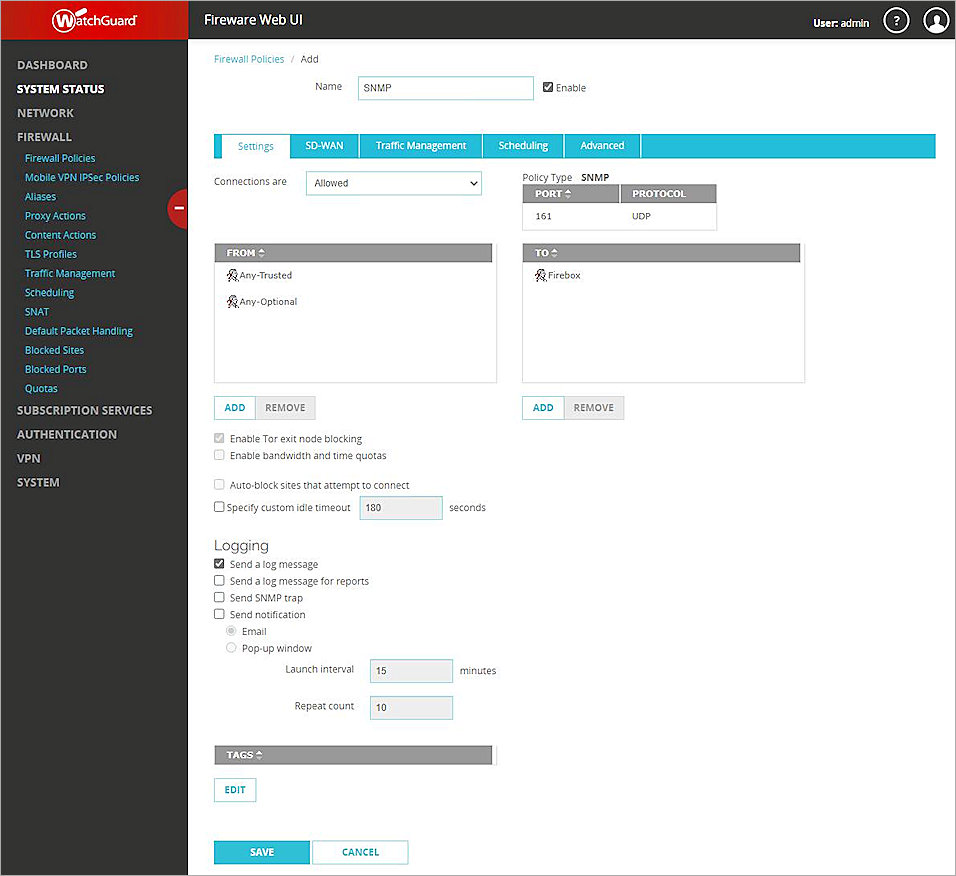
- Click Save.
N-able N-sight RMM Configuration
Log in to the N-able N-sight RMM Web UI.
N-able N-sight RMM cannot monitor a Firebox directly as a single device. You must monitor the Firebox through an SNMP check sent by a device that has the agent installed.
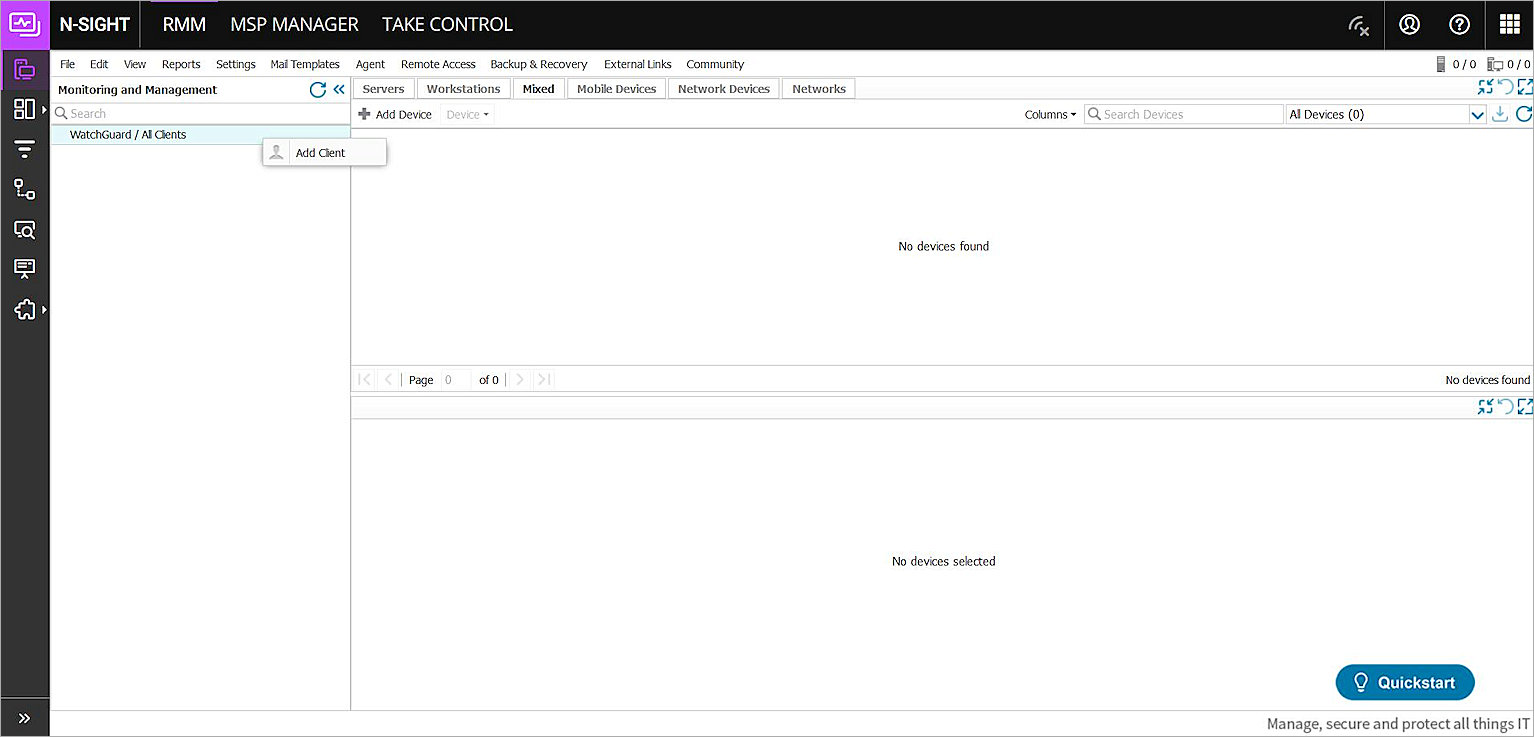
Add a Client and Site
In N-sight RMM you can add several clients. For each client, you can add Sites to help you classify your devices.
- Select your organization, then select Add Client.
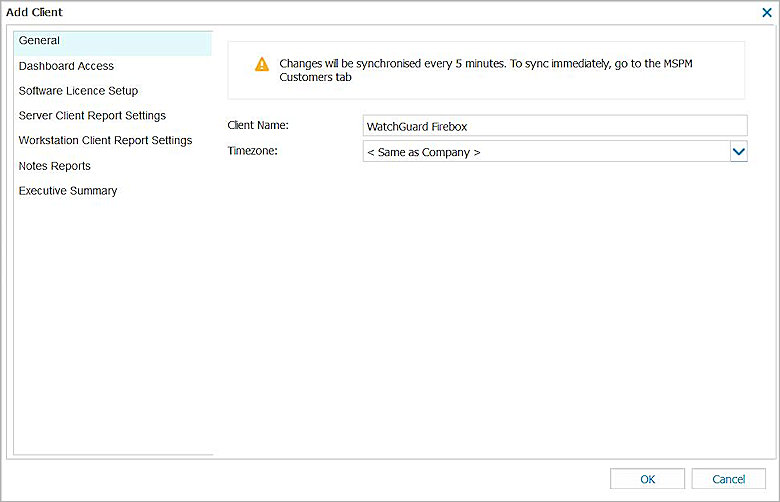
- In the Client Name text box, type a descriptive name to identify the client.
- Click OK.
- Right-click the client you added, then select Add Site.
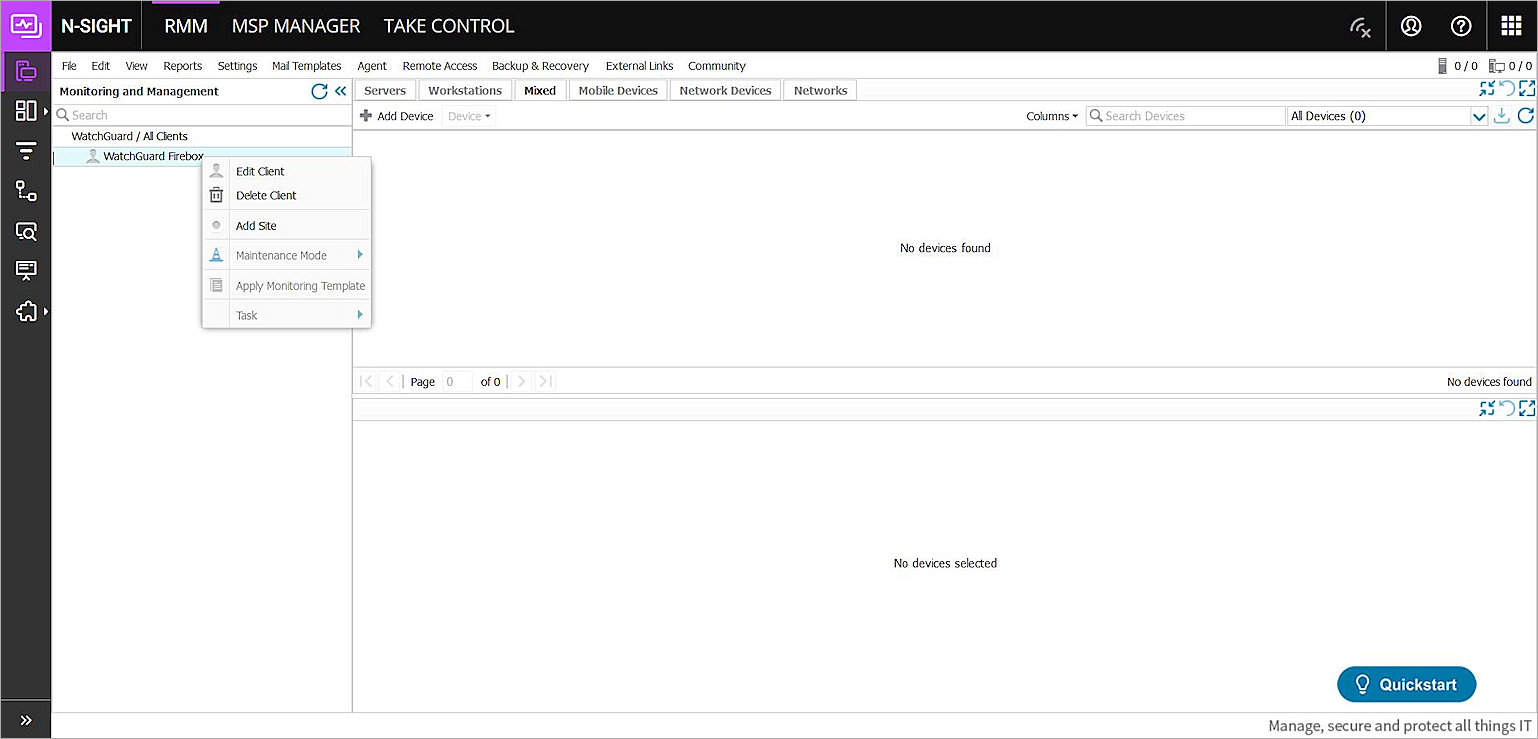
- From the Client drop-down list, select the Client Name you added.
- In the Name text box, type a descriptive name for this site.
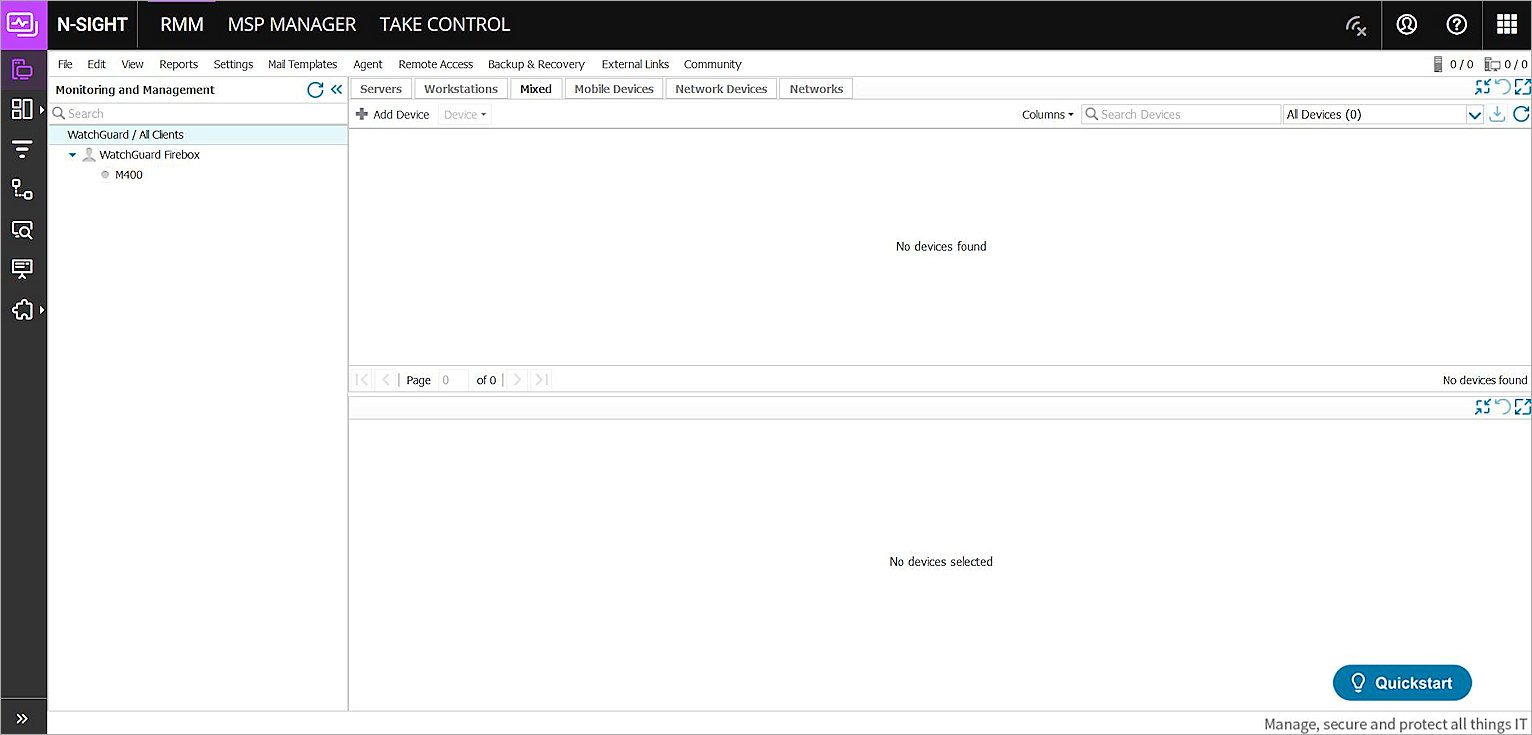
The site appears under the client.
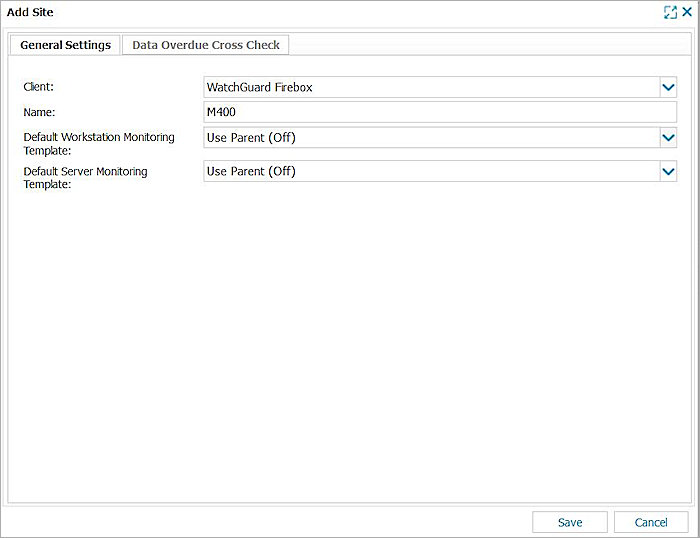
- Click Save.
Install Agent
You must install the agent on the device you want to use for management.
- Select Agent > Download Agent.
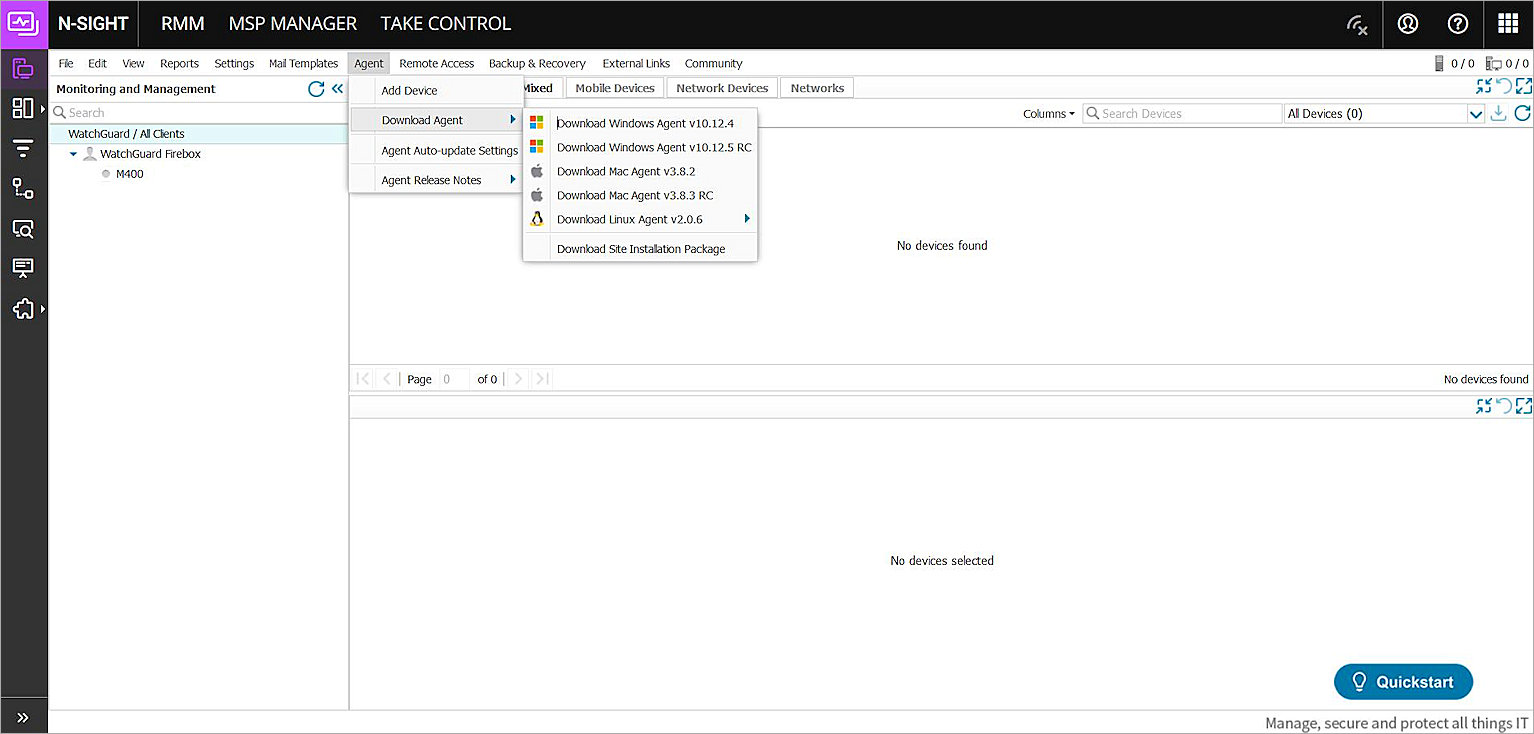
- Select the required agent for the OS of the device. In this example, we select the latest released version of the agent for Windows (v10.12.14) for a Windows Server 2019 device.
We recommend you do not install RC (release candidate) versions of the agent.
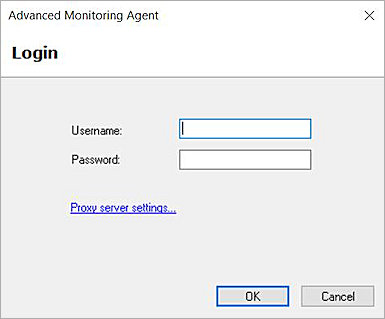
- Install the agent on the Windows server.
- Log in to the agent with the same credentials you use to log in to the N-able N-sight RMM Web UI.
The agent automatically synchronizes data with the N-able N-sight RMM server.
- In the Device Name text box, type the device name.
- In the Description text box, type the description.
- From the Client drop-down list, select your client.
- From the Site drop-down list, select a site.
- Leave the other options at their default value.
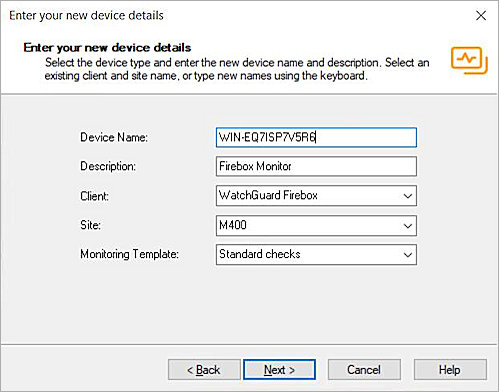
- Click Next.
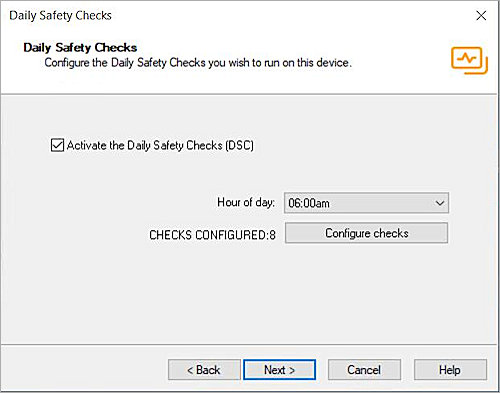
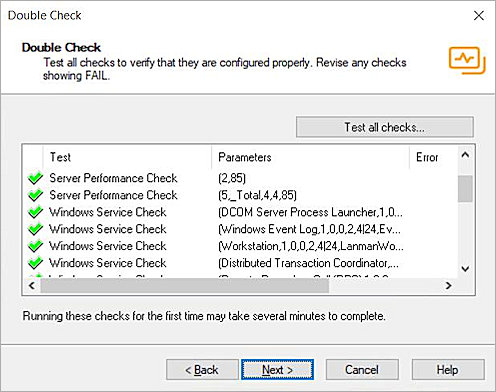
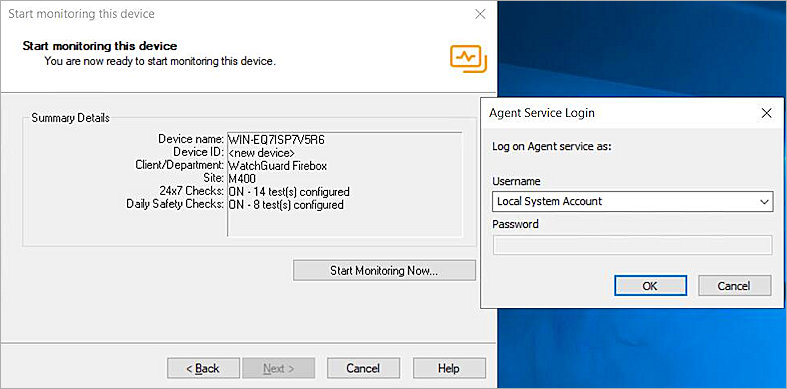
- Use the default settings, then click Next to start the agent monitor.


Add SNMP Checks
In N-able N-sight RMM, the information to monitor on the Firebox is defined by SNMP checks that go through the agent server.
To configure predefined SNMP Checks:
- In the N-able N-sight RMM Web UI, select Settings > SNMP Checks > Servers and Workstations.
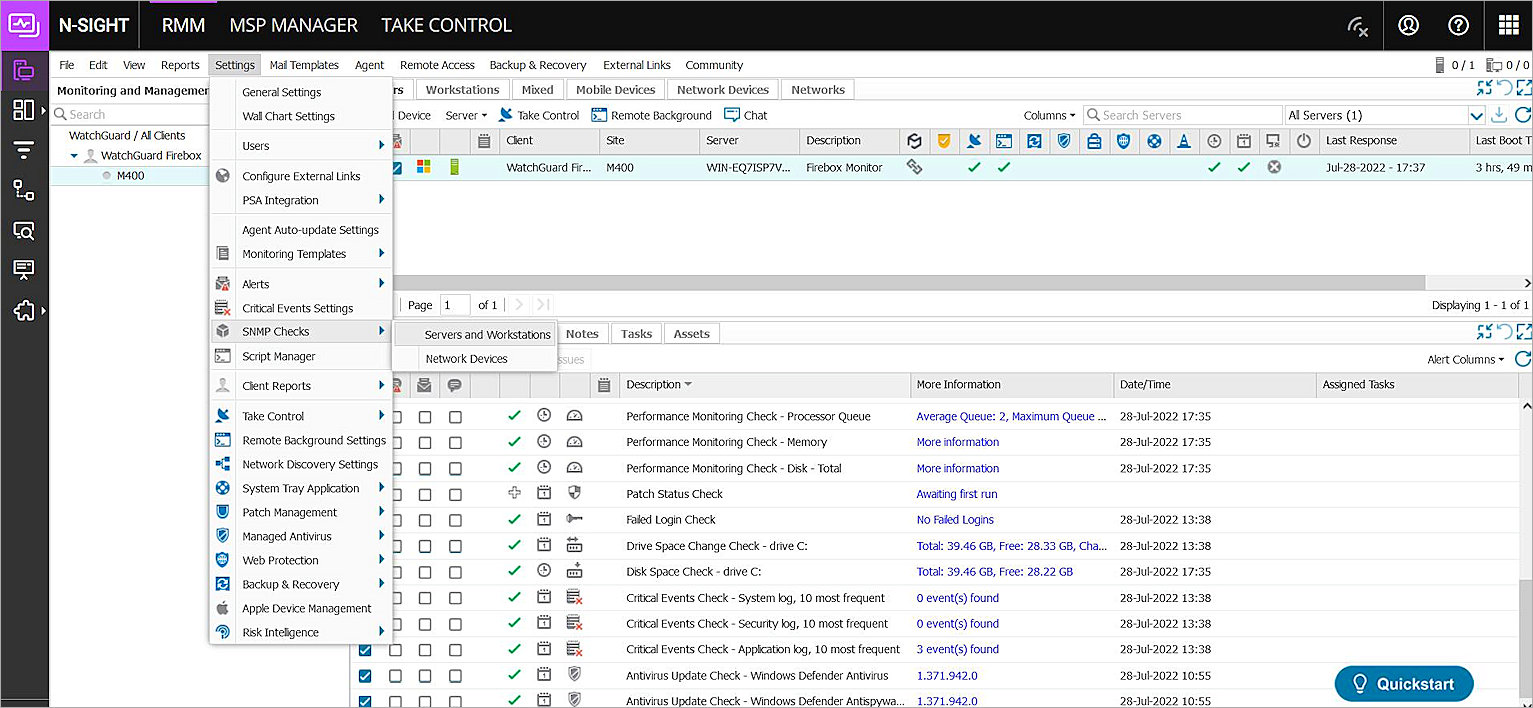
- Click New.
The Predefined SNMP Checks dialogue box appears.
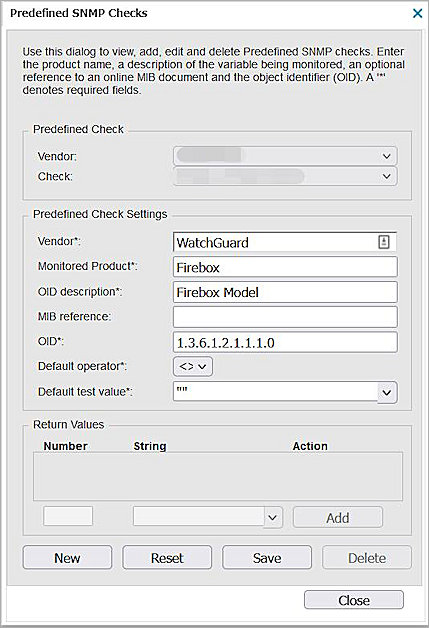
- In the Vendor text box, type the vendor name.
- In the Monitored Product text box, type the product name.
- In the OID description text box, type a description for this SNMP check.
- In the OID text box, type the accurate object identifier for this SMP check. You must exclude the leading period when you type the OID. For example, type 1.3.6.1.2.1.1.1.0 and not .1.3.6.1.2.1.1.1.0.
For more information about Firebox OIDs, see Enterprise MIB File Details.
- From the Default operator drop-down list, select <>.
- In the Default test value text box, type "".
Different types of OIDs require different Default operator and Default test value entries.
- Click Save to save this SNMP check.
- To add more checks, click New and repeat these steps. In this example, we add another check named Firebox Name with OID 1.3.6.1.2.1.1.5.0.
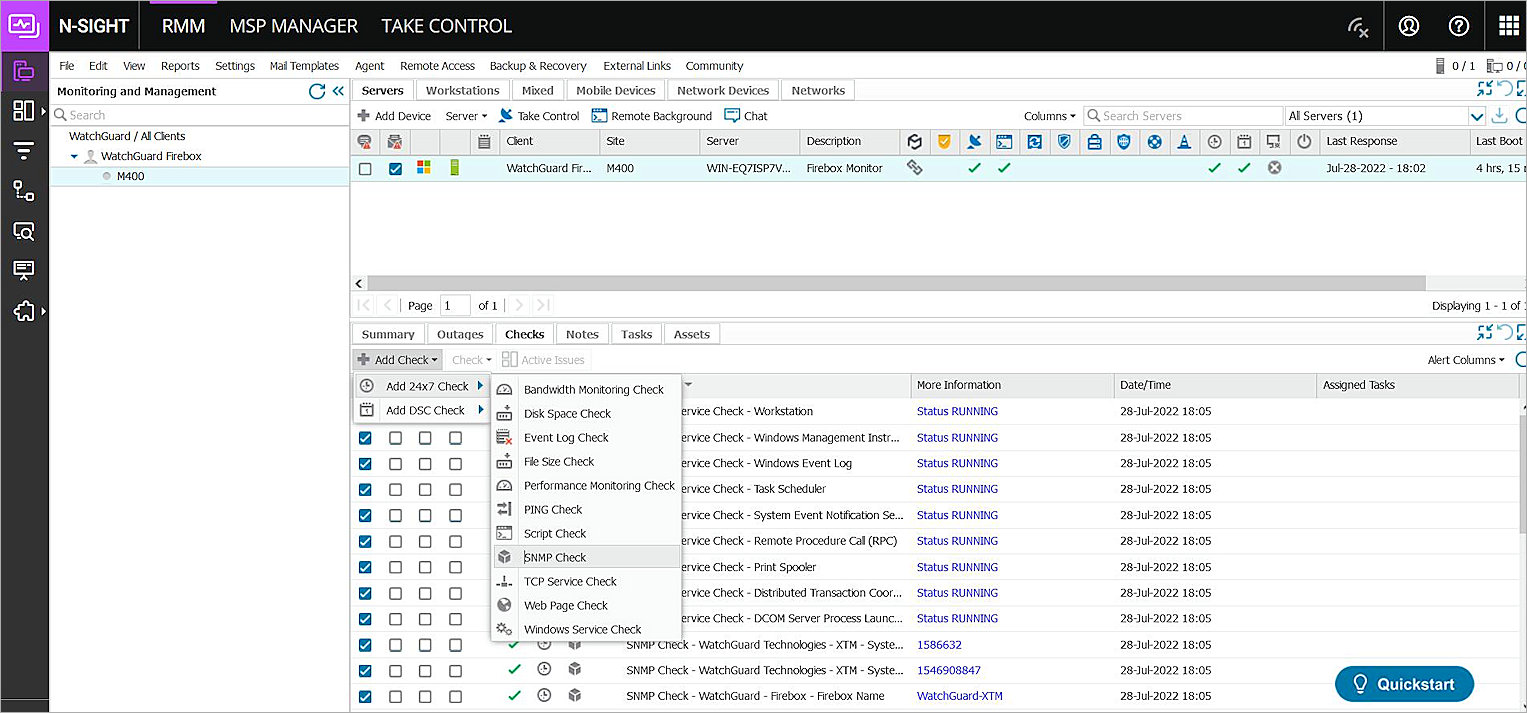
- Select your Server.
- In the Checks tab on the server list page, select Add Check > Add 24x7 Check > SNMP Check.
The SNMP Checks dialogue box appears
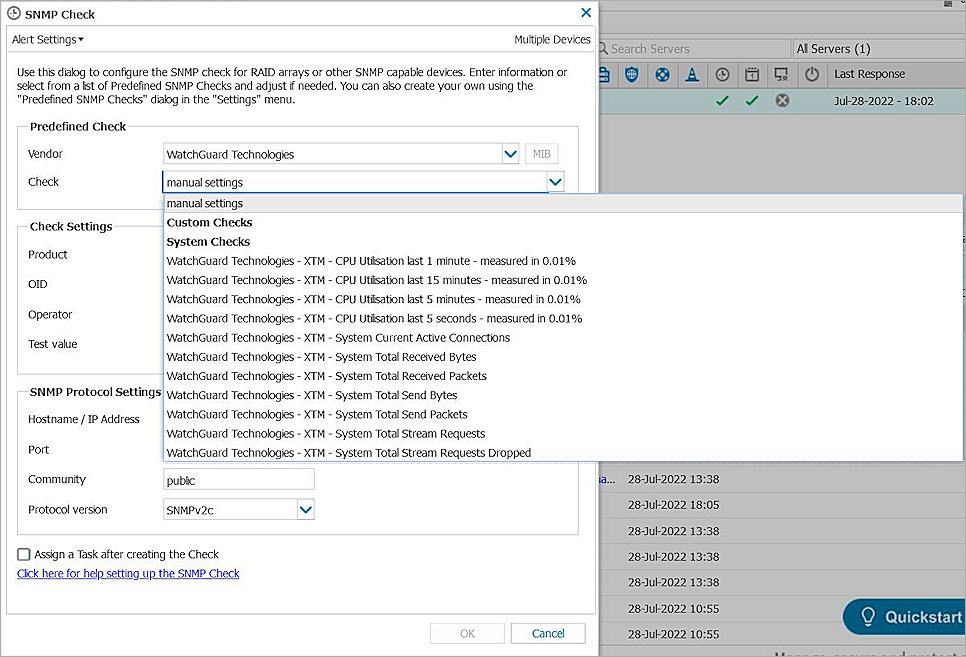
- In the Predefined Check section, from the Vendor and Check drop-down lists, select the vendor and the check you created.
The relevant settings automatically appear in the Check Settings section. - In the Hostname / IP Address text box, type the IP address of the Firebox Trusted or Optional port.
- In the Port text box, type the port used for SNMP on the Firebox. The default port is 161.
- In the Community text box, type the community string you configured on the Firebox.
- In the Protocol version drop-down list, select SNMPv2c.
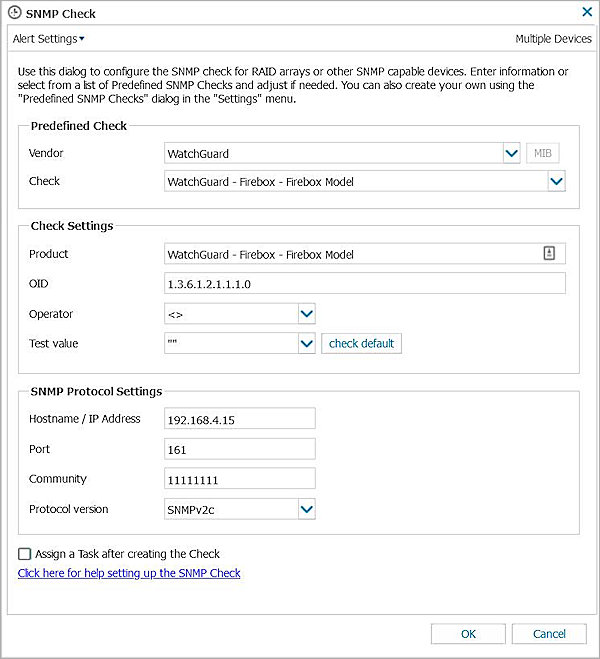
- Click OK.
- Repeat these steps to add more checks.
The N-able N-sight RMM has some built-in WatchGuard OIDs.
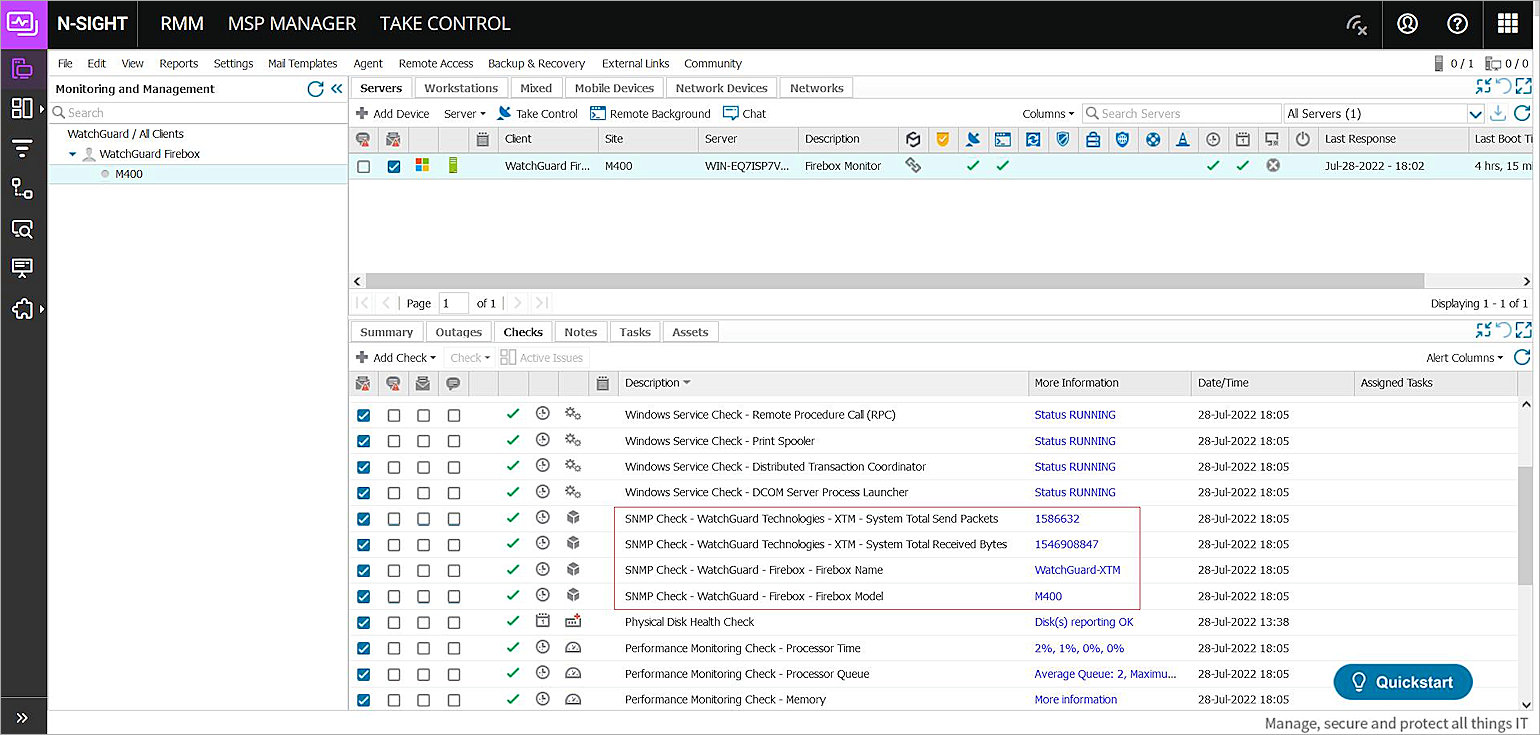
Test the Integration
After you add the SNMP checks to the server, they appear in the Checks section. After an SNMP check is executed, information about that check appears in the More Information column.