Deployment Overview
This document describes how to sync users from Google Workspace to AuthPoint. To sync users from Google Workspace, you must add an LDAP external identity in AuthPoint and create one or more queries.
In AuthPoint, LDAP external identities represent external user databases. They connect to user databases to get user account information and validate passwords. The queries you add to an external identity specify which users to sync from. They pull user information and create AuthPoint user accounts for the users that are found.
Google Workspace does not support identity provider initiated single-sign on (SSO) for AuthPoint. This means that Google Workspace resources do not work from the IdP portal. Users must go to the Google Workspace URL to log in.
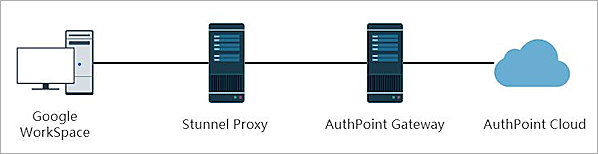
Topology
Before You Begin
Before you begin these procedures, make sure that:
- End-users can log in to Google Workspace
- A token is assigned to a user in AuthPoint
Configure Google Workspace
- Log in to Google Workspace as an administrator.
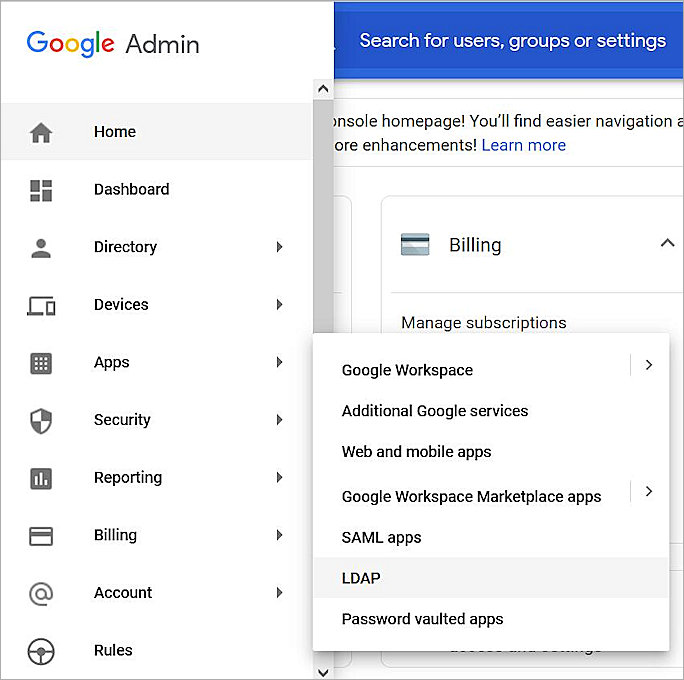
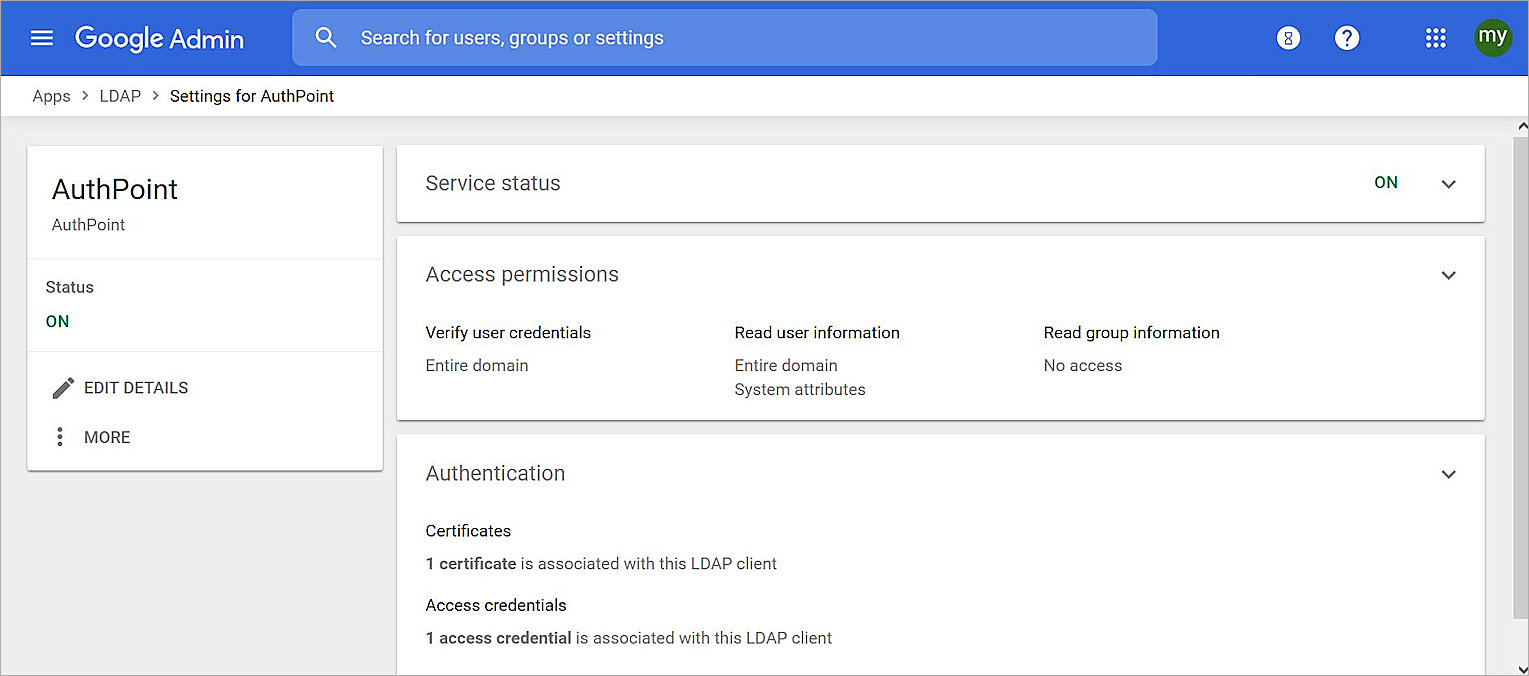
- From the navigation menu, select Apps > LDAP.
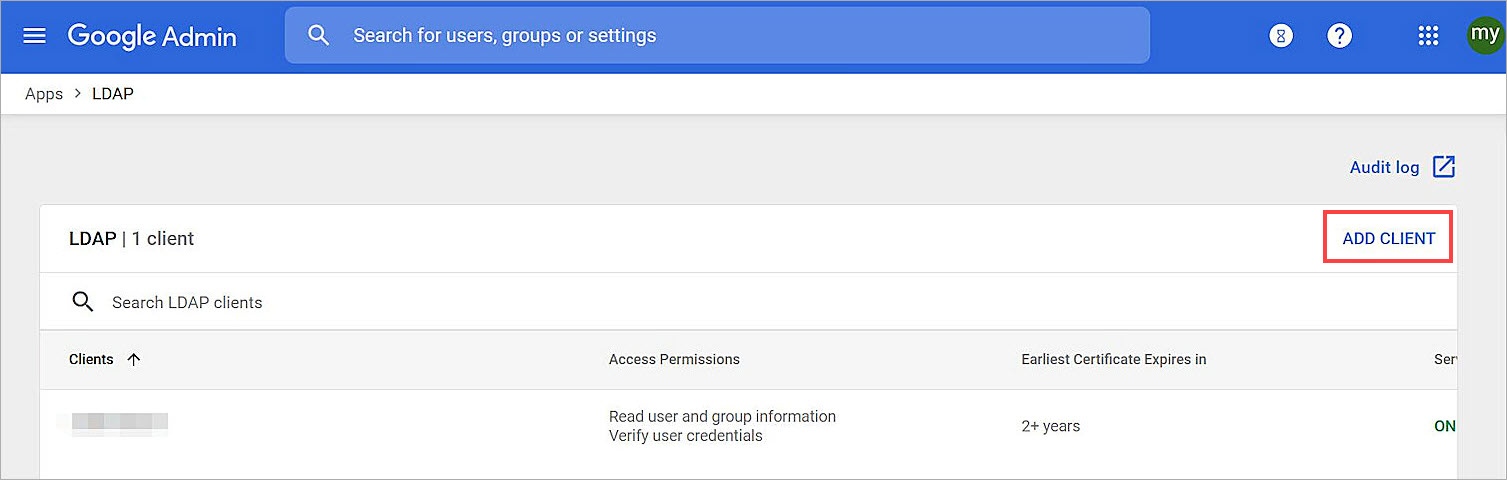
- Click Add Client.
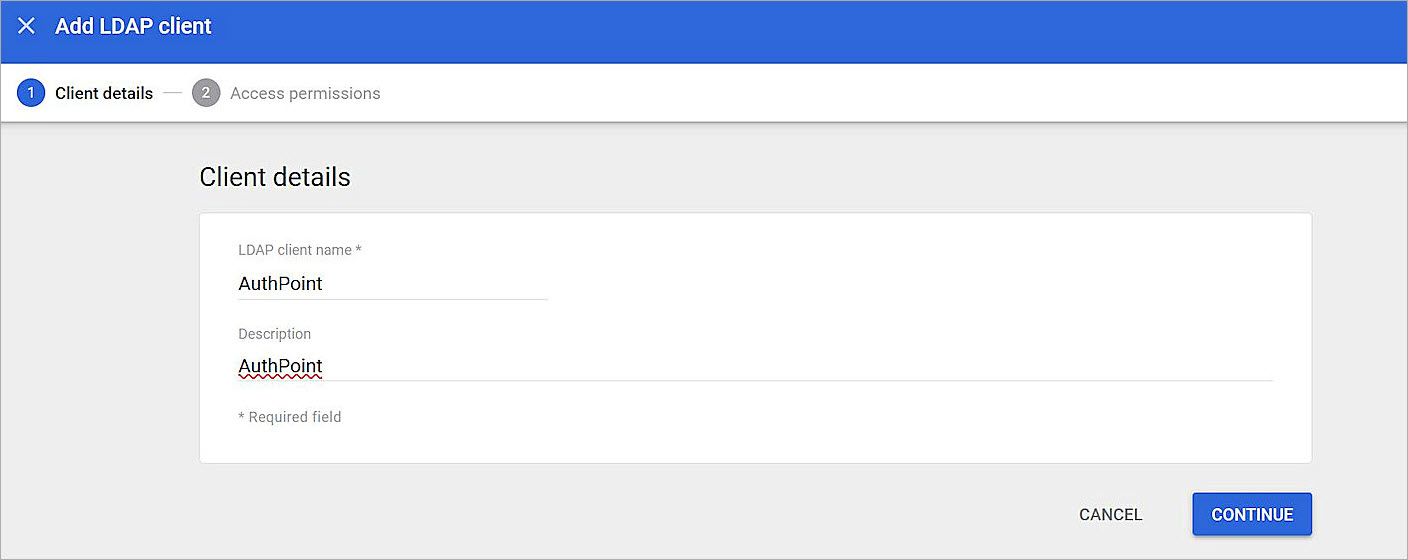
- Enter a name and description for this LDAP client. In our example, we name the LDAP client AuthPoint.
- Click Continue.
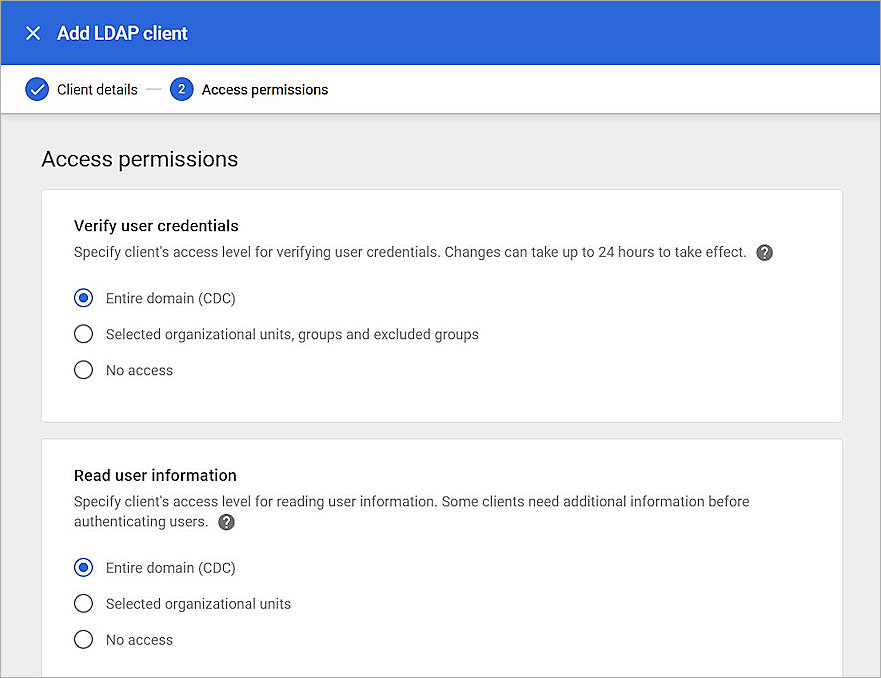
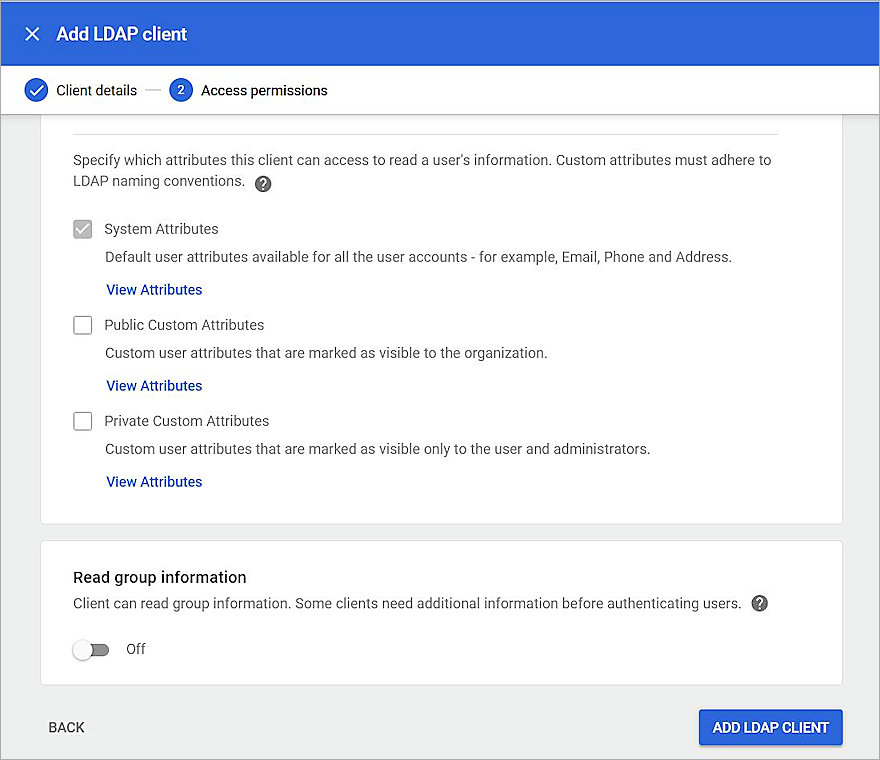
- Specify the access permissions for the LDAP client. In our example, we select Entire domain.
- Click Add LDAP Client.
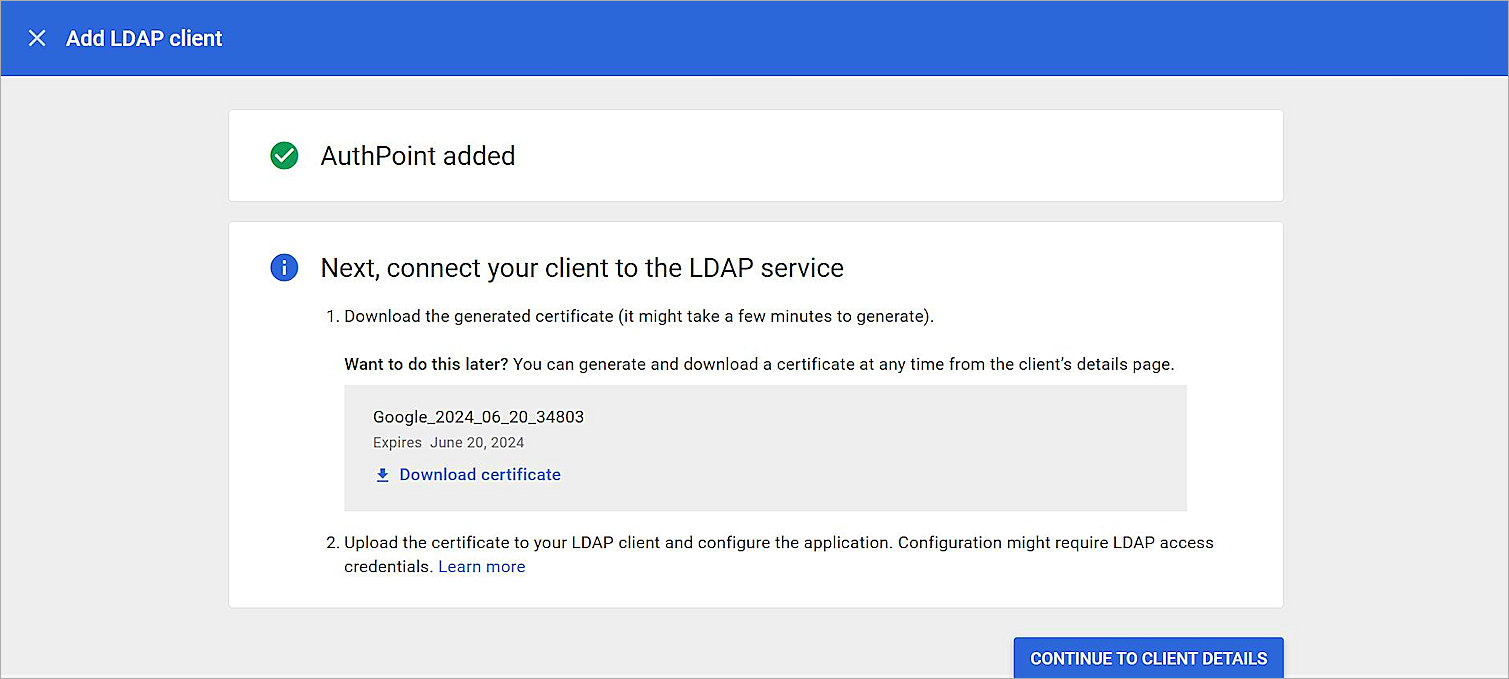
- Click Download certificate. You need this certificate to complete the steps in the next section.
- Click Continue to Client Details.
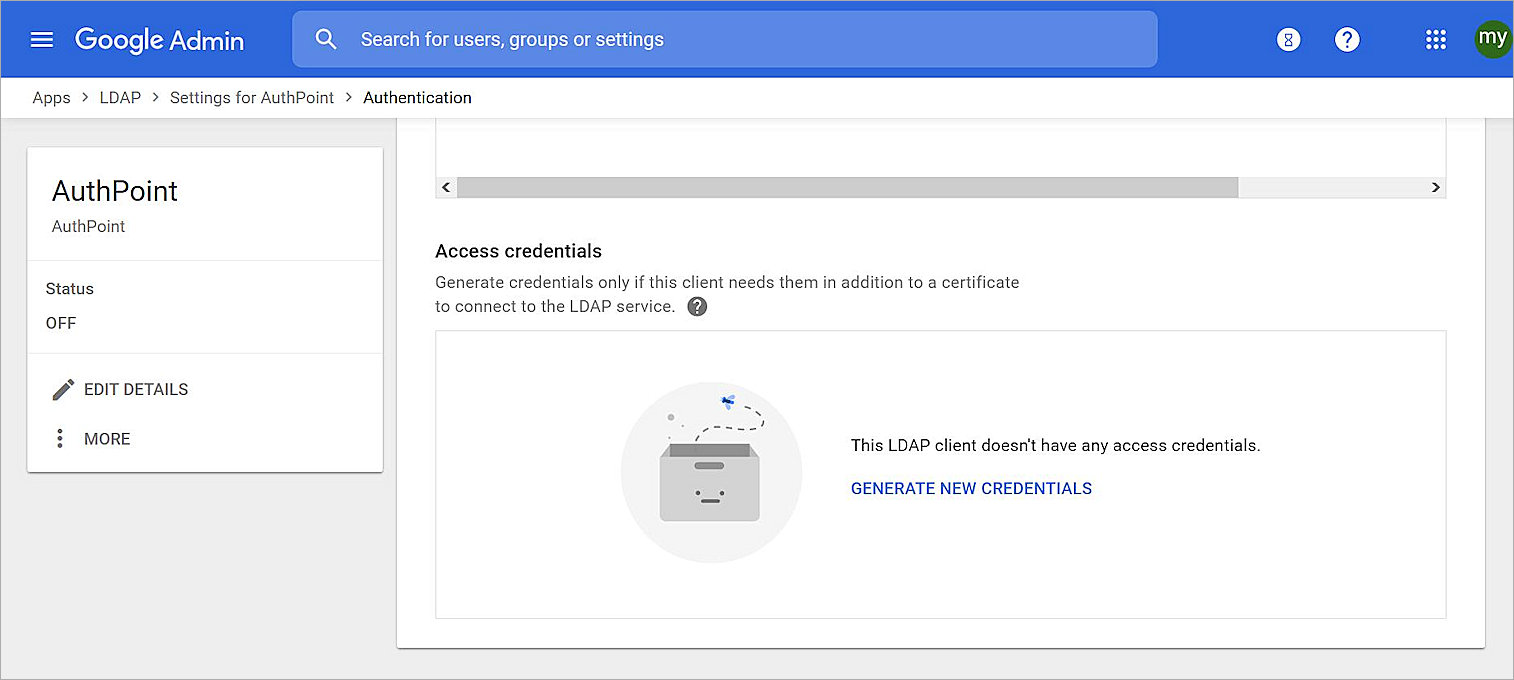
- Click Access credentials.
- Click Generate New Credentials.
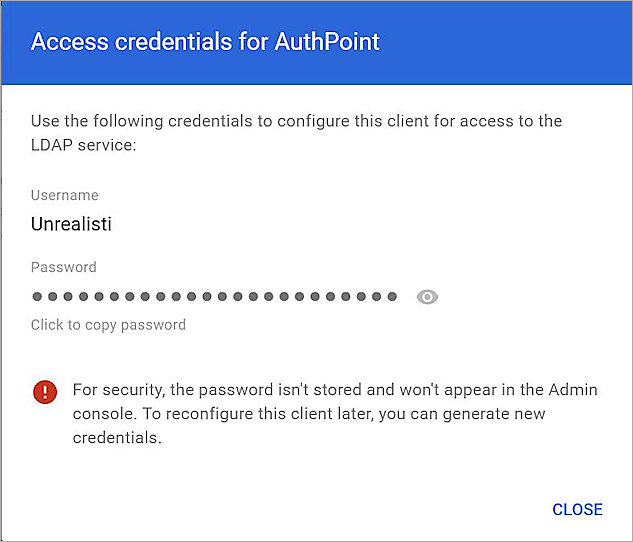
The Access credentials screen appears with the generated credentials.
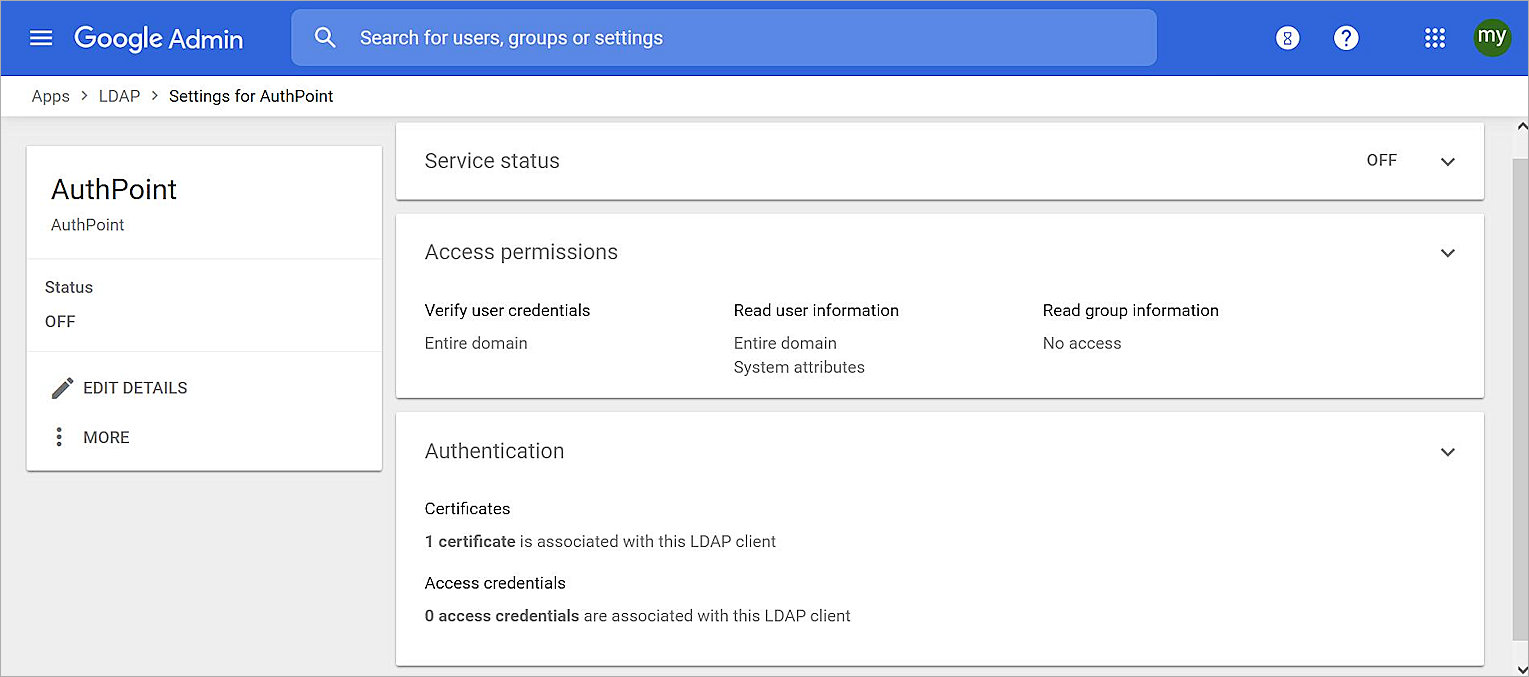
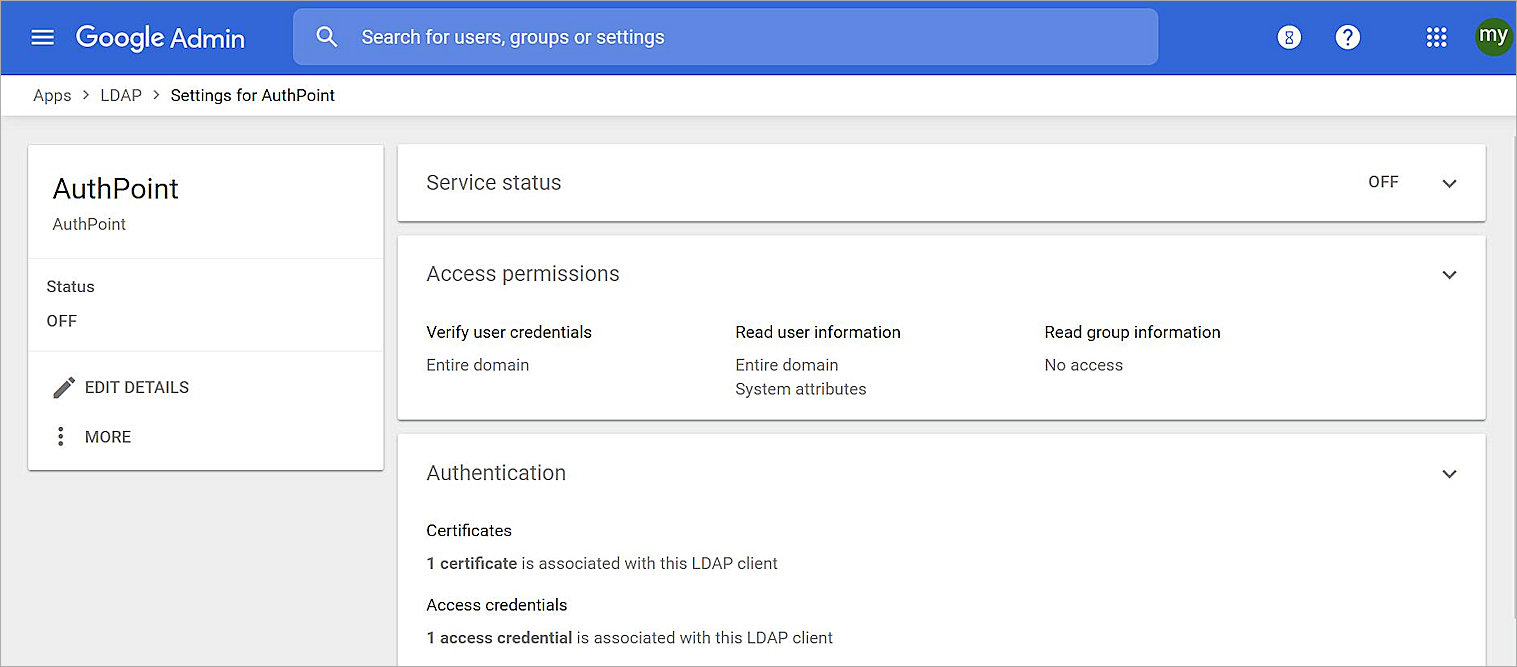
- Navigate back to the LDAP client settings page.
- Click Service Status.
- Select ON for everyone.
- Click Save.
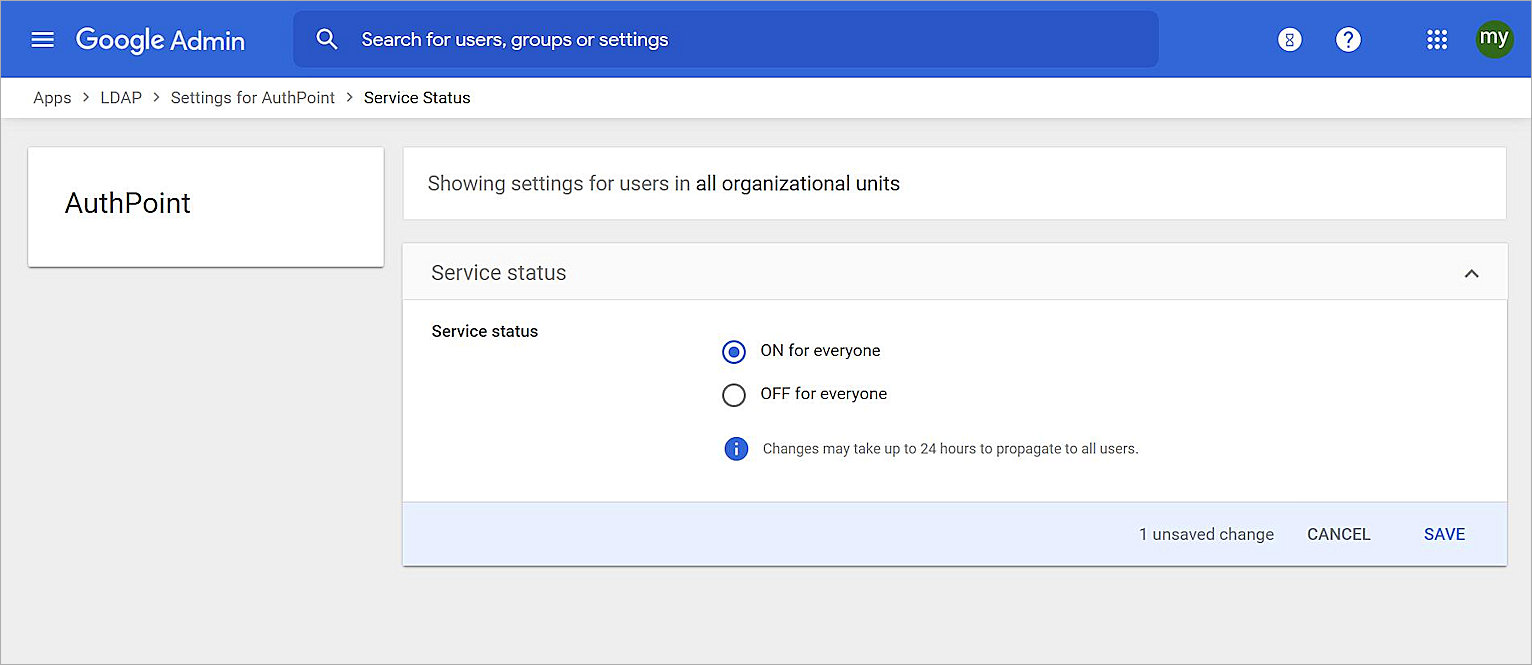
- Verify that the status of your LDAP client is on.
Configure Stunnel
- Install stunnel. For example, on Ubuntu you would type this command:
$ sudo apt-get install stunnel4 - Copy the Google Workspace certificate that you downloaded in the previous section to the stunnel folder (/etc/stunnel).
- Create a configuration file /etc/stunnel/stunnel.conf with these contents (ldap-client.crt is the certificate and ldap-client.key is the key):
[ldap]
client = yes
accept = 1389
connect = ldap.google.com:636
cert = /etc/stunnel/ldap-client.crt
key = /etc/stunnel/ldap-client.key - To enable stunnel, edit /etc/default/stunnel4 and set ENABLED=1.
- Restart stunnel with this command:
$ sudo /etc/init.d/stunnel4 restart
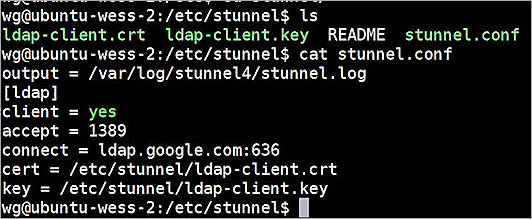
If stunnel does not run, use this command to reload the stunnel configure file: $ sudo stunnel stunnel.conf
Configure AuthPoint
Before you can sync your users to AuthPoint, you must:
- Add a user group.
- (Recommended) Configure Zero Trust authentication policies for your groups and resources.
- Configure an external identity
Add a Group in AuthPoint
You must have at least one user group in AuthPoint to configure MFA. If you already have a group, you do not have to add another group.
To add a WatchGuard Cloud-hosted group to the WatchGuard Cloud Directory:
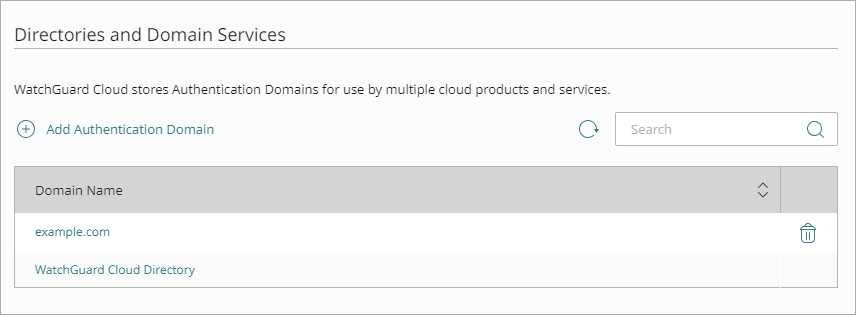
- Go to Configure > Directories and Domain Services.
- Click the WatchGuard Cloud Directory domain name. If you have not yet added the WatchGuard Cloud Directory, click Add Authentication Domain and select the WatchGuard Cloud Directory.
The New Group page appears.
- In the Groups tab, click Add Group.
- In the Group Name text box, type a descriptive name for the group.
- (Optional) In the Description text box, type a description of the group.

- Click Save.
Your group is added to the WatchGuard Cloud Directory and to AuthPoint.
Add a Zero Trust Authentication Policy
Zero Trust policies specify which resources users can authenticate to and which authentication methods they can use (Push, QR code, and OTP).
We recommend that you configure authentication policies for your resources before you sync users form your external database to AuthPoint. If you already have authentication policies, you do not have to create a new authentication policy. You can add this resource to your existing authentication policies.
Users that do not have an authentication policy for a specific resource cannot authenticate to log in to that resource.
To configure a Zero Trust authentication policy:
- Go to Configure > Zero Trust. If you have a Service Provider account, you must select an account from Account Manager.
- Click Add Policy.
- Type a name for this policy.
- In the Target section, from the Content drop-down list, select which groups this policy applies to. You can make multiple selections to add multiple groups.
- In the Resources section, select the AuthPoint resources this policy applies to.
- In the Conditions section, select the conditions that apply to this policy. When you add a condition to an authentication policy, the policy applies only to user authentications that match the policy and the policy conditions. For example, if you add a Network Location to a policy, the policy only applies to user authentications that come from that Network Location. Users who only have a policy that includes a Network Location do not get access to the resource when they authenticate outside of that Network Location (because they do not have a policy that applies, not because authentication is denied). For more information, go to About Zero Trust Conditions.
- (Optional) To create a new condition, click Add New Condition. After you create a new condition, you must still add the condition to the policy.
- From the Type drop-down list, select the type of condition to add to the policy.
- From the Name drop-down list, select which condition of the chosen type to add to the policy.
- To add more conditions, repeat Step 6.
If you add conditions to a policy, we recommend that you create a second policy for the same groups and resources without the conditions. Assign a higher priority to the policy with the policy objects. For more information about priority, go to About Zero Trust Policy Precedence.
- In the Action section, select an option to specify whether to allow or deny authentications for the resources in this policy. In our example, we want to allow authentications.
- Allow — Allow user groups in this policy access to the resources associated with this policy.
- Deny — Deny authentications when users in the groups associated with this policy try to authenticate to the resources associated with this policy.
- If you allow access with this policy, select the check box for each authentication option users can select when they authenticate to resources in this policy with MFA.
For SAML resources, if you select more than one authentication option, users must select one of the available options when they authenticate. For example, if you select OTP and Push, users can choose to type their OTP or approve a push to authenticate. You cannot require that they do both.
- Click Save.
Your policy is created and added to the end of the policy list. - Review the order of your policies and adjust as necessary. For more information about priority, go to About Zero Trust Policy Precedence.
Configure an External Identity
The steps in this section are specific to Google Workspace. To learn how to sync users from Active Directory or other LDAP databases, see Sync Users from Active Directory or LDAP.
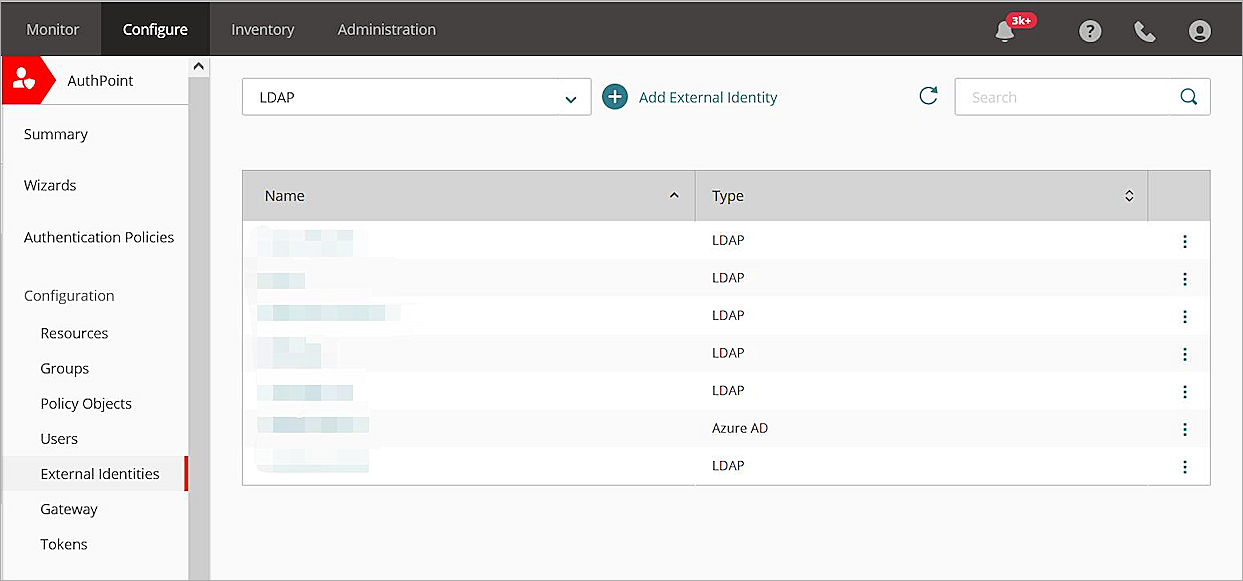
- Select External Identities.
- From the Type drop-down list, select LDAP. Click Add External Identity.
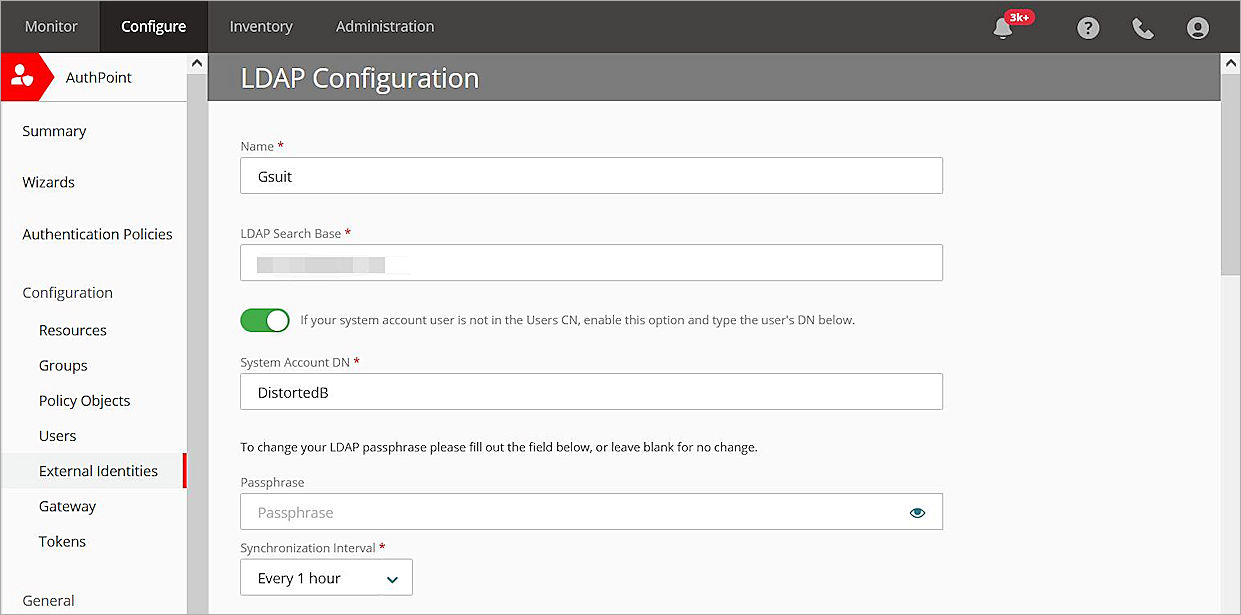
- In the Name text box, type a descriptive name for the external identity.
- In the LDAP Search Base text box, type the domain name for your Google account. for example, if your Google email domain name is yourgoogle.com, you would type dc=yourgoogle,dc=com.
- Enable the toggle that says If your system account user is not in the Users CN, enable this option and type the user's DN below.
- In the System Account and Passphrase text boxes, type your Google Workspace access credentials.
- From the Synchronization Interval drop-down list, select Every 1 hour.
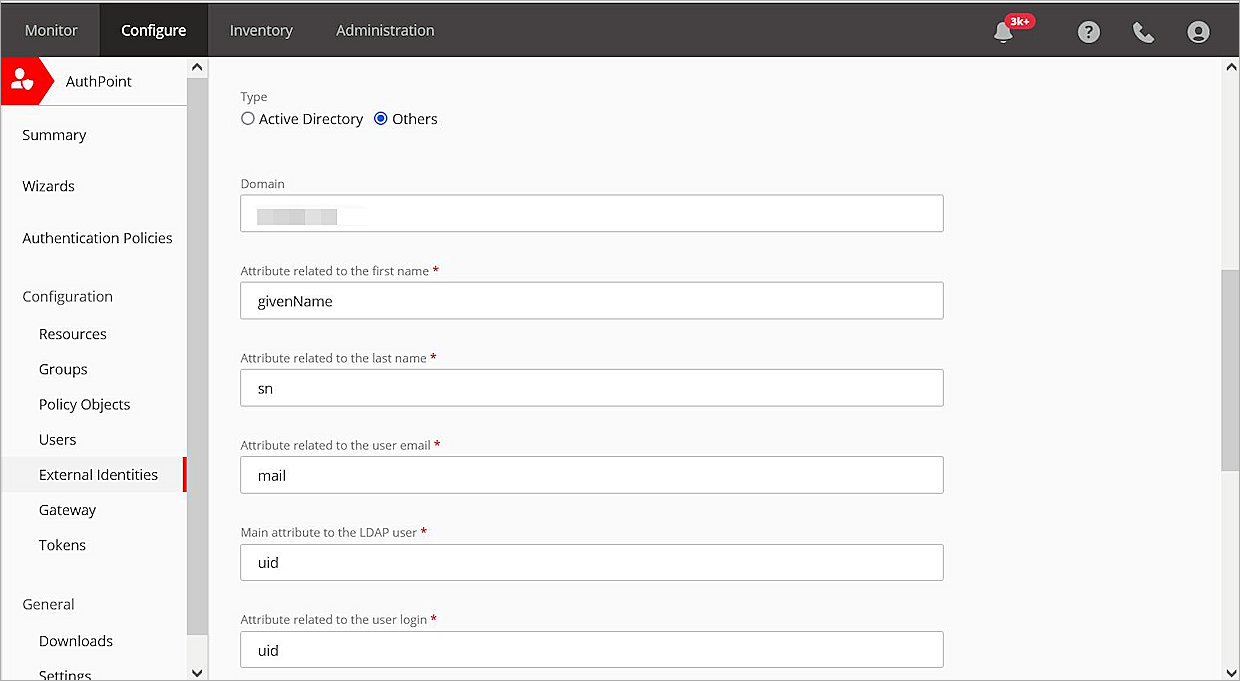
- For Type, select Others.
- In the Domain text box, type the domain name for your Google account.
- In the Attribute related to the first name text box, type givenName.
- In the Attribute related to the last name text box, type sn.
- In the Attribute related to the user email text box, type mail.
- In the Main attribute to the LDAP user text box, type uid.
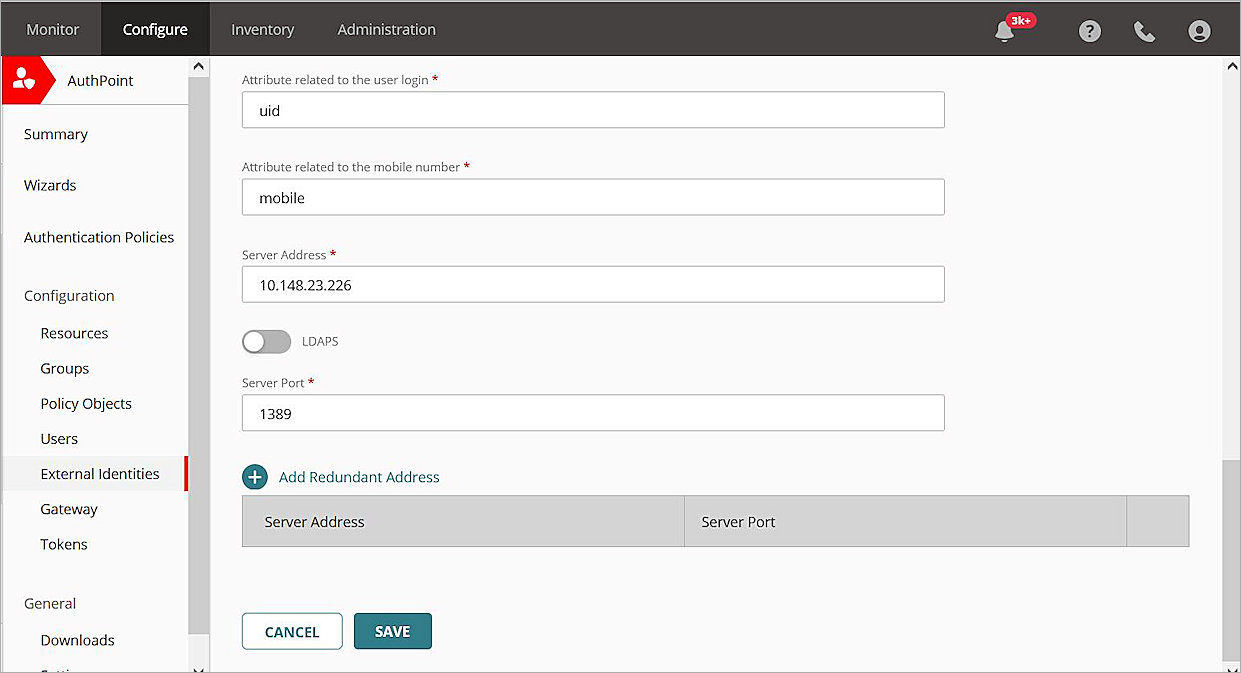
- In the Attribute related to the user login text box, type uid.
- In the Attribute related to the mobile number text box, type mobile.
- In the Server Address text box, type host IP address where Stunnel is installed.
- Disaple the LDAPS toggle.
- In the Server Port text box, type the port address that you configured in the Stunnel configuration file. In our example, we specified port 1389.
- Click Save.
- To verify that your external identity is configured correctly and AuthPoint can communicate with Google Workspace, next to your external identity, click
 and select Check Connection.
Sync Your Users to AuthPoint
- Next to your external identity, click and select Group Sync.
The Group Sync page appears. - Click Add New Group to Sync.
The Add Group Sync window appears. - From the Select LDAP Groups to Sync Users From drop-down list, select the Google Workspace groups you want to sync users from. You can select multiple groups.
- From the Select an AuthPoint Group to Add Users To drop-down list, select the AuthPoint group to add the users to. Synced users must be added to at least one AuthPoint group.
For each group sync, all users are added to the same AuthPoint group. To add users to multiple AuthPoint groups you must create a group sync for each AuthPoint group you want to add the users to. To add users to separate AuthPoint groups, you must create a separate group sync for each LDAP group.
- Click Save.
- Click Back.
You return to the External Identities page. - Next to your external identity, click and select Advanced Query.
The Advanced Query page appears. - Click Add Advanced Query.
- In the Name text box, type descriptive name for this query.
- From Group drop-down list, select the AuthPoint group to add the users to.
- In the Advanced Query text box, type uid=*.
- Click Add.
- Click Back.
You return to the External Identities page. - Next to your external identity, click and select Start Synchronization.