Applies To: WatchGuard Core MDR, WatchGuard Core MDR for Microsoft, WatchGuard Total MDR, WatchGuard Open MDR
WatchGuard MDR is a managed service provided by WatchGuard to eligible partners and customers. This topic provides new users with an overview of the WatchGuard MDR service and provides the basics steps to get started with WatchGuard MDR.
Before You Begin
Before you begin, make sure you have a basic understanding of the roles and responsibilities for partners or customers and WatchGuard.
Partner or Customer Responsibilities
If you have WatchGuard MDR for your account or for accounts you manage, your responsibilities for WatchGuard MDR include:
Purchase and Allocate Licenses
Each time you purchase a new MDR license, you activate the license, then allocate the MDR service to the users in WatchGuard Cloud. For more information, go to About WatchGuard MDR Licenses.
Configure the Environment
For accounts with a WatchGuard Core MDR license and WatchGuard Endpoint Security, you configure MDR settings for your endpoints in WatchGuard Cloud. For more information, go to Configure WatchGuard Core MDR Settings.
For more information about how to configure integrations with WatchGuard MDR, go to WatchGuard MDR Integration Guides.
Follow Remediation Guidelines
Make sure you can follow recommendations from WatchGuard MDR to remediate any incidents so you can return to business-as-usual as soon as possible. For more information, go to Review MDR Investigations.
WatchGuard Responsibilities
WatchGuard responsibilities for WatchGuard MDR include:
Monitor, Analyze, and Triage
WatchGuard proactively monitors and analyzes telemetry data from your customer endpoints to identify, aggregate, and prioritize indicators and alerts.
Investigate
WatchGuard determines whether an abnormal activity is malicious and requires a response.
Provide Threat Response
A threat response includes alerts that include details of the investigation, the list of affected endpoints, and guidelines to remediate the threat. When you onboard a WatchGuard MDR account, you can specify whether you want to allow WatchGuard MDR to isolate affected endpoints in response to a threat.
Search for Threats
WatchGuard threat hunters search for threats that might have evaded existing detection controls, based on threat intelligence and relevant indicators of compromise (IOCs) observed over time. If the threat hunting activity reveals indicators of malicious activity, the threat hunters perform an investigation. Additionally, WatchGuard creates new indicators of attack (IoAs) and indicators of compromise (IoCs) to improve the efficacy and efficiency of the service.
Deliver Reports
WatchGuard MDR automatically delivers periodic health status and service activity reports. For more information, go to View MDR Reports.
Provide Remediation Guidance
The WatchGuard SOC provides remediation guidance for any detected threats.
You are a good candidate for WatchGuard MDR if you have experience with the installation, support, and troubleshooting of a WatchGuard Endpoint Security product (Endpoint Security Elite, Endpoint Security 360, or Endpoint Security Prime) and third-party cloud platforms like Microsoft Defender for Endpoints, Microsoft 365, AWS CloudTrail, and Google Workspace.
Your staff must also have access to the environment or provide permission to the WatchGuard SOC team, so that they can work directly with the environment when the MDR service detects a compromise attempt.
You must have at least one person available 8 hours a day, 5 days a week, or 24 hours a day, 7 days a week (based on the model you select on the Tenant Settings page), in case the WatchGuard SOC team needs to contact you. For example, we might need your help to determine whether activity we detect on the network is approved by you or your customer or indicates a potential security threat.
We also recommend:
- You have a scalable business plan in place to support the growth of the MDR service.
- For WatchGuard Core MDR, WatchGuard Total MDR, or WatchGuard Open MDR, you have at least one staff member with a current WatchGuard Endpoint Security technical certification.
Get Started
To get started with WatchGuard MDR, complete these high-level steps.
- Step 1: Accept the Terms of Service and Configure Your Tenant Settings
- Step 2: Activate a WatchGuard MDR License
- Step 3: Allocate WatchGuard MDR for Users
- Step 4: Configure and Connect Managed Services
- Step 5: Configure MDR Report Recipients
Step 1: Accept the Terms of Service and Configure Your Tenant Settings
Log in to WatchGuard Cloud and open the Managed Services Portal to accept the Terms of Service and configure your tenant settings.
- Log in to your WatchGuard Cloud account.
- Select Monitor > Managed Services.

- Click Continue.
The WatchGuard Managed Detection and Response Terms of Service page opens.
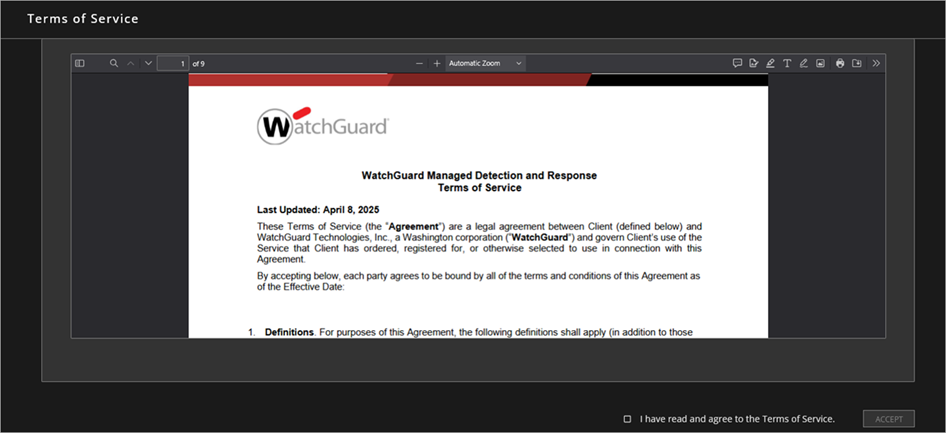
- After you read the agreement, select the I Have Read and Agree to the Terms of Service check box.
- Click Accept.
The Tenant Settings page opens.
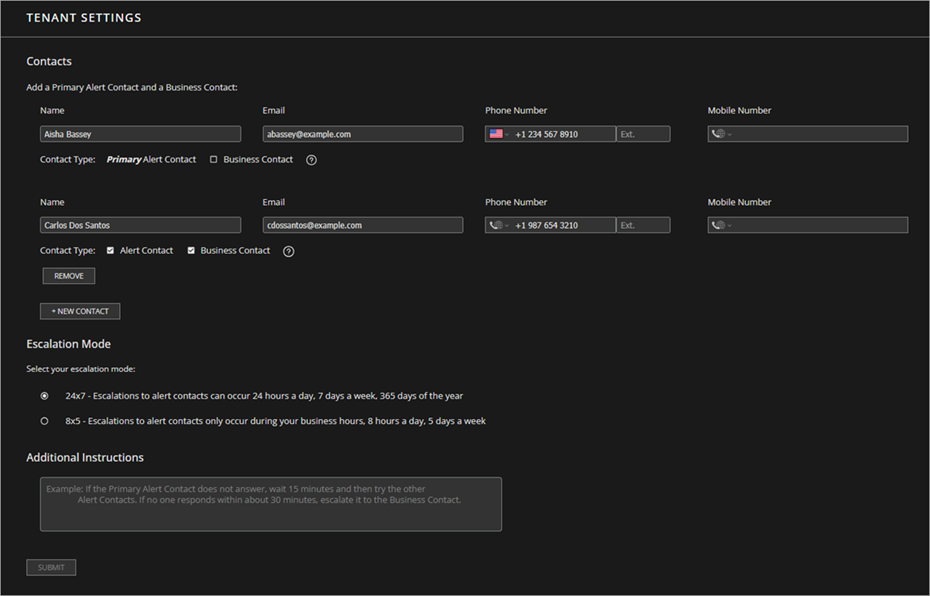
- In the Contacts section, enter contact information for the primary alert contact. This person is the designated contact for security alerts and incident notifications.
- Designate a contact as a business contact. The business contact is the designated contact for all business-related communication for the account. You can designate the primary alert contact as the business contact or you can add additional contacts.
- To add additional contacts, click New Contact and enter the contact information.
- To designate the contact as an alert contact, select the Alert Contact check box.
- To designate the contact as a business contact, select the Business Contact check box.
You must designate at least one alert contact and at least one business contact. You can assign these roles to the same contact or to different contacts.
- In the Escalation Mode section, select an escalation mode:
- 24x7 — Escalations to Alert Contacts Can Occur 24 Hours a Day, 7 Days a Week, 365 Days of the Year
- 8x5 — Escalations to Alert Contacts Only Occur During Your Business Hours, 8 Hours a Day, 5 Days a Week
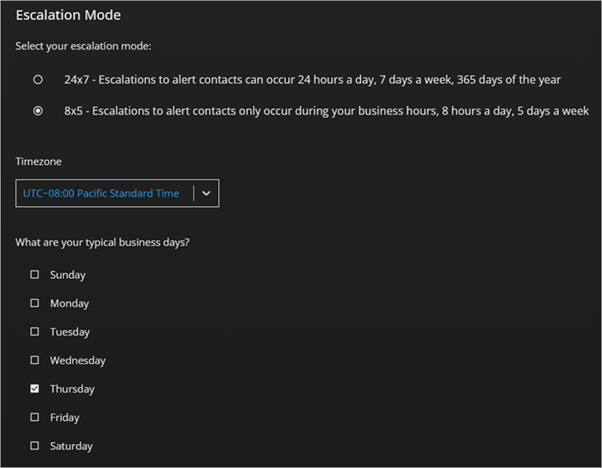
- If you select 8x5 as the escalation mode, from the Timezone drop-down list, select the time zone for the primary alert contact.
- Select the check boxes for the business days when the alert contacts are available.
- In the Additional Instructions text box, type any special instructions for the MDR team related to your alert contacts.
- Click Submit.
For more information about MDR tenant settings, go to Manage MDR Tenant Settings.
Step 2: Activate a WatchGuard MDR License
After you accept the terms of service and configure the tenant settings, make sure you have a WatchGuard MDR license for your account. For more information, go to Activate a WatchGuard MDR License.
You cannot activate a WatchGuard MDR license until you accept the terms of service and configure the tenant settings.
Step 3: Allocate WatchGuard MDR for Users
When you activate a WatchGuard Core MDR for Microsoft, WatchGuard Total MDR, or WatchGuard Open MDR license, the available license and user allocation appear on the Inventory page in WatchGuard Cloud. For more information, go to Allocate WatchGuard MDR Users.
Step 4: Configure and Connect Managed Services
The steps you must take to configure and connect MDR to your environment depend on your WatchGuard MDR license and the environments you want WatchGuard MDR to manage.
WatchGuard Core MDR
For accounts with WatchGuard Core MDR and WatchGuard Endpoint Security, you configure MDR settings in WatchGuard Cloud. For more information, go to Configure WatchGuard Core MDR Settings.
WatchGuard Core MDR for Microsoft
For accounts with WatchGuard Core MDR for Microsoft, you must complete steps to allow WatchGuard to monitor endpoints in your environment that runs Microsoft Defender for Endpoints. For more information, go to Connect WatchGuard MDR with Microsoft Defender for Endpoints.
WatchGuard Total MDR and WatchGuard Open MDR
After you activate and allocate users from a WatchGuard Total MDR or WatchGuard Open MDR license, ThreatSync is automatically enabled and configured for all eligible WatchGuard devices and products. For more information, go to ThreatSync.
To view which products and devices have ThreatSync enabled, go to Configure Device Settings in ThreatSync. Customers with WatchGuard Total MDR or WatchGuard Open MDR can only view, not edit, the configuration on the Device Settings page in ThreatSync.
For steps to configure your third-party integrations, go to WatchGuard MDR Integration Guides.
All MDR licenses also enable WatchGuard to monitor your cloud-based Microsoft 365 environment. For information about how to connect WatchGuard MDR with Microsoft 365, go to Connect WatchGuard MDR with Microsoft 365.
Step 5: Configure MDR Report Recipients
WatchGuard MDR automatically delivers periodic health status and service activity reports to help you mitigate and remediate identified threats. The reports and content are different for different WatchGuard MDR products. For more information about MDR reports and how to add report recipients, go to Manage MDR Report Settings.
Manage MDR Team Access to WatchGuard Cloud Accounts
When you allocate users from a WatchGuard MDR license, the WatchGuard MDR team is automatically granted access to the account to provide managed detection and response services.
If you need to remove access to an account from the MDR team, you can disable the toggle in WatchGuard Cloud.
Caution: If you remove access, the MDR team can no longer respond to detections for the WatchGuard products associated with this account.
To remove access to an account from the MDR team:
- Log in to WatchGuard Cloud.
If you have a Service Provider account, from Account Manager, select the Subscriber account. - Select Administration > Managed Access.
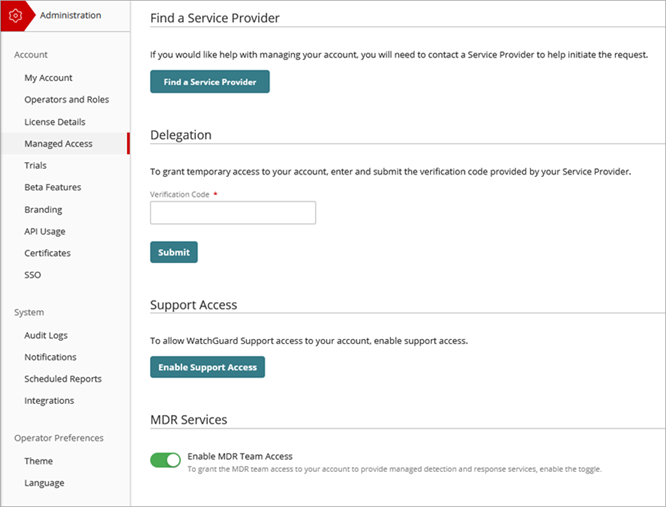
- In the MDR Services section, disable the Enable MDR Team Access toggle.
A warning dialog box opens.
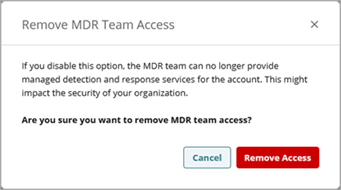
- Click Remove Access.
To re-enable MDR team access to your account, select the Enable MDR Team Access toggle.
Disable Notification Rules
WatchGuard MDR notifies you in the Managed Services portal when detections occur.
If you set up notification rules in WatchGuard Cloud for products that WatchGuard MDR monitors, we recommend you disable those notifications to avoid discrepancies. Use the Managed Services portal to see the status of the service for your account. For more information, go to Review MDR Detections and Review MDR Investigations.