Applies To: Endpoint Security Elite, Endpoint Security 360, Endpoint Security Prime, WatchGuard EDR, WatchGuard EDR Core, Endpoint Security Basic
The WatchGuard Agent handles communication between managed computers on the same network and the WatchGuard server. The agent is installed on each endpoint or computer.
To install the endpoint software locally, you download the agent installer and run the installation wizard on the computer or device. The WatchGuard Agent installs the Endpoint Security product according to the settings you select. There is a single agent for all Endpoint Security products and modules.
For accounts with more than one WatchGuard product license (for example, an Endpoint Security product license and a FireCloud license), the Configure > Agent Deployment page in WatchGuard Cloud is useful to centrally configure product deployment behavior for endpoint groups and endpoints. For more information, go to Configure WatchGuard Agent Deployment in WatchGuard Cloud.
Your operator role determines what you can see and do in WatchGuard Cloud. Your role must have the Add, Discover, and Delete Computers permission to view or configure this feature. For more information, go to Manage WatchGuard Cloud Operators and Roles.
Download the WatchGuard Agent Installer in Endpoint Security
Prior to downloading the installer, you select an endpoint group. Any computers or devices that you use the installer on are automatically added to the endpoint group you select. The security policies assigned to a computer or device depend on the group it belongs to. For information about the different types of endpoint groups, go to Manage Computers and Devices in Groups in Endpoint Security.
To download the installer, from WatchGuard Cloud:
- Select Configure > Endpoint Security.
- Select Computers.
- Click Add Computers.
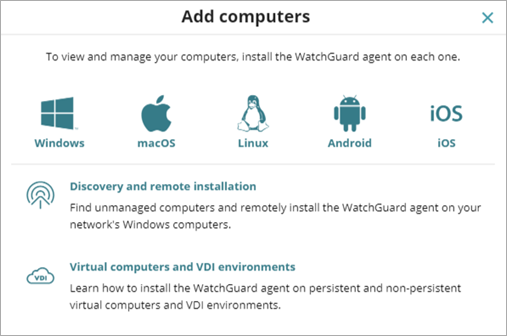
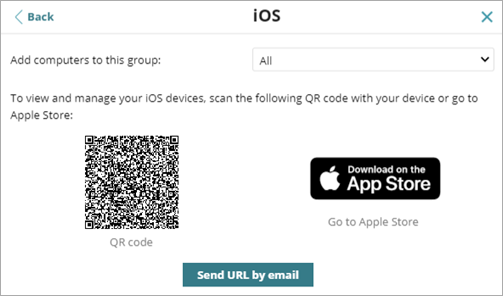
- Select the platform you want to download the installer for (Windows, macOS, Linux, Android, or iOS).
The Windows version includes the installer for x86 and ARM computers. For iOS devices, we recommend that you download the app integrated with the WatchGuard mobile device management (MDM) solution. For more information, go to Mobile Device Management for iOS Devices.

You can also create a download link for the installer and send the link to computers and devices on the network. For more information, go to Create a Download Link.
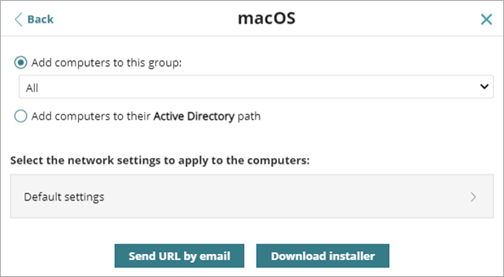
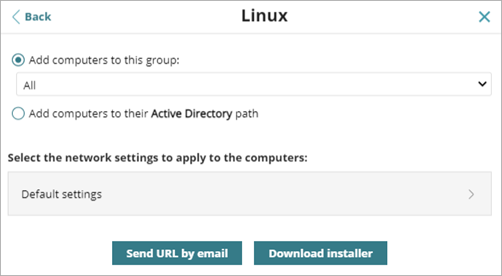
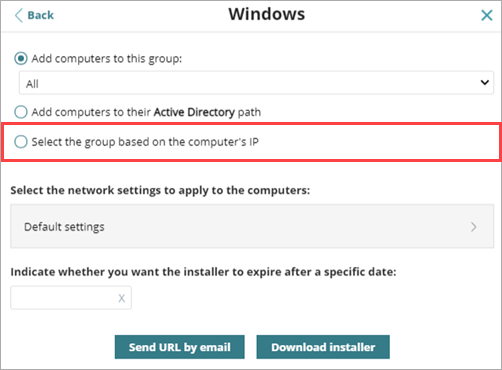
- Select the group you want to add the computer to.
The security policies assigned to a computer depend on the group it belongs to.- To add the computer to a group created in the Endpoint Security management UI, select Add Computers to this Group. From the drop-down list, select a folder.
- (Windows, Linux, or macOS only) To add the computer to an Active Directory group, select Add Computers to their Active Directory Path. Select the network proxy to apply to the computers.
If the Active Directory administrator moves a computer from one organizational unit to another, the change is reflected in the Endpoint Security management UI as a group change. The security policies assigned to the computer might also change.
- To add the computer to a group based on IP addresses, select Select the Group Based on the Computer's IP. Select an IP-based group from the drop-down list.
For more information, go to Integrate Computers by IP Address.
For more information about the different types of endpoint groups, go to Manage Computers and Devices in Groups in Endpoint Security.
- To specify the network settings to apply to the computer, click Default Settings.
For more information on how to configure network settings, go to Configure Network Settings.- If the computer is added to a group created in the Endpoint Security management UI, it automatically inherits default settings from the folder it is in.
- (Windows, Linux, or macOS only) To add the computer into an Active Directory group, select network settings from the drop-down list that appears.
For information on how to assign settings to computers, go to Assign a Settings Profile.
- To specify an expiration date for the Windows installer, click in the box and select a date from the calendar.
After the expiration date, if users try to start the installer, a message informs them that the installer is expired, and they should download a new one or contact their administrator. - Click Download Installer.
The installer downloads. - To start the installation, double-click the downloaded installer file.
For information on how to run the installation wizard on different platforms, go to Install the Endpoint Software Locally.
Integrate Computers by IP Address
When you create a computer group in the management UI, you can specify IP addresses and IP address ranges to determine which computers are added to the group. For more information, go to Manage Endpoint Groups in Endpoint Security.
If you select Select the Group Based on the Computer's IP, Endpoint Security searches all IP addresses associated with the endpoint group and child groups you select.
- If a single IP address is found, the computer moves to the relevant group.
- If multiple IP groups match the computer IP address, the group that is deepest in the tree is selected. If there are multiple groups at the same level with IP addresses that match the computer IP address, the last one is selected.
- If no matches are found, the computer moves to the selected group. If the selected group does not exist when the computer is integrated, it moves to the All group.
After Endpoint Security places a computer in an endpoint group, if you change the IP address for the computer, the computer does not automatically move to another endpoint group. If you change the IP addresses assigned to a group, the computers in the group are not automatically reorganized.
Create a Download Link
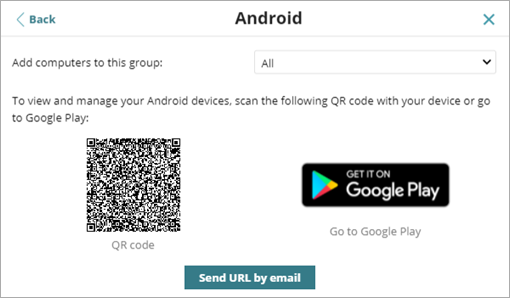
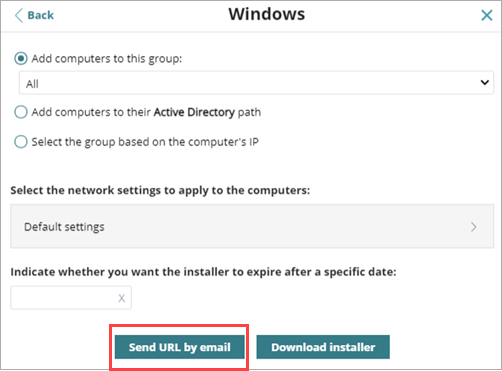
With the Send URL by Email option, you create a download link and send it to users. Users click a link to download the installer to their computers.
To create a download link, from Endpoint Security:
- Select Configure > Endpoint Security.
- Select Computers.
- Click Add Computers.
- Select the platform you want to create a download link for (Windows, macOS, Linux, Android, or iOS).
The Windows link includes installers for x86 and ARM processors. For iOS devices, we recommend that you download the app integrated with the WatchGuard mobile device management (MDM) solution. For more information, go to Mobile Device Management for iOS Devices. - Select the endpoint group you want to add the computer to.
The security policies assigned to a computer depend on the endpoint group it belongs to.
- To specify an expiration date for the Windows installer, click in the box and select a date from the calendar.
After the expiration date, if users try to start the installer, a message informs them that the installer is expired, and they should download a new one or contact their administrator. - Click Send URL by Email.
Your email application opens a new email with the link. Send the email to users in the selected group. When a user clicks the link, the installer downloads. - To start the installation, the user double-clicks the downloaded installer file.
For more information, go to Install the Endpoint Software Locally.
Install the Endpoint Software Locally
Download and Install the WatchGuard Agent from WatchGuard Cloud