Applies To: Cloud-managed Fireboxes
This document applies to Fireboxes you manage in WatchGuard Cloud. For information that applies to Fireboxes managed in Fireware Web UI or WatchGuard System Manager, go to: Connect to Fireware Web UI from an External Network.
Overview
WatchGuard Cloud enables you to manage a cloud-managed Firebox configuration from any remote location. You cannot manage the Firebox configuration from the local Fireware Web UI on a cloud-managed Firebox. You can use local Fireware Web UI to troubleshoot the connection to WatchGuard Cloud, download a diagnostic log file, and to upgrade Fireware.
The default WatchGuard Web UI system policy allows connections to Fireware Web UI on TCP port 8080 from internal networks that have the Web UI Access option enabled in the network settings. By default, the WatchGuard Web UI system policy does not allow connections to Fireware Web UI from external networks. Because this is a system policy, you cannot edit it.
We recommend that you do not enable Web UI Access on an external network because this adds the network to the Source list of the WatchGuard Web UI system policy and allows connections to Fireware Web UI from any IP address on the network. To connect to Fireware Web UI from a remote location, we recommend that you add a new policy to allow administrative connections from your specific location.
We strongly recommend that you use a VPN to connect to the Fireware Web UI from a remote location. This greatly increases the security of the connection. If this is not possible, we recommend that you allow access from the external network to only specific authorized users and to the smallest number of computers possible. For example, your Firebox is more secure if you allow connections from a single IP address instead of from the alias Any-External.
Add a Policy to Allow Connections from a Remote IP Address
To add a policy that allows connections from a remote IP address to Fireware Web UI:
- Select Configure > Devices.
- Select the cloud-managed Firebox.
- Click Device Configuration.
- Click the Firewall Policies widget.
The Firewall Policies page opens.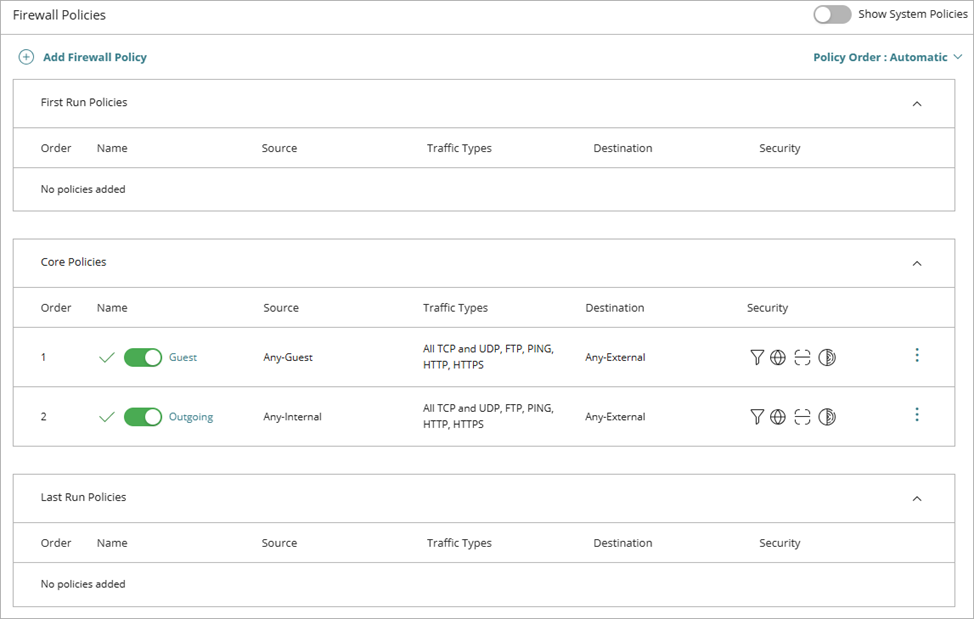
- On the Firewall Policies page, click Add Firewall Policy.
The Add Firewall Policy page opens.
- Select Inbound.
- Click Next.
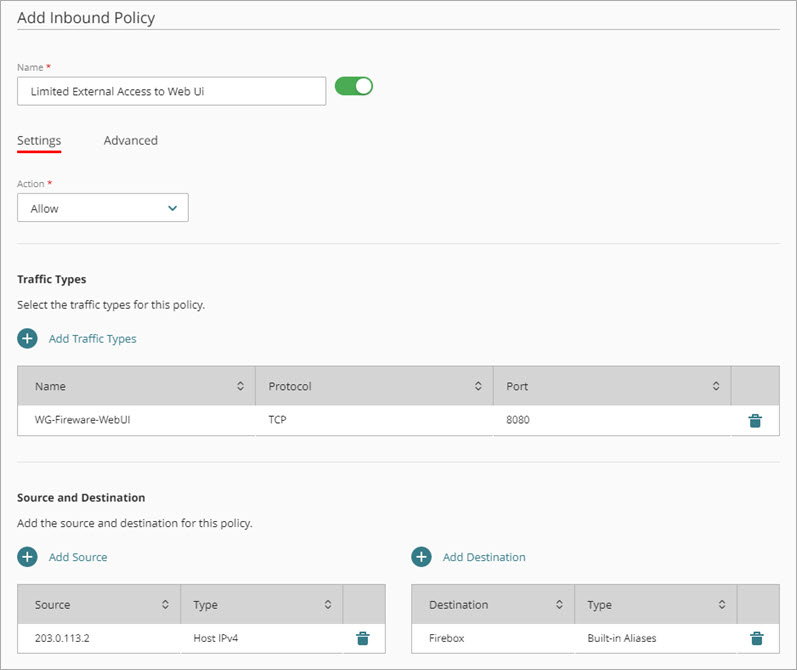
Settings for the selected policy type open. - In the Name text box, type a name for this policy.
- From the Action drop-down list, select Allow.
- Click Add Traffic Types.
- Select the check box next to the WG-Fireware-WebUI traffic type.
- Click Add.
- To add the IP address of an external computer as the source of the traffic:
- Click Add Source.
The Add Source Address dialog box opens. - From the Type drop-down list, select Host IPv4 or Host IPv6, then type the IP address.
- Click Add.
- Click Add Source.
- To add the Firebox as the destination of the traffic:
- Click Add Destination.
The Add Destination Address dialog box opens. - From the Type drop-down list, select Built-in Aliases.
- From the Built-in Aliases list, select Firebox.
- Click Add.
- Click Add Destination.
- Click Save.
Knowledge base article: Firebox Remote Management Best Practices
About Fireware Web UI for a Cloud-Managed Firebox