Applies To: Locally-managed Fireboxes
To replace an existing FireCluster with a new pair of Fireboxes, you can use your existing FireCluster configuration file for the replacement FireCluster.
To do this, replace the feature keys in the original cluster configuration file with the feature keys for the new Fireboxes you want to configure as a cluster. When you import a new feature key to your existing configuration file, Policy Manager automatically updates the model in the configuration file to match the Firebox model specified in the new feature key.
Before You Begin
Before you begin to move your FireCluster configuration to a new device model, make sure you understand these requirements:
- Make sure that your two new Fireboxes for the FireCluster are the same model. For a list of models that support FireCluster, go to Supported Models for FireCluster.
- Make sure the Fireware version and build installed on the two new Fireboxes are the same. The Fireware version must also be the same as or higher than the Fireware version installed on the FireCluster Fireboxes that you want to replace.
- Before you can migrate your FireCluster configuration to new hardware, you must get the feature keys for your new Fireboxes.
- If you migrate your current Firebox configuration to a Firebox model with fewer interfaces than your original Firebox, when you save the configuration to the new Firebox, the process removes any network interfaces that are not physically available on the new Firebox. This includes the removal of wireless interfaces when you migrate a configuration from a wireless model to a non-wireless model. You must use Policy Manager if you migrate a configuration to a different Firebox model that has a different number of interfaces.
- If you manage a FireCluster in Fully Managed mode with a Management Server, we recommend you first switch the Fireboxes from Fully Managed mode to Basic mode or temporarily remove the Fireboxes from the Management Server. Fully Managed mode retains the serial number and certificate information of the original device, and this results in an error when you migrate the configuration. After the configuration migration you can add the new FireCluster to the Management Server in Fully Managed mode. For more information, go to Remove a Device from Fully Managed Mode.
- If you use the AuthPoint authentication server, you must complete additional steps after the migration. For more information, go to Additional Migration Steps.
Activate and Get the Feature Key for Your New Fireboxes
First, activate your Firebox and get the feature keys for your new Fireboxes from the WatchGuard website. You need the device feature keys to upgrade software on the device (if necessary) and to configure FireCluster.
To get the feature key for your device:
- Open a web browser and go to https://myproducts.watchguard.com/manage-products.
- Log in to your WatchGuard account.
- On the Manage Products page, in the Network Security section, click View Products.
- Select a friendly name to open details for that device or product.
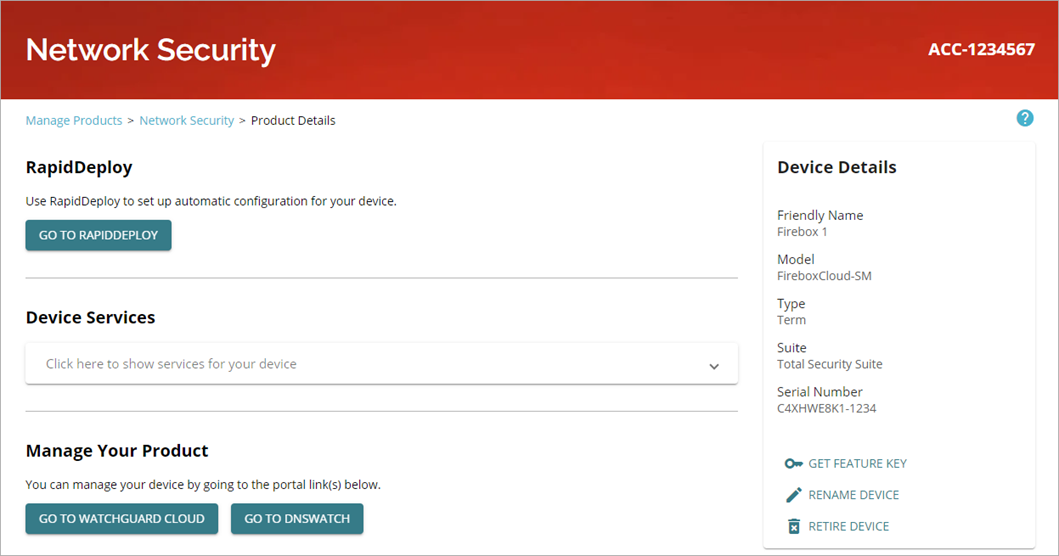
- Click Get Feature Key.
- Click Copy.
- Save the feature key to a local text file.
Check the Fireware Version on the New Devices and Upgrade, if Necessary
The Fireware version and build installed on the two new Fireboxes must be the same. The Fireware version must also be the same as or higher than the Fireware version installed on the FireCluster Fireboxes that you want to replace.
To find the Fireware version and build number installed on a new Firebox:
- Start the Firebox. It does not need to be connected to the Internet for this procedure.
- Use an Ethernet cable to connect your management computer to interface 1.
- In WatchGuard System Manager, connect to the device with the default device settings:
- IP Address: 10.0.1.1
- User Name: status
- Passphrase: readonly
- After you connect to the Firebox, look for the installed version and build number in WatchGuard System Manager. The Fireware version and build number appear to the right of the model number (Fireware v12.11.Bxxxxxx, for example). The number after the v is the version number. The number after the B is the build number.
What if the version or build numbers do not match?
If the Fireware version and build numbers on the two new Fireboxes do not match, or if the version of the new Fireboxes is lower than version on the existing FireCluster, you must upgrade Fireware on the new Fireboxes.
To upgrade Fireware on each new Firebox:
- Run the WSM Quick Setup Wizard to set up the new Firebox with temporary basic configuration.
- In the Quick Setup Wizard feature key step, paste the feature key you downloaded when you activated the device. The feature key is required for the Fireware upgrade.
- Upgrade the device.
For information on how to run the Quick Setup Wizard from WatchGuard System Manager, go to Run the WSM Quick Setup Wizard.
For information about how to upgrade the Fireware, go to Upgrade Fireware or WatchGuard System Manager.
Configure Fireware Compatibility
If the new Fireboxes run a different Fireware version than the existing FireCluster Fireboxes, you must update the OS Compatibility setting to the Fireware version that the new Fireboxes use.
To configure OS Compatibility, from Policy Manager:
- Select Setup OS Compatibility.
- From the For Fireware version drop-down list, select the Fireware version that the new Fireboxes use.
- Click OK.
Move the Configuration
To move the configuration to the new Fireboxes you must update the configuration to replace the feature keys, save the configuration to the new cluster master, and synchronize the configuration to the second cluster member.
Update the Configuration
Use Policy Manager to update the existing FireCluster configuration with the feature keys of the new Fireboxes.
Before you begin, you must verify the Fireware model and remove the existing feature keys for each member of the cluster before importing the new feature keys.
- In Policy Manager, select Setup System and verify that the new device model is shown correctly. If the Firebox model is not correct, from the FireModel drop-down lists, select the product family and Firebox model of your new Fireboxes.
- Select FireCluster > Configure.
- Select the Members tab.
- Select the first cluster member, then select Edit > Feature Key.
- Remove the feature key. Select OK to confirm.
- Select the second cluster member, then select Edit > Feature Key.
- Remove the feature key. Select OK to confirm.
To import the new feature keys:
- Select FireCluster > Configure.
- Select the Members tab.
- Select a cluster member and click Edit.
- Select the Feature Key tab.
- Click Import.
- Paste the content of the feature key file for one of the new Fireboxes in the dialog box.
- Click OK to add the new feature key for this member.
- Click OK to close the member configuration.
- Select the other cluster member and click Edit.
- Repeat steps 5 through 9 to replace the current feature key with the feature key of the other new Firebox.
- Click OK to close the FireCluster Configuration dialog box.
Save the Configuration to the New Cluster Master
After you update the configuration, you can save it to one of the new Fireboxes, which becomes the initial cluster master.
To save the updated configuration to the new device:
- Connect your computer to a trusted interface on the new Firebox (interface 1 by default).
- Make sure your computer gets an IP address on the same subnet as the interface you connect to.
- In Policy Manager, select File Save To Firebox.
- In the Firebox Address or Name text box, type the IP address of the new Firebox.
- In the Administrator Passphrase text box, type the passphrase for the admin account on the new Firebox. If the new Firebox uses the default configuration, the passphrase is readwrite .
- Click OK.
- In the File Name text box, type the file name to save the configuration file.
- Click Save.
- Policy Manager displays a warning if you save a configuration to a Firebox IP address that does not match any of the IP addresses in the configuration file. Click Yes to confirm that you want to save the configuration to the new Firebox.
Add the New Backup Master
To add the new backup master to the cluster and synchronize the configuration:
- Connect the cluster interfaces of the new FireCluster devices.
For more information, go to Connect the FireCluster Hardware. - Start the second device with factory default settings. The steps to do this vary by device model. For more information, go to Reset a Firebox.
- Connect to the new cluster master in Firebox System Manager.
- In Firebox System Manager, select Tools > Cluster > Discover Member.
When the cluster master detects a connected device with a serial number that matches the serial number in the FireCluster configuration, the cluster master synchronizes the configuration and adds the Firebox to the cluster.
If the second cluster device still appears as "Inactive", there might have been an issue with the reset of the Firebox. Make sure the Firebox is reset to factory-default settings. For instructions, go to Reset a Firebox.
For more information, go to Discover a Cluster Member.
For a summary of all steps to set up the new FireCluster, go to Configure FireCluster.
Additional Migration Steps
After you move the configuration to the new Fireboxes, you might have to make other configuration changes.
When you move an existing Firebox configuration to a new Firebox, the existing Firebox resource in AuthPoint is no longer associated with the new Firebox and you must delete the resource. To continue to use the AuthPoint authentication server on the new Firebox, you must add the device to WatchGuard Cloud again and add a new Firebox resource for the device in AuthPoint.
To replace a Firebox that you have already added to AuthPoint as a Firebox resource:
- Add the new Firebox to WatchGuard Cloud.
- Add the device as a new Firebox resource in AuthPoint.
- Add the new Firebox resource to your AuthPoint authentication policies, and remove the old Firebox resource from those policies. For more information, go to About AuthPoint Authentication Policies.
- Delete the Firebox resource associated with the old Firebox from your AuthPoint account.
Troubleshoot Cluster Configuration for Move to New Device Model
In some cases, you might encounter issues when you attempt to save the feature key where the serial number might not match the correct device model of the new Fireboxes. Use this procedure to disable the cluster configuration and perform a manual update of the feature key for the new devices.
Disable the Cluster Configuration
On each new Firebox:
- From Policy Manager, select FireCluster > Configure.
- Clear the Enable FireCluster check box.
- Save the configuration.
Update the Feature Keys Manually
On each new Firebox:
- From Policy Manager, select Setup > Feature Keys.
- Replace the current feature key with the new feature key.
Enable FireCluster
Re-open the saved configuration file in Policy Manager and re-enable FireCluster:
- From Policy Manager, select FireCluster > Configure.
- Select the Enable FireCluster check box.
Make sure you type the new Firebox serial numbers for each cluster member when you configure the FireCluster.
Save the Configuration to the New Cluster Master
- From Policy Manager, select File > Save > To Firebox.
- Connect and save the configuration to the new Firebox that will be your cluster master.