Applies To: AuthPoint Multi-Factor Authentication, AuthPoint Total Identity Security
Remote Desktop Web Access is a web page that shows a list of applications published from a server. From the web page, you can click on the icon for an application to launch that application.
The AuthPoint agent for RD Web adds the protection of multi-factor authentication to RD Web Access. When you configure the agent for RD Web, users must authenticate with AuthPoint MFA to access the RD Web page.
RD Web Server Requirements
To install the AuthPoint agent for RD Web, the RD Web server must meet these requirements:
- Microsoft .NET Framework — Version 4.8 or higher installed
- Operating System — Windows Server 2012 R2, Windows Server 2016, Windows Server 2019, or Windows Server 2022 with the Remote Desktop Web Access Role configured.
Configure MFA for RD Web
There are two parts to configure MFA for RD Web:
- The resource you configure in AuthPoint
- The agent you install on the RD Web server
Configure an RD Web Resource
To configure an RD Web resource for AuthPoint:
- Go to cloud.watchguard.com and log in to WatchGuard Cloud.
- From the navigation menu, select Configure > AuthPoint. If you have a Service Provider account, you must select an account from Account Manager.
- From the AuthPoint navigation menu, select Resources.
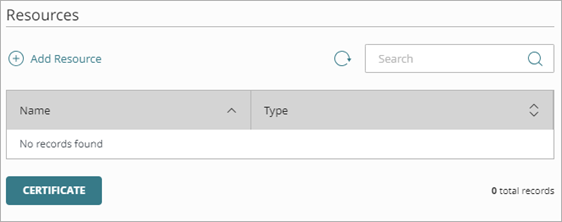
- Click Add Resource.
The Add Resource page opens.
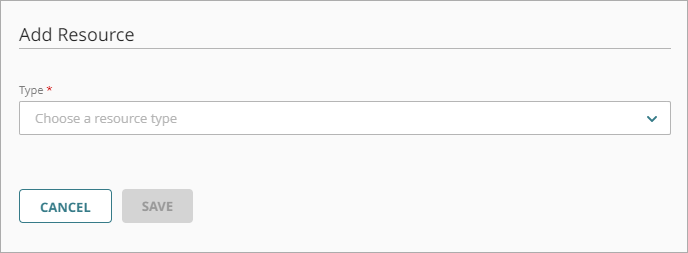
- From the Type drop-down list, select RD Web.
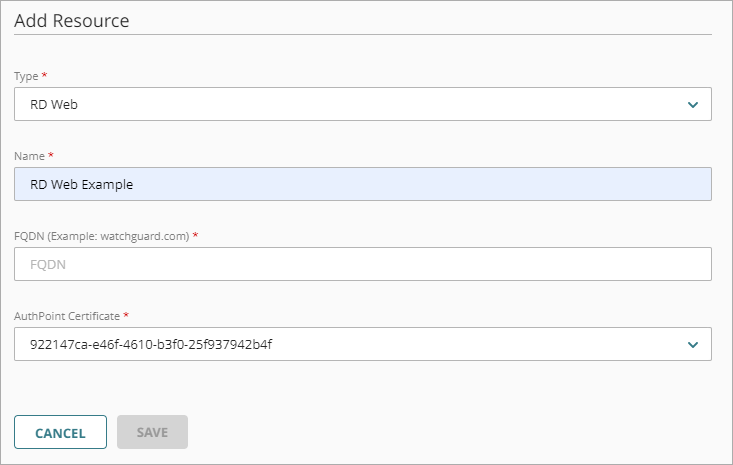
- On the RD Web page, in the Name text box, type a name for this resource.
- Type your FQDN. For example, example.com or example.net. If you have configured RD Web to use a port other than port 443, you must append the port number to your FQDN. For example, if you have configured RD Web to use port 8443, you would type example.com:8443.
If you update the FQDN value, you must download the updated configuration file and reinstall the agent for RD Web.
- From the AuthPoint Certificate drop-down list, select the AuthPoint identity provider certificate to use for SAML authentication. This is used for the SAML applications that support RD Web. For more information, see Certificate Management.
When you change the certificate that is associated with an RD Web resource, you must download the updated configuration file and install the agent for RD Web again.
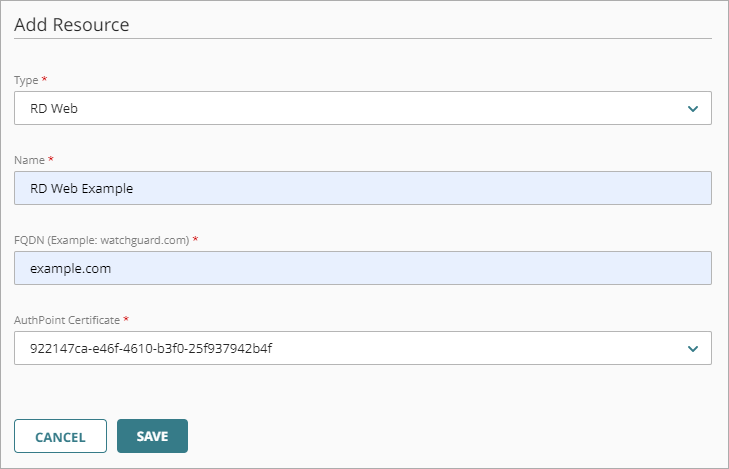
- Click Save to save your resource.
- Add the RD Web resource to your existing Zero Trust policies, or add new policies for the RD Web resource. Zero Trust policies specify which resources users can authenticate to and which authentication methods they can use. For more information, go toAbout Zero Trust Policies.
RD Web resources do not support password-only authentication. You must enable at least one authentication option (push, QR code, or OTP) in your Zero Trust policy.
- Add the RD Web resource to your existing Zero Trust policies, or add new policies for the RD Web resource. Zero Trust policies specify which resources users can authenticate to and which authentication methods they can use. For more information, go toAbout Zero Trust Policies.
Download and Install the Agent
After you configure the RD Web resource, you must download and install the AuthPoint agent for RD Web on the RD Web server.
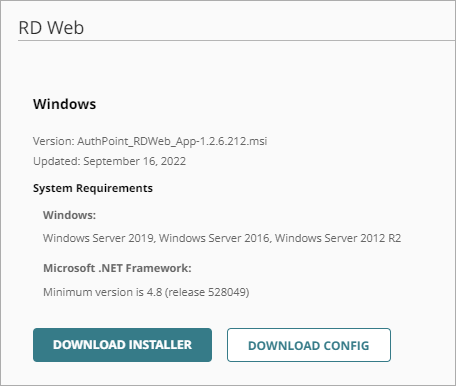
- Select Downloads.
- In the RD Web section, click Download Installer.
- To download the configuration file for the RD Web agent, click Download Config.
- Move the downloaded configuration file to the same directory as the installer (.msi file) for the RD Web agent.
- To install the AuthPoint agent for RD Web, run the installer (.msi file) on the RD Web server. You must run the installer as a local administrator.
If the wizard shows a Files in use message that prompts you to close the IIS Worker Process, click Ignore and continue the installation process.
Update the RD Web Agent
The AuthPoint agent for RD Web does not automatically upgrade to the latest version. To upgrade the agent for RD Web, you must download and install the updated version of the agent. The most current version of the agent is available on the Downloads page.
You do not have to uninstall the AuthPoint agent for RD Web or download a new configuration file when you install an updated version.
To update the agent for RD Web:
- In the AuthPoint management UI, select Downloads.
- In the RD Web section, click Download Installer. You do not have to download the configuration file.
- To install the AuthPoint agent for RD Web, run the installer (.msi file) on the RD Web server. You must run the installer as a local administrator.
If the wizard shows a Files in use message that prompts you to close the IIS Worker Process, click Ignore and continue the installation process.
Authentication for RD Web
After you configure the AuthPoint agent for RD Web, when a user types their user name and password on the RD Web page, the agent directs the request to AuthPoint. The single sign-on page opens and the user must authenticate. After the user authenticates, the RD Web page opens and the user can access the applications available to them.
When a user authenticates on the RD Web page, the user receives a prompt to share their location. This prompt appears even if your AuthPoint account does not use geofence and geokinetics policy objects.
RD Web Access is only used to launch the remote applications. After the application opens, you can close RD Web Access.
To use RD Web with AuthPoint MFA in private browser sessions, you must configure your browser settings to allow cookies. Some web browsers block cookies in private browser sessions by default.
To authenticate for RD Web Access:
- In a web browser, go to the URL of the RD Web Access site.
The default URL is https://<server name>/rdweb, where <server name> is the fully qualified domain name of the web server where you installed RD Web Access.
- The user types their user name and password. Click Sign in.
The AuthPoint authentication page opens. - Select an authentication method and authenticate.
- Push — The user approves the push notification that is sent to their device.
- QR Code — Use the AuthPoint mobile app to scan the QR code, then type the verification code shown in the app.
- One-Time Password — Type the one-time password for your token.
After the user authenticates, the RD Web Access page opens and shows all the applications available to them. When the user selects an application, the behavior is different based on the web browser:
- Internet Explorer — When the user selects an application it opens directly in the browser.
- Other browsers — When the user selects an application, an .rdp file downloads. The user must run the .rdp file and type their login credentials to access the application.
The connection through an .rdp file is not protected by MFA. To require MFA for direct access to these applications, we recommend that you install the Logon app on servers that host the applications.
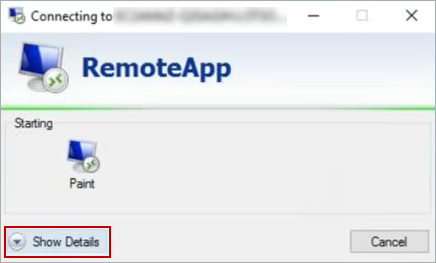
If the user uses an .rdp file to connect to an application on a server protected by the Logon app, after they run the .rdp file and type their credentials, they must select Show Details to show the authentication page, and then authenticate.