About AP Groups
This is useful if you need to group APs based on specific device or radio settings that should not apply to other APs in a location folder.
For example, you may need to create a configuration for dual-radio APs configured as dedicated WIPS sensors, and a different configuration for dual-radio APs configured as dedicated Wi-Fi access points in your deployment.
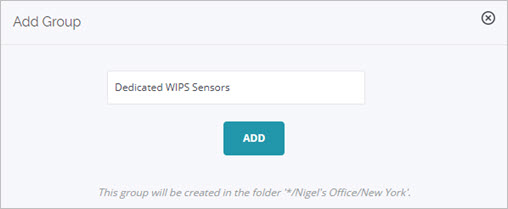
To add a group:
- Select System > Navigator > Groups.
- From the Navigator, select a location where you want to add the group.
- Click the
 icon to add a group.
The Add Group dialog box appears in the selected location. - Type a name for the group and click Add.
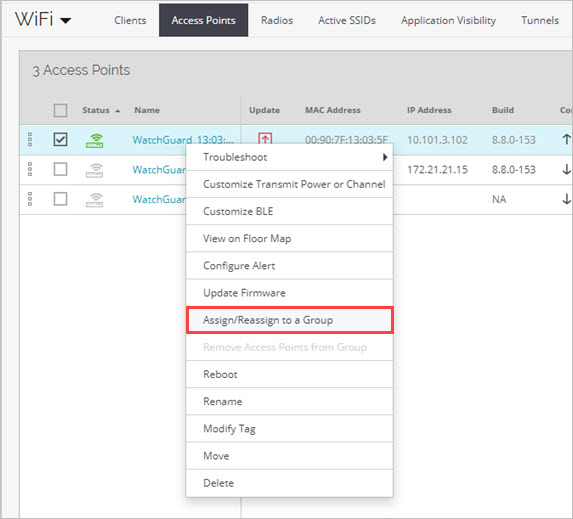
To assign an AP to a group:
- Select Monitor > WiFi > Access Points.
- From the Navigator, select a location where the AP is located.
- Right-click an AP.
- Select Assign/Reassign to a Group.
- Select the group, then click Assign.
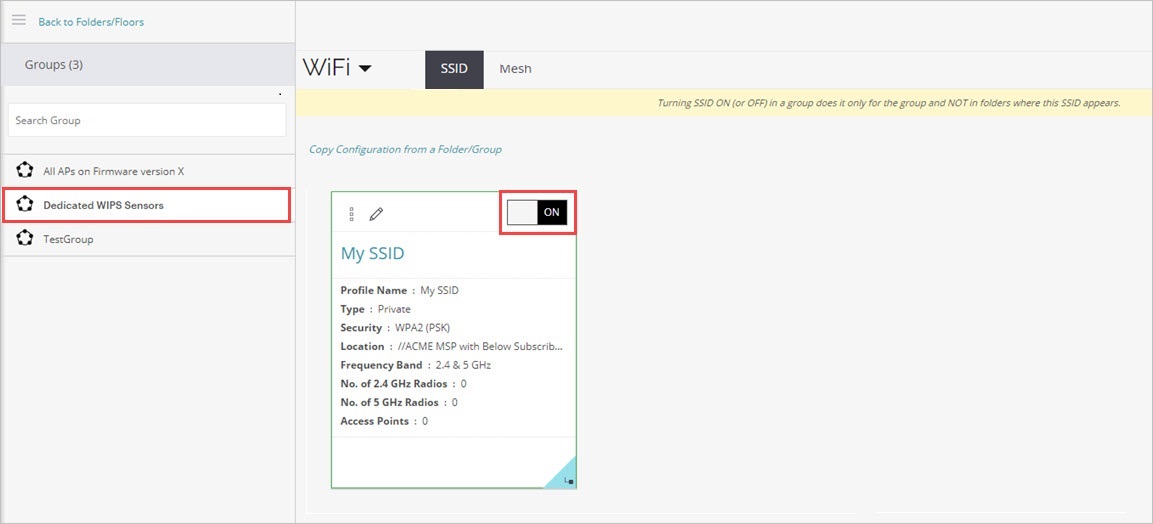
To configure a group with SSID, radio, and device settings:
- Select Configure > WiFi.
- Open the Navigator and select a location. Expand the list of groups available for that location at the bottom of the Navigator window.
- Select the group to which you will apply the configuration.
When you select the group, the list of SSIDs on the right hand side panel is refreshed. - From the list of SSIDs, set the SSID you want to enable ON.
The configuration of the SSID will be applied to the selected AP Group.