Configure RADIUS Servers in Discover
Applies To: Wi-Fi Cloud-managed Access Points (AP125, AP225W, AP325, AP327X, AP420)
For information on how to configure Microsoft Active Directory and NPS for Wi-Fi authentication, see Authenticate Wi-Fi Cloud Users with Microsoft Active Directory and NPS.
You can use RADIUS servers for these features:
- Security mode is WPA2 or WPA/WPA2 mixed mode with 802.1x selected
- Secondary authentication that uses RADIUS MAC authentication
- Captive Portal configured as External Splash Page with RADIUS Authentication
The WatchGuard AuthPoint authentication service is currently not supported with RADIUS authentication in Wi-Fi Cloud.
To configure a RADIUS server in Discover:
- Open Discover.
- Open the Navigator, and select the location where you want to create the RADIUS server.
- Select Configure > Network Profiles > RADIUS.
- Click Add RADIUS Server.
- Configure these settings:
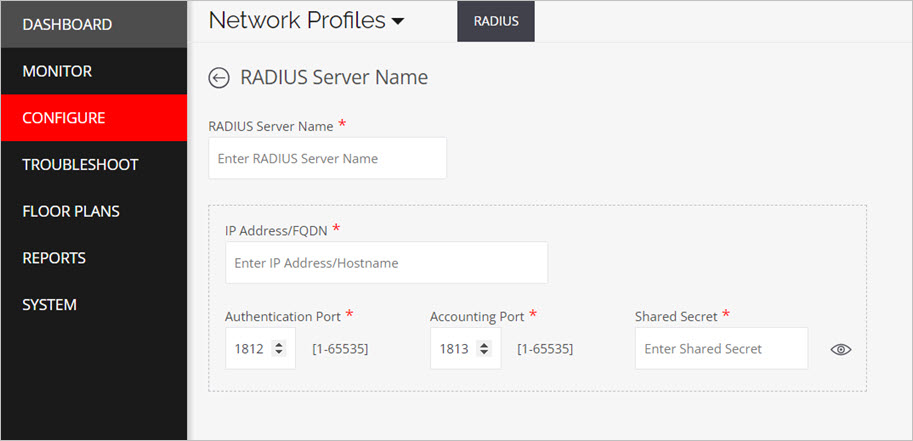
- RADIUS Server Name — Descriptive name for the RADIUS server.
- IP Address/FQDN — IP address or FQDN of the RADIUS server.
- Authentication Port — Port number on which the RADIUS server listens for authentication requests. The default is 1812.
- Accounting Port — Port number on which the RADIUS server listens for accounting requests. The default is 1813.
- Shared Secret — Shared secret for the RADIUS server.
- Click Save.